Master Bathroom Refresh – How To Caulk!
As an Amazon Associate and member of other affiliate programs, I earn from qualifying purchases.
![]()
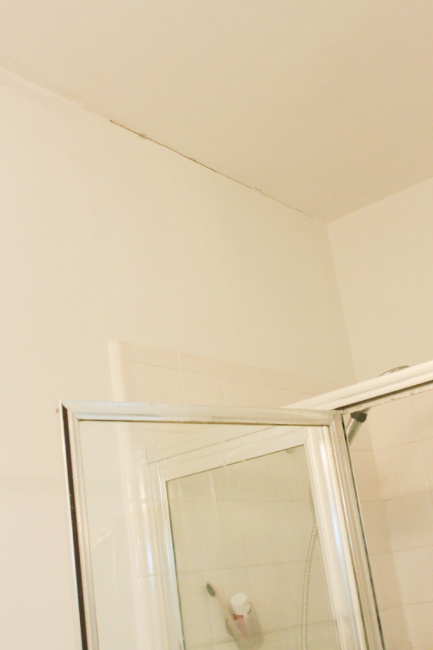
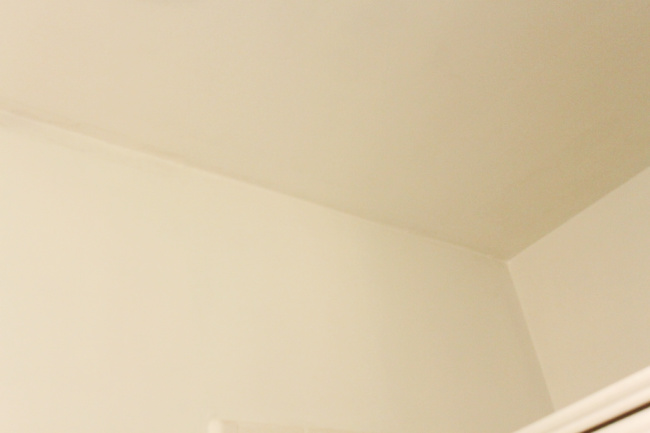
Welcome to Week 2 of the January edition of the $100 Room Challenge. This week I caulked the gap between the ceiling and the walls in the master bathroom. Caulking is my new favorite skill! There is something weirdly satisfying about removing imperfections. My first experience with using caulk was for my Entryway Project. I used caulk again when I replaced my carpet with painted stairs.

Caulking Made Easy
I quickly sanded the area to be caulked. Then I wiped the area to ensure it was free of dust. My caulk of choice is Dap Alex. I loaded it into my Ryobi battery operated caulk gun. When you cut the caulk tube, do it on a 45 degree angle using a sharp utility knife. Always cut away from your body to avoid injury from the sharp blade. A great tip is to sand the edge of the caulk tube after you have made your cut. This allows the tip to move smoothly along your wall or ceiling during application. Using the caulk gun, I laid a bead of caulk into the crack. I used my finger to smooth the caulk and then wiped the area with a damp cloth. It is really that easy!
Here is a quick video of the process:
This caulk is easy to remove. It simply wipes away with a damp rag. So it is easily forgiving. With all DIY, the more you practice, the easier it gets.
The next task is to select a paint color. I am torn. I still love the dramatic white but I feel like it is time for some color. Why are these decisions so difficult? I was late to the farmhouse craze and I suppose I am late to the rebirth of color. I’m off to Pinterest for inspiration! See you next week!
Here are the other blogger updates for Week 2 of the $100 Room Challenge!


It’s all in the details! Caulk can make all the difference.
Indeed! I am so hooked on caulk! Haha
I can see how this would be a satisfying project. We have to do this to our baseboards. In some places there’s quite a gap between the baseboard and the wall. Thanks for the idea to sand down the tip of the caulk. I had never thought of that.
I would love to retile and put some marble in this room but not in the budget right now. That is why I love this challenge! You keep me accountable and inspire me to get things done without a ton of $$$. Thanks so much!
I had no idea Ryobi made a caulk gun! We have a bunch of their other tools and they are great.
They just keep coming up with more and more incredible gadgets! So addicted!
Great tips for good caulking! Looking forward to seeing your project complete!
Thanks Jackie! I’m scrambling to finish. Been so sidetracked. I can’t wait to browse all of the incredible projects and stock up on tips and ideas!