Updating Seasonal Thrift Store Art – Fall Edition
As an Amazon Associate and member of other affiliate programs, I earn from qualifying purchases.
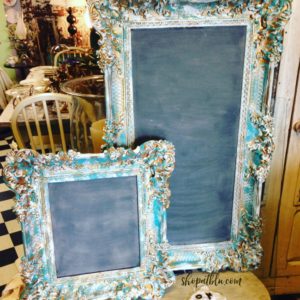
Have you ever walked through the thrift store and spotted an item that you kind of love? Maybe part of the item is fabulous but the rest of it is not? I find myself drawn to items that have damage or are simply outdated. This happens frequently with thrift store are. Here is one item…
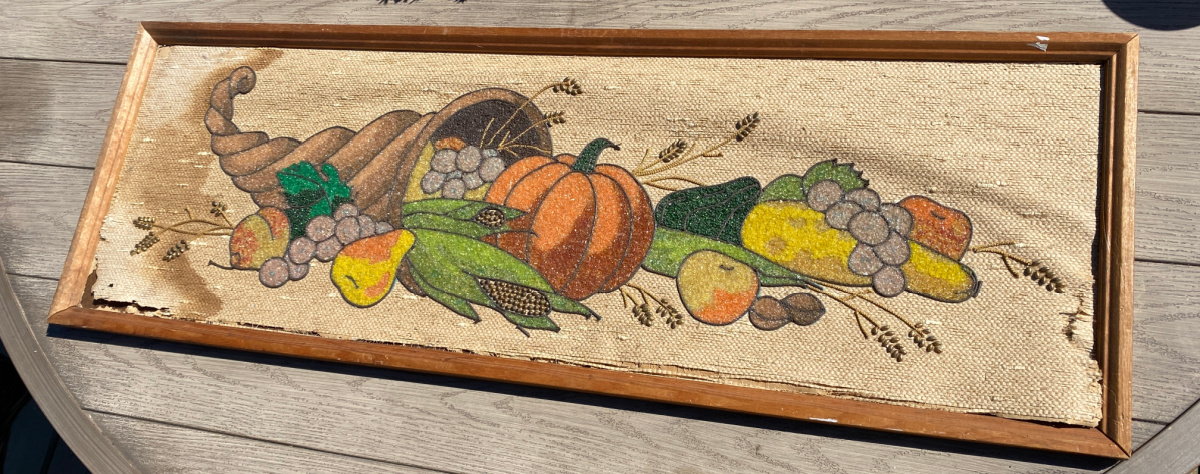
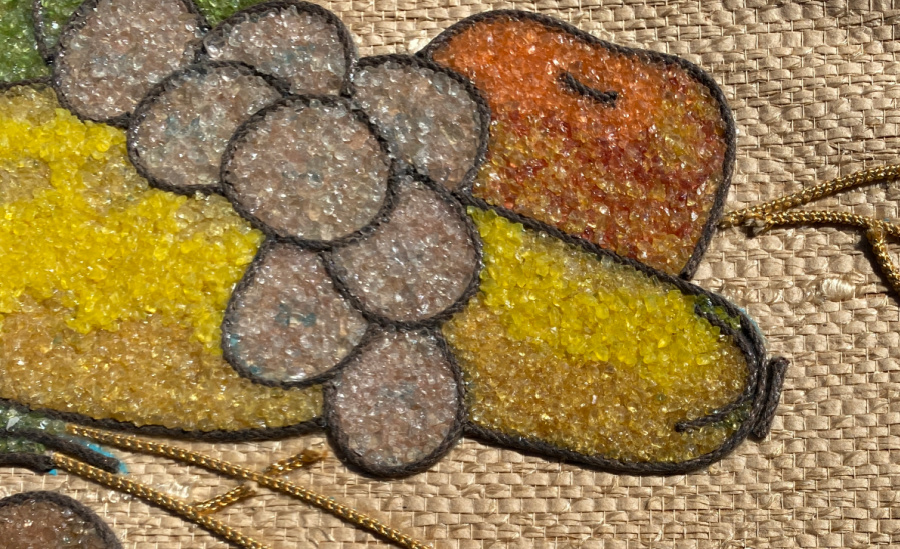
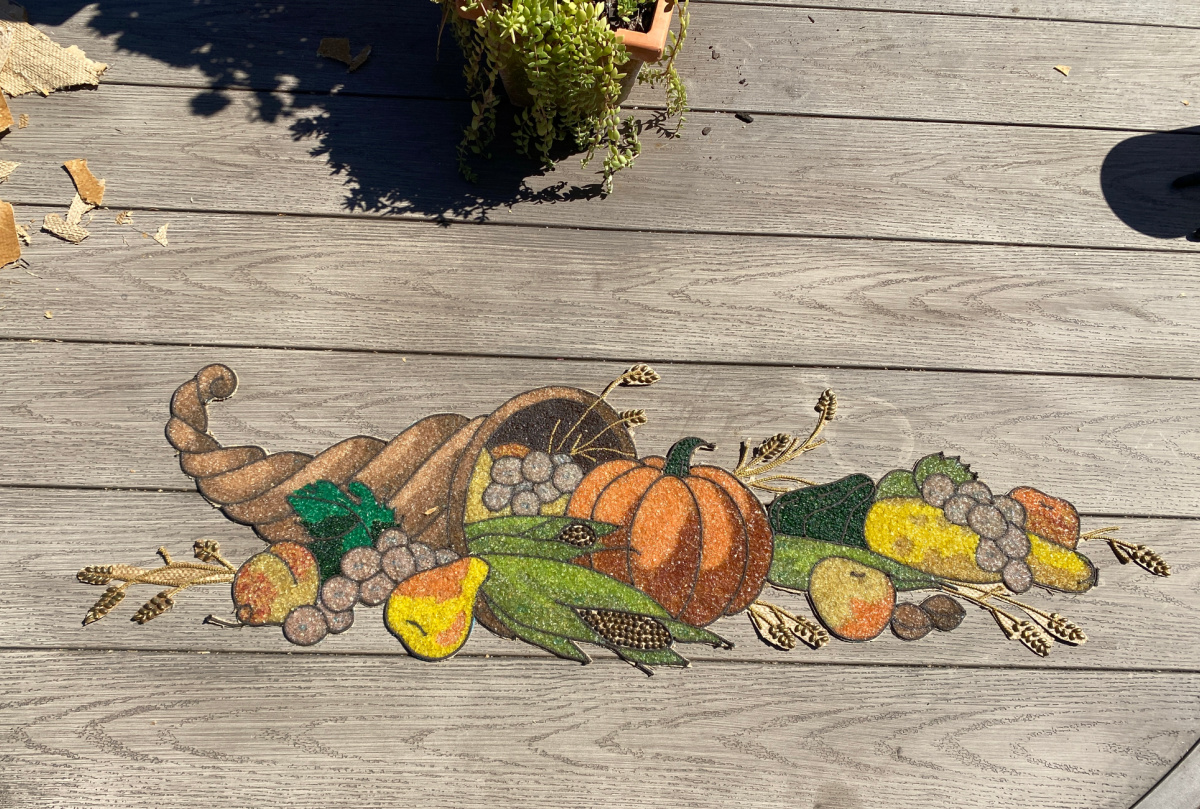
Look at the design! Can you imagine how long this project took? It is actually made from tiny pieces of gravel. This art form is known as mid century gravel art! Who knew??!!
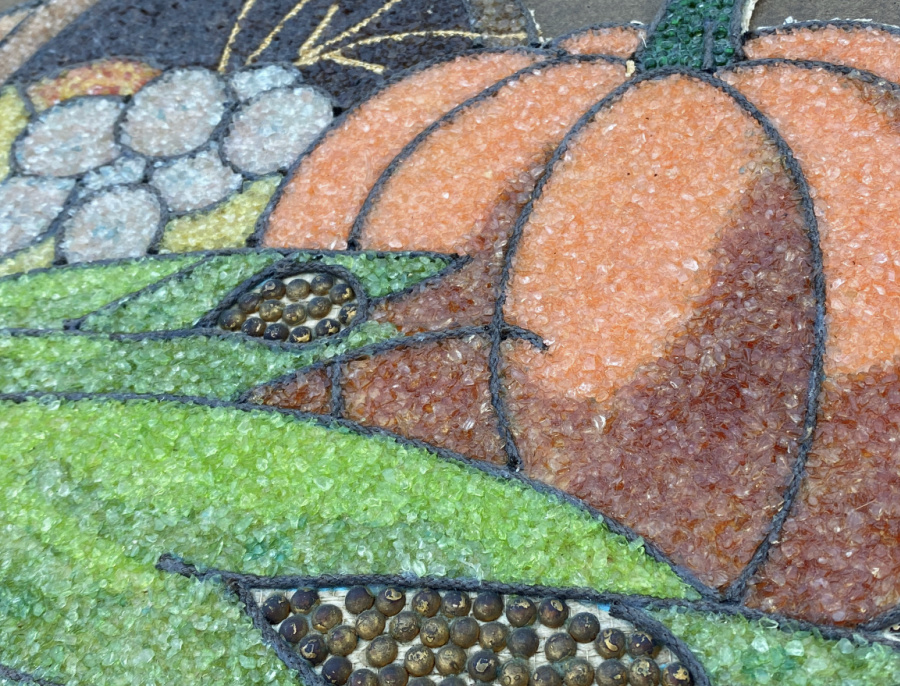
It is a mosaic, of sorts. How cool are the colors?!
After some research, I found some other examples of lovely authentic MCM gravel art. You can see them at the very end of this post.

Well, I scooped it up several years ago with the intention of using it around Thanksgiving. We had a flood (one of many) while I still had my store, The Blue Building Antiques and Consignment. This item was water damaged. From sitting over the years, the backing on the frame had deteriorated. I suspect this is a Vintage piece that someone created back in the 50s or 60s. At any rate, my love for the artistic design prevented me from trashing this piece when it was damaged.
It’s time to salvage this thrift store art and upcycle it into something fabulous. What better time for up cycling, repurposing and renewing items than Thrift Store Decor Team Wednesday!

If it’s Thrift Store Decor Team Wednesday, that means it’s the second Wednesday of the month! With crisp air and falling leaves all around us, I expect to see some wonderful fall projects in this month’s roundup. At the end of this post, you will find all of the teams projects.
Game Plan
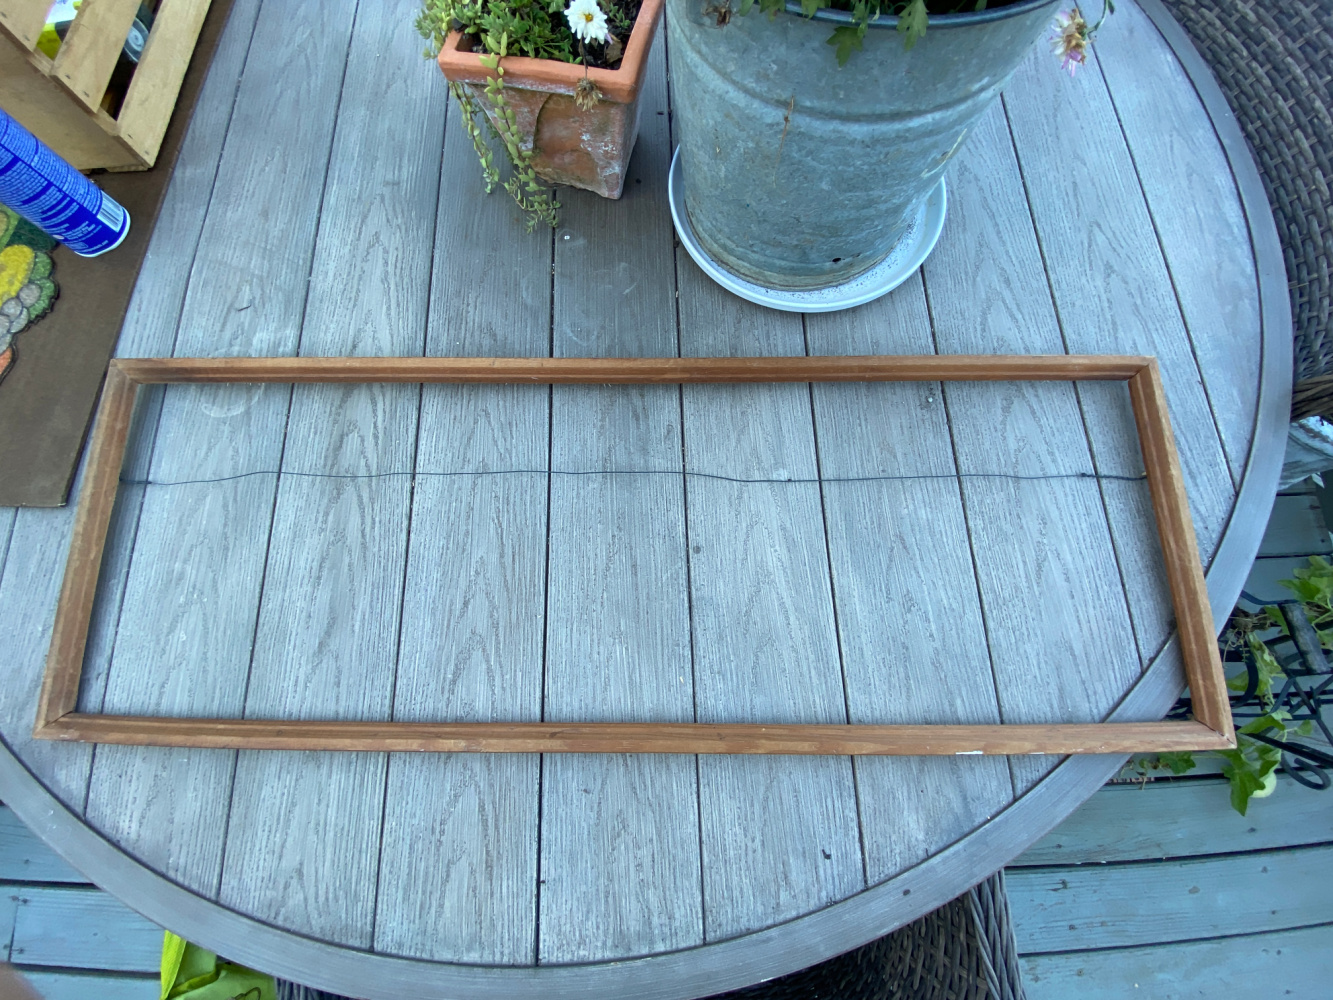
My plan is to remove the artwork from the frame and discard the damaged background fabric.
The frame will need repair as it is quite loose.
I need to determine what type of new background to use for the gravel mosaic. I will attach that background to the frame backing board and secure the mosaic onto that. The final step will be to repair and reinstall the frame around the artwork. Here we go…
Remove the Thrift Store Art from the Frame
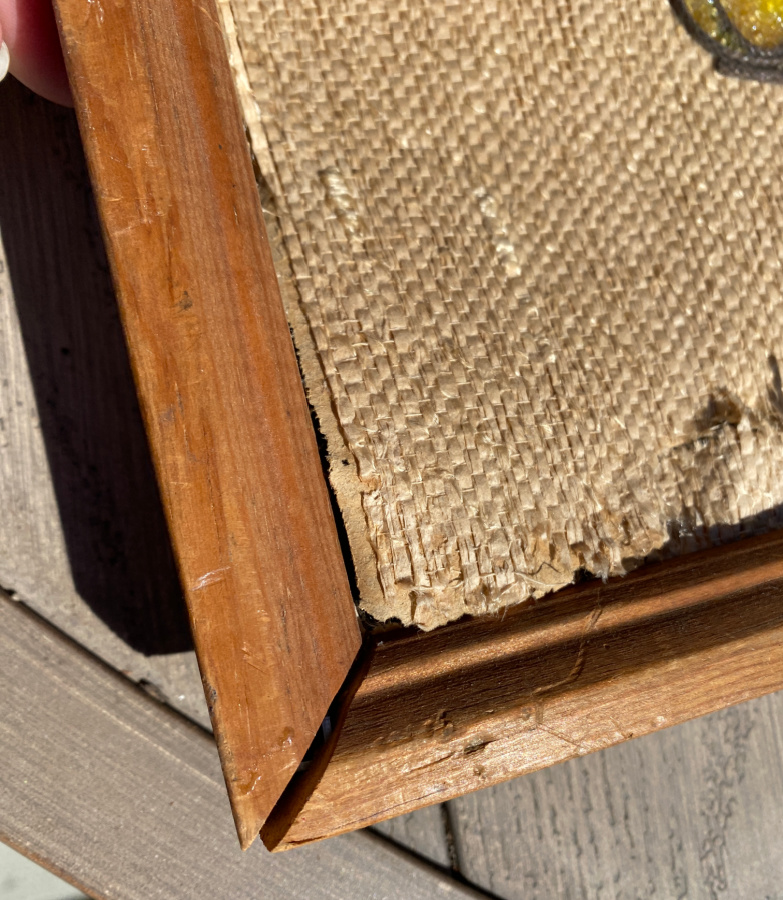
Step one is to flip the frame over and remove the backer board from the frame. I used a small screwdriver to pry the staple heads up above the wood surface and then used needle nose and regular pliers to extract the staples from the wood. Sometimes frames use small nails to hold the backer board in place. I find that needle nose pliers, usually do the trick in removing those buggers.
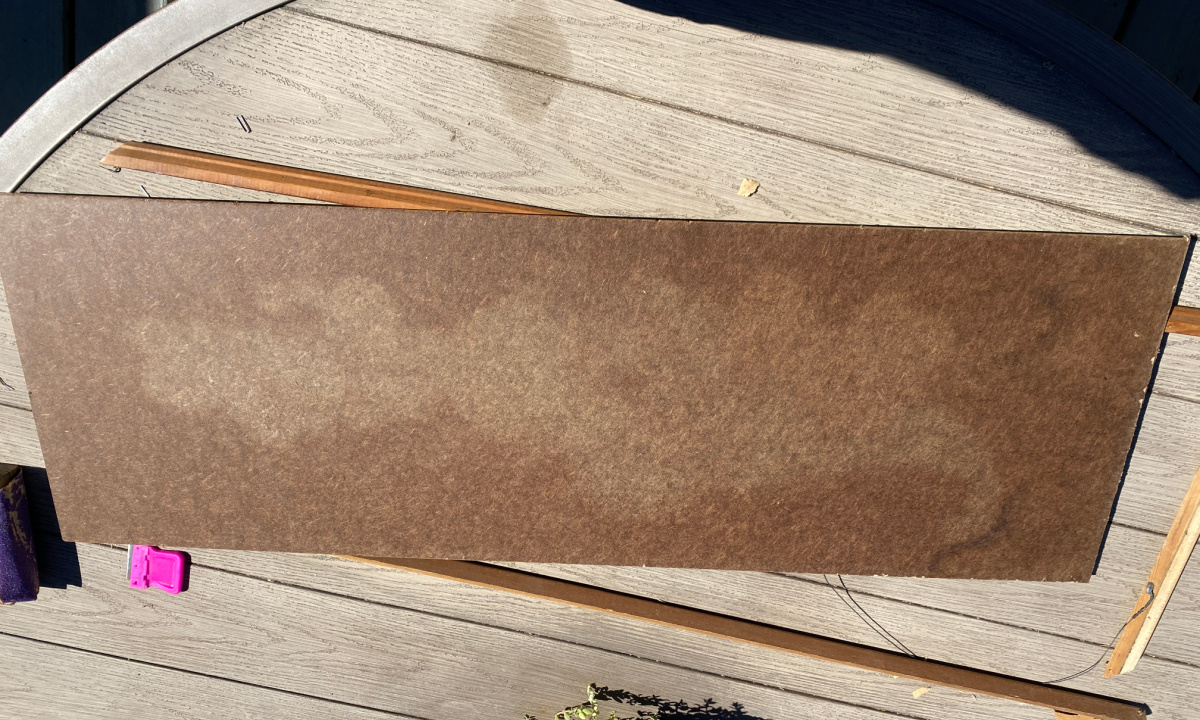
After removing the backer board, the frame was very unstable and actually fell apart. I set this aside to secure later and moved onto removing the background from my mosaic.
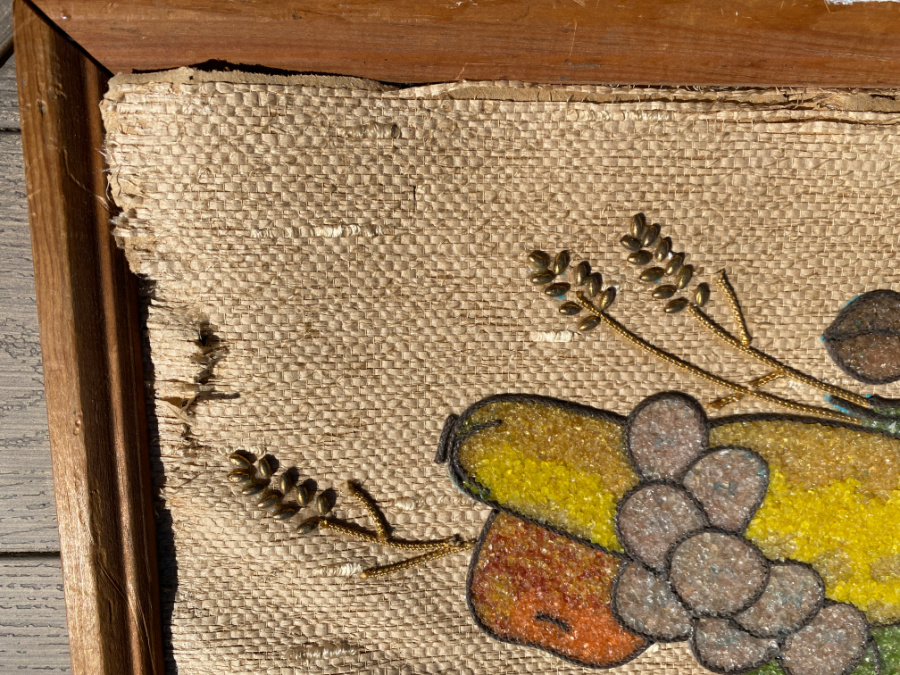
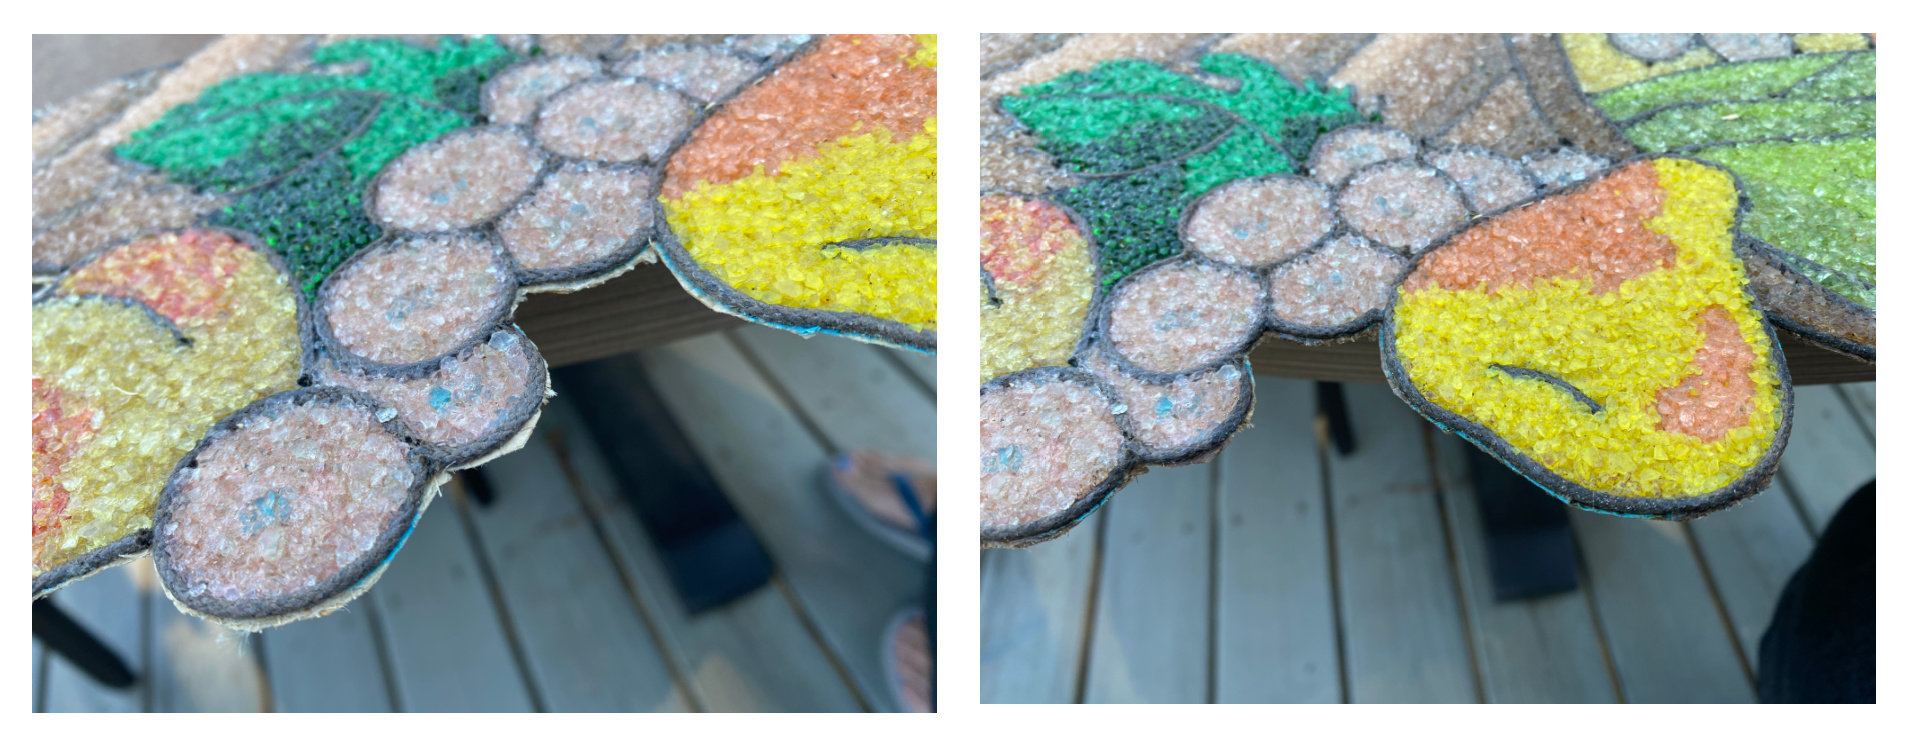
This background is a seagrass or grasscloth fabric. As I said earlier, it is vintage art and the grasscloth backing was very fragile and tore easily. However, because it’s fabric I needed to cut the excess grasscloth from around the edges of my mosaic. I used fabric scissors, and a very small set of curved scissors that were very sharp.
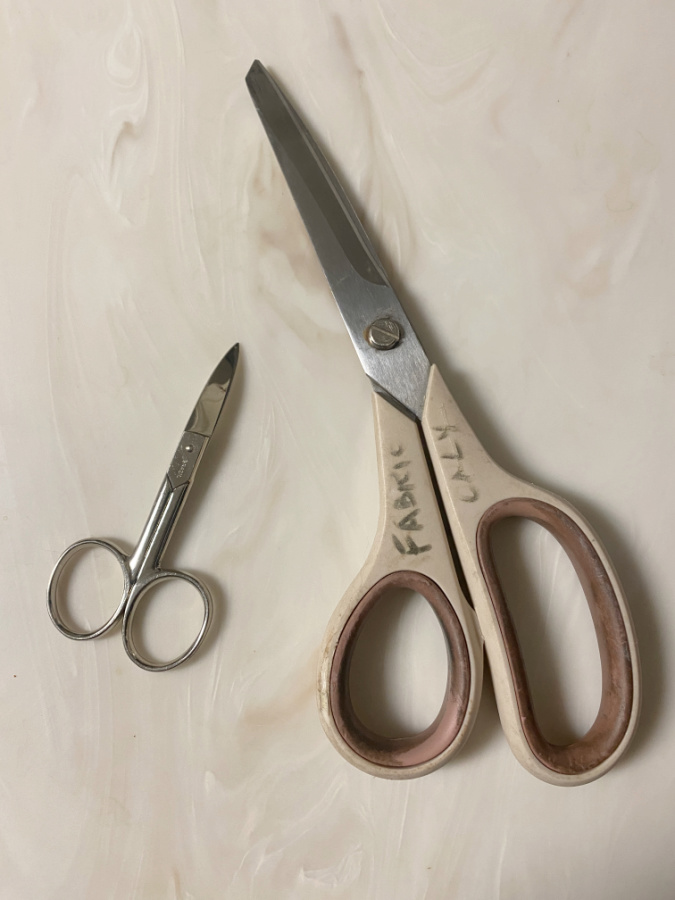
I believe these little curved beauties are also vintage sewing scissors.
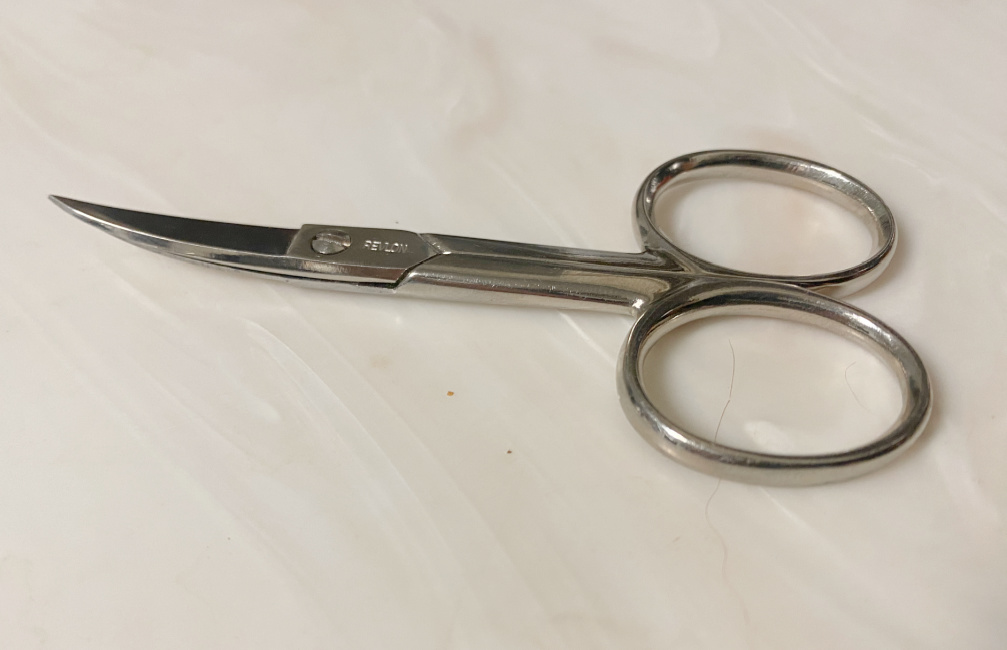
The curves on these tiny scissors helped get as close as possible to the mosaic when cutting off the grasscloth.
Fortunately, the tiny stone pieces were very securely glued to the fabric, which allowed me to simply cut around the design. I was left with one large appliqué, if you will, that was ready to be remounted in the frame.
I used some Old English for dark woods to touch up the sides of the mosaic appliqué since the edges were white.
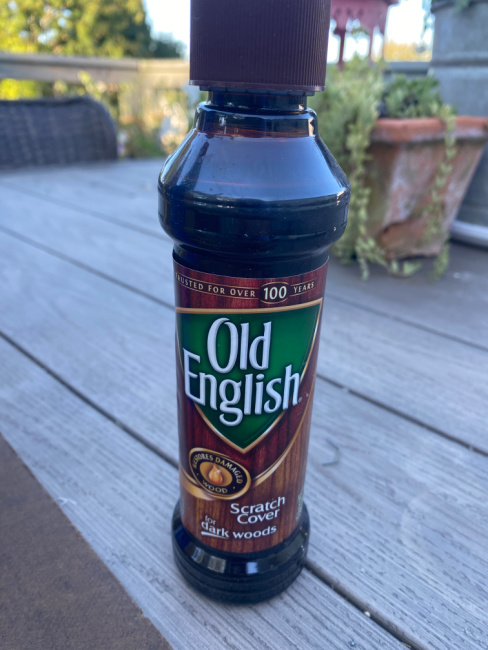
I used a paint brush. You could also use some brown paint or stain. Just be careful to allow the edges to dry completely before you glue the mosaic appliqué to the backer board.
Touching up those white edges made a huge difference on the dark backer board.
She is ready to go.
Selecting a New Color for the Background
I moved on to determine what color my background should be. Since I did not have any replacement, grass cloth on hand, I decided to go with a natural or darker wood look for the background behind the mosaic. The backer board on my frame is nothing but a traditional backer board with a very very dark color. The more I handled it, the more I like it. However, I thought I would try to lighten it a bit. So I mixed a solution of one part water to one part bleach and wiped the entire surface twice.
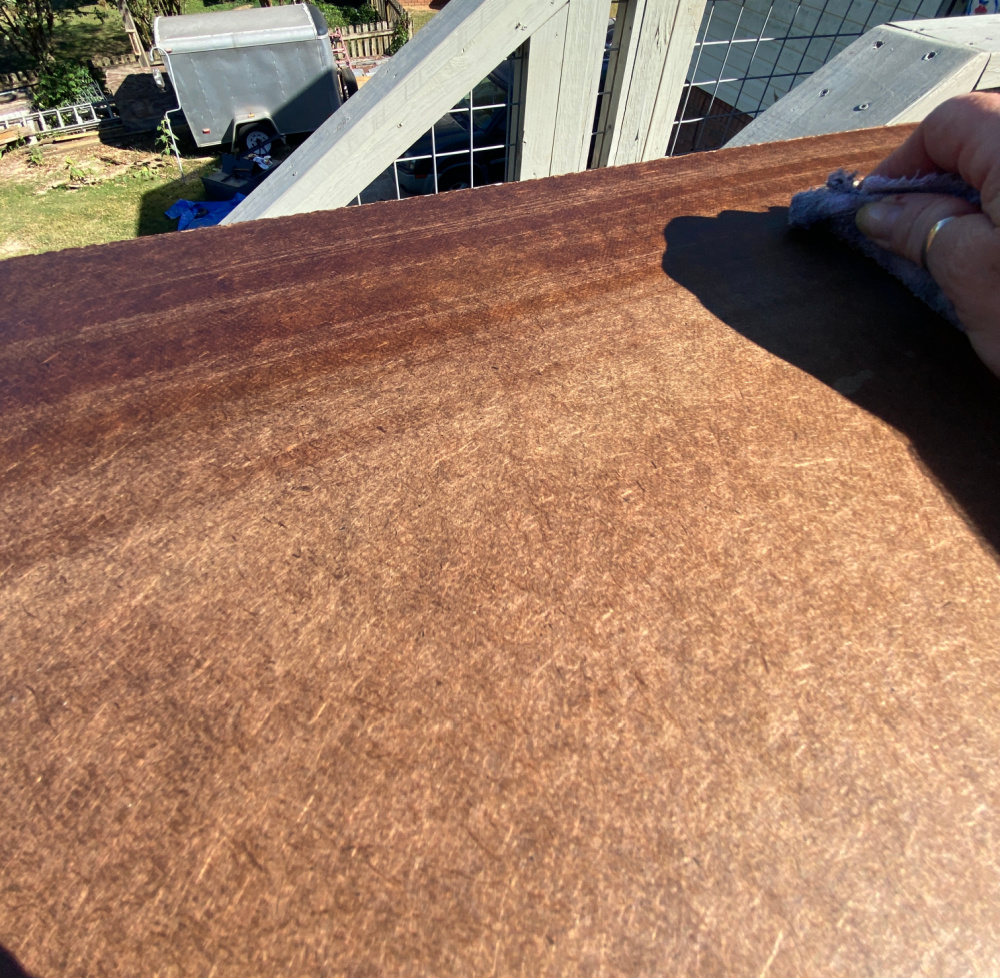
While it did not lighten the backing, it did clean things up and even out the surface so that it wasn’t streaky. The result was a rich chocolatey color. I’ll try this dark background for my appliqué.
Attaching the Mosaic Appliqué
I grab some E6000 adhesive to secure the appliqué. This little tube has tiny applicators that help to get to small places.

I used the tube around the large parts of the appliqué and used the skinny applicator on the smaller parts. After applying the E 6000 to the back of the appliqué, I placed it carefully onto my backer board and pressed it securely into place. I placed a crate on top to hold all of the corners down as the appliqué is rather thick and some areas did not want to lay flat.
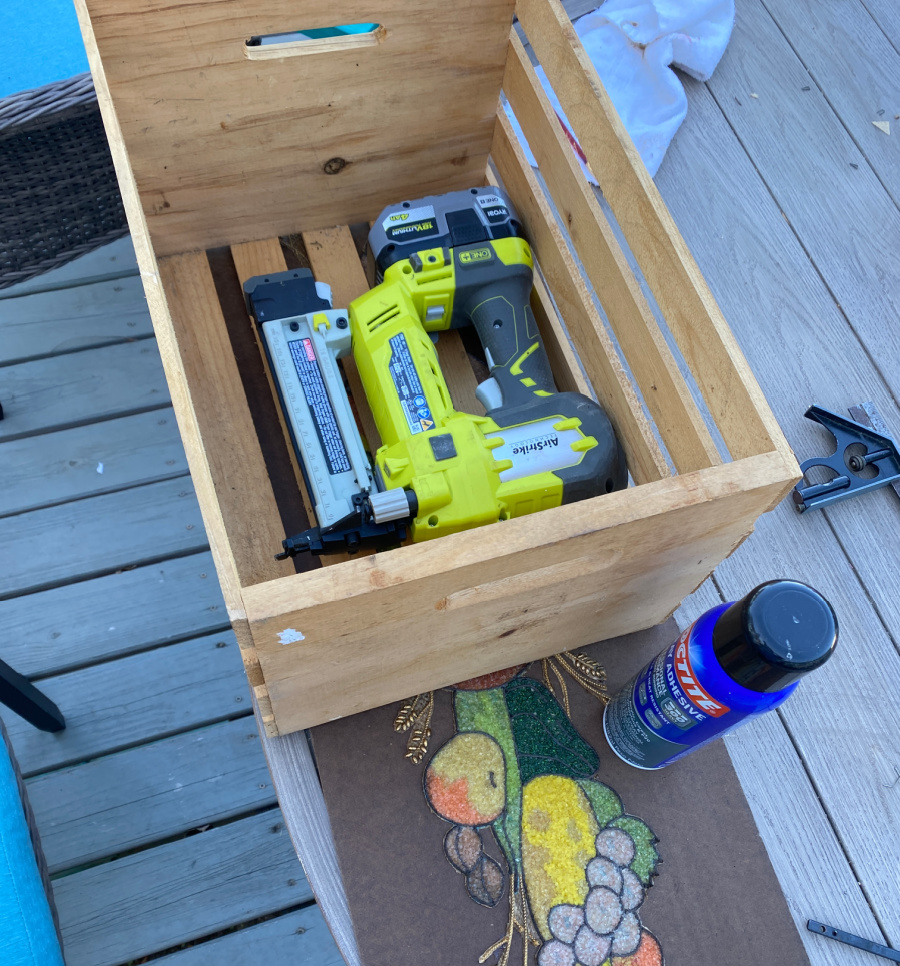
The weighted down crate helped apply pressure across the entire surface where needed so that the mosaic applique dried flat. I allowed E6000 to dry for about four hours. In the meantime, I worked on rebuilding and securing the frame.
Repairing a Frame
The frame was in four pieces. Here are the corners where they should meet to form the 90 degree angles.
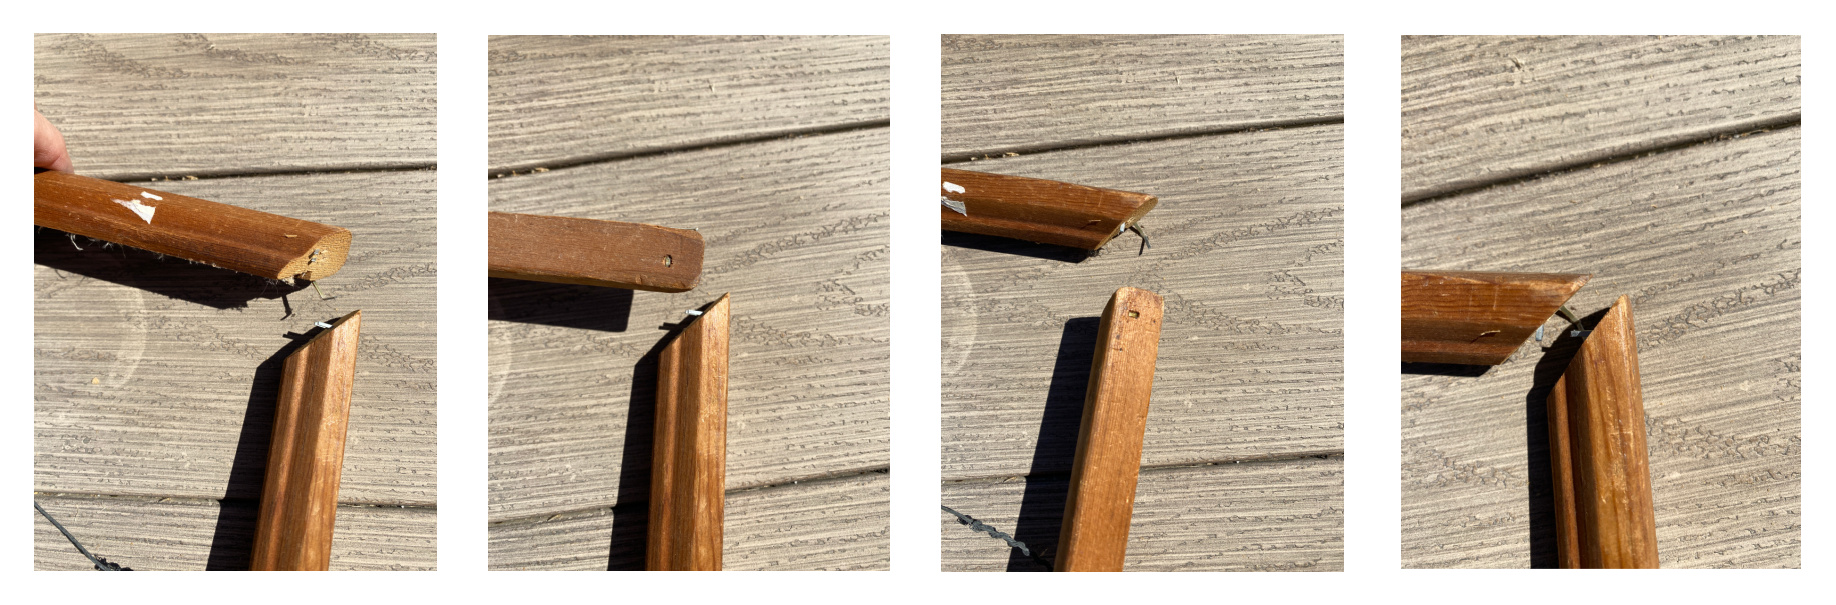
The repair process is quite simple, in theory.
- remove the old hardware (staples or nails)
- glue the corners to one another and allow to dry
- reinforce the corners
But, if you’ve every tried to repair a frame, you know that the process is quite complicated and frustrating. So let me show you how I managed to stablize the skinny pieces of wood and form beautiful 90 degree angles with the end result of a sturdy frame for my thrift store art.
First, use your pliers, flathead screwdriver, and wire clutters to remove all of the old staples. Grab your wood glue (Elmer’s works in a pinch). You will also need a few clamps. I like the ones with the squeeze grips but I also use the clip clamps as well (they resemble a clothes pin with a spring). And you will need a small block of wood with a nice 90 degree angles (to ensure that your frame ends up with perfect corners). The block doesn’t need to be more than 4 inches long x 1 inches deep x 1-2 inches long. It is just a guide for your corners. You can use a smaller or a larger size.
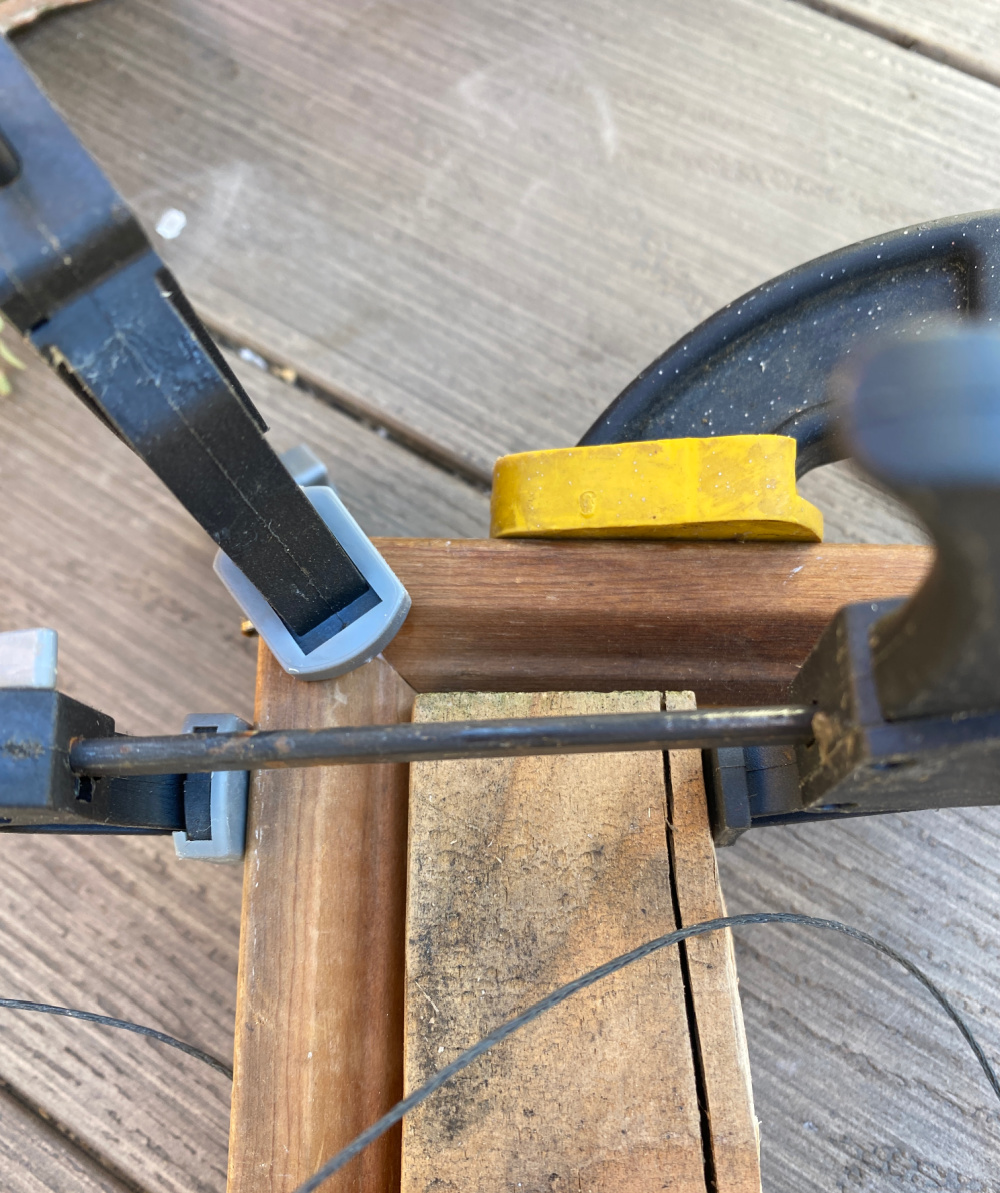
There are clamps that are made specifically for 90° angles that are perfect for securing or building picture frames or repairing. However, I have not splurged on any of these yet. Hmm, this is the first item to go onto my Christmas list! I will rely on old-fashioned ( cave man style) engineering skills. I used a wood block (with perfect 90 degree angle) and secured one edge of the frame to the block with a clamp. I applied some glue to each of the two frame pieces that would fit together to create the corner and layed the pieces into place at the corners. Then I grabbed another clamp and secured the other side of the frame to the wood block as well. This provides a sturdy support for your frame as the glue dries. A third clamp was placed directly over the 90 degree corner. I need to make a video of this process. Until then, hopefully these photos help.
Once the glue had dried, I used my Ryobi airstrike stapler to staple each side the corners.
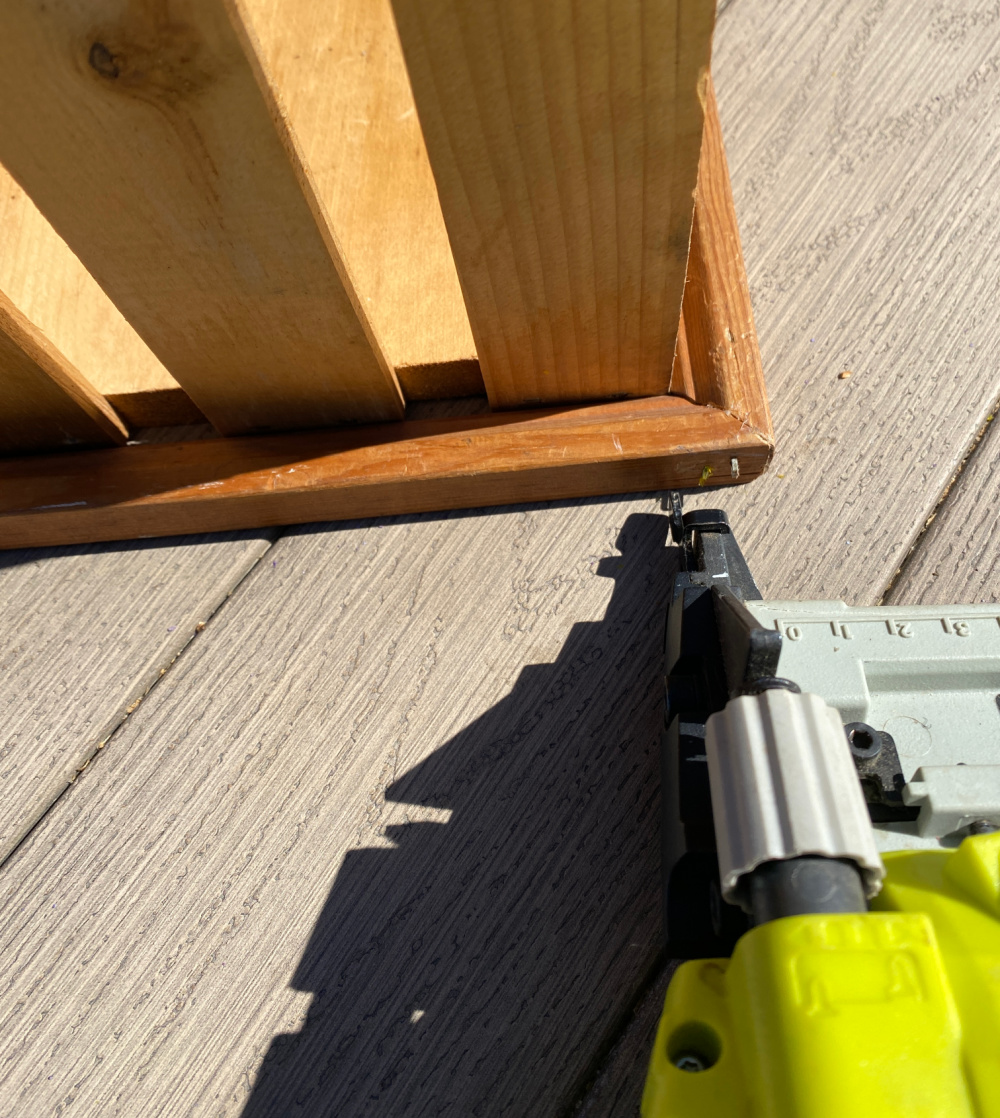
I used the crate again as a support for my frame while I set the staples into place. It kept the frame steady and helped me get the staples into place perfectly. Then I repeated the entire process for the other 3 corners of my frame.
And here is the frame!
Reinstalling the Frame
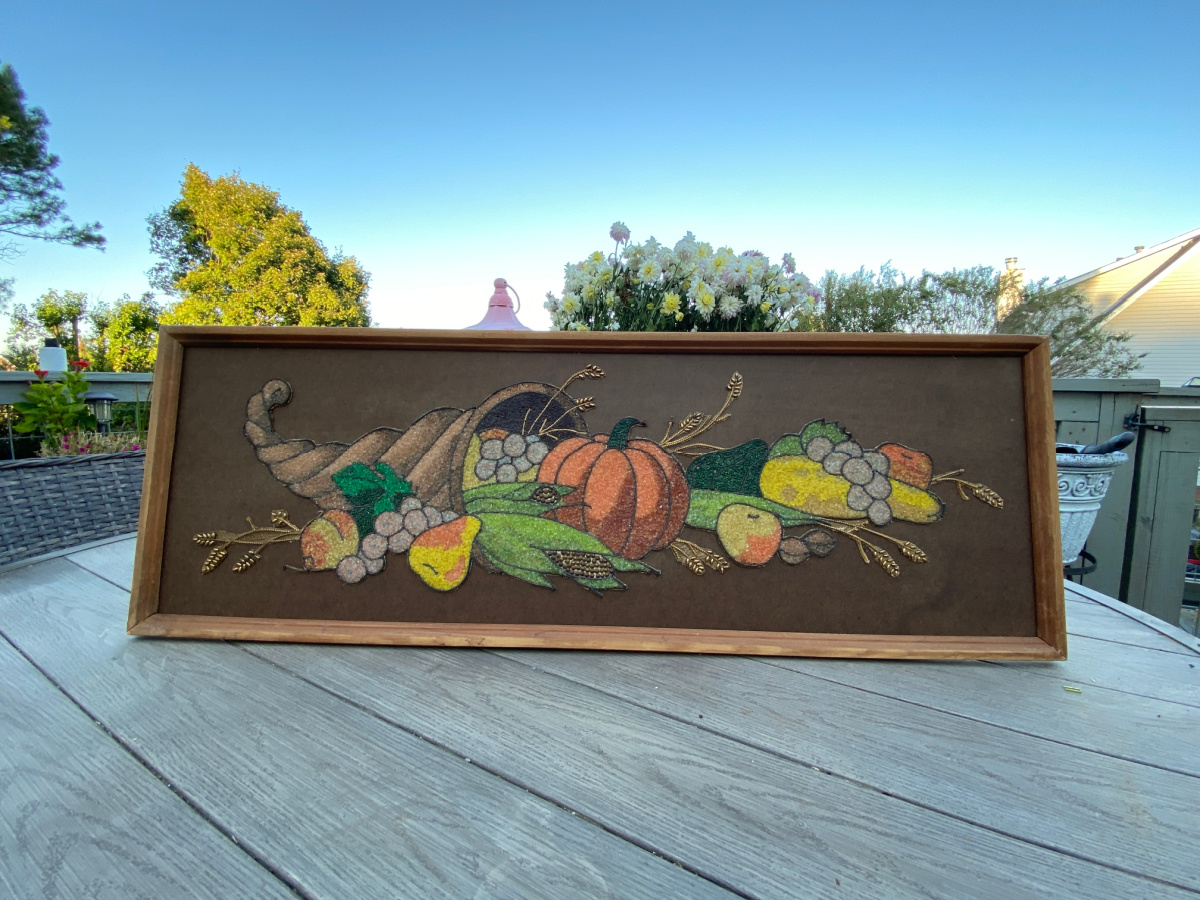
The final step was to place the artwork back into the frame. The best part about reusing the original backer board is that the fit was perfect. I simply laid the board into the frame and stapled it into place.
Isn’t she lovely???!!!

I do like the change in the dark background. I think it really makes the colors so much more vibrant. I will be sure to display this in a room with much light to accent the colored gravel.
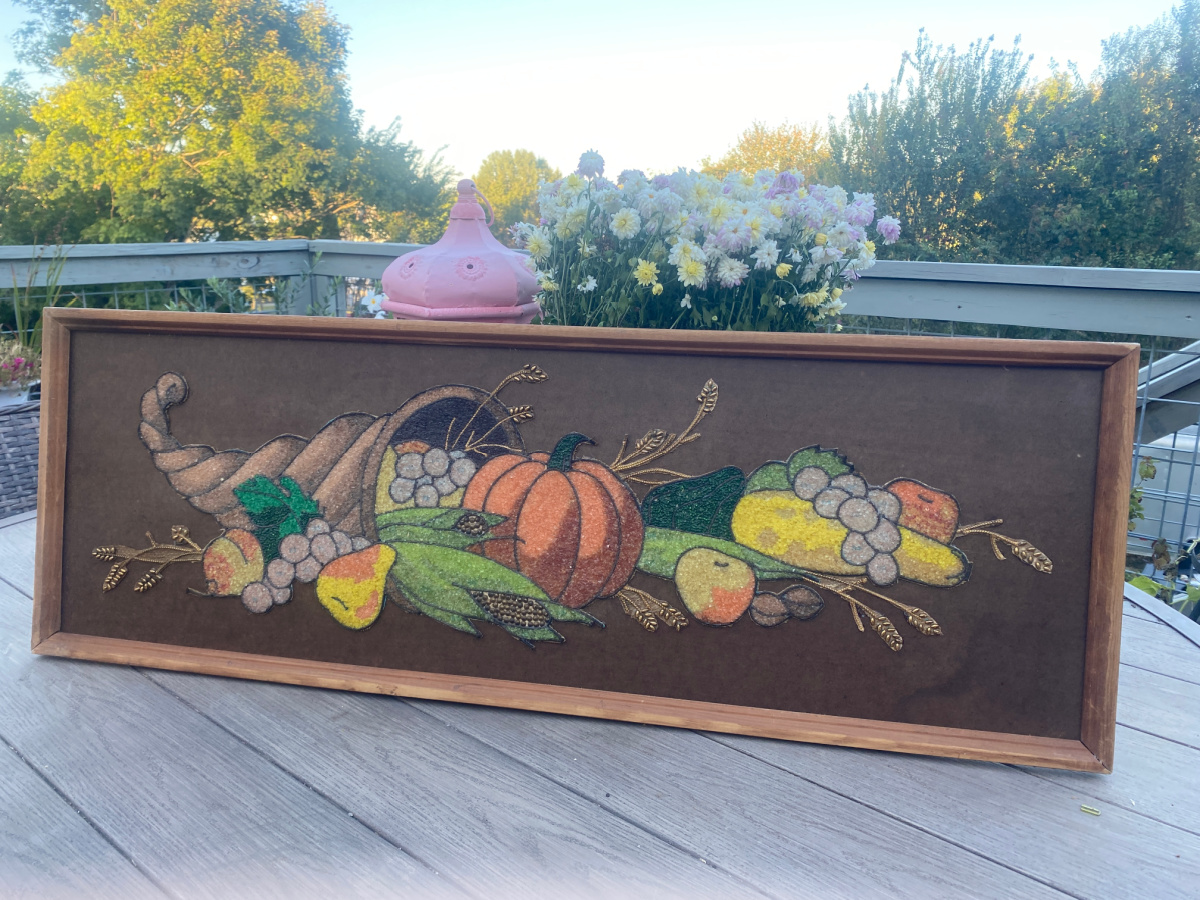
She will make a beautiful addition to the mantle. I can picture her with a beautiful potted mum on either side for a very simple yet elegant display.
Somehow, after this sweet project, I know there will be many more thrift store art work upcycles to come!
Thrift Store Decor Team Projects
As promised, here are the other projects from my fabulous Thrift Store Decor Team members. Take some time to enjoy the creative talents of my fabulous friends. Enjoy!
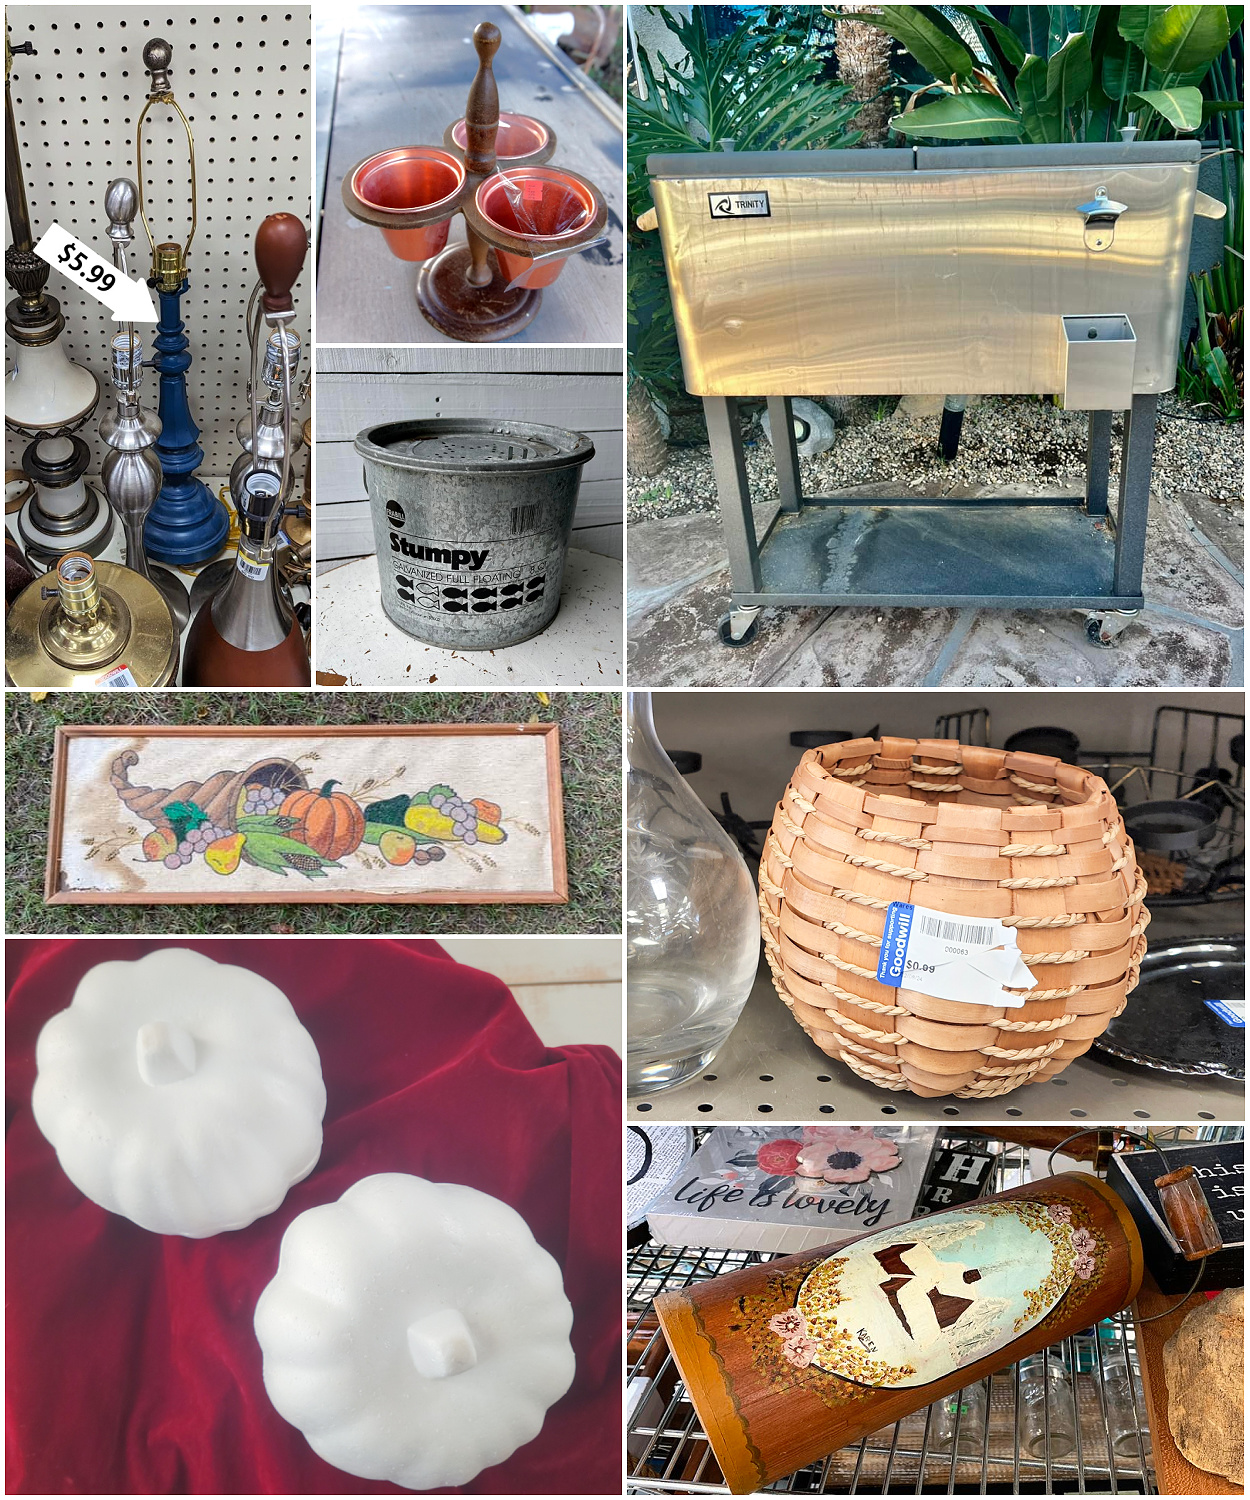
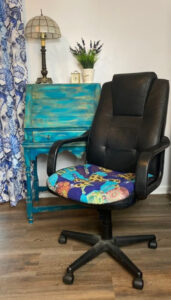
Painting A Thrift Store Lamp My Repurposed Life
Thrift Store DIY Upcycle Petticoat Junktion
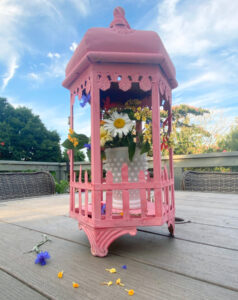
Minnow Bucket Pumpkin With Dollar Tree Stencil Organized Clutter
Updating a Rolling Cooler With Spray Paint My Uncommon Slice of Suburbia
Updating Fall Thrift Store Art Shop At Blu
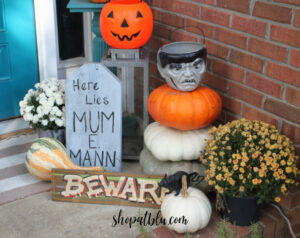
Boho Pumpkin with All-Natural Craft Supplies Sadie Seasongoods
DIY Velvet Pumpkins Domestically Speaking
Vintage Wooden Bucket Makeover House of Hawthornes

And here is the compilation of lovely MCM gravel art pieces that I found on Etsy:
Can you guess which one of these I just ordered…..???


Such a great update with a little work – turned out so pretty!
Thank you, Maryann!
What a difference a new frame and background made, it really makes the piece really pop! I can’t believe that was made out of gravel, that is amazing. Those scissors really did the trick to get to the edges. I’ve been needing to buy some for my dogs eyes but may just need them for my craft drawer as well 🙂
Thanks Kristin. Can’t wait for Thanksgiving!
What a great save of something from time gone by. Nice work.
Thanks so much, Judith!
Great Post and projects! Love the eclectic style and innovative creativity. Demonstrating how you can have a social conscience and decorate beautifully. The integration of different upcyclers provides a diverse view of creativity. It’s like looking through the glass of a kaleidoscope, beach view is different. Great ideas!
What a great comment, Robin! I’m trying! Thank you.