Master Bathroom Refresh Reveal $100 Room Challenge
As an Amazon Associate and member of other affiliate programs, I earn from qualifying purchases.
Here We Go Again!
Why is it that my projects always spur additional little projects? I guess that is all part of being addicted to DIY. I am simply never finished! Today I have finished my Master Bathroom refresh as part of the $100 Room Challenge! I would love to replace the original builder grade floor and wall tiles. But, we recently upgraded our kitchen and replaced the floors on our main level with LVP. So, basically we have exhausted our budget. The remainder of projects throughout the house, for now, will be mostly cosmetic upgrades completed with products, materials, and furniture that are all sitting in my garage. Today, you get to tour my master bathroom refresh that was completed for under $100.
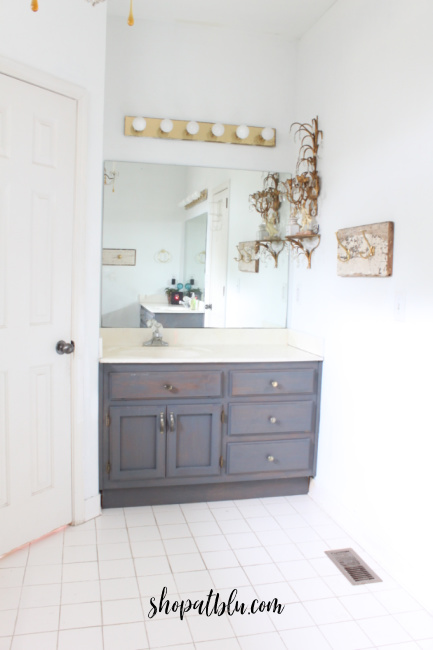
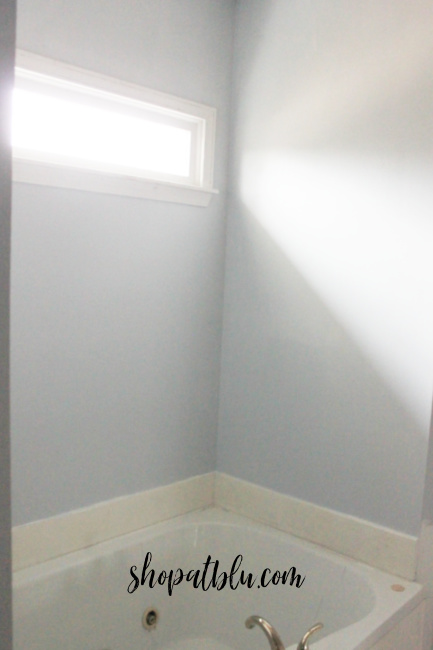
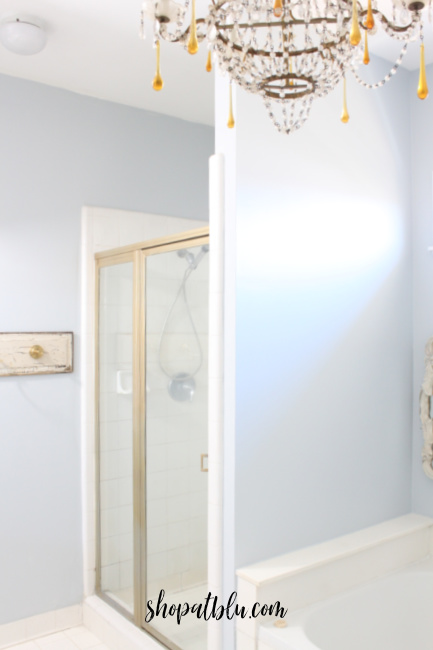
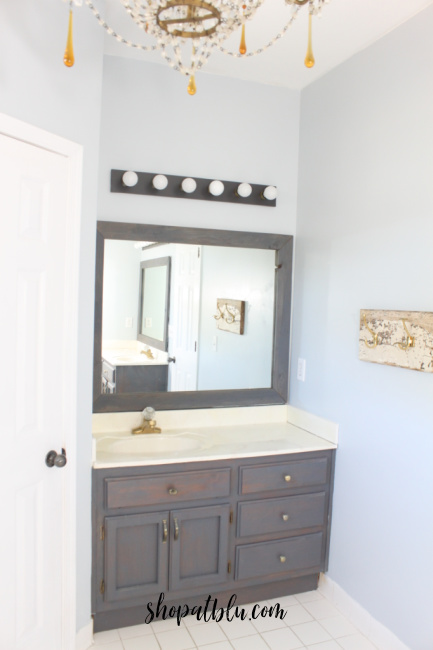
Here are some pictures of the bathroom before this challenge. When we moved into the house almost 20 years ago, the master bathroom walls were a hunter green mottled by a horrible attempt to faux finish. A few years ago, we removed the popcorn ceiling and painted the entire room white. I love it. But Mr. Blu is ready for some color.
So we selected a pale blue that sometimes appears grey. You can read all about the color here.
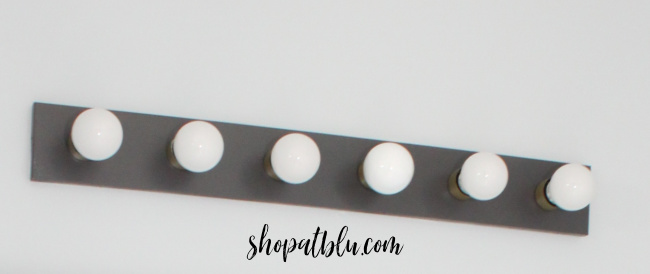
Refresh for Dated Vanity Lights
In keeping with my $100 budget, I decided to upcycle my Hollywood (also original builder grade) vanity lights. I will be posting the process soon.
It was so much easier than I had anticipated. The fixtures disassembled easily. I simply sanded and painted and reassembled. And the lights are much more contemporary. What do you think?
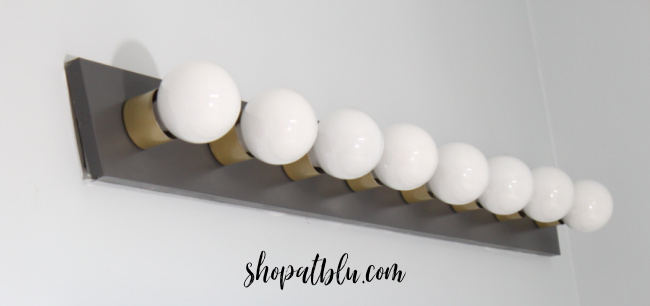 The only expense was one can of grey spray paint to match my vanity which had previously been stained with General Finishes Grey gel stain. I had a nice selection of gold spray paint in the garage from previous projects. I selected Pure Gold to match the hooks on my towel bars.
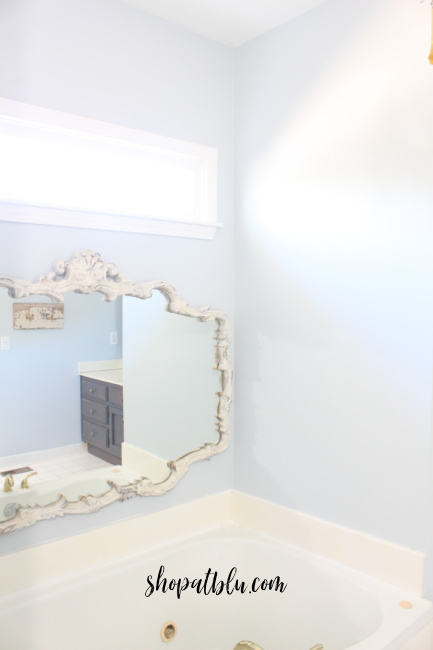
Caulking = Fresh and Clean
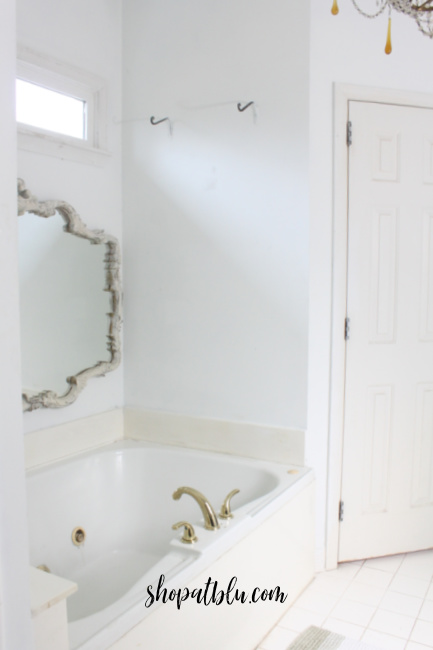
The next project was to re-caulk the garden tub. I tried to remove the caulk but even after soaking with acetone, it was not coming off easily. So I cleaned and dried the area and simply re-caulked. Again, I didn’t spend any money because I had one tube of Tub and Tile caulk sitting in the garage. I removed old and discolored silicone sealant from around the shower door and replaced with fresh beads of Tub and Tile caulk. There is nothing like a freshly caulked surface to make an area fell clean and revived. Here is a post on how to apply caulk from Week 2 of this same challenge.
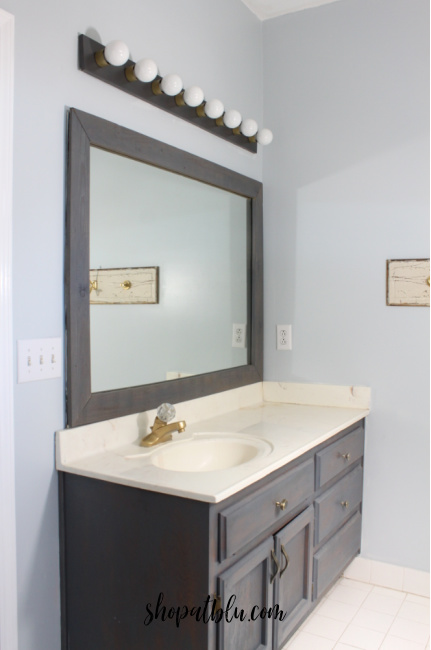
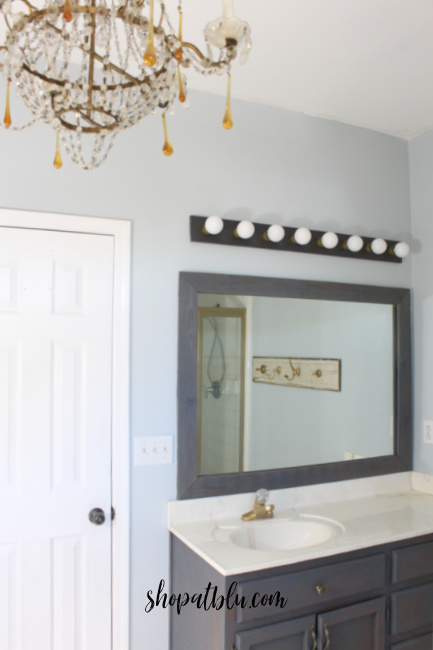
Frame Out the Mirrors
Time to build mirror frames around the vanity mirrors. I used old pieces of oak from the garage. I was lucky to find two pieces that were 3 inches wide by 100 inches long. Additionally I found 3 smaller pieces that matched the wood. I used my miter saw to cut the appropriate lengths. I used the miter saw again to make the 45 degree cuts on each end.
I applied Liquid Nails to the back of each side piece and placed each directly onto the mirror. I used duct tape to hold the wood in place while the adhesive dried. Custom look for the price of one tube of Liquid Nails!
Spray Painting the Faucets
Next project is to spray paint the vanity sink faucets gold to match the new accents in the room. I cleaned the faucets, sanded the surfaces lightly, cleaned again, and taped off the surrounding area. Since I had already installed the new mirror frames, I used brown paper to tape off the new frames and ensure they were blocked from any potential overspray. I used Rustoleum automotive primer.
Once dry, I sprayed several light coats of Pure Gold. I finished up with two light coats of Rustoleum Lacquer Spray. Shout out to Kristen who blogs at My Homier Home for documenting this project in her blog. I simply followed many of her suggestions on products.
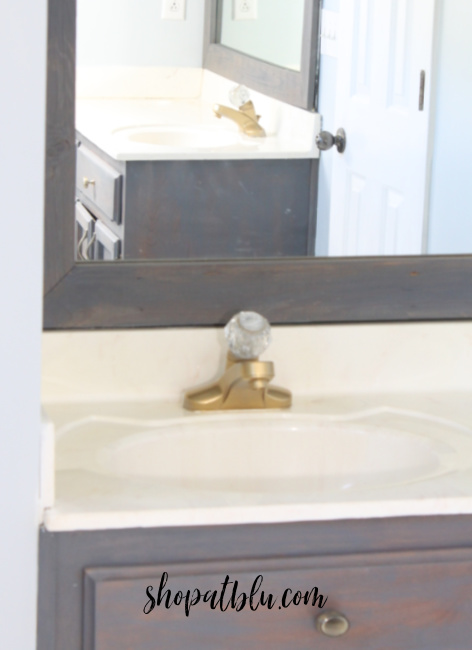
Our intent is to eventually replace both vanity faucets and the shower assembly with gold toned products. Our garden tub faucet broke about a year ago and we had already replaced that. So, the spraying of the faucets is a quick and budget friendly upgrade. I will keep you posted on durability.
I Just Could Not Stop
Originally I had planned to either 1) spray paint the shower enclosure gold or 2) remove the glass door assembly completely and replace with a curtain. I was able to clean the glass doors to my liking so it was not necessary to remove the doors. I was going to leave the door surround silver until we could upgrade. But here I was admiring my newly painted faucets and thought to myself…why not??!!
So I taped off the glass and sprayed away.
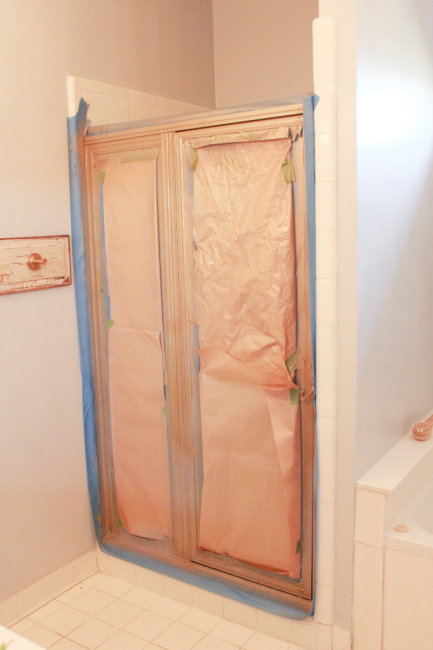
At the onset of this master bathroom refresh, this was probably the most intimidating project. I just didn’t think it would be easy to tape off all of the glass. I was afraid that the paint would look like more of a cheap afterthought. Wow! was I wrong. Once the glass and tile was taped off, the application was so easy. As with the faucets, I will keep you updated on durability. If it holds up for a year, I will be happy. We will be ready for new tile and a shower/tub update by then.
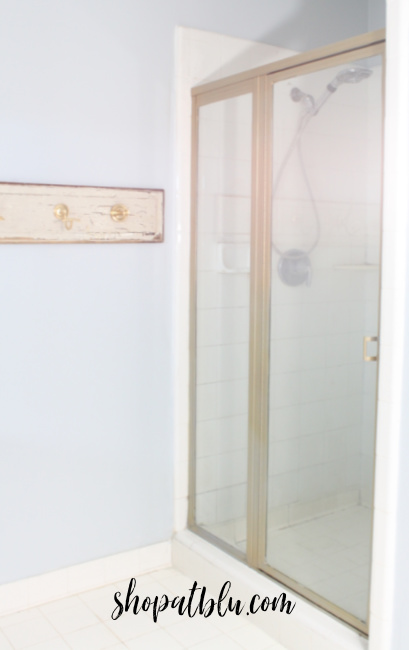
I am so happy with the additional gold in the room.
List of Expenses for this Master Bathroom Refresh
Here is a list of expenses:
- 1 Gallon Behr Marquee Satin paint 47.95
- 1 tube of Liquid Nails 7.99
- 2 spray bottles of CLR Shower glass cleaner (BOGO at Publix) 4.53
- 1 can Rustoleum Auto Primer in gray 4.27
- 1 can Rustoleum Lacquer spray 4.18
GRAND TOTAL: $68.92
Let me offer a great big thank you to Erin of Lemons, Lemons, Lavender, and Laundry for once again hosting this challenge. This fun bi-annual event holds me accountable. And my home is becoming a haven!
Here are all of the wonderful reveals for this edition of the $100 Room Challenge!

I love the simple changes you made in this bathroom, on such a tight budget! I love spray paint and think it just might be the best invention ever. I am anxious to hear how the fixtures and shower surround hold up over time. I also love the framed mirror. It adds a little character to the space. Thank you for joining in the challenge this month. Enjoy your new space!
Thanks Erin! It was a fun transformation!