Upcycled MCM China Cabinet
As an Amazon Associate and member of other affiliate programs, I earn from qualifying purchases.
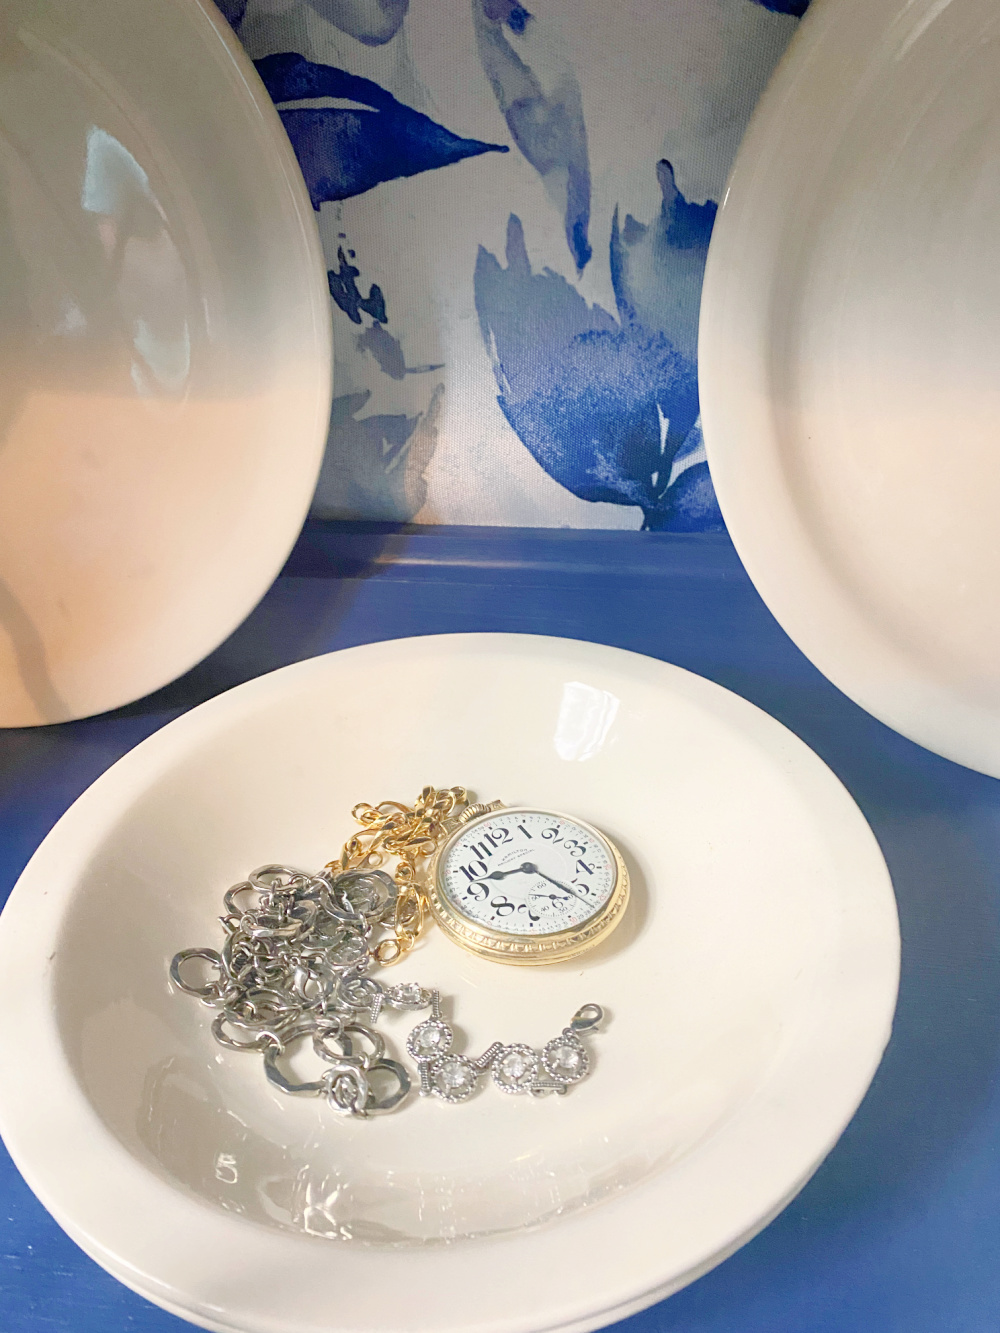
Every now and then I get the itch to upcycle a fabulous piece of furniture. You know, take a nice solid, well made something and use it for something else. Repurposing at its purest. Today’s project was inspired, as many of my projects are, by clutter. This time it was the jewelry gathered on my bedroom dresser. Not just clutter. If you know me, my clutter is pretty cool. My store even had a catch name describing such…ELEGANT CLUTTER! I’ve had enough of the stuff being exposed so why not fabricate (sort of) a giant jewelry box, or likeness thereof, to house my collection of costume jewelry? I am knee deep in an upcycled china cabinet project that will serve as a giant jewelry box!! Come along and let’s finish this!
If I am upcycling, recycling, renewing, or refreshing….it must be time for this month’s THRIFT STORE DECOR TEAM projects!

At the end of this post are the links to every team member’s projects for this month. What new skills do you think we will see today?
Now, let’s get into our upcycled MCM china cabinet!
Where We Started
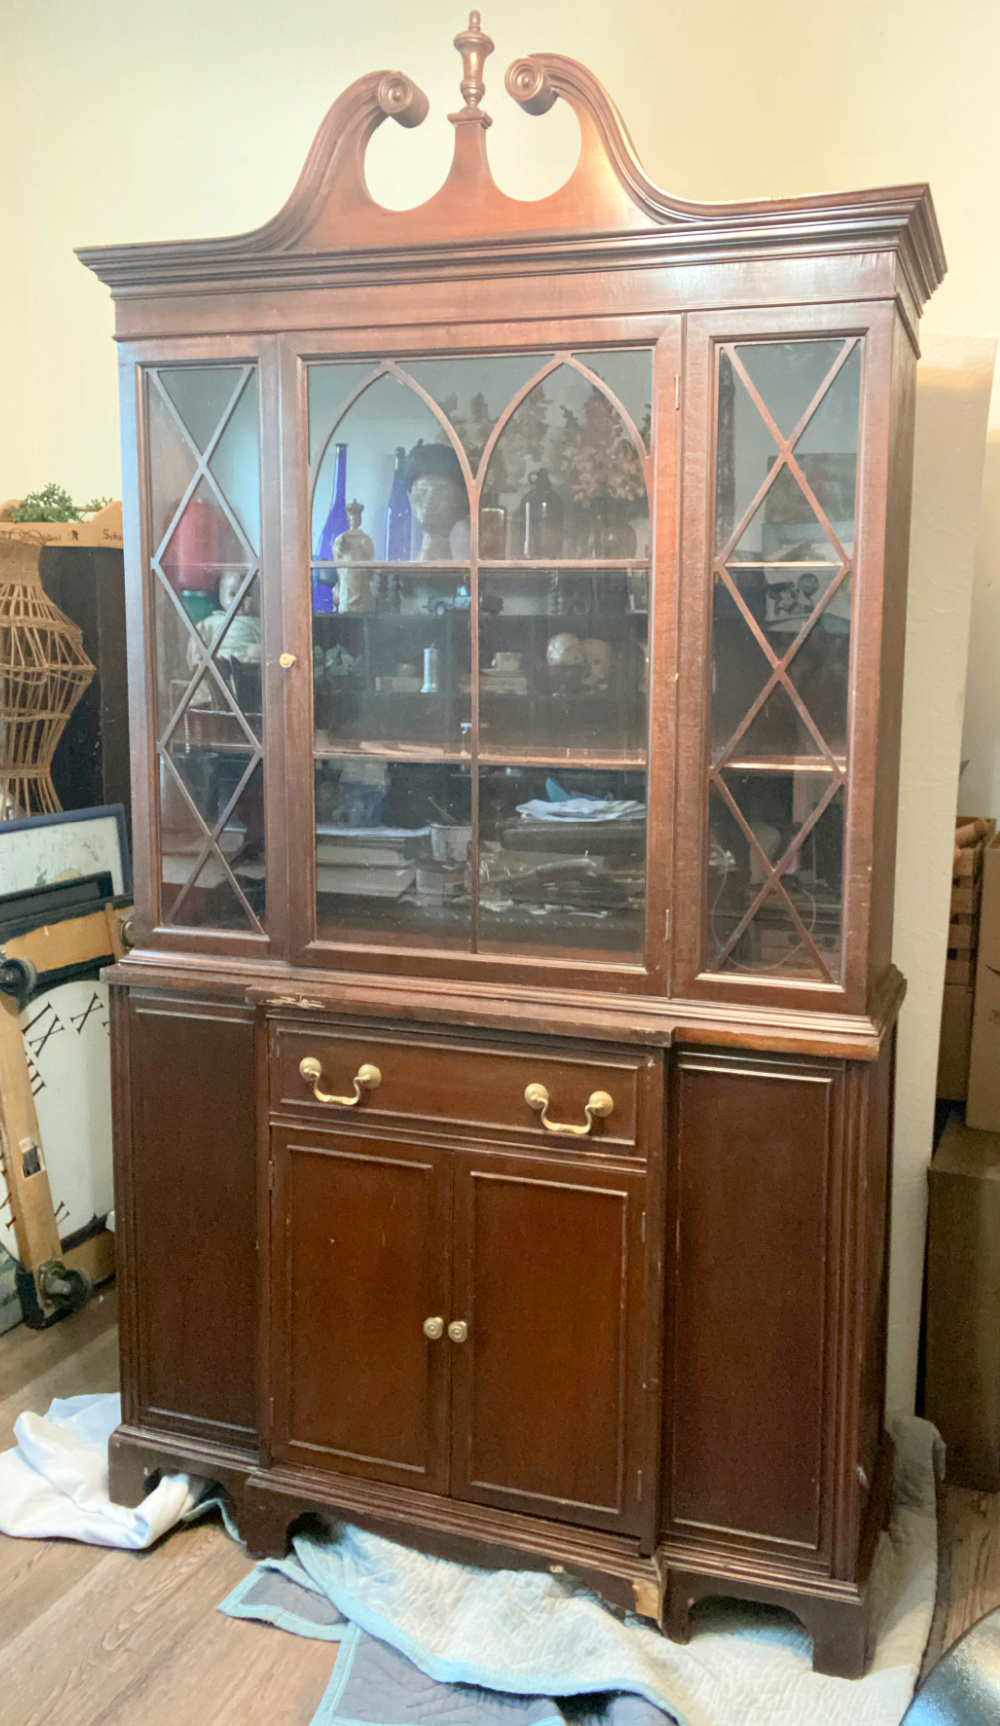
I’ve had this china cabinet in the garage for some time. I am drawn to the wooden design in the glass doors as well as the Queen Anne-like curves on the top of this classic beauty. Those wooden designs have a name. From Google:
Mullions / Muntins are moldings that divide the opening of a Cabinet Door Frame and either hold individual panes of glass (true divided lites) or more commonly serve as decorative accents over a single pane of glass.
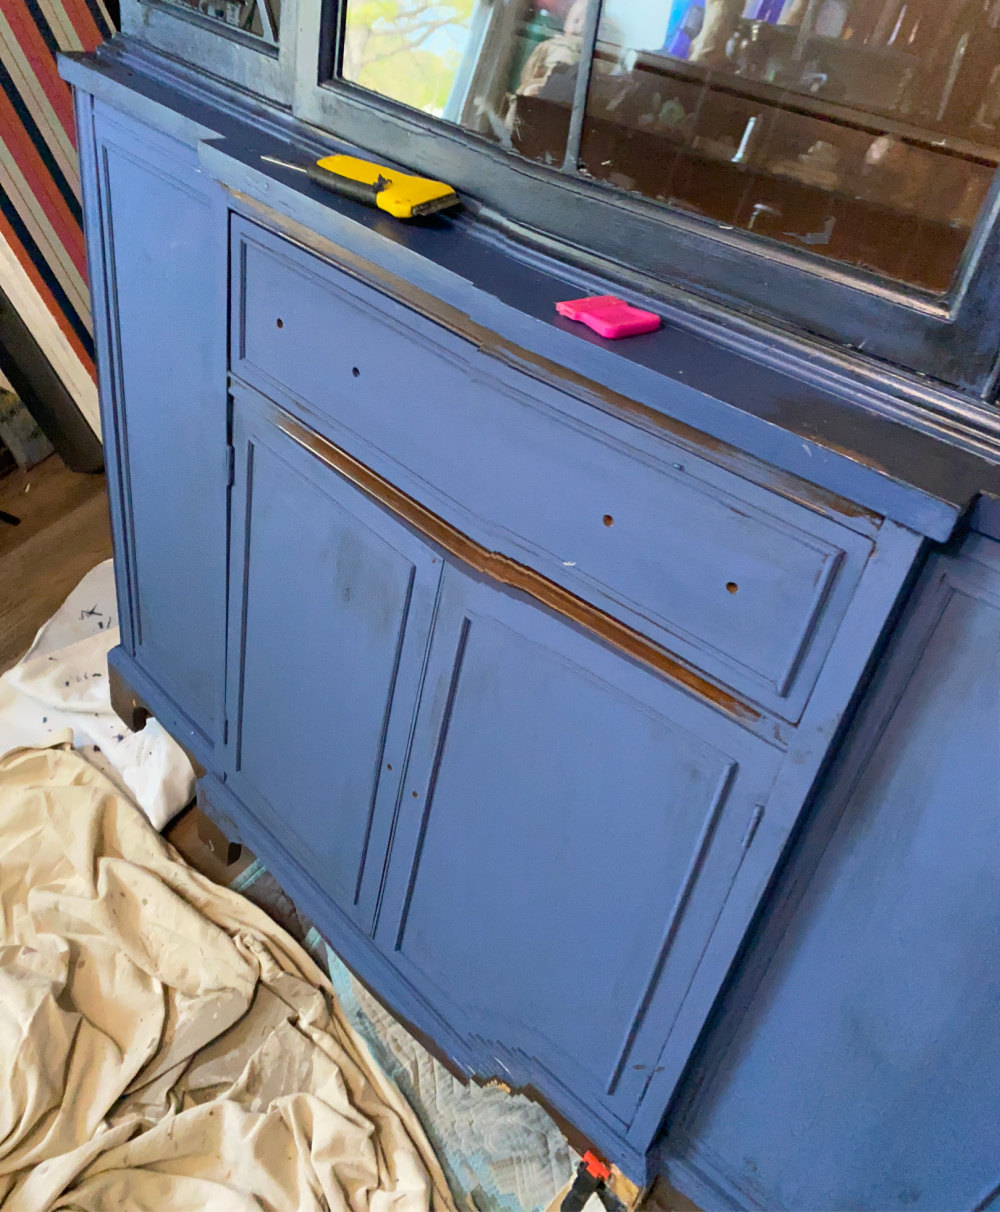
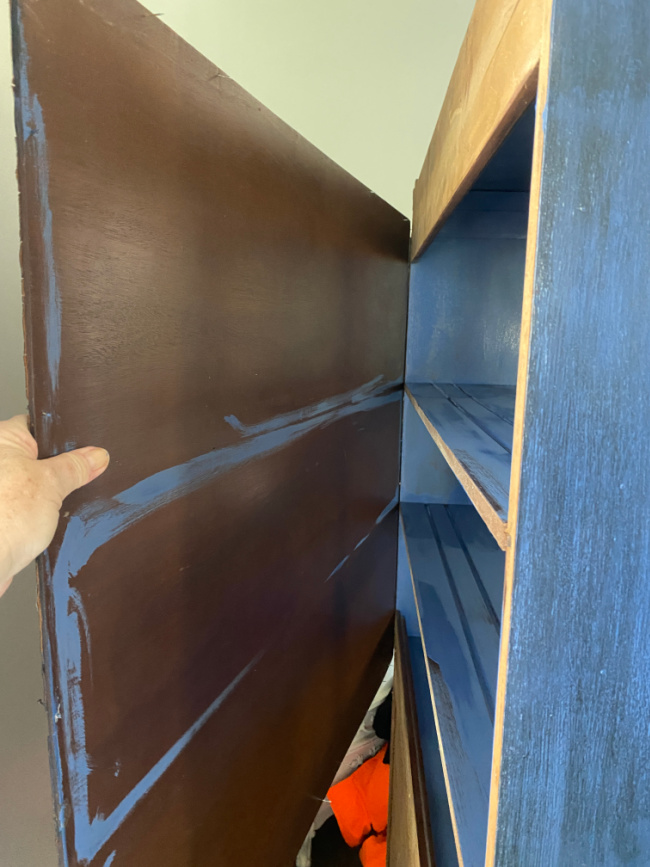
While my love for mahogany is growing, this piece has some veneer damage…

and other issues…
And I can’t help wonder how beautiful she would be upcycled with a more contemporary flair. She’s been waiting for a fabulous makeover. Until today, I didn’t know how or where she would be used. But, I finally have a plan for this beauty. This will be fun.

Prep Your Furniture
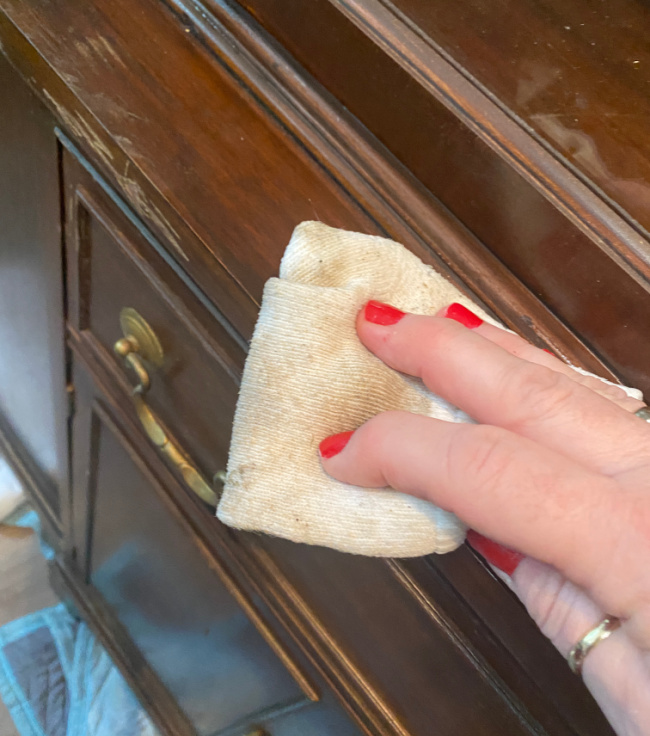
I always start a furniture project by cleaning the piece, sanding (the whole piece or selective area, depending on the amount of damage and the condition of the wood), cleaning again, and wiping down with TSP to remove residual dirt and oils. Sometimes, like in this case, some repairs are necessary too.
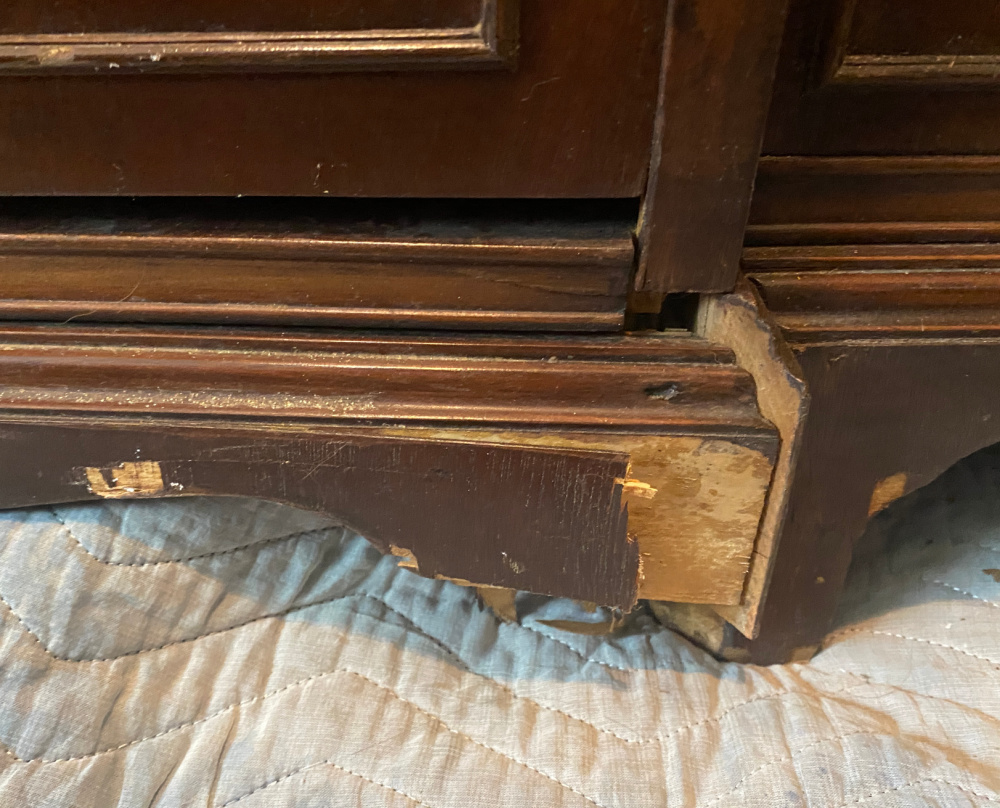
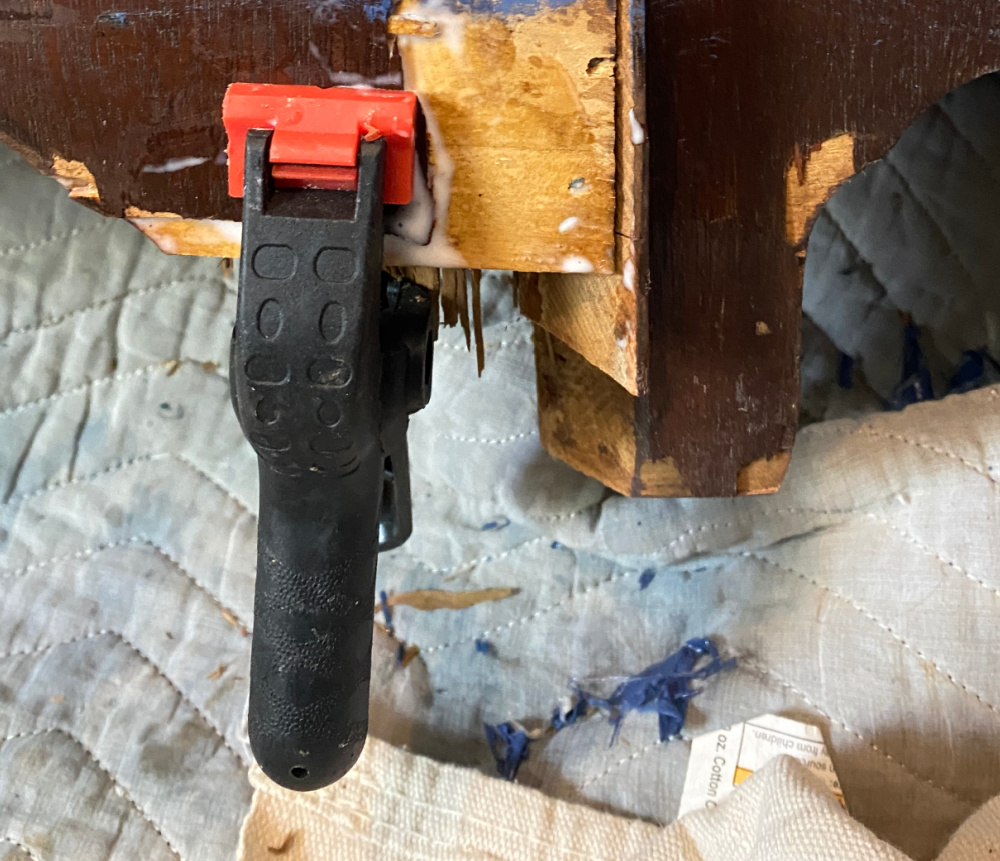
In this case, part of the base had fallen off when the piece was exposed to a flood. I had the damaged parts so I just glued them back into place and secured with a few nails. I made the basic repairs so that I could continue but I will most likely return to this piece and reinforce the repairs.
I’m often torn between getting on with the project and completing a restorative repair that takes more time. Usually, my excitement gets the best of me and I do a quick but effective patch. What would you do? Sand, patch, restore? Or glue, paint, move on? Although I’m excited to have this piece in my home, I don’t know how long I will keep her as she is quite large. I suppose if I was going to keep her forever or if she was a family heirloom then I would spend the time for a flawless repair. This time, my impatience got the best of me and I did the basics. I’ll keep you posted on whether I polish her up.
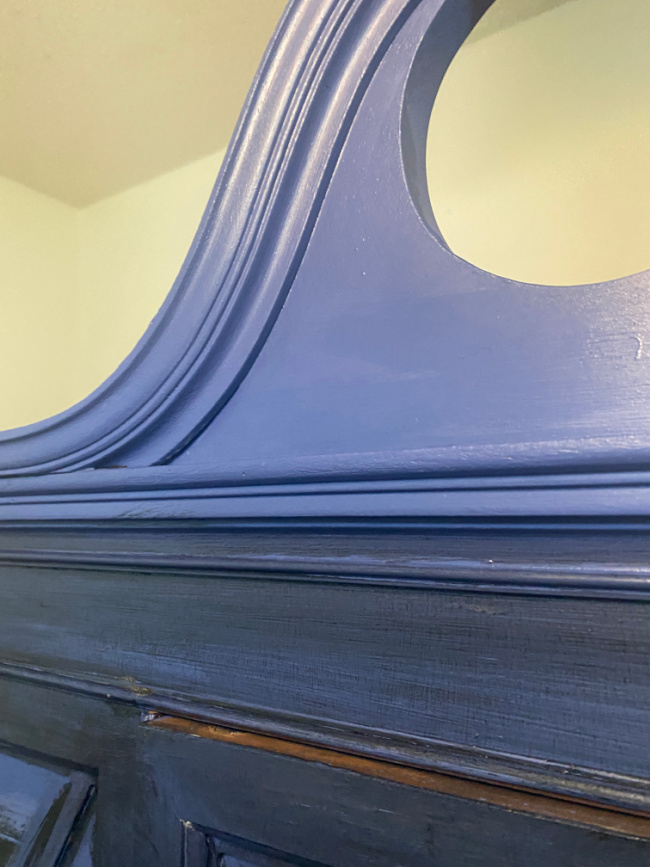
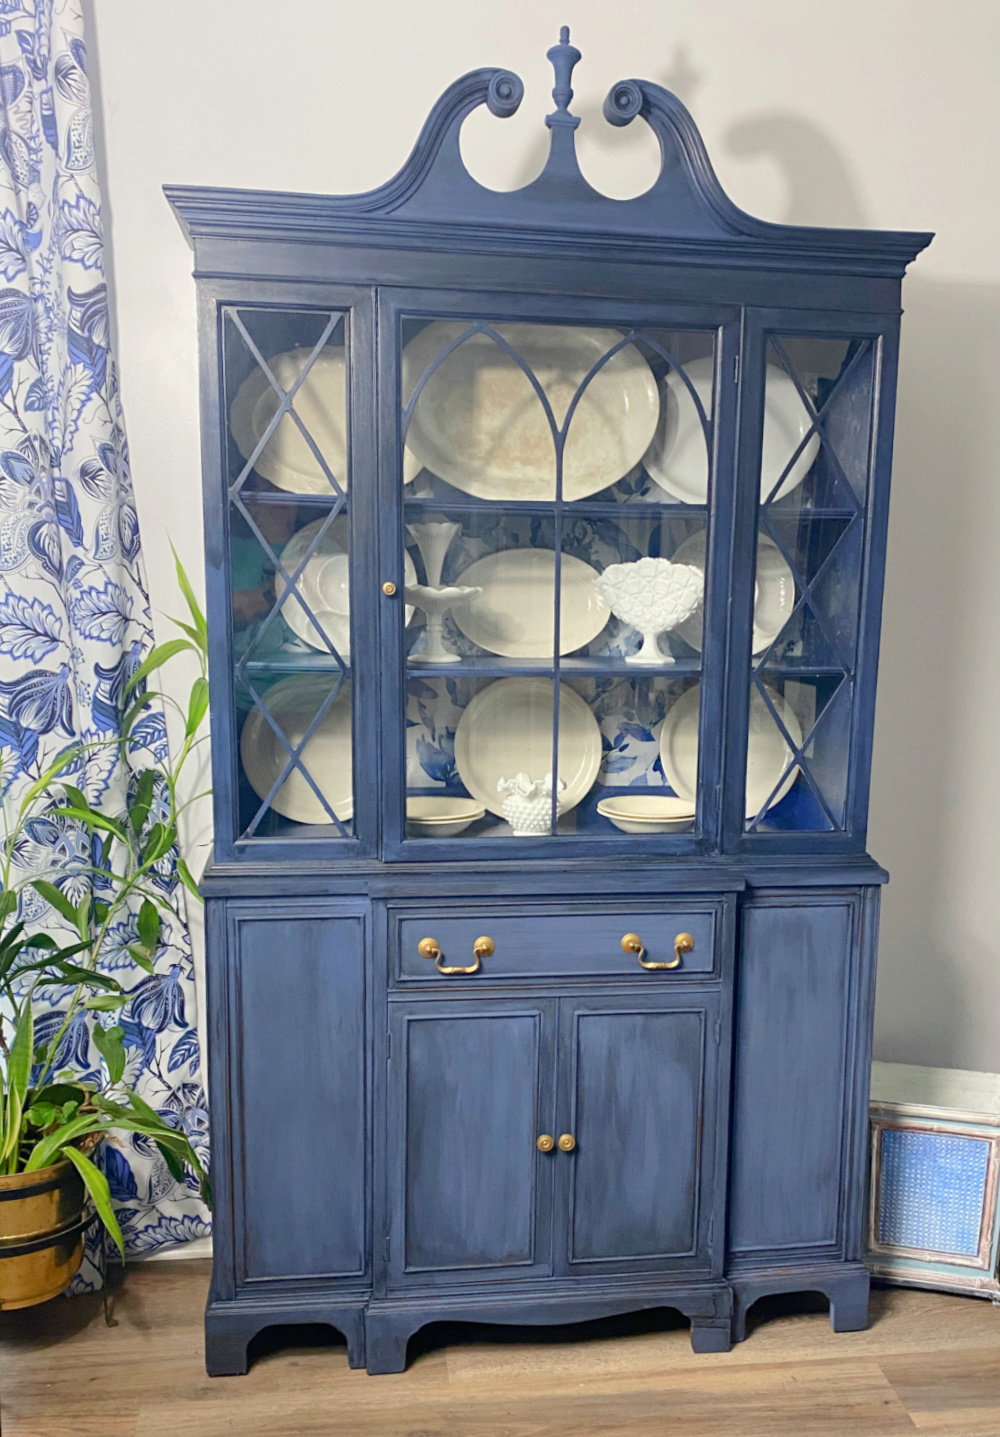
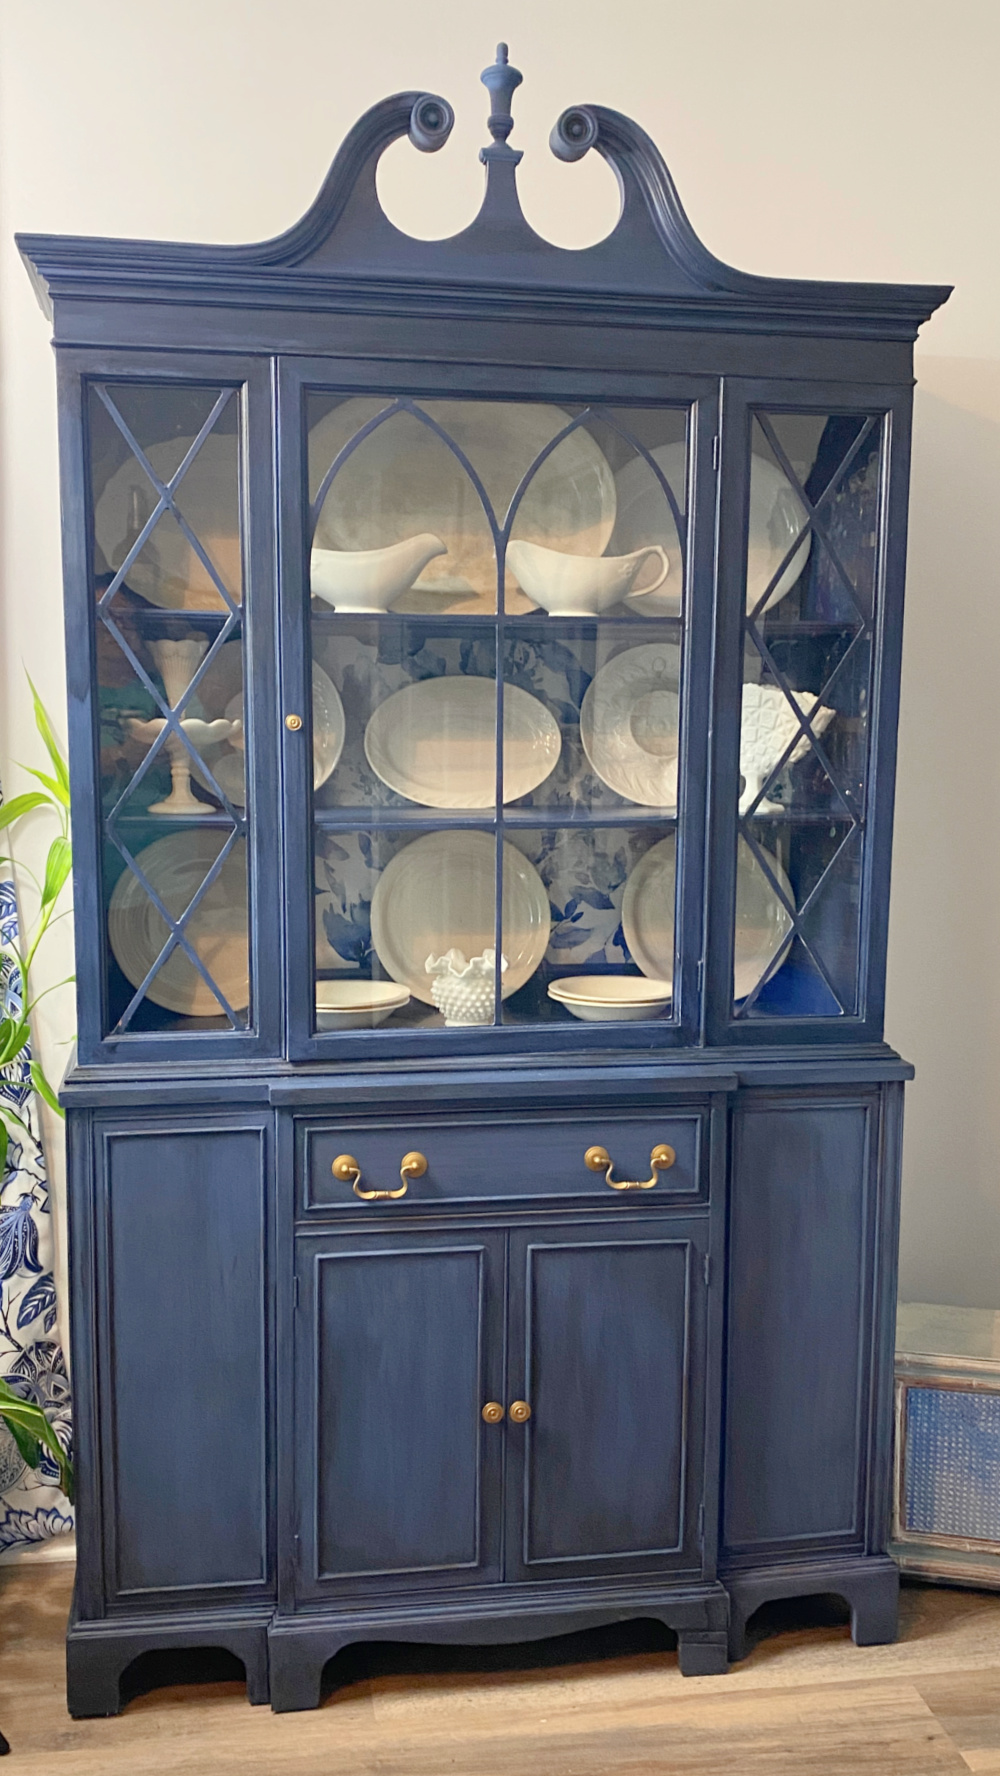
You know I love me some blue. I mean, look at the dresser that’s already in the room. I’m trying to create a vibrant yet moody broody blue bordering on indigo. A rich velvety blue. Ah!
Creating Color with Black Dog Salvage Furniture Paint
I consulted my friend Swooz, aka the paint recipe genius at Black Dog Salvage Furniture Paint. Swooz is the genius behind the BDSFP recipes and fabulous color combinations you will see on their website.
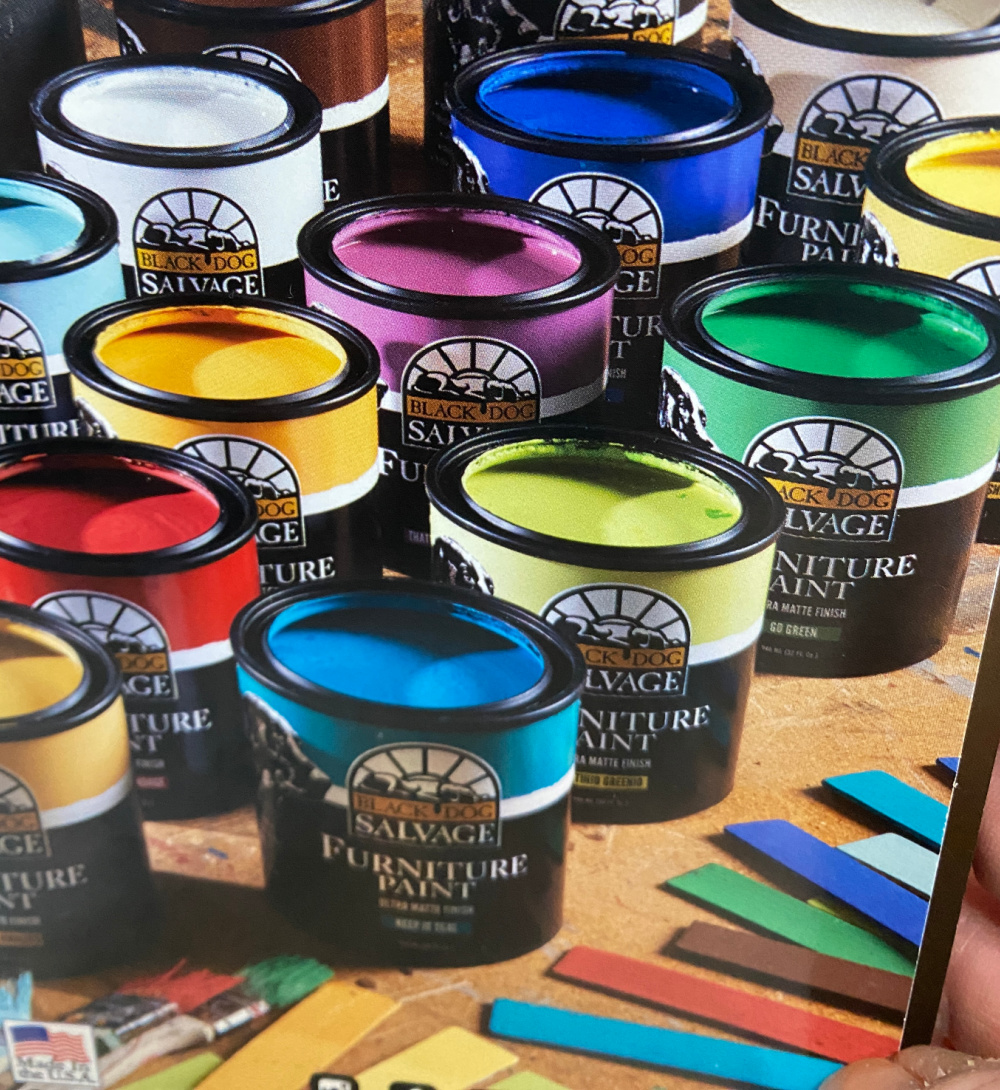
At Swooz’s recommendation, I went with Cadet Blue followed by a coat of black glaze. Swooz recommended General Finishes glaze in Pitch Black. So that’s what I used.

The recipe for Cadet Blue is a 1:1 ration of Blue Ridge to Appalachian Sunset.
Introducing a New Product
Before we begin with the Cadet Blue, let me to introduce you to a new product! This is Mask and Peel.
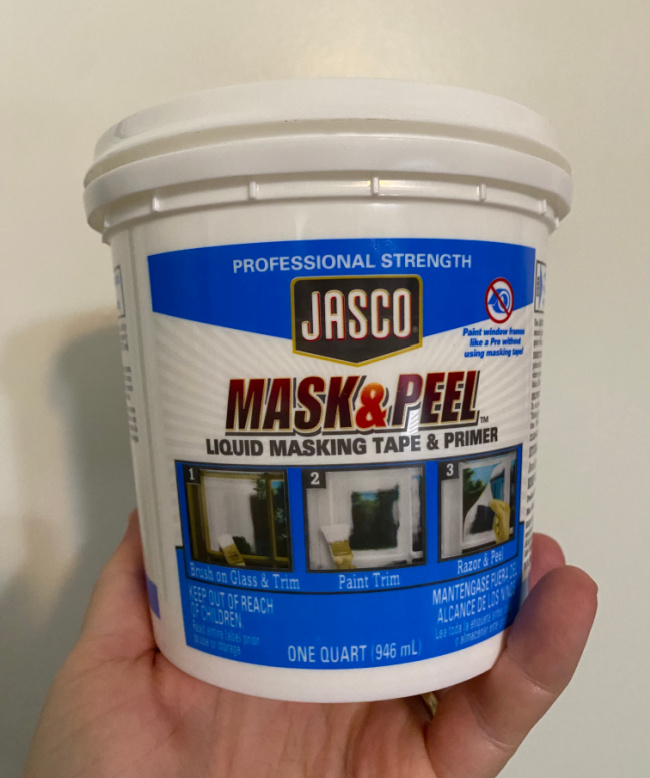
It cuts down on the time and effort and elbow grease needed to paint things like window panes and dividers and mullions or muntins. Congratulations to me on using our new terms in a complete sentence.

In theory, you paint on the mask and peel, allow it to dry, paint your mullions, allow to dry, score the straight edges, and peel the mask off of the glass.
I am sure that this product works. I just has beginner’s bad luck. I think I painted the mask on in too thin of a coat. Most of it did not peel very well. But some did.
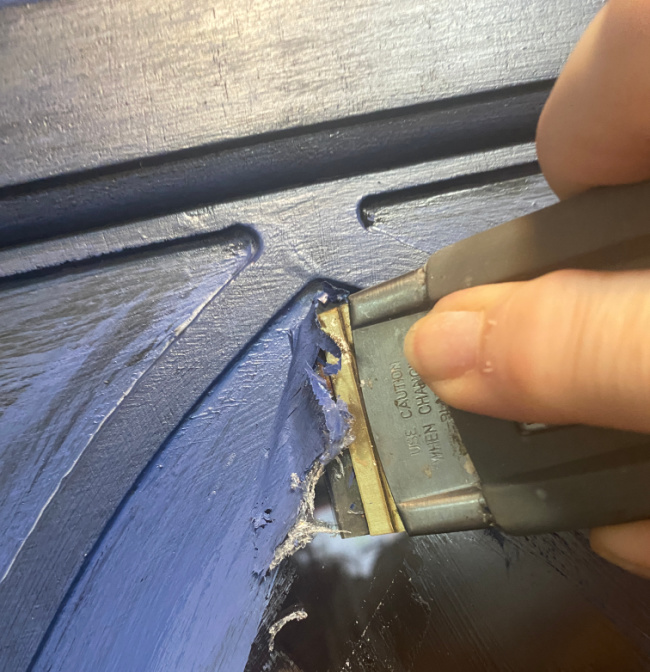
I used a razor blade to scrape the portions that would not peel This took some time, but was till easier than painting each mullion and scraping the paint off of the glass. I would definitely use it again. It really made the paint come off of the glass quite easily.
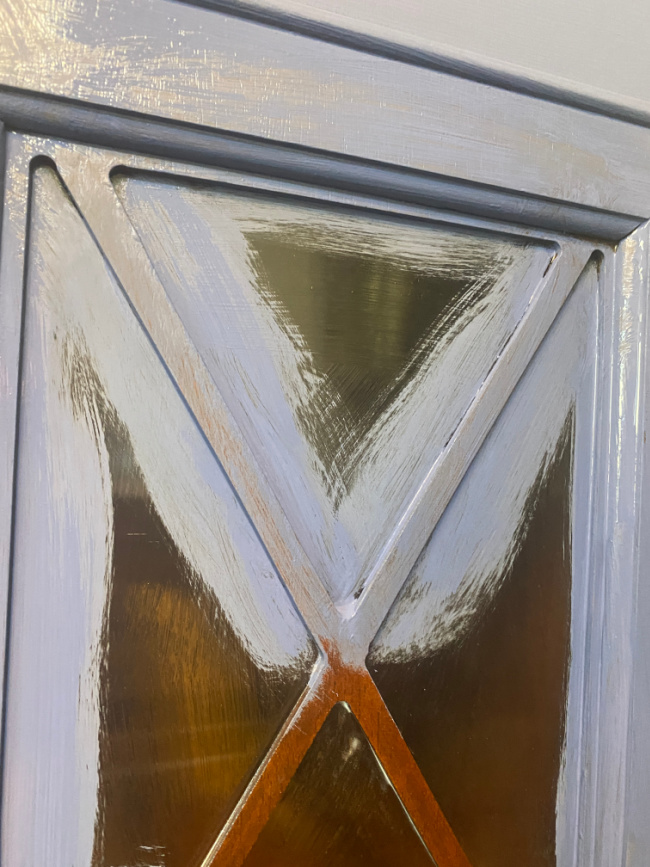
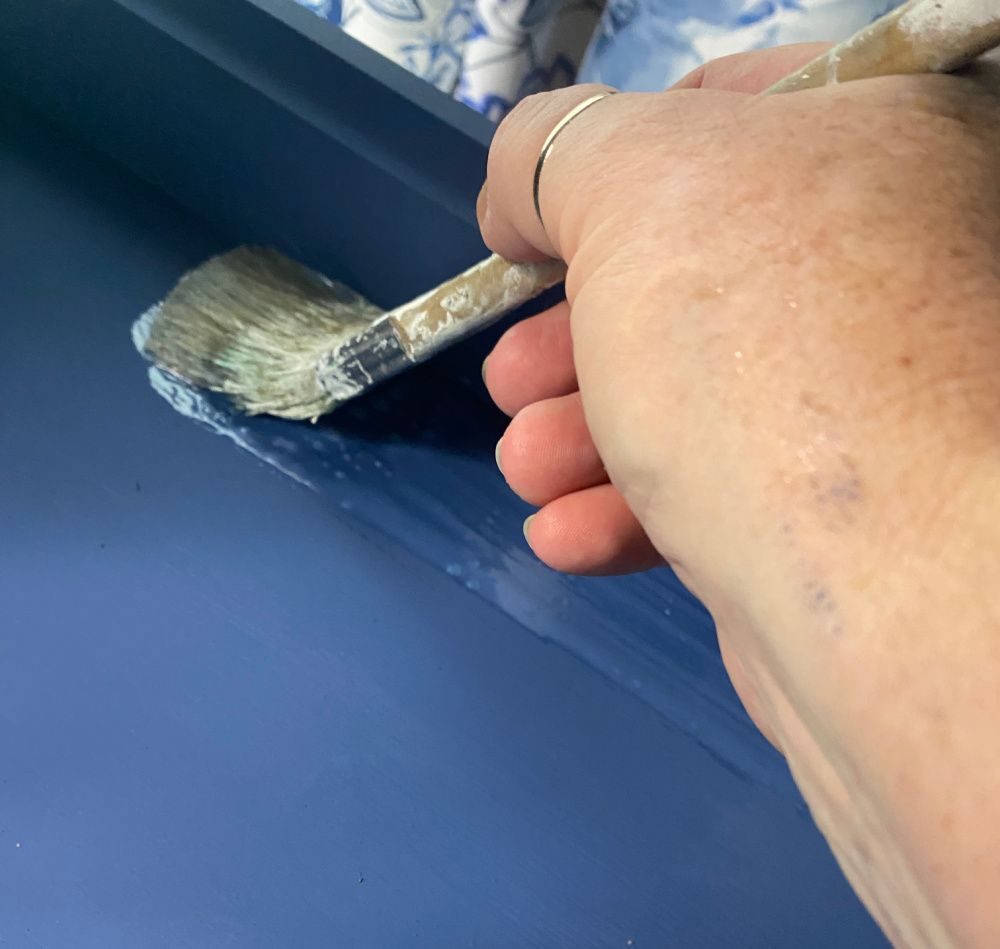
Slap on that Color
After prepping, I applied 1 coat of Cadet Blue allowing at least 4 hours of dry time before the second coat.
These days, sometimes it’s a week between coats. At any rate, the paint is dry and ready for the next layer.
Time to Glaze
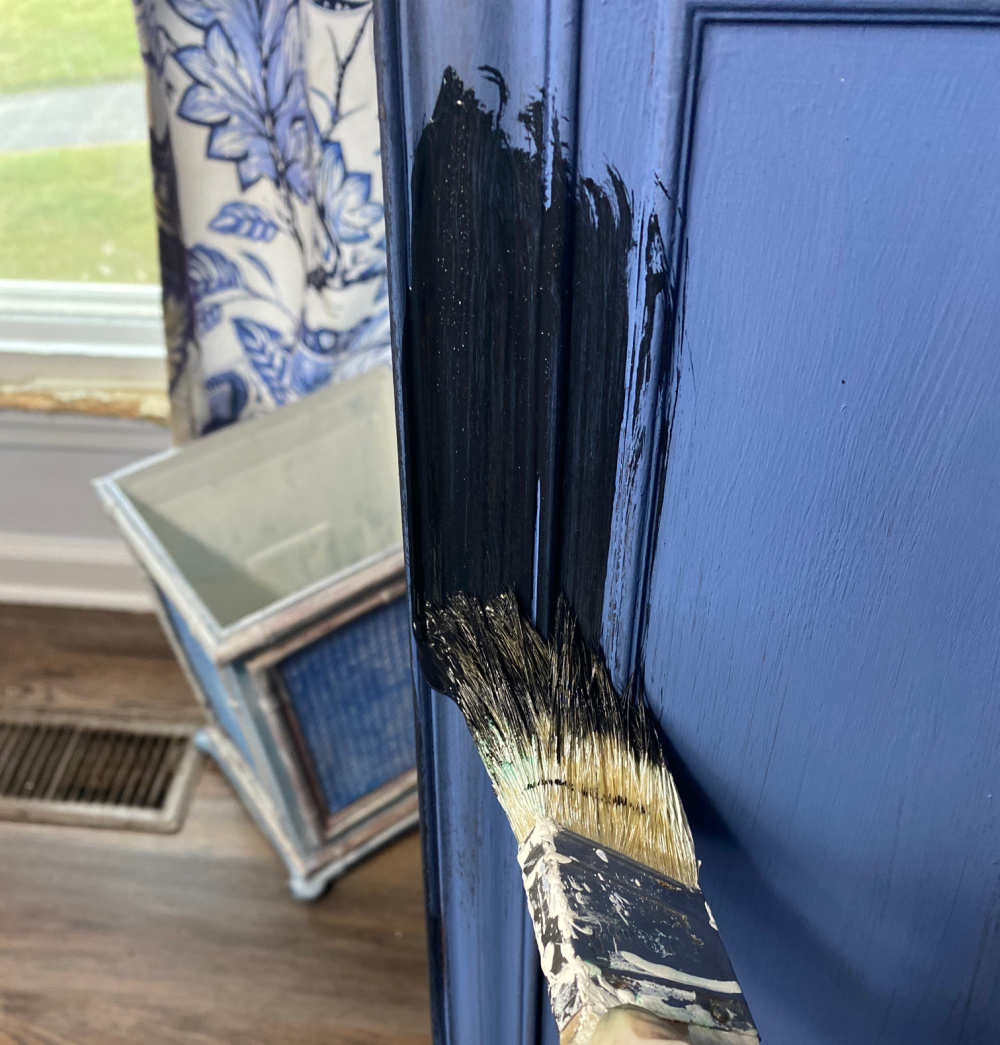
I painted on the black glaze and wiped it off. I wanted a dark and broody look so I left the glaze rather thick. For a lighter appearance, you can cut the glaze or remove more during the wipe off process.
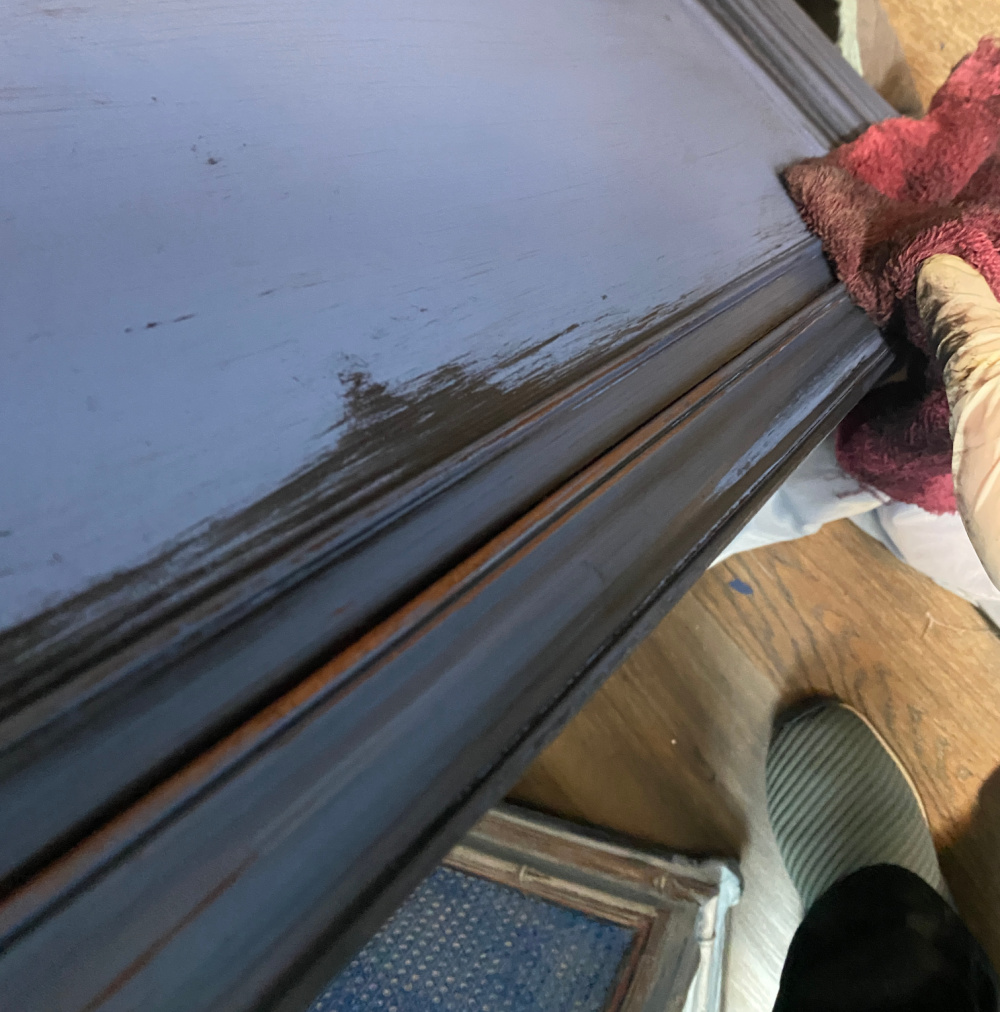
Here are some photos of the process…
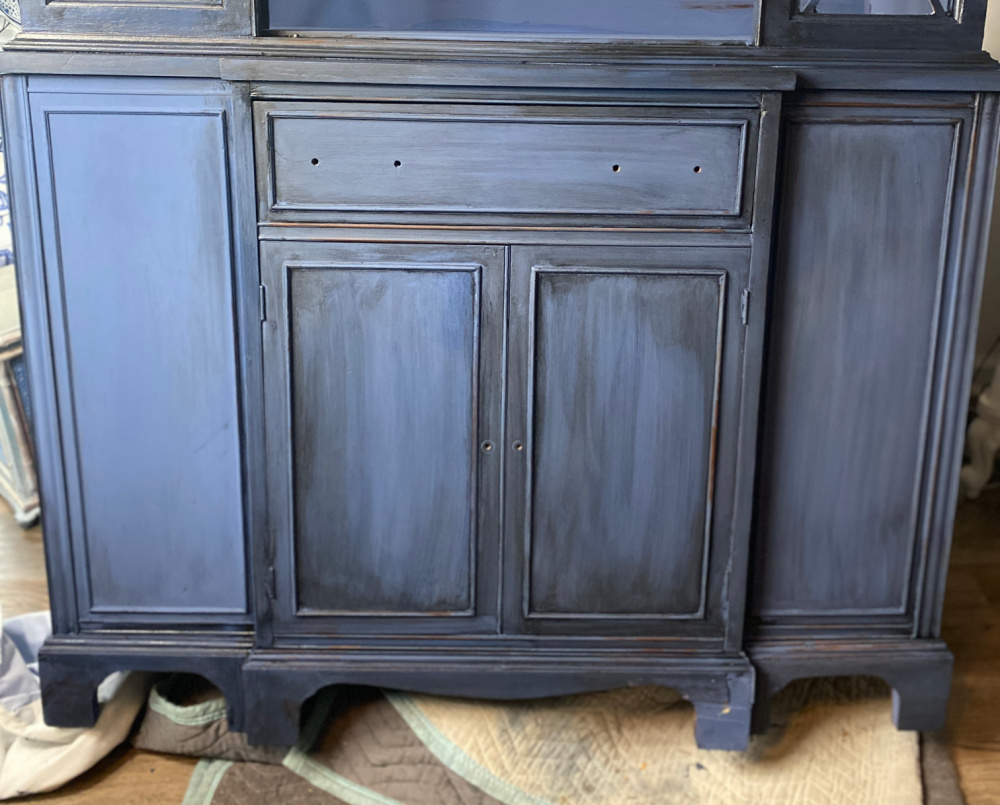
I painted the inside with two coats and opted not to apply glaze to the inside so the interior would be brighter.
Here she is after paint but before the finishing touches. Don’t mind the lighting. This is such a difficult spot to photograph with that window causing the light in the room to constantly change.

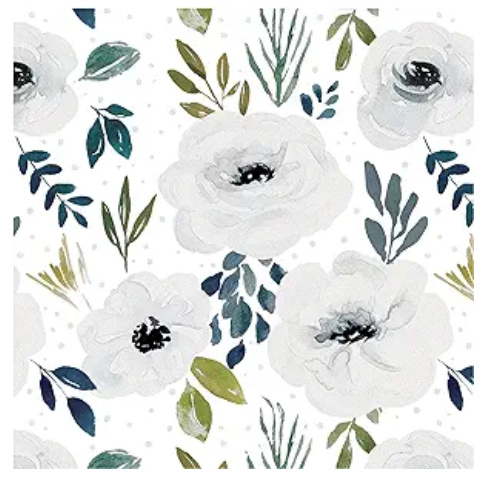
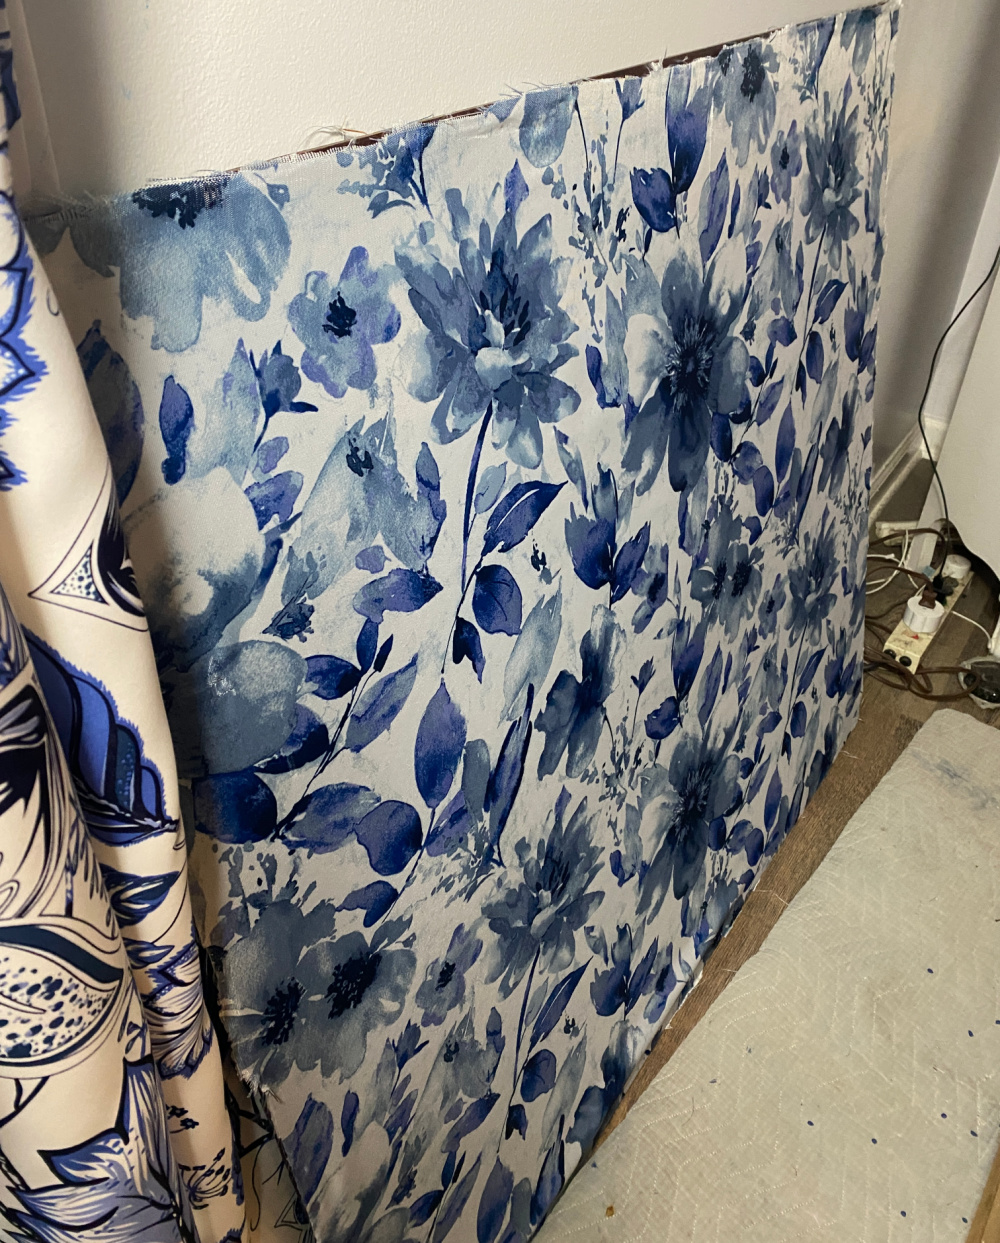
My choice of wallpaper did not arrive in time for this project.
So I made a trip to a local store that was having a clearance sale and grabbed a shower curtain for $5.00.
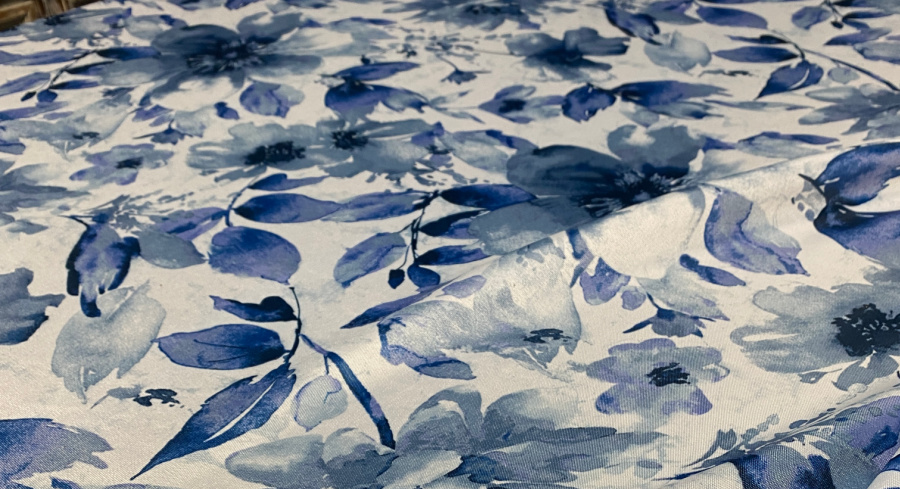
I suspected that the shower curtain would be too bright of a back ground for my jewelry so I wanted the option to easily switch it out for the wallpaper or a lighter background at some point.
My first thought was to paint the interior white and mod podge colorful paper. But that seems like alot of work. After a quick inspection of the china cabinet, I determined that the back panel of the china cabinet was easily removeable.
I decided to simply wrap the panel with the material. Later, I can apply the wallpaper to the backside of the panel. Thus I will have two options that easily switch out by flipping the panel. We will see how that works after the wallpaper finally arrives. So for now, we have the floral shower curtain fabric.
I laid the fabric onto the panel and hot glued the edges. Then I simply took a razor blade and trimmed the excess fabric.
Once all of the paint dried, I simply tacked the panel into place on the back of the upcycled china cabinet.

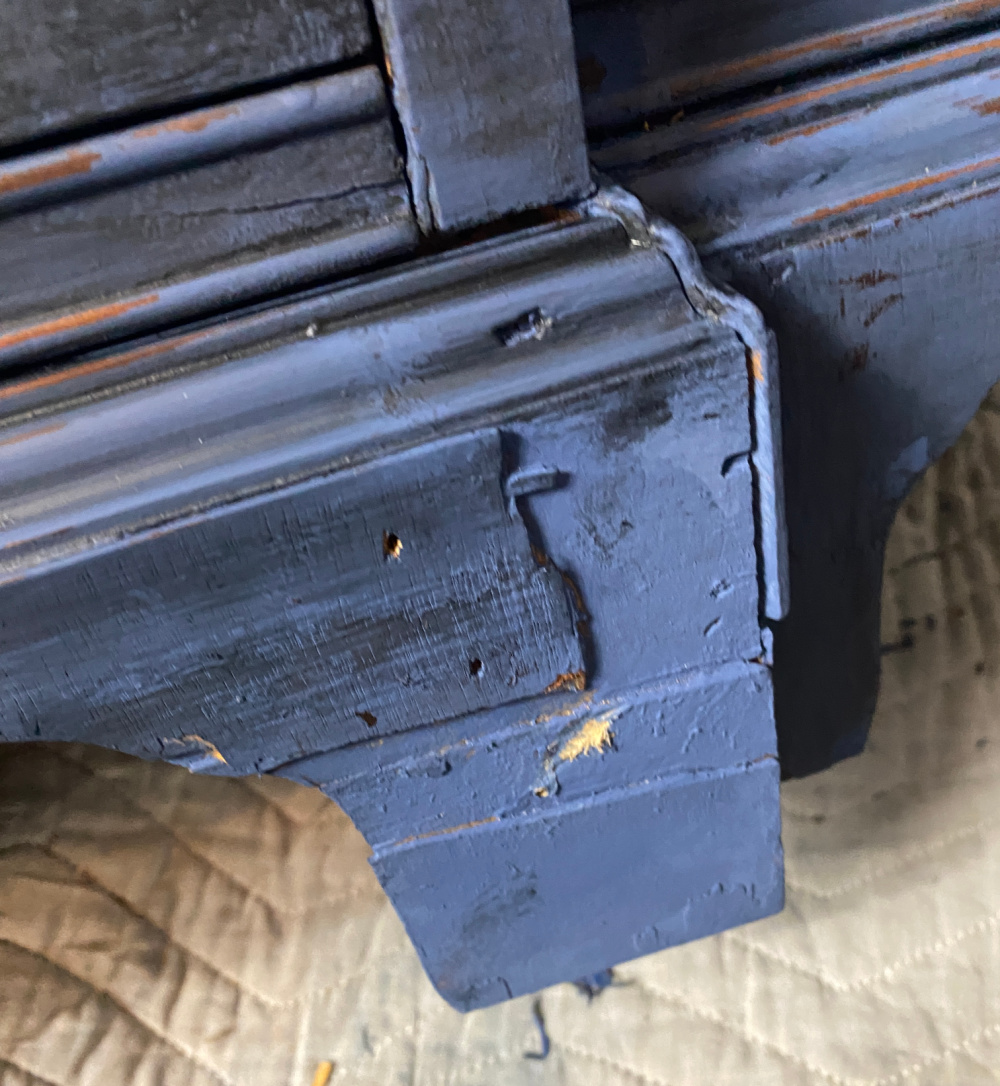
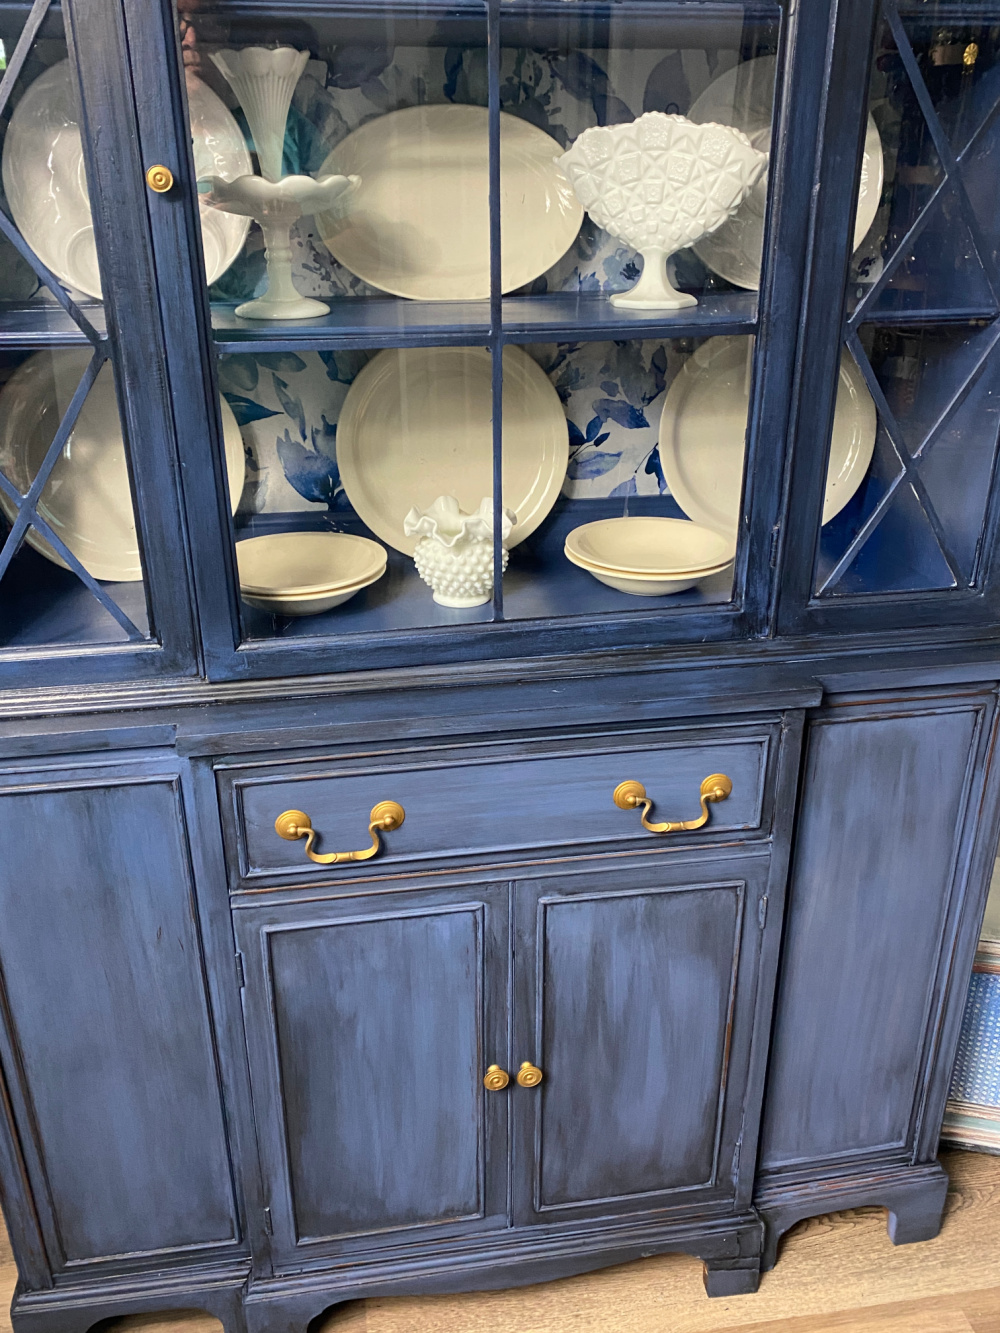
I did a few minor repairs to the bottom front of china cabinet where a piece of the molding had fallen off. I glued the pieces together and nailed them back into place. I toyed with the thought of using wood putty to fill in the mars but decided against that as dings and knicks over time will reveal the light putty under the dark paint. I also don’t think the bottom mars will be noticeable as the focal point will be the interior of the piece. It’s a little rough, I will admit. This is before the glaze.
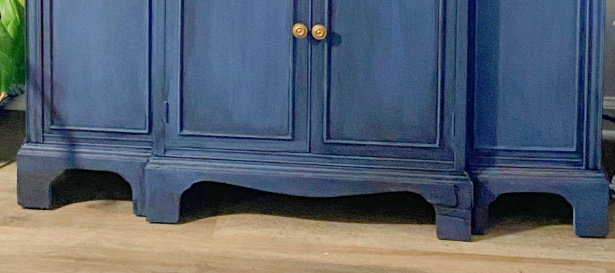
And here is a close up of the final project…
Although it is not super noticeable, I should have filled it with wood putty, sanded, and painted. I guess I will go back and do that. Slow down!! Do it right!
My ultimate plan is to move all of my jewelry into this updated MCM china cabinet. I think I will store our family photos in the bottom! You know, keep all of my treasures together. However, I have ALOT of jewelry so sorting and moving it all is a project for another day.
But, I couldn’t resist adding a few…
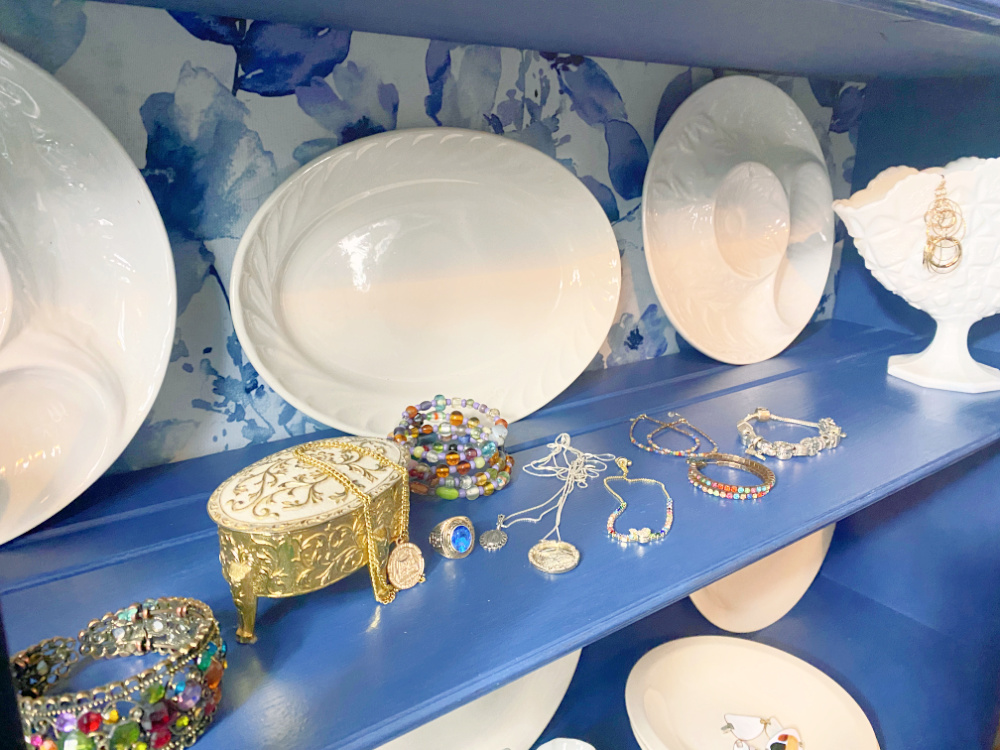
Maybe I can start to fill her up one day at a time.
I’m already enjoying walking past my most sentimental pieces.
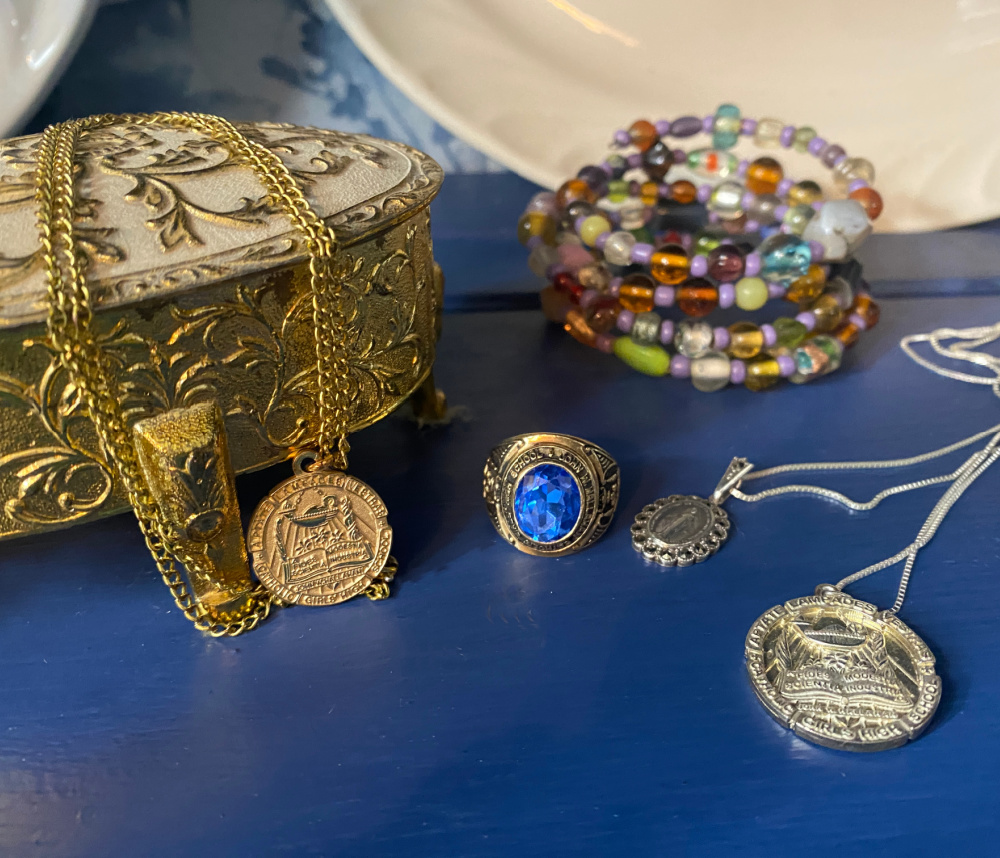
This might take a while!

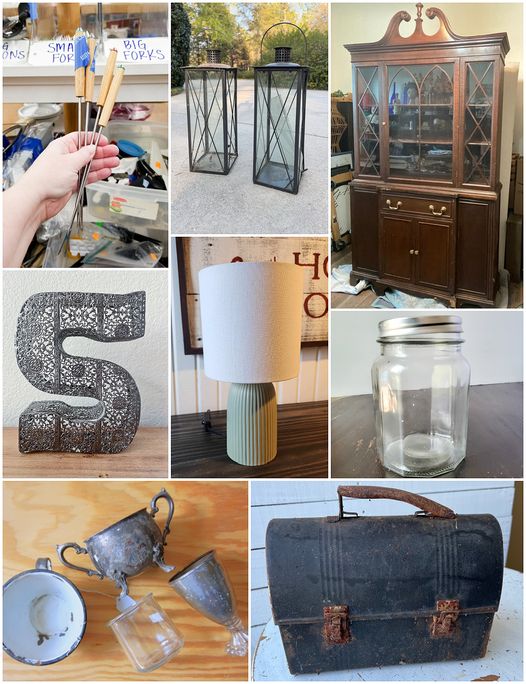
Fondue Forks as Plant Labels or Herb Markers
Vintage Metal Lunchbox Planter
Thrift Store Lamp Refresh With Paint and Rub-on Transfer
Succulent Letter Planter Arrangement
Upcycled MCM China Cabinet That’s me! You are HERE!


Beautiful transformation! The shower curtain worked out perfectly!
Right? I really like it and I didn’t think I would like the bold pattern. Thanks, Carlene.
WOW Sue, this turned out beautiful! I love the fabric you used. And that paint is gorgeous. Sorry your mask didn’t turn out on the glass but everything came together beautifully!
Thanks, Kristin. I’m chalking it up to user error. It was so much easier to get remove the excess paint from the glass. I just need to master the product.
So stunning! I love the paint finish and that fabric is gorgeous!
Thanks, Maryann! You are so kind. I like the fabric though I was doubtful.
Blue is having such a well-deserved moment in the decorating world. I just love how this turned out! The shower curtain for the back is genius.
Thanks Christy! My mantra is always Hurray for Blue!
What is an MCM Cabinet?
Hi Vicky! MCM stands for Mid Century Modern. This is decor from the 50’s through the 70’s.