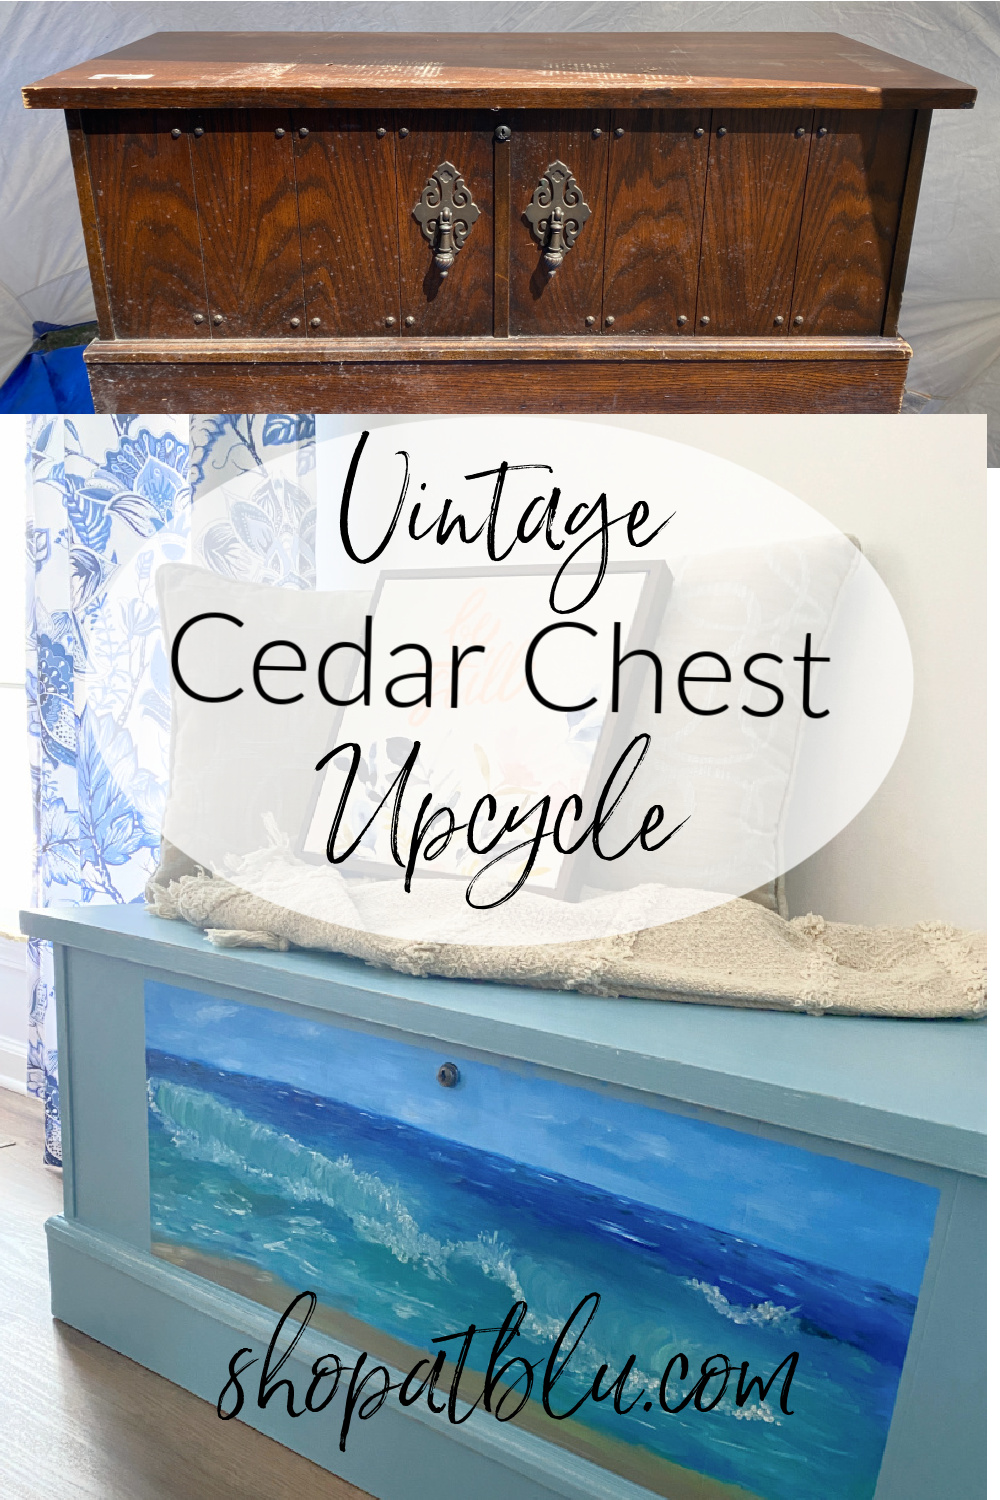
Upcycled Cedar Chest Trunk
As an Amazon Associate and member of other affiliate programs, I earn from qualifying purchases.
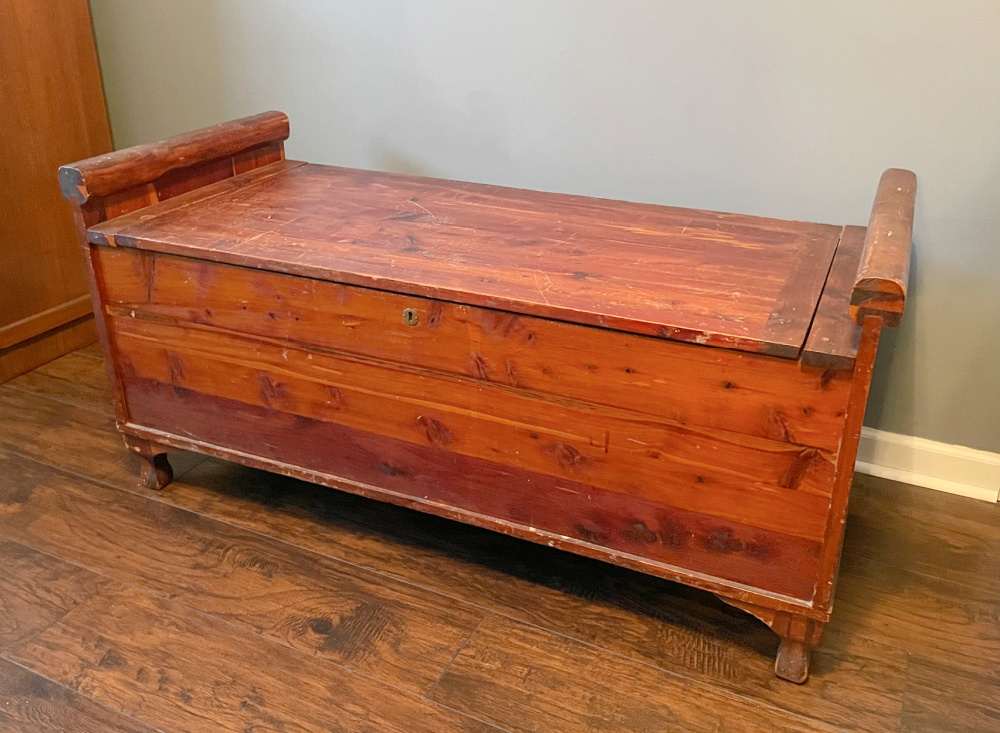
I am always looking for more creative ways to store my stuff. Any time I can use a piece of antique or vintage furniture to accomplish this task, I am thrilled. The subject of today’s project is a cedar chest. You know, those items that are always available at the thrift store, garage sales, yard sales and resale shops even antique stores. Like this one…

History of the Cedar Chest
Aromatic cedar wood was highly prized for its natural insect-repelling properties and was used to store clothing, linens, and other fabric items. Such chests were commonly used for storing prized fabrics, the cedar protecting precious fabrics from insects and larvae. Throughout history, cedar chests were commonly gifted to young women. The chests were used to store items that they made or gathered for their future lives as wives. Commonly called hope chests, generations of young women lovingly stored gifts and heirlooms away for safekeeping. I have my great grandmother’s cedar chest.

Nana was born in 1888. I’m not sure how old she was when she married, but I imagine this was a gift from her parents when she was a young girl. It seems this was a Christmas gift from the date written on the inside. My nana would have been 15 that Christmas, the perfect age to prepare for marriage.
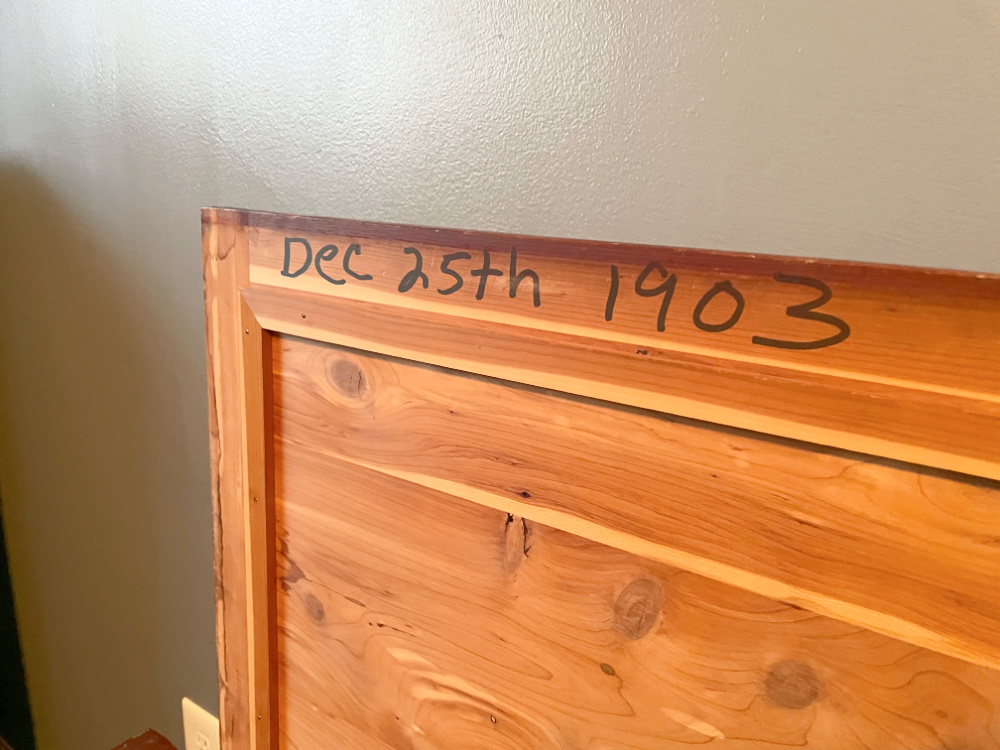
I have suspicion that my mother wrote over the original date that was probably written very lightly in pencil. Sharpies weren’t invented until 1964. And this is definitely mom’s handprinting.

And here is my mom’s hope chest that sits at the foot of my bed.
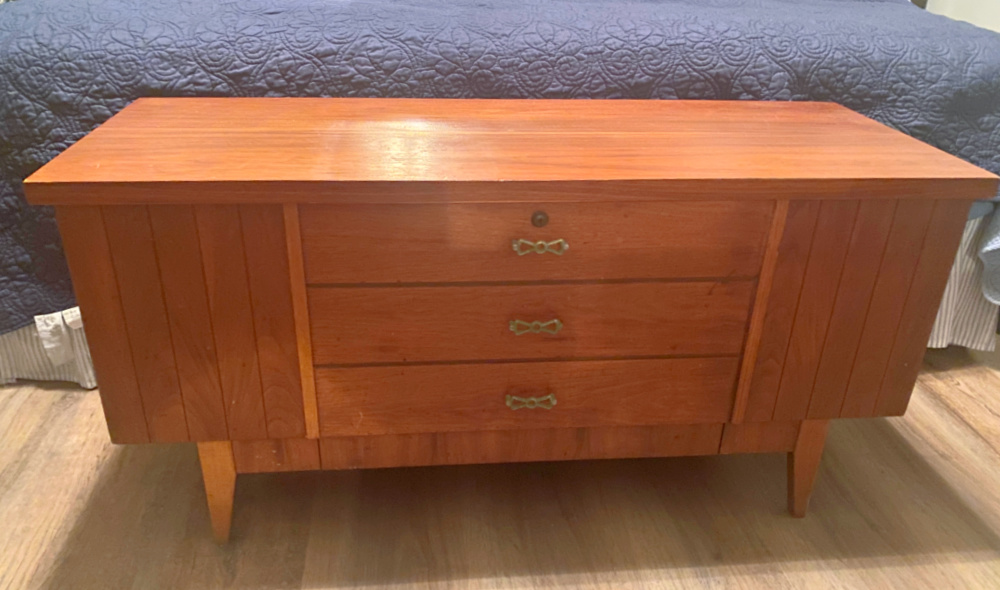
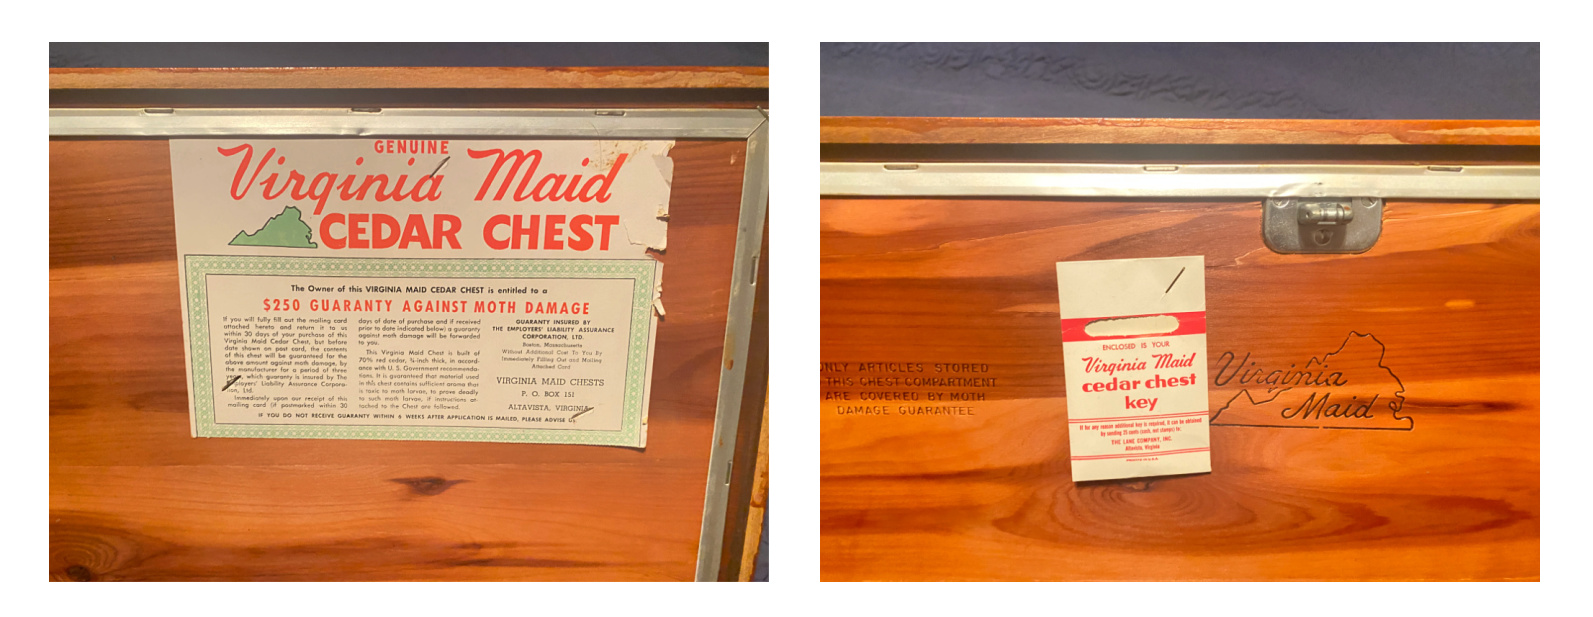
Hope chests always had a makers mark or symbol inside. They were “guaranteed” again moth damage. And they always had a lock so your treasures were safe.
I have great memories at a young age of browsing through mom’s jewelry box in search of her hope chest key. I would carefully unlock the chest and lovingly inspect all of the items she kept locked away. It was like a treasure hunt.
Mom’s hope chest matches the first bedroom suite my parents bought when they were first married in 1961. Here is photo of the suite today. My daughters and I gave it a refresh two years ago when my oldest daughter bought her first house. It’s in their guest bedroom so I get to enjoy it when I visit.
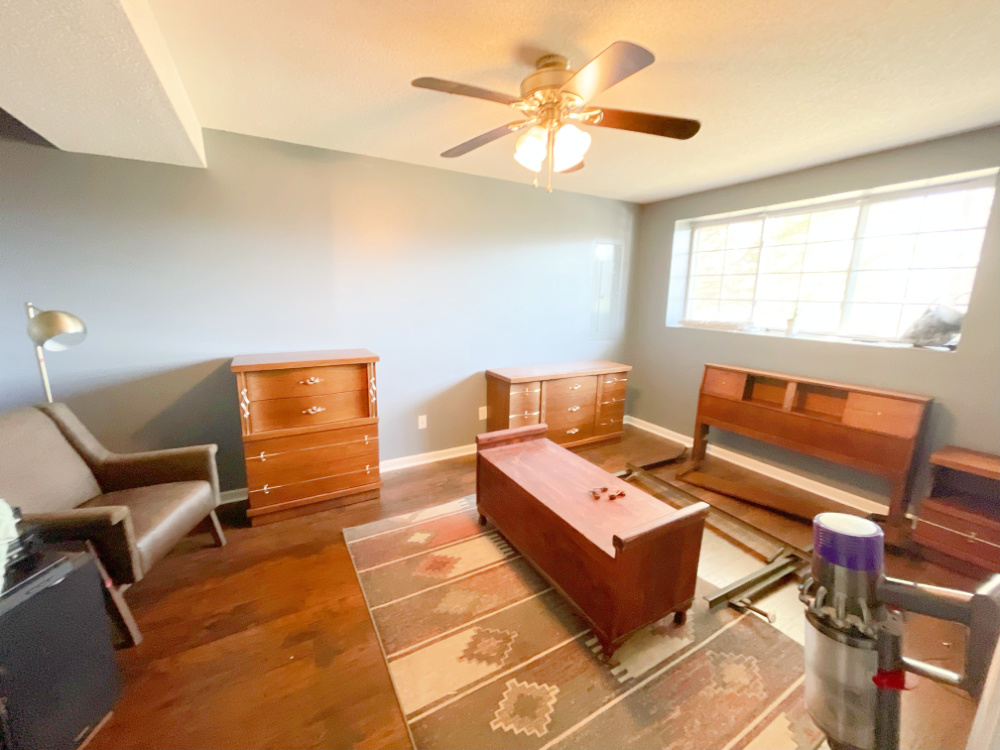
Somehow that bugger ended up with the heirloom trunk and I have the one that matches the BRS. Things that make you go hmmm….
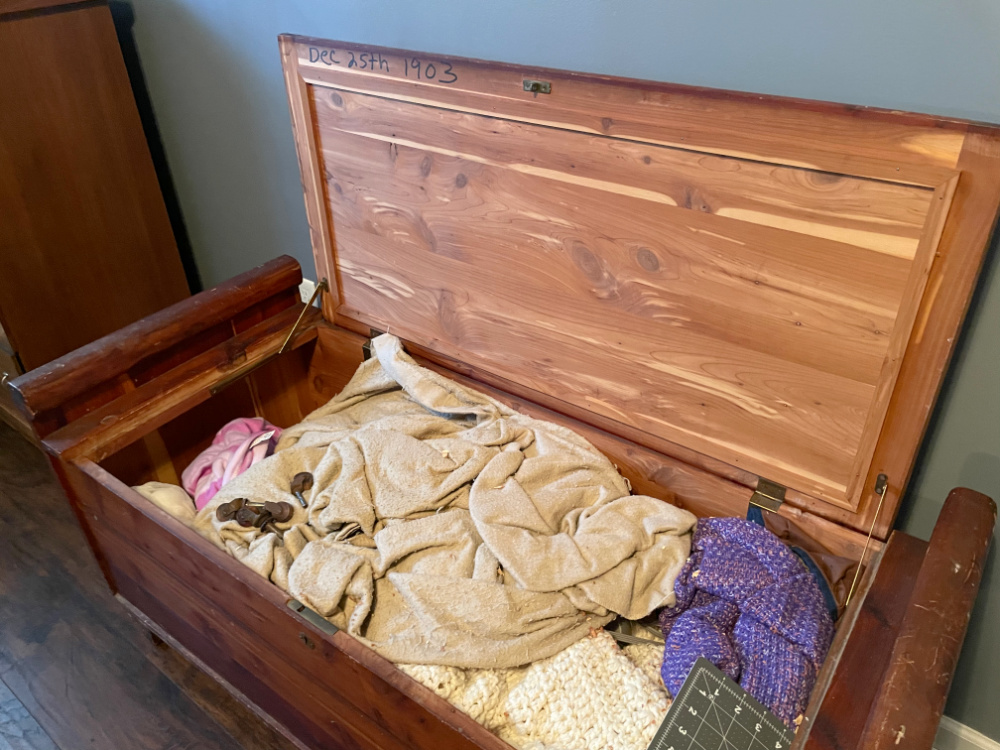
Here is the inside of my Nana’s hope chest still holding the items that my Mom deemed fit for safekeeping including several afghans lovingly made by friends, favorite linens, mementos and the original wooden wheels. She is loaded with precious memoirs as she should be.

What better time to share a creative project than on Thrift Store Decor Team Wednesday! That’s right! It’s the second Wednesday of the month so the team has new thrifty decor projects for you. You will find them all at the end of this post.
SUPPLIES
- Murphy’s Oil Soap
- Sandpaper
- rags and a bucket of water
- Electric sander or Ryobi cordless sander
- tsp
- screwdriver
- General Finishes Halcyon Blue
- Homeright Paint Sprayer
- MinWax Polycrylic sealer Satin finish
What We Started With
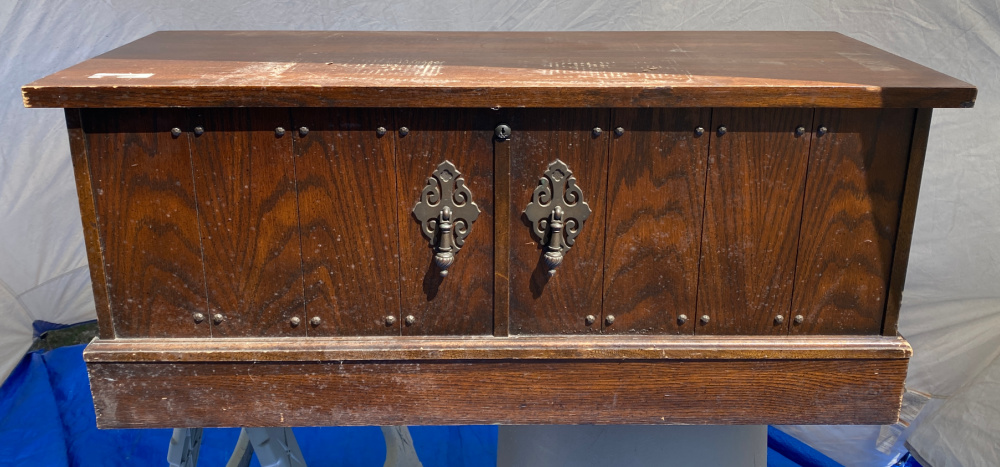
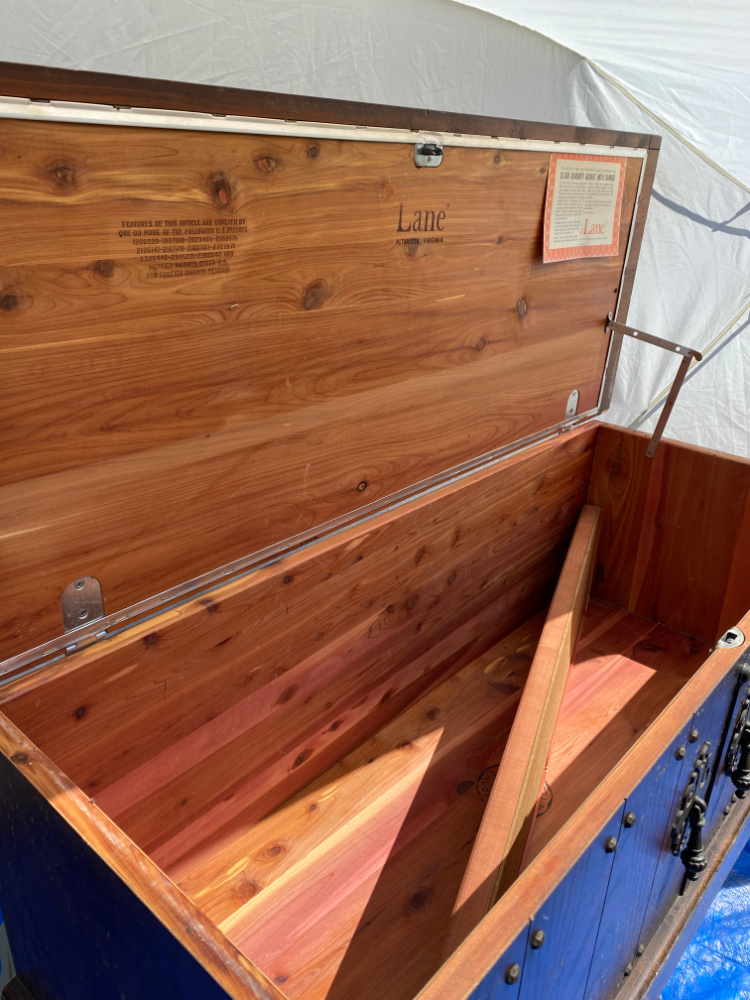
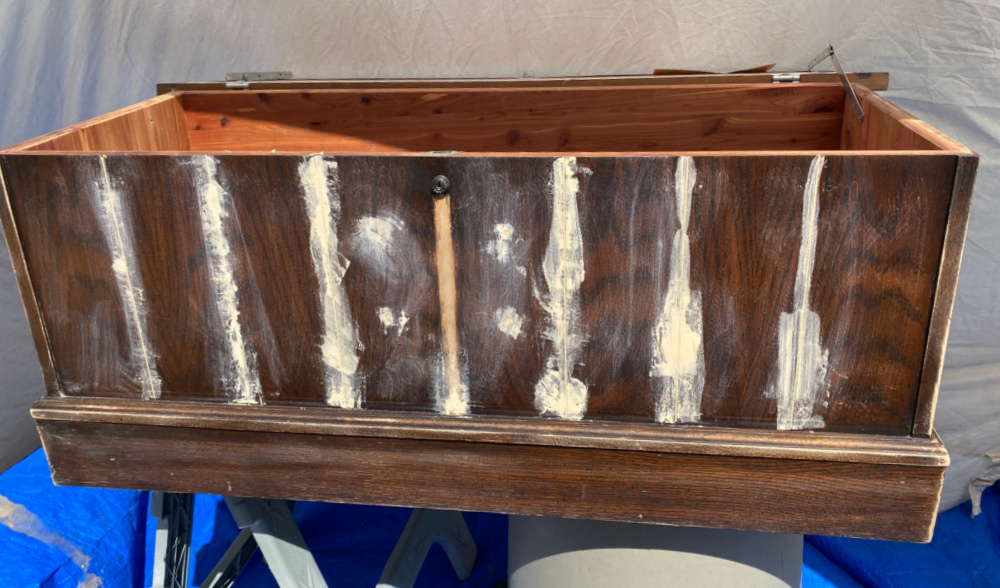
The inside is pristine. The cedar still somewhat fragrant. This can be renewed by lightly sanding the wood. Notice the Maker’s mark for Lane, probably the most common cedar chest brand. The Lane factory closed in 2001.
The loose piece of wood is actually a small shelf that is attached with hardware. Ladies used this shelf for small items like handkerchiefs, veils, etc. The hardware on the left side was missing a screw and would hang up when opening the lid. So I removed it to prevent damage and will easily reinstall when the trunk is finished.
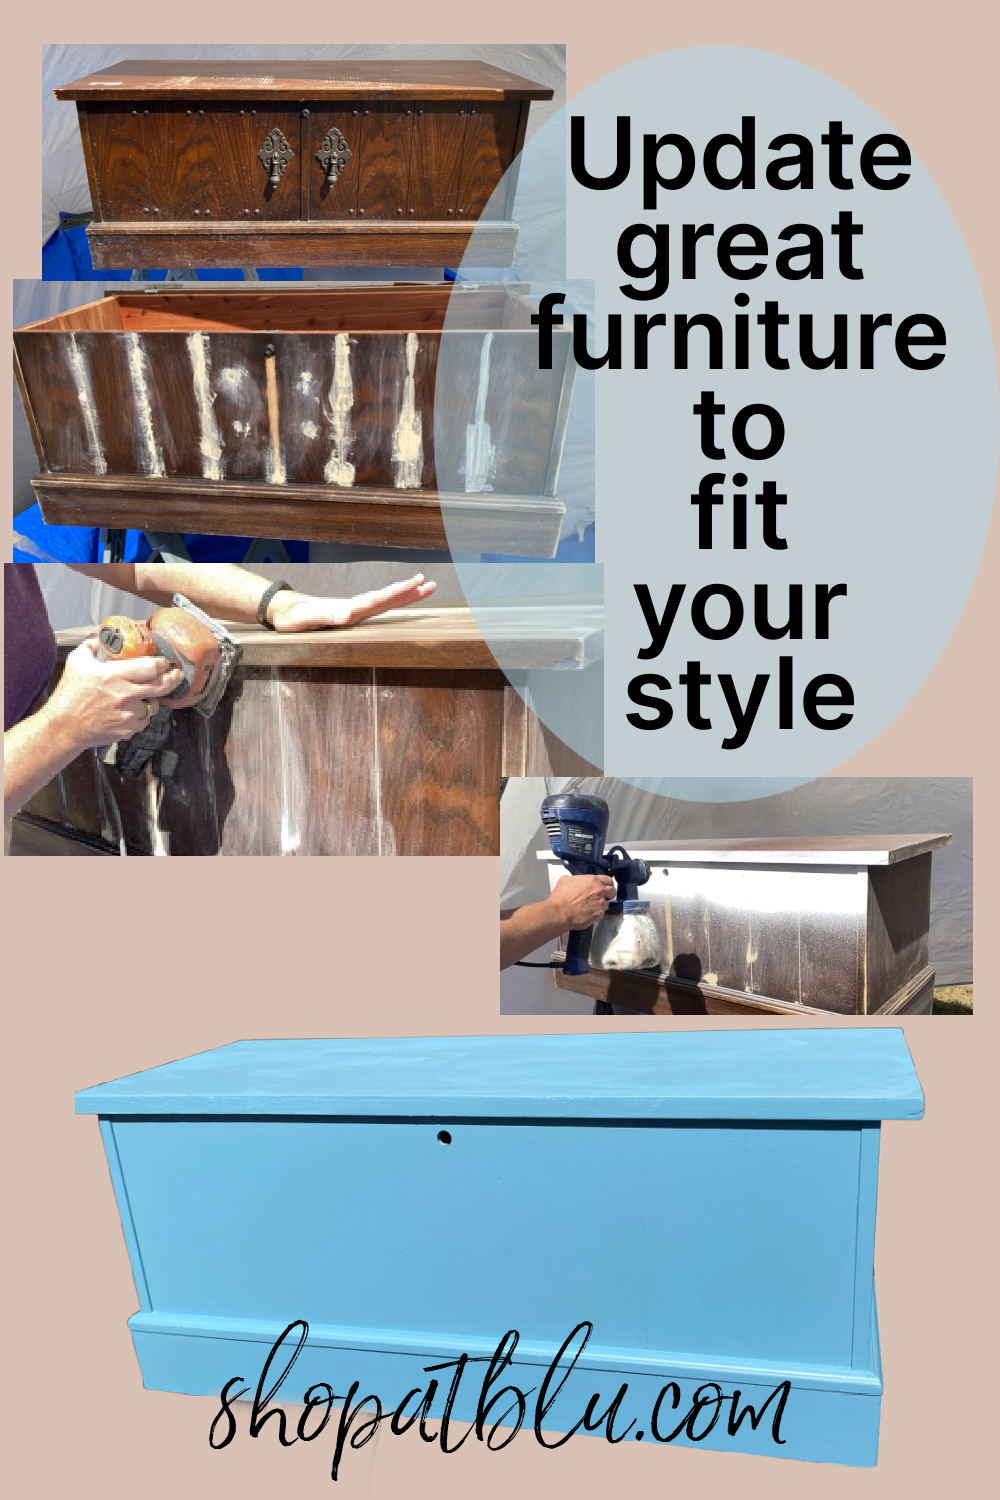
Let’s get started with redressing this beauty with a more contemporary look. The finish, as you saw above, was scratched and marred. I will be quite easy to remove the paint and restore the original finish sometime in the future if desired.
First Step – Always Prep
The first step to working on furniture is always clean your project piece. I used a bath with Murphy’s Oil Soap to remove any grime and dirt that accumulated from years in storage. Her surface had seen better days.

I decided to paint the cedar chest one solid color because my plan was to paint some sort of landscape on the front. I needed to ensure that the front surface was flat. I removed the decorative studs and hardware. I removed the lid so that I wouldn’t have to worry about opening and closing it. Next, I sanded the entire exterior to prep the surface and wiped off the excess dust.
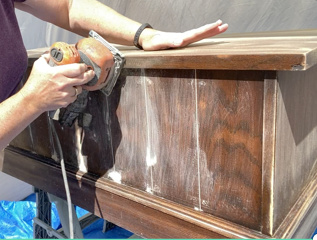
To ensure the surface was suitable for a hand painted design, I filled the vertical lines and stud holes with wood putty. Once dry, I sanded the surface smooth.
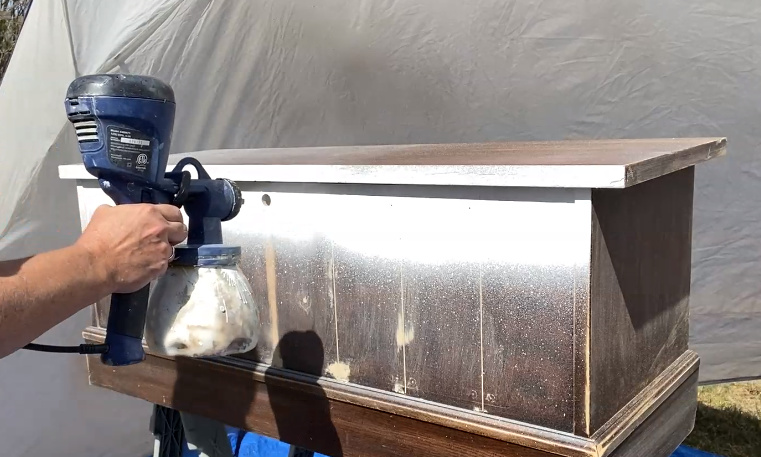
The next step was to prime the cedar chest. I used my Homeright Finish Max spray gun. One coat was plenty.
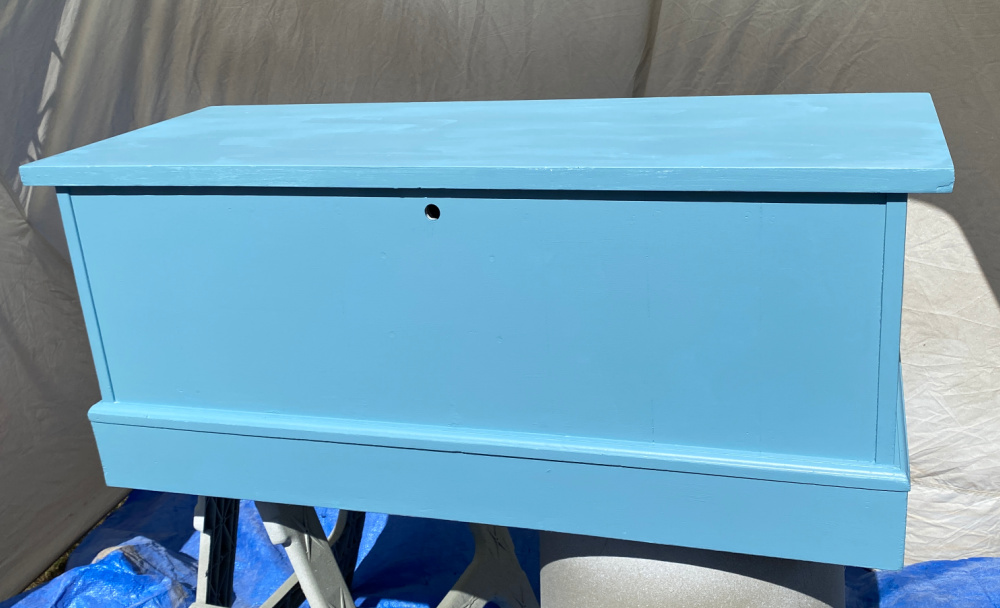
It’s a good idea to lightly sand the primer once it dries. Then apply two light coats of your desired final color. Though I love a contrasting top to furniture, I didn’t want it to detract from the artwork so I decided to paint the lid of the cedar chest as well. Of course, I selected blue. I decided on General Finished Halcyon Blue. My European French loving soul decided for me. And I brushed it on. There is something uniquely satisfying about old fashioned painting with a brush.
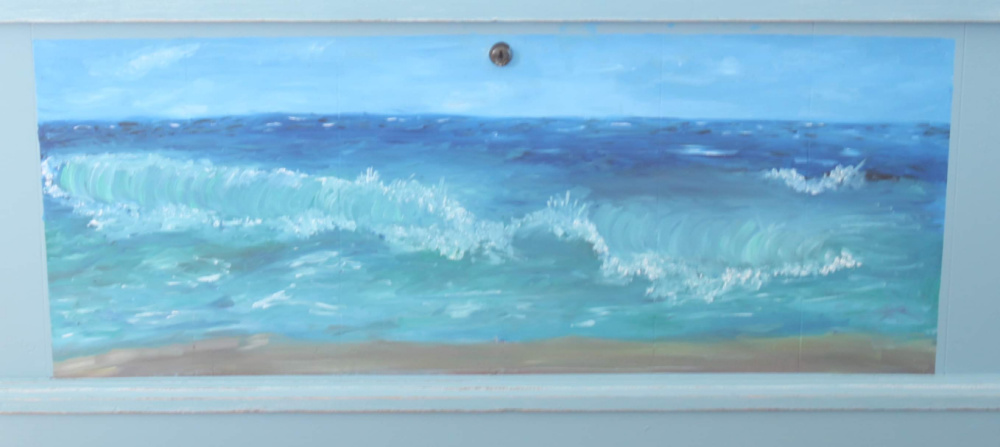
Here she is after two coats. I love the color. It was very beachy and fresh. And so, I decided to paint a beach scene!
Alternative to Painting a Design
I realize that not everyone feels comfortable in creating artwork. So other options are embellishing the front or top of your cedar chest with stencils, mod podge, or abstract designs. There are so many ways to decorate a flat surface. Stripes, polka dots, verses and script, even fabric…so many possibilities. But I wanted to try my hand at being super creative (not to mention bold) and create an original sea scape. I haven’t ever taken an art class but I’ve always had a slight ability to draw fairly well. And as I began this project, I realized that I could progress through this like any other project…in stages. This sea scape really was a series of creating small focal points and blending the paints to create the end product.
Preparing to Paint a Sea Scape
Of course I’ve drawn the beach and the sea before. But the results were very elementary and rather simple. For this project, I wanted to capture the waves. So, I googled wave tutorials. Here are a few that I watched and that seemed to demonstrate the skills I needed. I took tips and tricks from each video. They made it look so easy so I forged ahead.
How to Paint Waves – Acrylics
PAINTING TUTORIAL Acrylic Ocean for Beginners
Easy Ocean Wave Painting Tutorial
How to Paint a Wave in Acrylics Windy Crashing Wave
I placed my “canvas” at eye level. grabbed some acrylic paints, and got to work.
NOTE: I actually videoed the process of painting the sea scape in stages. Stages 1, 2, 3.5, and 4 are fabulous. Stage 3 completely disappeared. Somehow, I must have deleted that video. So, I am sharing the other videos and I promise to recreate the process at some point in the future and post the update here.
I started by taping off my “canvas” so I would stay within this area. I added some paint to a makeshift palette. And I started to paint.
I started with the sky, horizon and the water. I added the beach at the water’s edge.

And then I worked on those waves. Video Part 1 shows the beginning of the sea scape. Part 2, which is show how I added color blocks for the sky, horizon, water and sand. Then these colors were blended creating a smooth transition. Then waves are added and the paint is further blended.

Though you can’t see the specific steps of Part 3, Part 3.5 shows all of the same techniques that I used. It was a literally series of adding color and blending the brush strokes.

Practice makes it easier. You will learn how the paint flows when wet, over dried paint, and how your brush moves. It’s learning through repetition just like sports, music, etc. Practice makes it easier and practice makes it better. Find a great tutorial or 6, and just start!!

And this is the photo before I added those curling waves. I thought the waves were a little too wild so I just kept adding the curves of the white caps until I was happy.
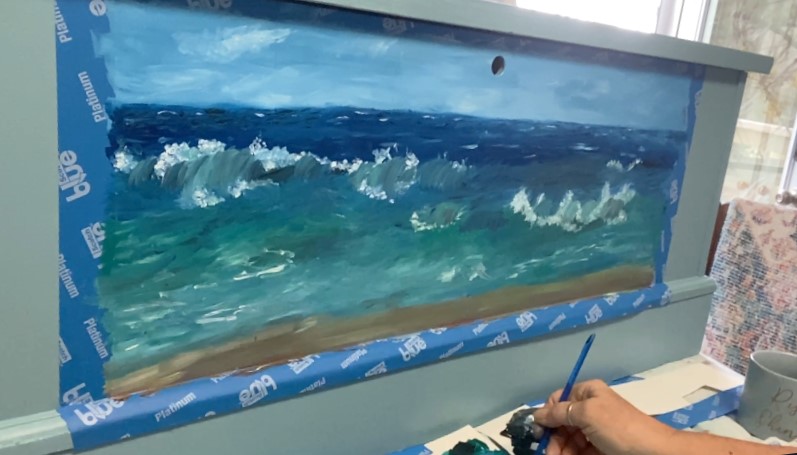
I literally added white “c’s” to create the rolling wave. Again, and again, and again I added “c’s” and lightly blended the “c’s” as I moved across the front of the cedar chest. Then I dabbled white paint here and there to make the sea spray and highlight the waves. It was so much easier than I had thought. My waves actually came to life! I promise to do a full tutorial again since this project was so satisfying.
Remember to add a coat of Polycrylic SEALER over the entire cedar chest to protect the paint and you art work.
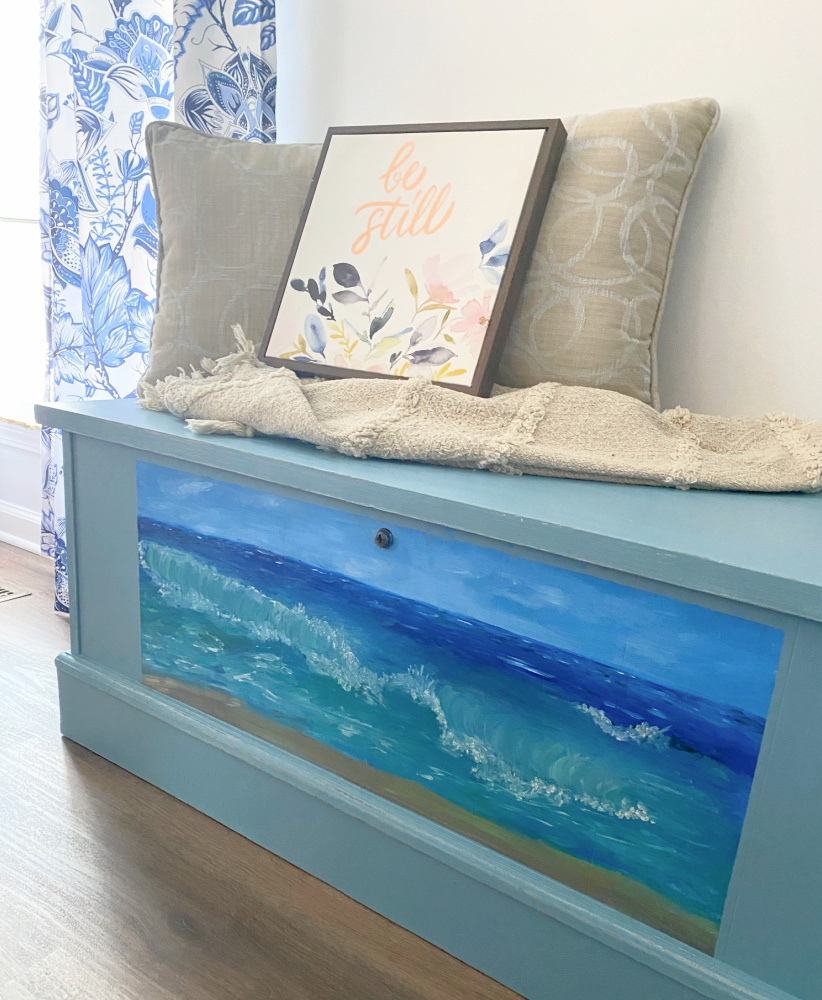

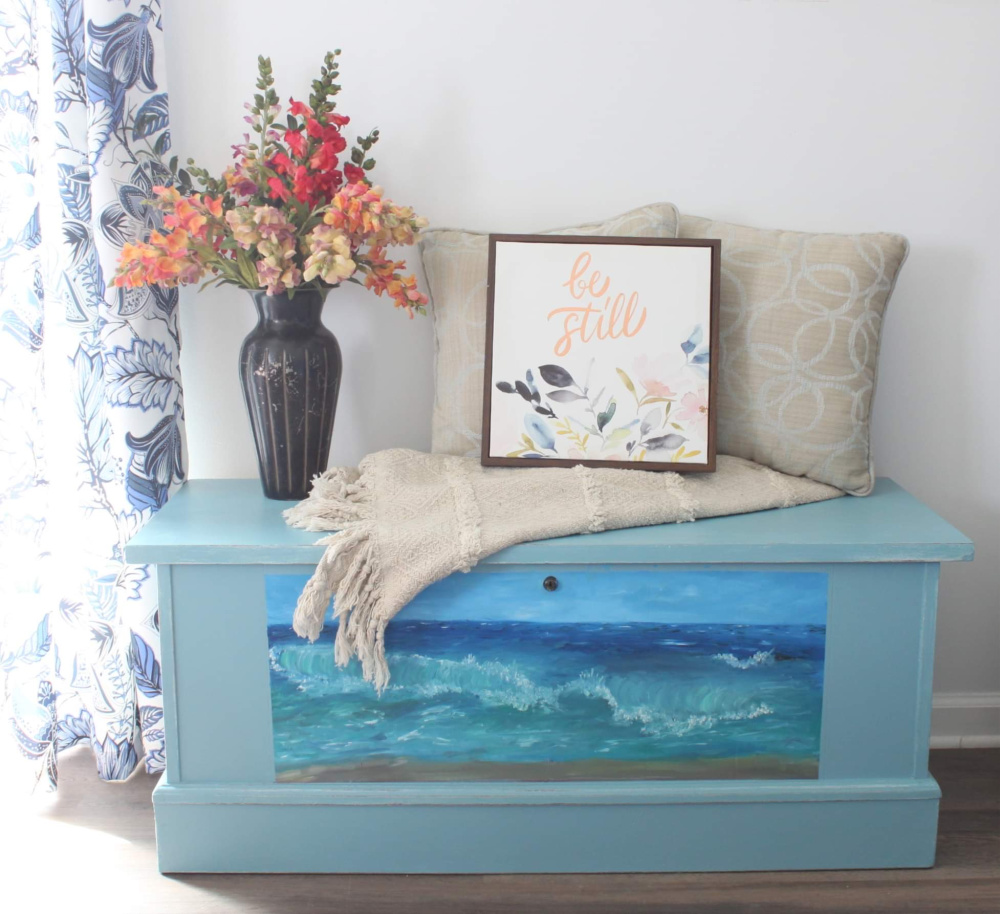
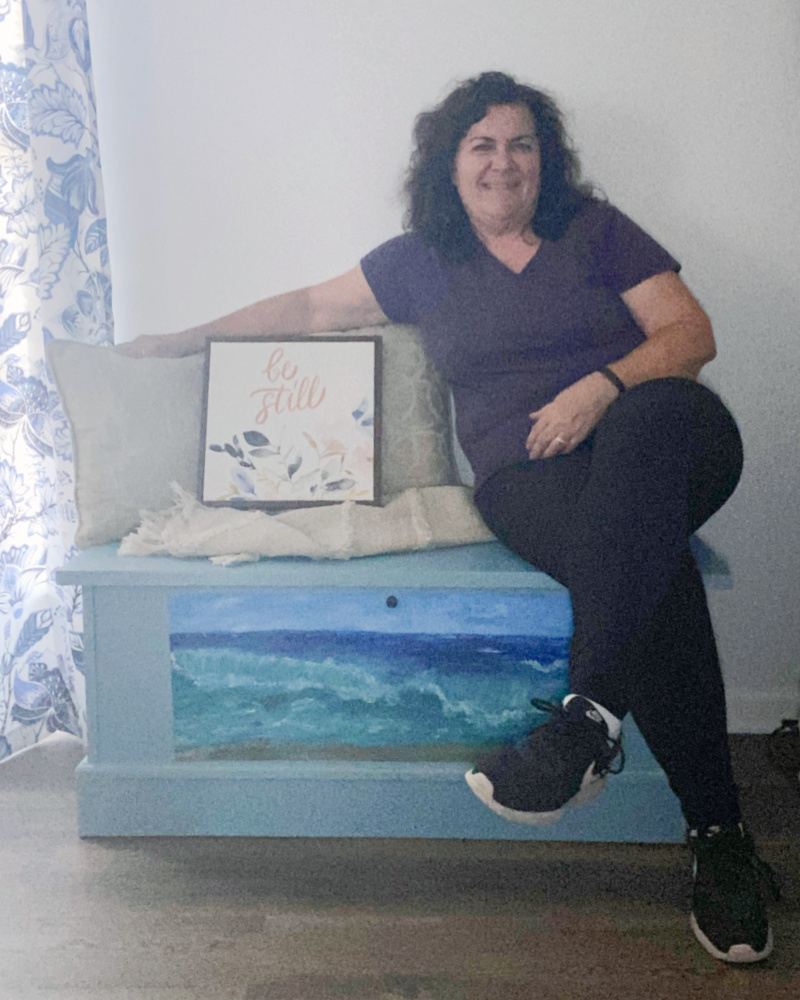
I’m quite happy with this fun cedar chest. I think I will try some florals next!

As promised, here are the projects from the Thrift Store Decor Team for this month. We are off to a creative start this year. Thanks for visiting. We are looking forward to a fabulous year of incredibly thrifty and creative projects!
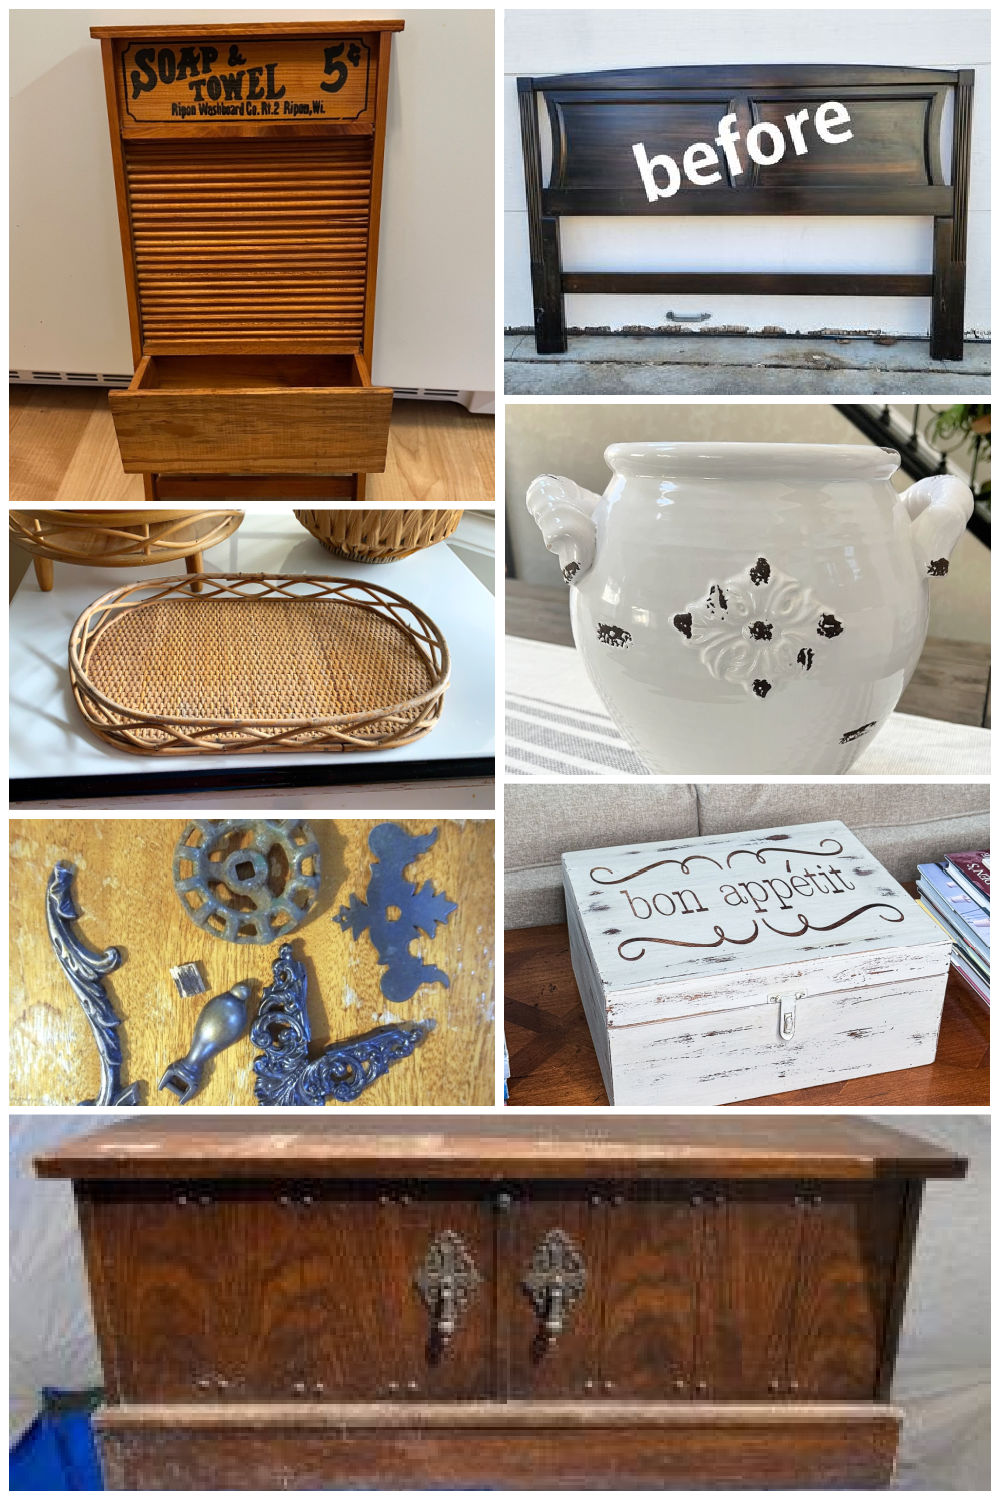
Eleven Washboard Upcycled Decor Projects Organized Clutter
Vintage Headboard Makeover My Repurposed Life
Upcycled Boho Bamboo Decor House of Hawthornes
DIY Vintage Aged Pottery Vessel My Uncommon Slice of Suburbia
DIY Love Sign Petticoat Junktion
Thrift Store Box Makeover Our Southern Home
Upcycled Cedar Chest Trunk Shop At Blu
Family Tradition
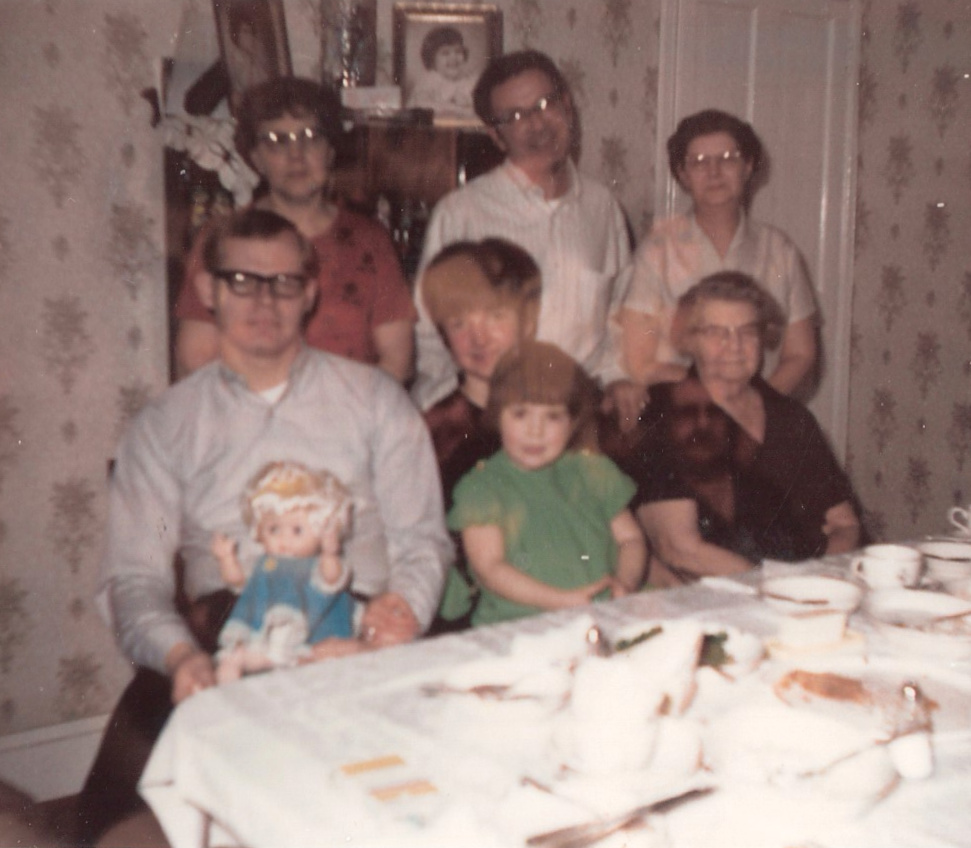
Here is my Great Grandmother, Bessie Mill. She’s on the far right in the front row. My Grandmother (Mom Mom) in the back row on the left. Center back row is Pop. Aunt Marion (Mom Mom’s sister) is on the right in the back row.
In Loving Memory of Aunt Mary
Front and center is my dear Aunt Mary. That’s me on her lap. I was 4. I can tell by the hair cut. It was 1969. Front row left is Uncle George. I call him Uncle. He’s the only uncle on that side of the family, my mom’s only sibling. He’s an incredibly loving person and so funny. I obviously had him wrapped around my finger as I’m sure you can tell. Uncle and Aunt Mary have left immeasurable impressions on our family.
Thanks to all of you wonderful prayer warriors who prayed for Aunt Mary over the past 4 months. She fought long and hard and stayed with us a bit longer than she probably should have. Uncle and the entire family are all grateful for the power of your prayers. I just returned from a beautiful celebration of her life. I am inspired by her love for her family and her servant nature.
I sure do miss you already, Aunt Mary. I am so honored to have been the recipient of your love for 58+ years. I am a better person because of you. And I will strive to make you proud. Love you!


I am literally blow away by your artistic skills. This turned out fantastic! I’d love to do something like this with a lake scene for the airbnb.
Do it! Start now by practicing. It will all come together. Thanks Christy!
The chest came out wonderful. I love it. I’m sorry for the loss of your Aunt. She looks like she had a sweet soul. Thank you for sharing
Thank you, Cheryl. She really was something special. I appreciate you stoppy by.
Suzanne, love the makeover, and I’m seriously impressed with the artwork too!
Thanks, Carlene. I’d like to do more of this!
The chest turned out so beautiful! Your art with the waves is amazing, you are quite the artist! I have my mom’s chest in our bedroom, I’ll have to see if it has the same stickers as yours, I love the history lesson behind the chest. I’m so sorry to hear of your aunt Mary, she sounds like an amazing person. It’s so hard to loose our loved ones. My godfather/uncle passed on the 10th, he was the last of the last on my dad’s side. Thinking of you and your family, sending love!
Thanks Kristen. How wonderful to have your mom’s chest. So very sorry about your godfather. Use those wonderful memories for comfort.
Love this! Looking forward to the video!
Thanks, Susan. It would be a great re-do on a rainy day.
Wow! You did a fabulous makeover on this treasured family heirloom. I love the color and the beautiful scene.
I’m so sorry for your loss, aunts are special people.
Pinned!
gail
Thanks my friend. She sure was one of a kind!