Upcycle Your Garden Pots With Paint
As an Amazon Associate and member of other affiliate programs, I earn from qualifying purchases.
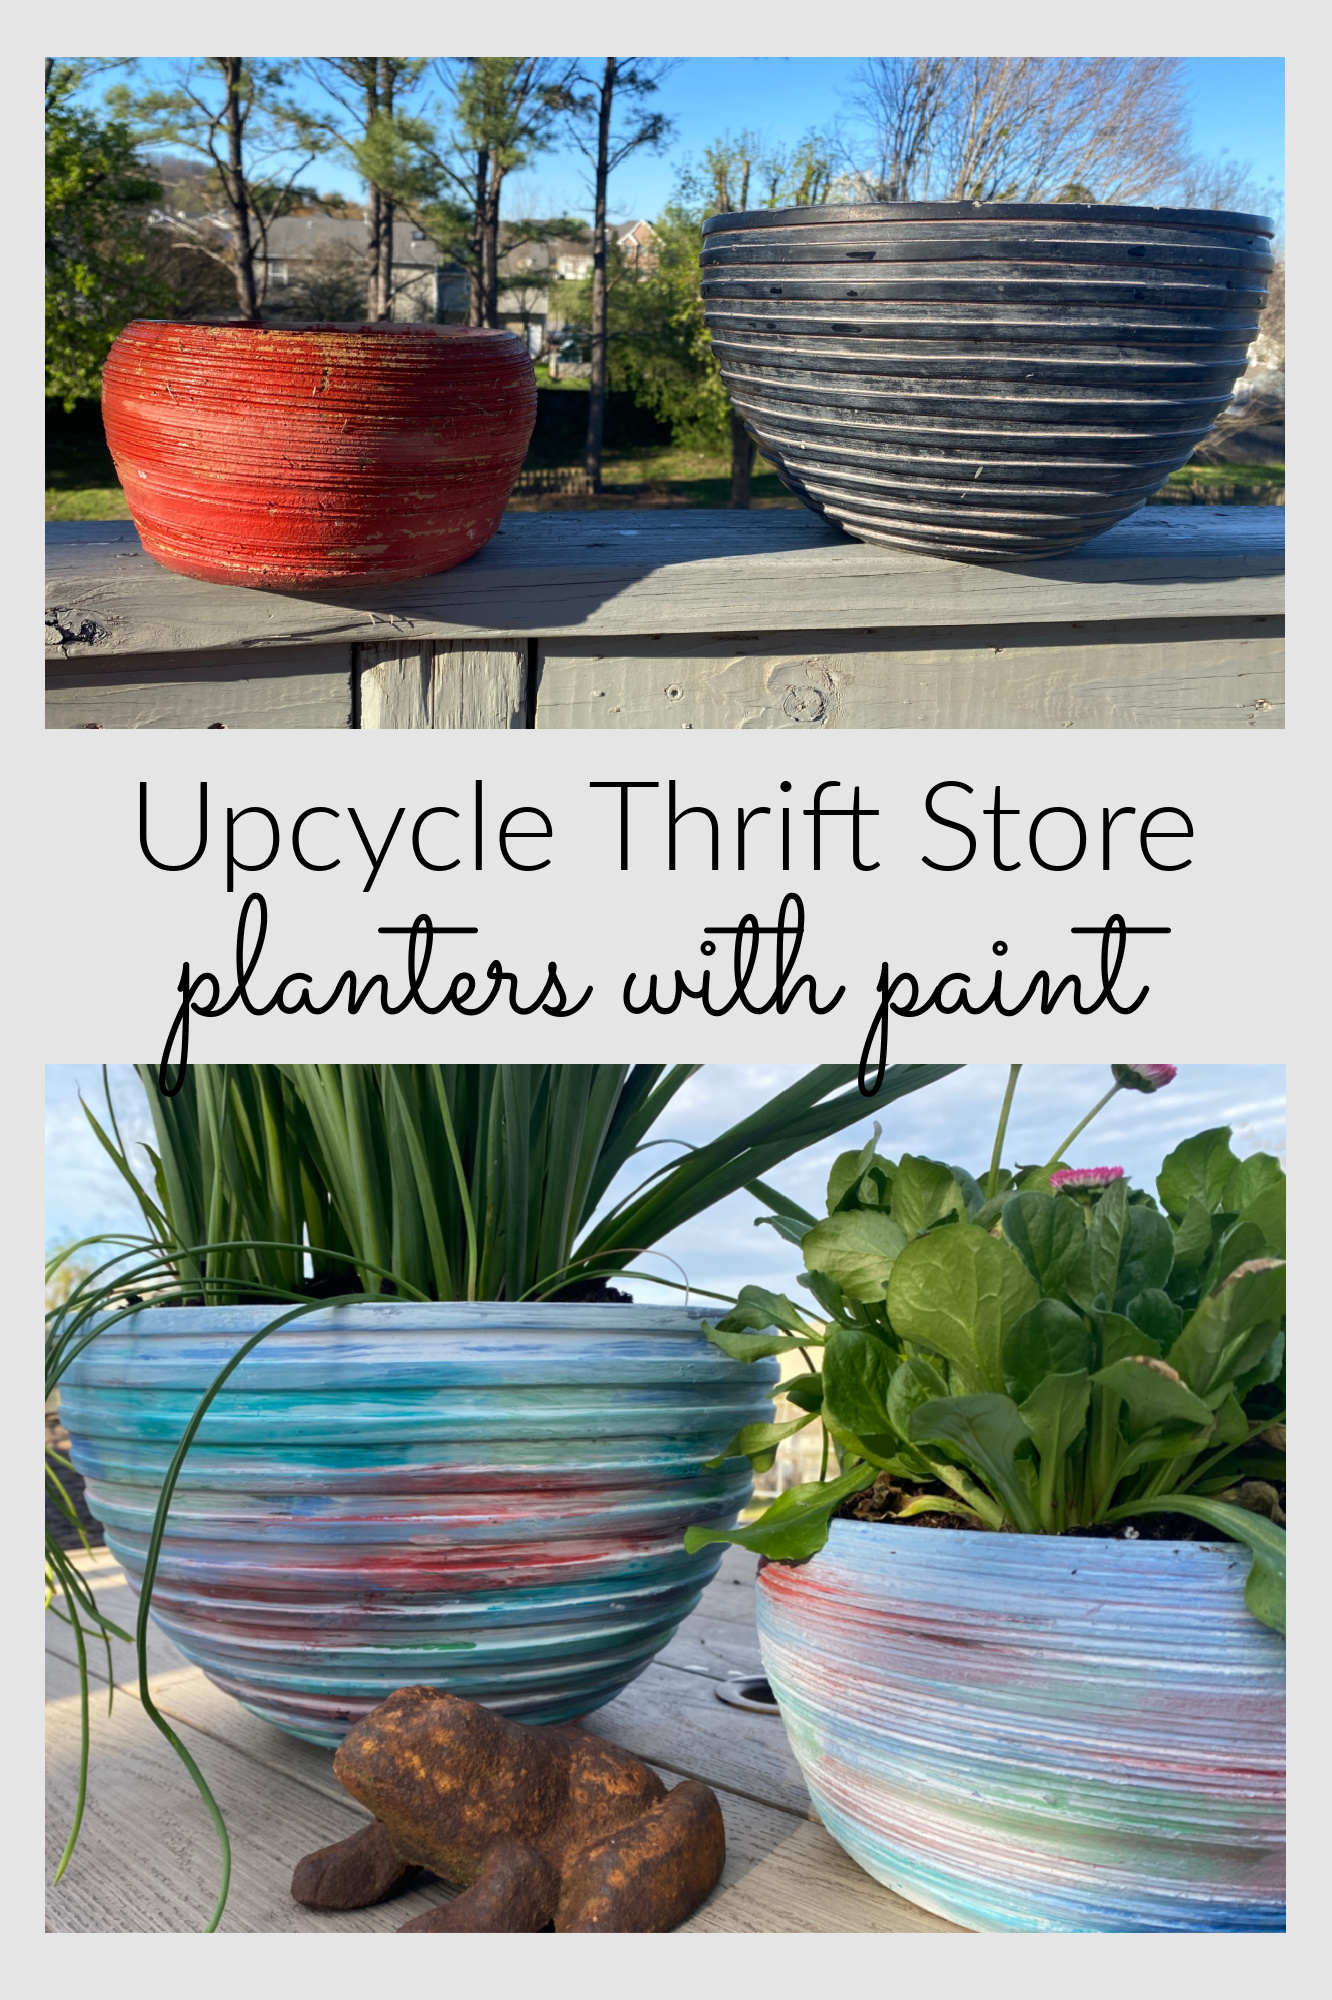
The temperature in Alabama has finally hit 70 this week. That’s not bad for the second weekend in March. Are you like me? When the first hint of spring appears, I run to Home Depot or Lowe’s and scout out the new colorful spring plants. It never fails. The first warm day has me planning my spring and summer deck/garden design. What colors? What plants? Will I add any new species this year? I have a lot of pots so I tried to recycle them. That gives me more funds to spend on new plants, right? So let’s upcycle some garden pots with paint! This year I’m starting with these two.
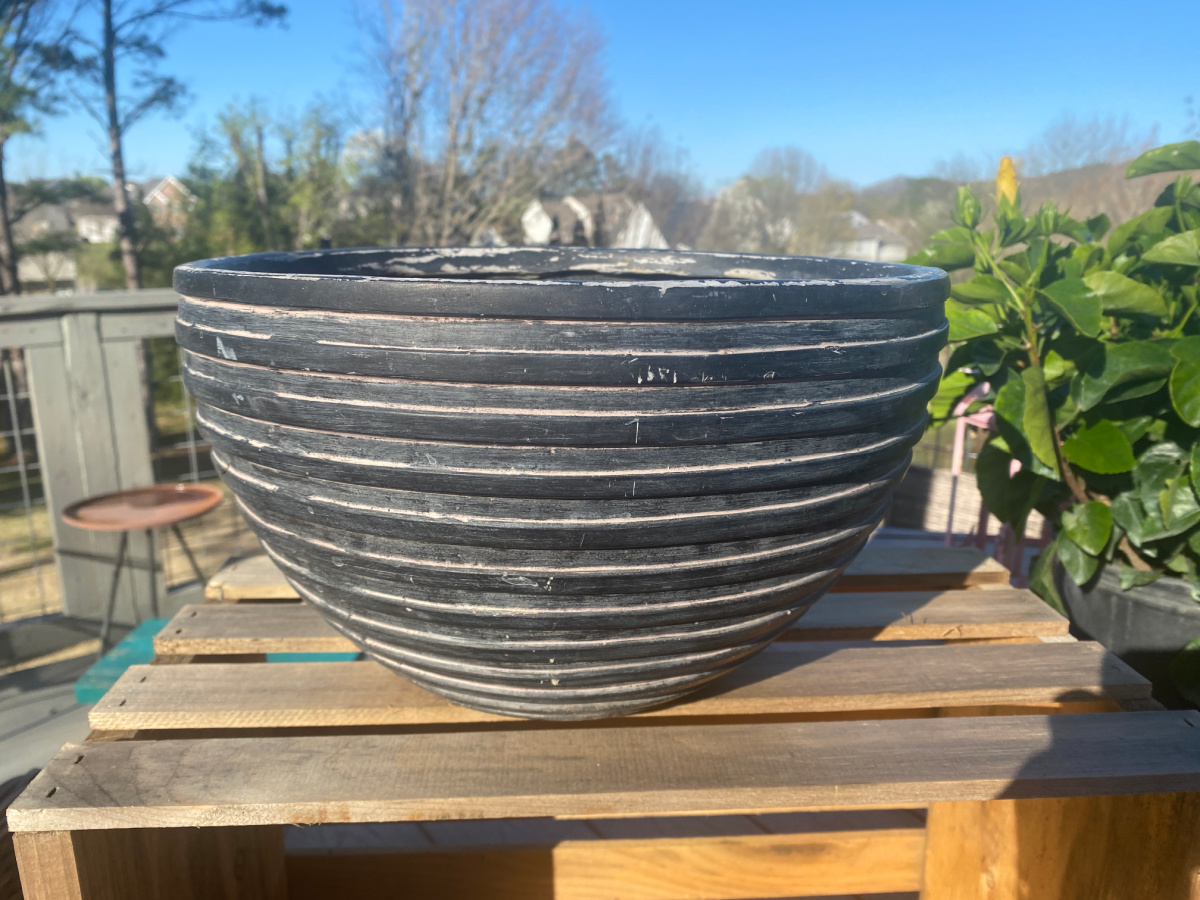

I thought I could use them for some spring flowers and then Easter flowers and then some succulents for the summer.

If we are recycling, upcycling, renewing, or repurposing, chances are a thrift store find is involved…like those two pots above. And, of course, this is a great topic for Thrift Store Decor Team Wednesday!

So here we go to upcycle these pots by adding some paint. Remember to scroll to the end of the post to see all of this month’s projects from the fabulous Thrift Store Decor Team!
Prep to Paint
As with any paint project, the first step is to prep. Start by removing and old plants from the pot. Remove any plants and remnants of dirt from last year. Clean all of the old soil out of the pot.
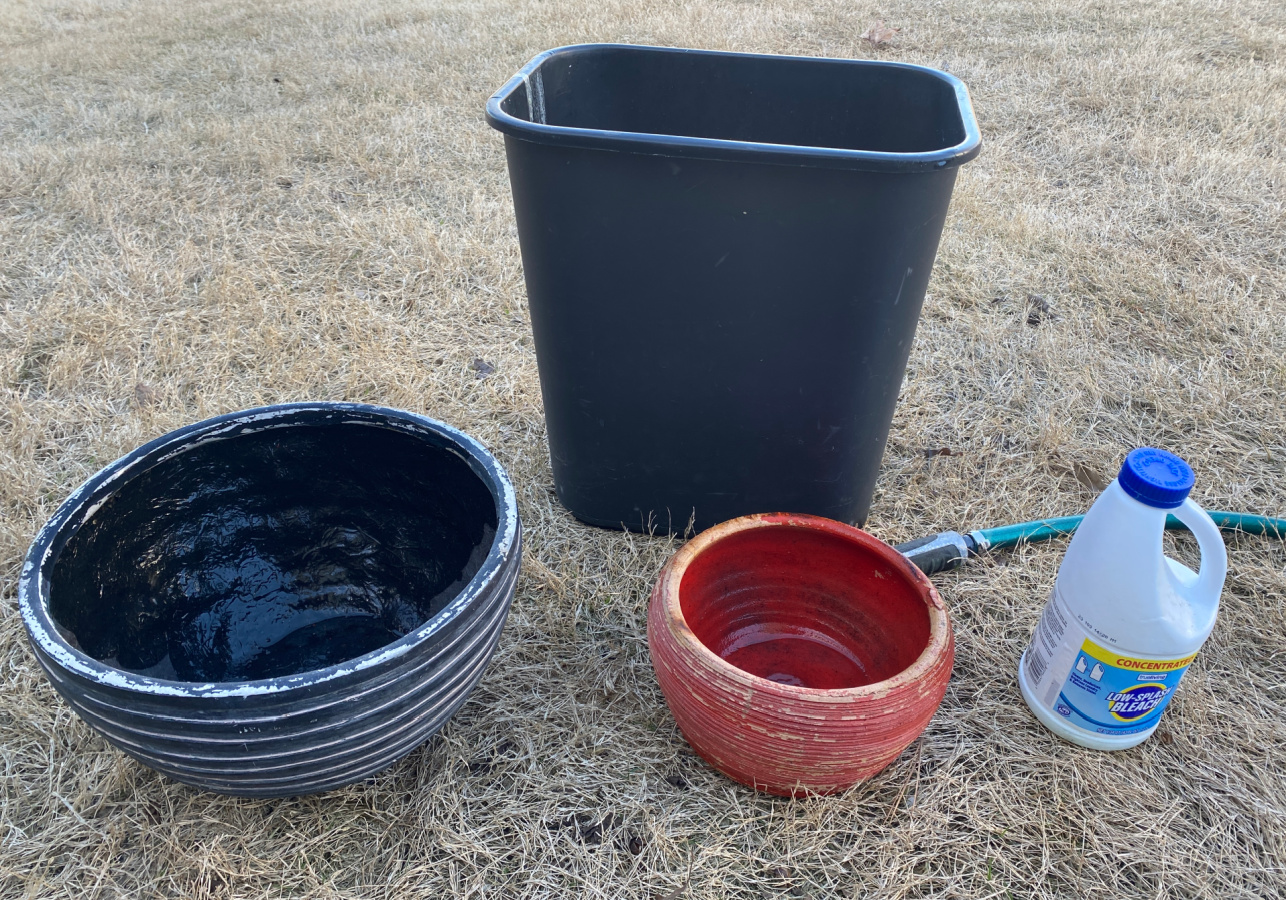
Give your pots a good bath in warm soapy water. Scrub them with a brush. Rinse well and let them dry in the sun. Soak them for about ten minutes in a solution of one part water, one part bleach. Put them in the sun to dry. After they dry, I always wipe my project pieces down with TSP to remove any lingering dirt or oils. This will ensure that the paint adheres to my project piece.
You are ready to paint!
Decide on a Color or Color Scheme
I decided to keep a similar color scheme from last year as there’s a good variety of colors and it’s easy to match accessories and additional pots. So of course, I grabbed my supply of Black Dog Salvage Furniture Paint. If you scroll back through the blog, you will see the variety of colors I’ve used in past projects. The beauty of BDSFP is that you can blend the paints to make custom colors. So everything matches! Check out their website for color recipes. This paint was designed for salvaged items so you can use it on any surface including, of course, furniture, concrete, metal, synthetic resins, glass, etc.

I grabbed five smaller paint brushes and five different colors of BDSFP. My plan was to slap the paint on each pot in a random manner and after the paint dried, cover the pot with a white wash to mute the colors. I have enough bold colored pots on the deck. So I wanted more of a muted or neutral color this year.
I started by painting the rims of each of the pots with Clean Canvas (pure white).

I don’t have any real reason for this except that I thought starting with the white would seem to unify the two different pots as they were different sizes and colors with different textures. The large pot is resin and the smaller is concrete.

Adding Color
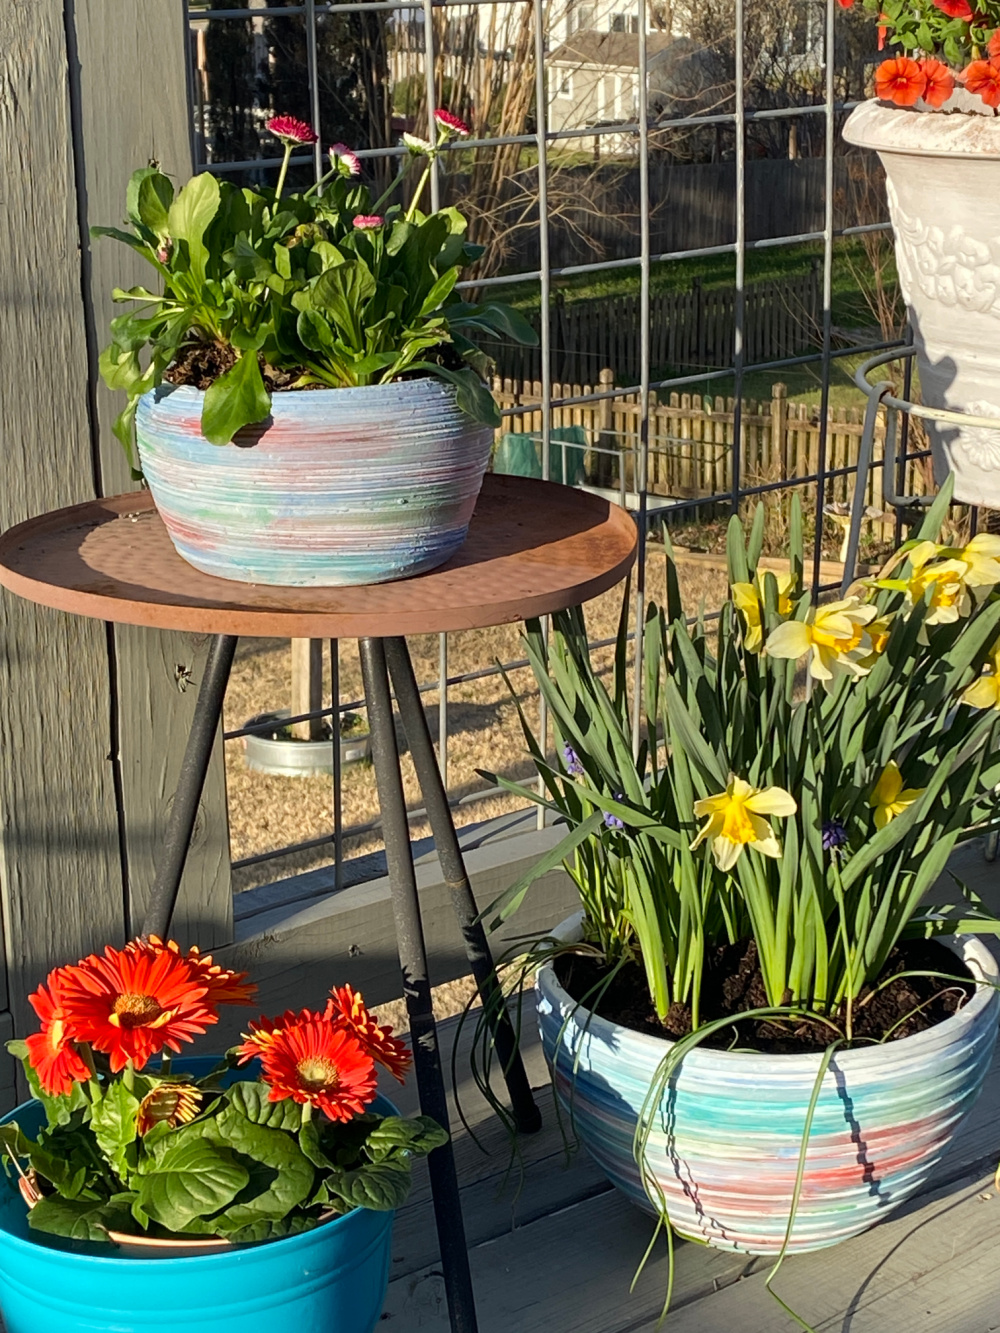
Ready for real color! I started with Blue Ridge, of course!! I loaded a brush and applied a stripe to the pot. I rotated the pot slightly and made two more stripes. I alternated stripes from the top to the bottom to the center of the pot in no particular order. I rotated again and added another stripe. I continued until my rotation brought me back to my first Blue Ridge stripe. Then I added Go Green in the same manner followed by Keep it Teal.
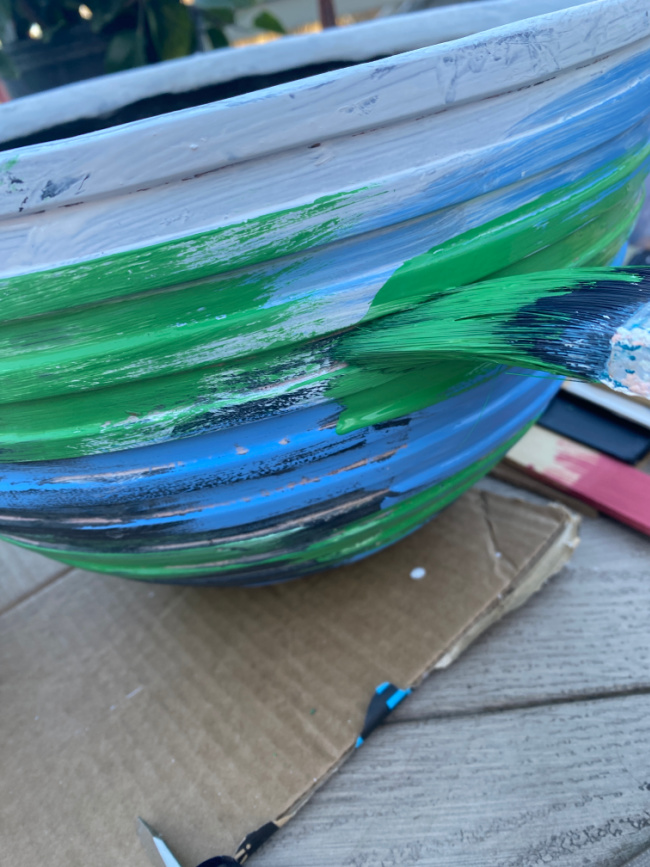
I had some Watermelon left from the drum table project so I used that next. And I ended with That’s Gonna Need a Bandage.

You can see the application is completely random.
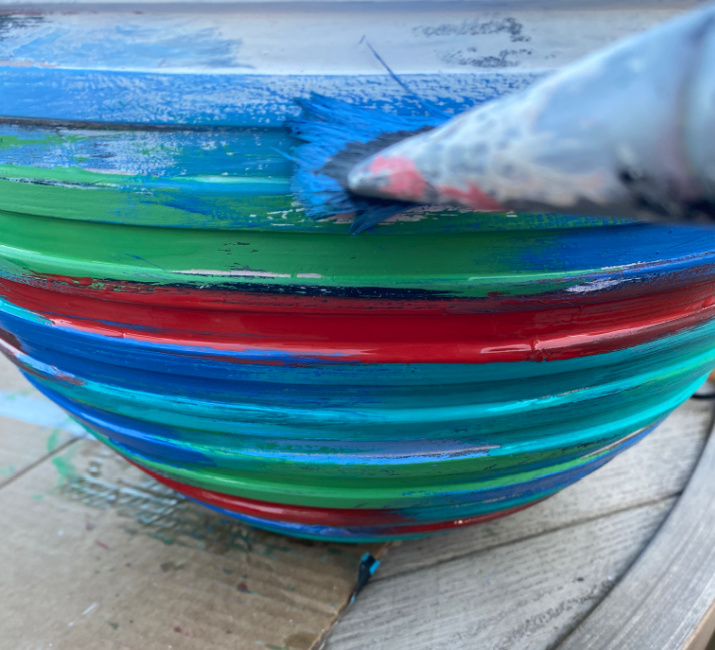
And I like how each section of the pot is a little different.
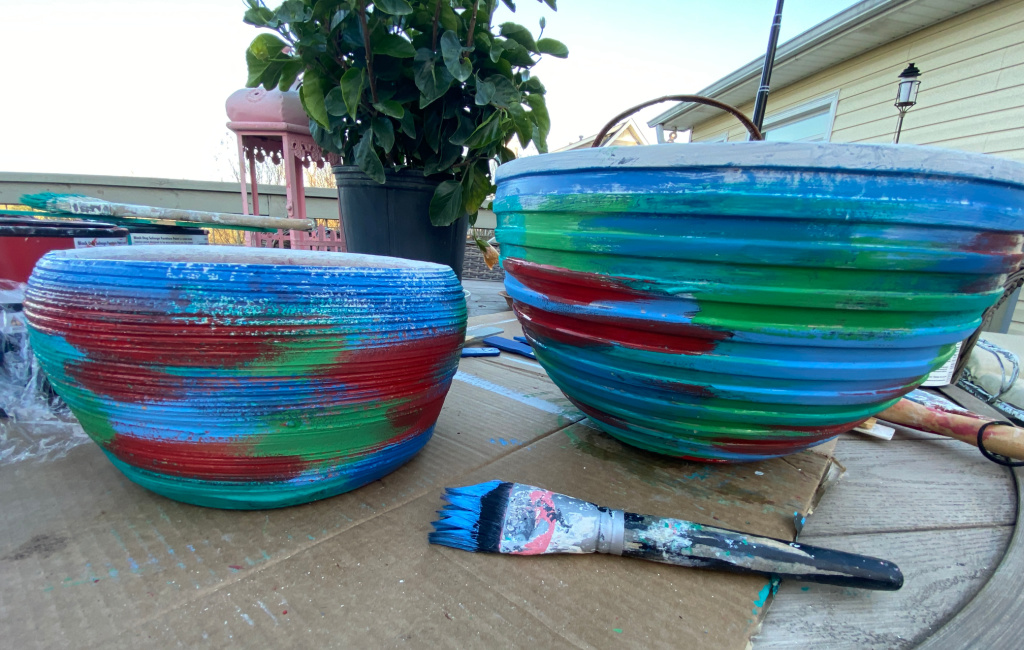
I went heavy on the red in one area. To highlight that color on my deck, I will simply display my pot with that side forward to highlight any red pillows or accessories. You can play with the colors however you like.
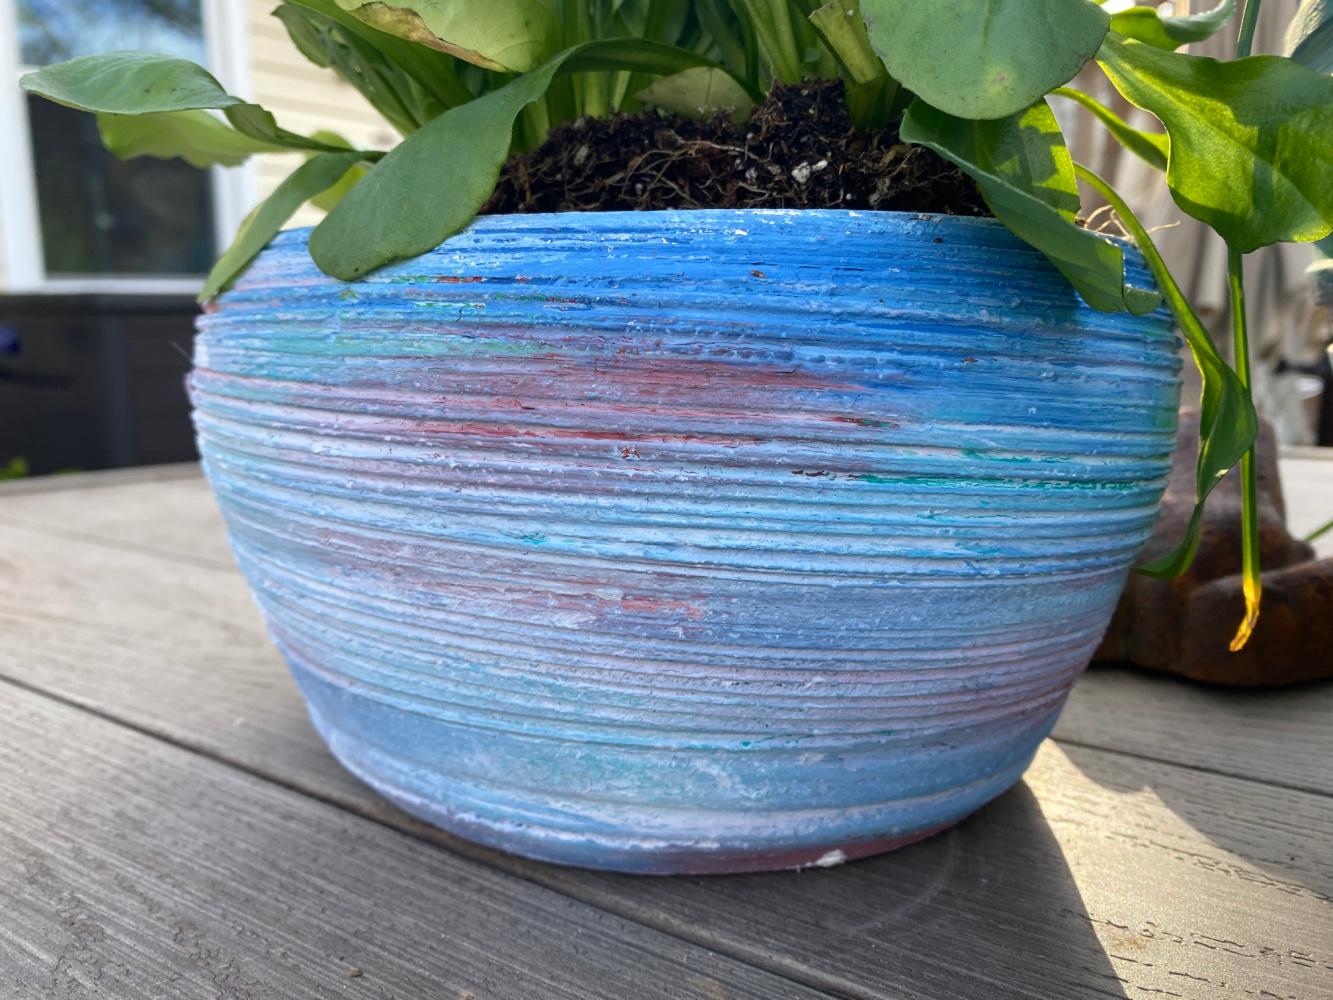
Making a White Wash
Next I mixed one part Clean Canvas (White) with a bit of water. You can play with the consistency. I kept my paint rather on the thicker side because I didn’t want the colors to be too bold. Although, as you know I love color. So I did find it hard to apply the white wash. But I stuck to the plan! Simply brush the white wash over the pot and then wipe it off with a rag. If there is too much white on the pot, wet the rag and wipe again. Continue to add and remove the white wash until you achieve the look you like.

Head to the thrift store or a yard sale and grab some old pots! How easy was this upcycle???
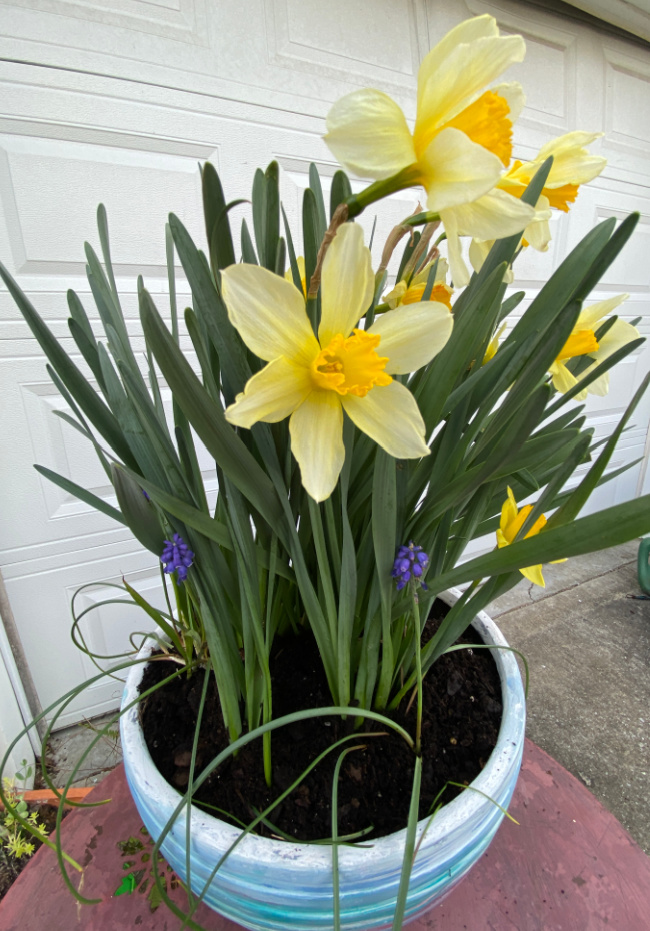
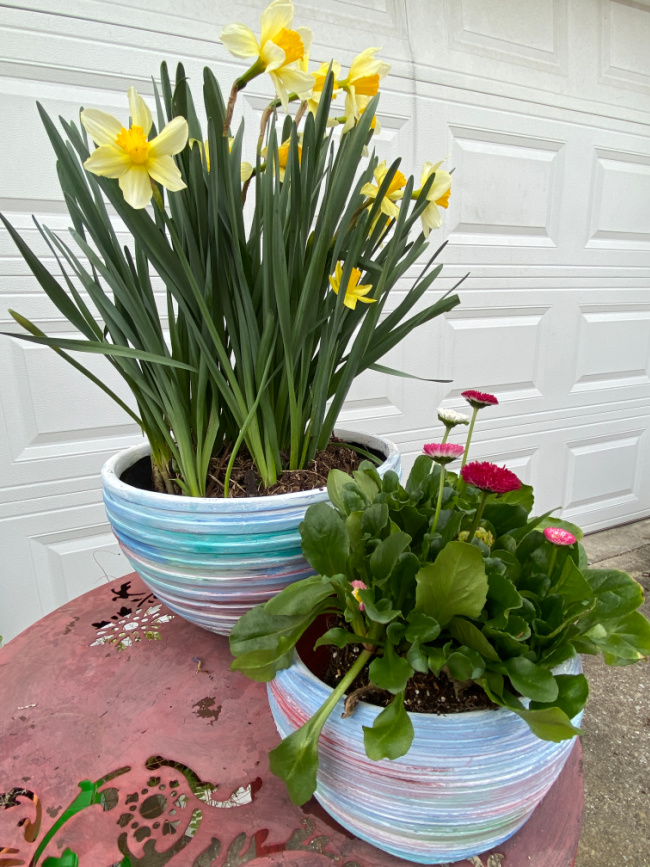
And now the fun part…filling the pots!
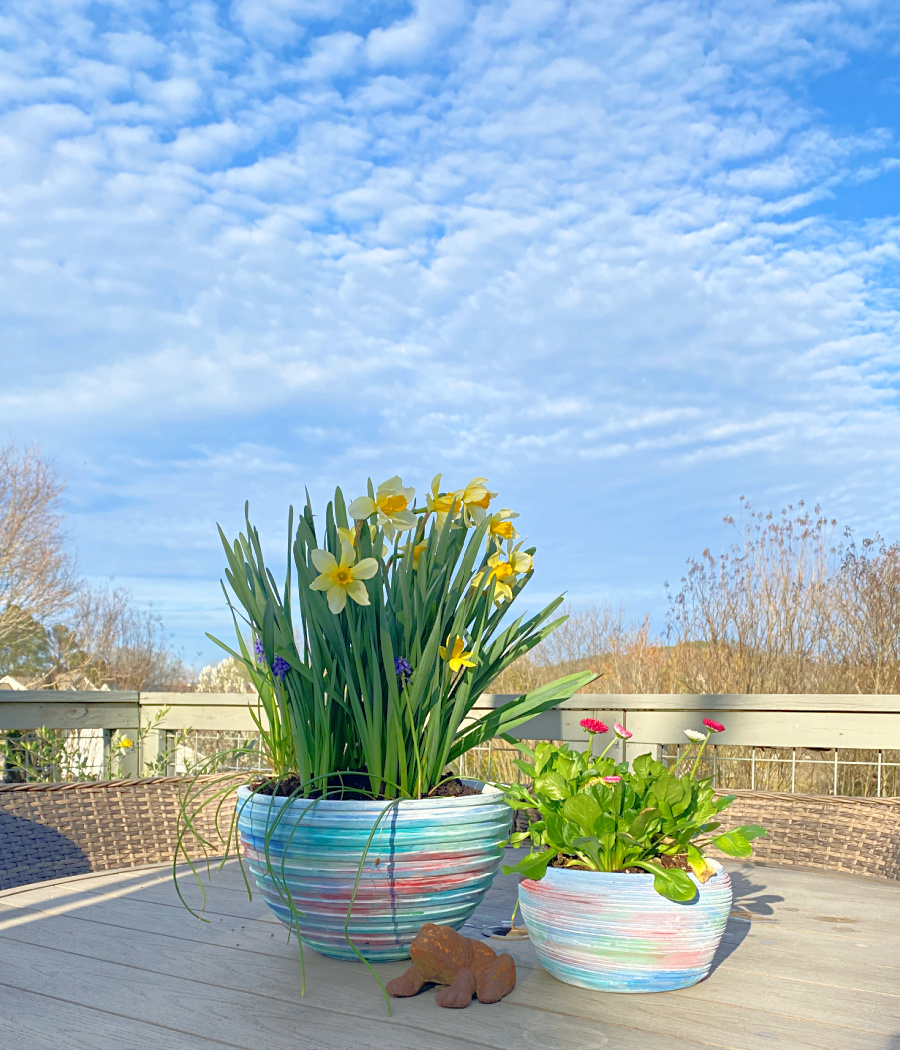
I dug up a nice round of daffodils from the front yard. They will do nicely on the deck for the next week or so.
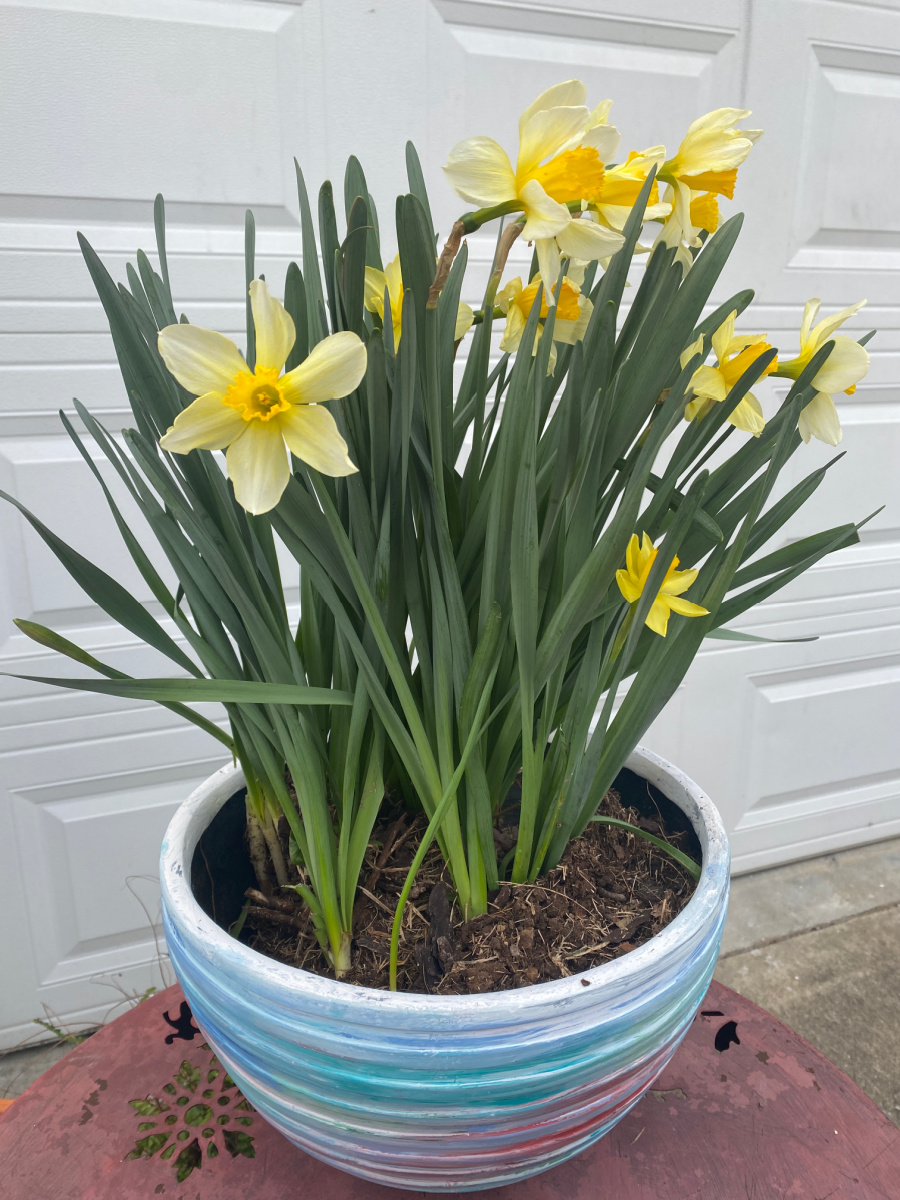
I added a few grape hyacinths as well.
I found these English Daisies at Home Depot. Have you ever seen these before? I’m hoping they are hardy like my Shasta Daisies that are just starting to appear in the yard.
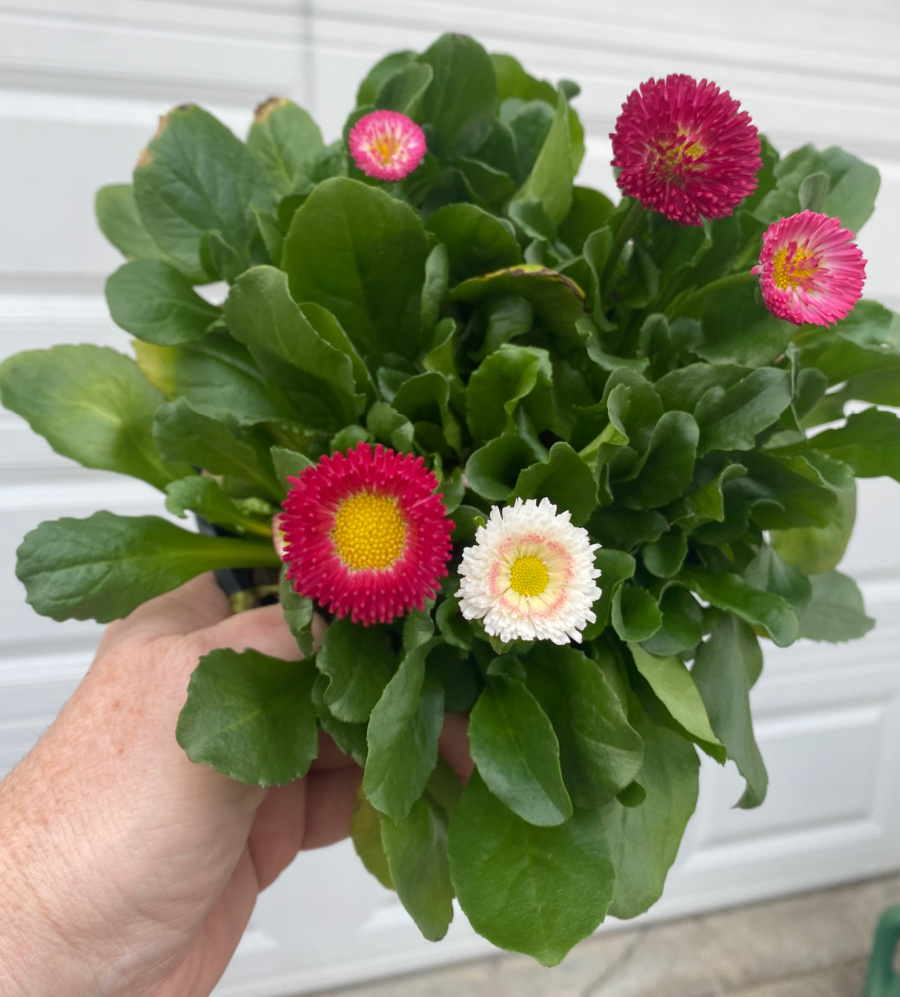
They were the perfect size for the smaller pot.
Looks like I am gonna be busy the next few weekends painting some more pots as I’ve got plants waiting in line.

How do you stop with just one color when all of the colors are so beautiful?

Can’t wait to fill up the pots…all of the pots.
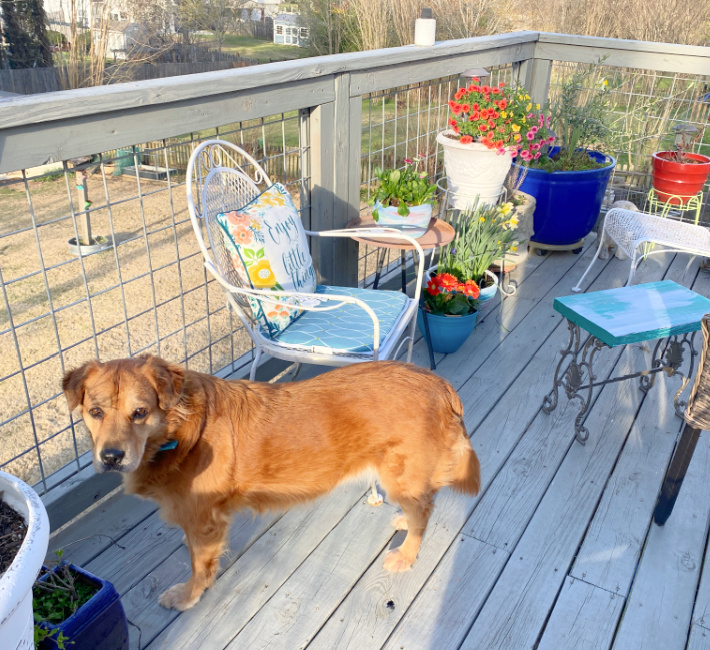
Mia is pretty excited for deck season too!

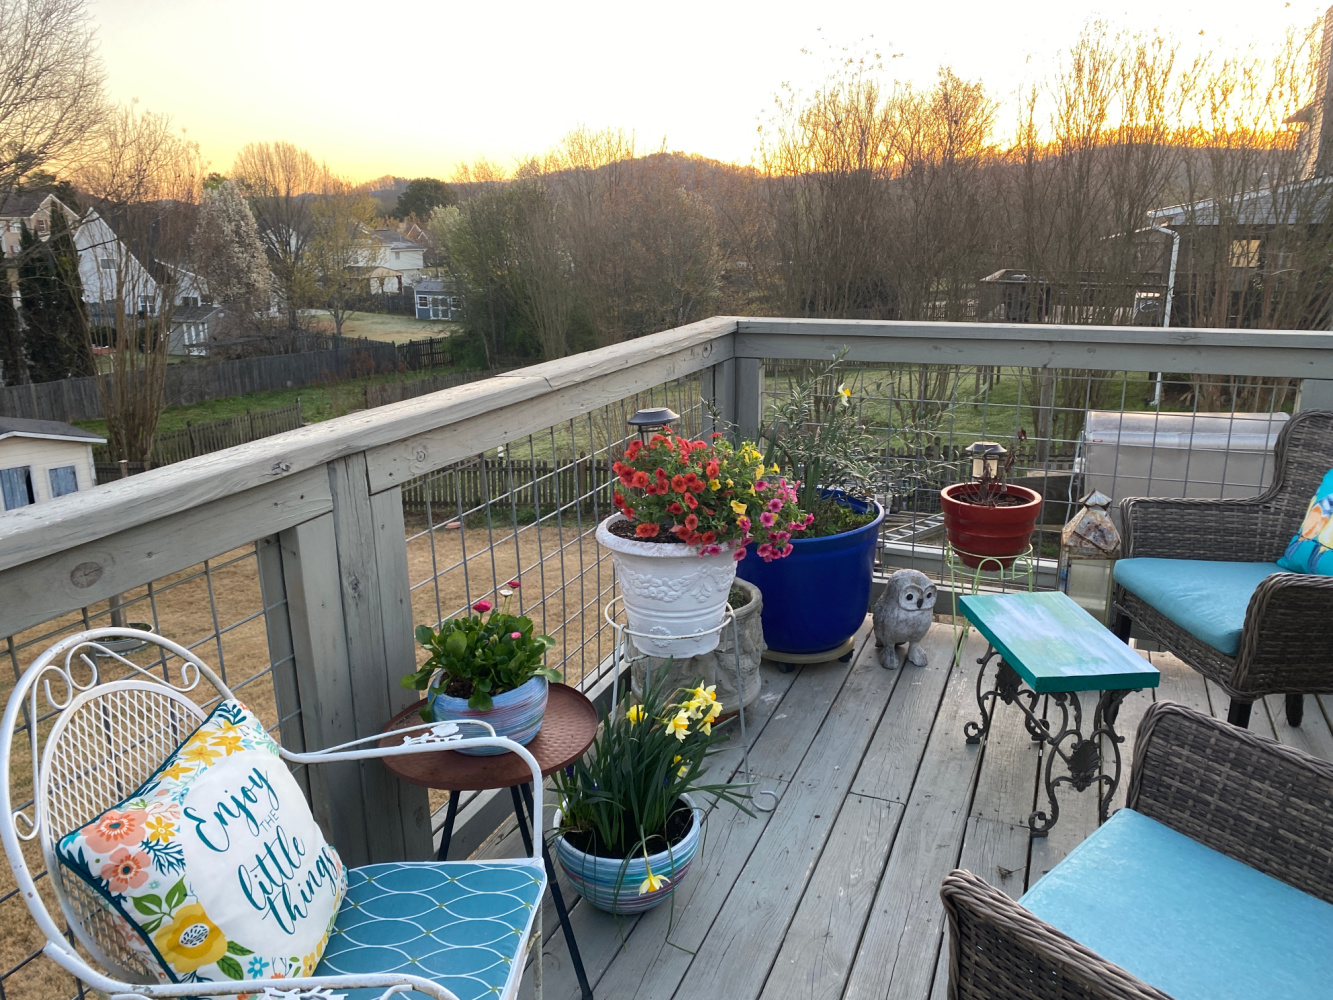
Look at that March sky!
We certainly are looking forward to the sunsets too!
- House of Hawthornes- Salvaging A Vintage Porcelain Enamel Kitchen Table
- My Uncommon Slice of Suburbia – DIY Wood Candle Holders from Finials
- Sadie Seasongoods –Mid-Century Modern Wall Decor from a Collage Frame
- Petticoat Junktion –Paint A Wood Mirror
- My Repurposed Life – Simple Small Table Makeover
- Our Southern Home –Decoupage Wastebasket Makeover
- Organized Clutter – Thrift Store Hinged Box Spring Makeover
- Shop at Blue – Upcycle Garden Pots with Paint
- Domestically Speaking – How https://www.domestically-speaking.com/how-to-make-a-cane-wrapped-vase/To Make A Cane Wrapped Vase
Be sure to leave a comment on each post. We love your feedback! What do you want to see next?


Nice facelift for the old flowerpots! Colorful and modern! Pinned.
Thanks, Carlene. Such an easy way to switch things up.
Loved the color you picked! So pretty!
Thanks, Maryann. Seems to be my constant spring refresh…pick another color combination for the pots. It works!
These tuned out so pretty, I love the mix of the colors. I can’t wait for Spring! Mia seems pretty happy out in the deck 🙂
Thanks Kristin! Mia loves the deck! Now if I can get her to stop chasing the bees.
Very colorful pots! I always love your use of bright colors on your deck!
Thanks, Pam. I fell like I might never have to buy another pot as long as Rustoleum and BDSFP stay in business.