Shut the Front Door! Our new front door is installed!
As an Amazon Associate and member of other affiliate programs, I earn from qualifying purchases.
Our New Front Door is Here!
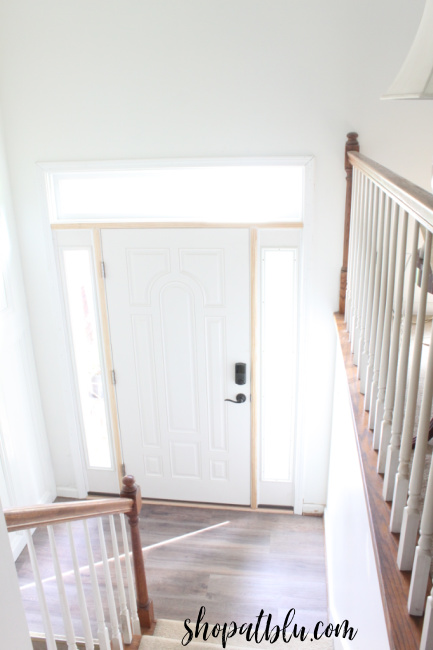
We have a new front door! It’s only taken 7 months but it is installed! Blame it on delays caused by the pandemic. We started looking for a new door back in February. The home improvement stores were just overwhelmed with people stuck at home doing DIY projects. We had trouble getting estimates. We had trouble getting measurements. Our order was delayed because a salesman left the company. Warehouses were not running at full capacity. We completely renovated our kitchen during the pandemic without any major delays! The door was another story completely. But now…the door, sidelights, and transom are installed!
I am so anxious to get this beauty painted so that the door looks complete! But first, there is some important prep work.
Necessary Steps
When you purchase a new door with sidelights and a transom, it comes as one piece. The installers remove the old and slip in the new. New molding is installed around the door and sidelights. Some of the new molding is primed and some is just raw wood. So my first task is to prepare the newly installed door assembly for paint.
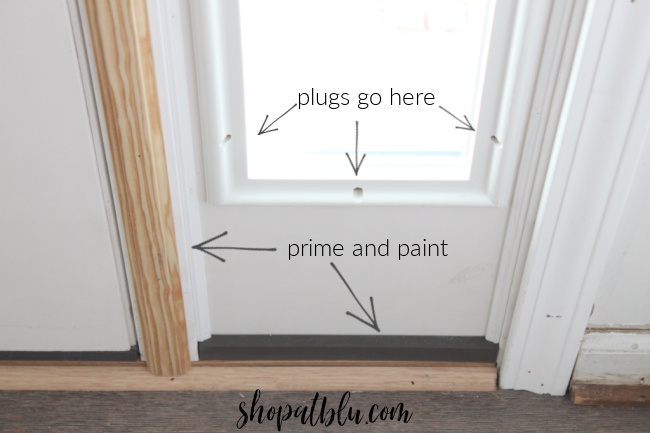
First I filled the nail holes with putty. Once dried, I sanded for a smooth finished look. There were so many more nail holes than I expected. They were on the transom, both side lights and the door frame. So this took a little time.
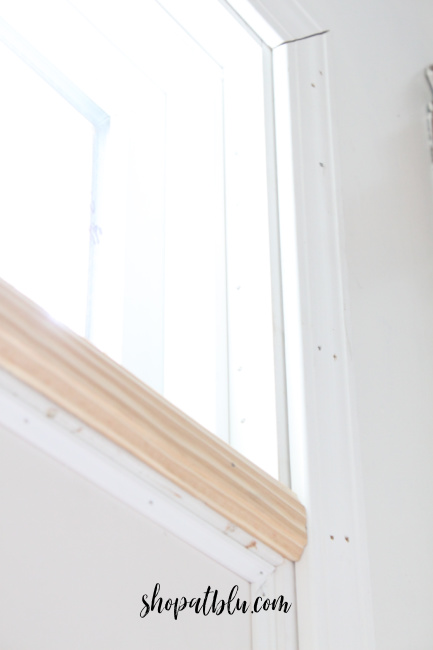
Then I installed the screw plugs along the sidelights. Plugs are tiny plastic caps that fill the holes where the glass was installed in your door or sidelights or transom. The plugs make the unit look seamless. Easy peasy! Tip: put the plugs in the freezer for about 30 minutes before you install them. This will allow you to easily pop them into their appropriate holes. As the plugs adjust to room temperature, they expand slightly ensuring a snug fit. I tapped each plug gently with a hammer and block of wood to ensure they were inserted completely.

Um…Front Door Disaster!
Next I caulked around the door trim and the sidelights to fill in any gaps.
Insert phonographic needle ripping across a vintage record and coming to a screeching halt HERE!!!!!!!!!!!!!!!!!!!!!!!!!!!!!!!!!!!!!!!!!!!!!!!!!!!!!!!!!!!!!!!!!!!!!!!!!!!!!!!!!!!!!!!!!!!!!!!!!!!!!!!!
Y’all!!! I have been doing DIY projects since I was a child. I know the rules and basics on planning and proceeding through a project. But this next paragraph is a testament to the fact that everyone makes mistakes that eat up time and make you want to scream. You know…the stupid rookie mistakes that you can justify…when you are a rookie, but not when you simply know better! My tip…slow and steady wins the race. Don’t rush to get through your project!
My Stupid Rookie Mistake
Imagine, just for example (winks her eye)…you lend your daughter your Ryobi battery operated caulk gun because she just bought a sweet little camper that she is renovating. You have it already loaded with caulk so she can use it. The caulk gun is returned with caulk still installed so all looks normal. And you have a brand spanking new beautiful front door that you’ve waited for through a pandemic so you excitedly grab the caulk gun, which is ready to go, and start to caulk around your beautiful and newly installed freakishly gorgeous new front door.
The caulk seems a little loose. But you tell yourself…oh well maybe I just don’t remember correctly. But when you go to smooth the caulk, it really is thin and gooey and, well, quite frankly a mess. So then you do WHAT YOU SHOULD HAVE DONE FIRST before you even got near that beautiful door with that already loaded caulk gun…YOU CHECK TO SEE WHAT TYPE OF CAULK is in the gun. And then the fireworks and the really loud gong and the WOMP WOMP WOOOOOMP! Kitchen and Bath SILICONE. IV had a leak on the camper and had switched the caulk to make that repair. So proud of her!!! So pissed at me!
Why Use the Right Caulk?
If you haven’t used the wrong caulk before, let me tell you what a nightmare this is:
- Silicone caulk is waterproof. It is petroleum based. Therefore, you cannot paint over it. It is primarily used for waterproofing outdoor projects or in bathrooms and kitchens and is usually white in color. So for my (eventually to be painted a super cool color) new front door, this simply will not work.
- Normal caulk for paint projects is water based. You can paint it. You cannot install it over silicone because it will not stick, just like paint over silicone…it beads up and looks hideous, and well, basically it fall the heck off.
- To remove silicone caulk, you must try to scrape it off with a putty knife and then scrub with alcohol to get what you couldn’t scrape off. It is time consuming and tedious work.

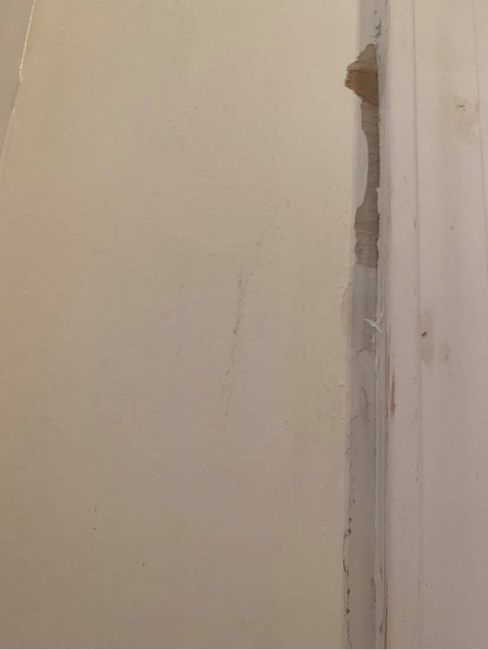
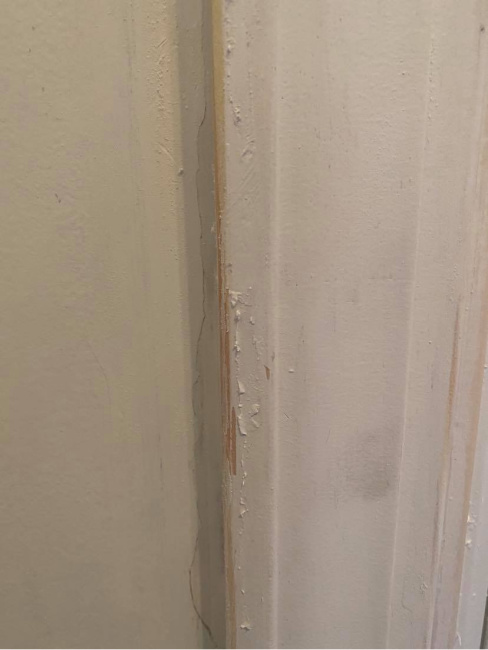
I even called DAP, the manufacturer of my go to caulk to see if there was any way to avoid the horrible process of removing the silicone. But, alas, there was not! Jesse, the customer service expert, was wonderful! So I scraped and peeled and scrubbed and wiped. And finally, I was ready to caulk…with the real caulk, the right caulk!
Just a Little Delay
And so my friends, as of this writing, my two hours prep and paint the front door project has turned into a two day project. The result of which is that I do not have a photo of my beautifully painted new front door.
I do, however, have a picture of my beautifully primed front door:
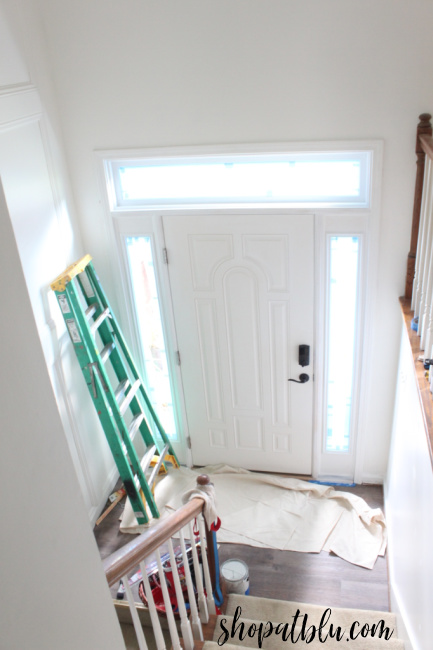
My plan was to prime the entire door unit and then paint it white for the time being. I know that I definitely want to put a beautiful color on the inside of the door, but I think at this point I will wait until I have completed the stair project and selected a color for the furniture piece that will sit inside the front door. I tend to tweak and change my projects as I proceed with each step. Inevitably, there will be surprises. I can’t wait to see what surprise pops up next.
Next Step
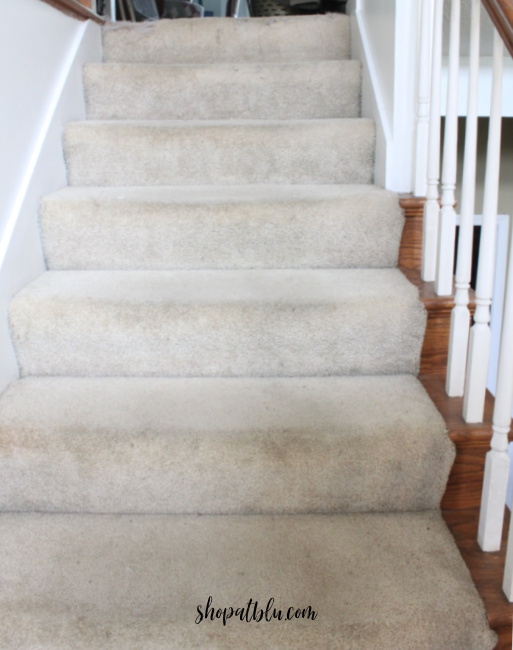
Next project is to tear up the carpets on the steps and prep the steps for paint.
I suppose this is a good time to select a paint color and possibly a stencil design as well.