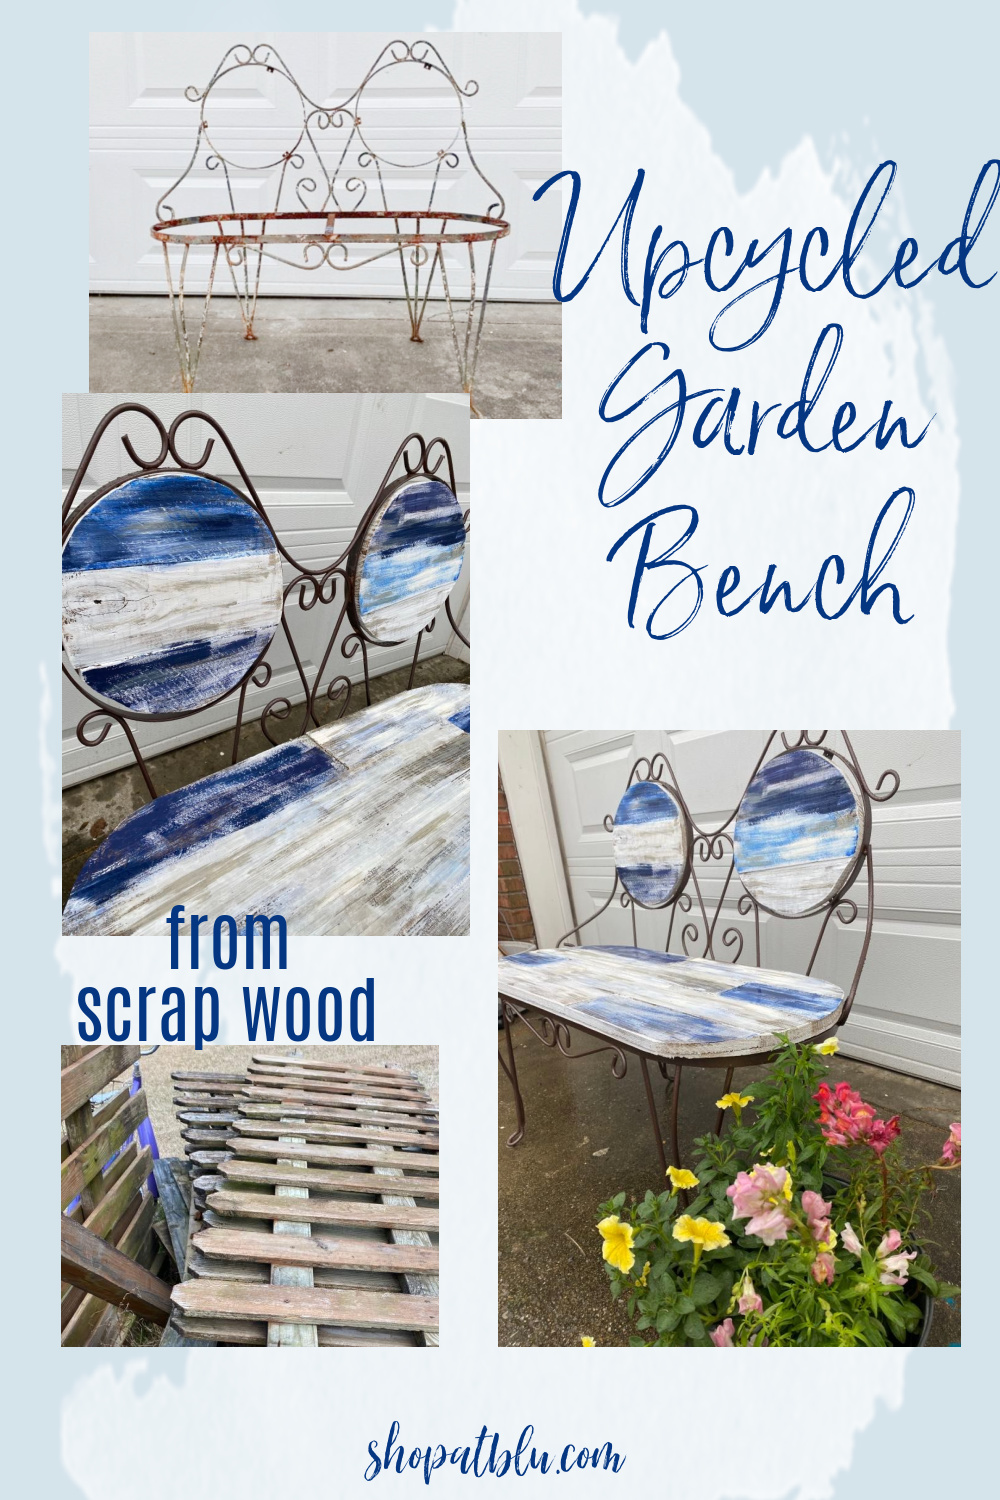
Vintage Garden Bench Upcycle
As an Amazon Associate and member of other affiliate programs, I earn from qualifying purchases.
With Spring approaching, all hands at Chez Edinger are focused on outdoor living! What better time to tackle this sweet project that has been waiting patiently in my driveway??!! Though I absolutely love the rustic chippy look, I decided this vintage garden bench needs some love to preserve her structural beauty. So, lets get ride of the rust and preserve that metal. An updated look is welcome for this vintage garden bench.

And, guess what day it is??? It’s the second Wednesday of the month so that means the Thrift Store Decor Team has a whole new set of projects for your thrift loving soul. This vintage garden bench refresh is my contribution for this month. I’m sharing the other team projects at the end of this post so be sure to check them out!
![]()
Refreshing a Vintage Garden Bench
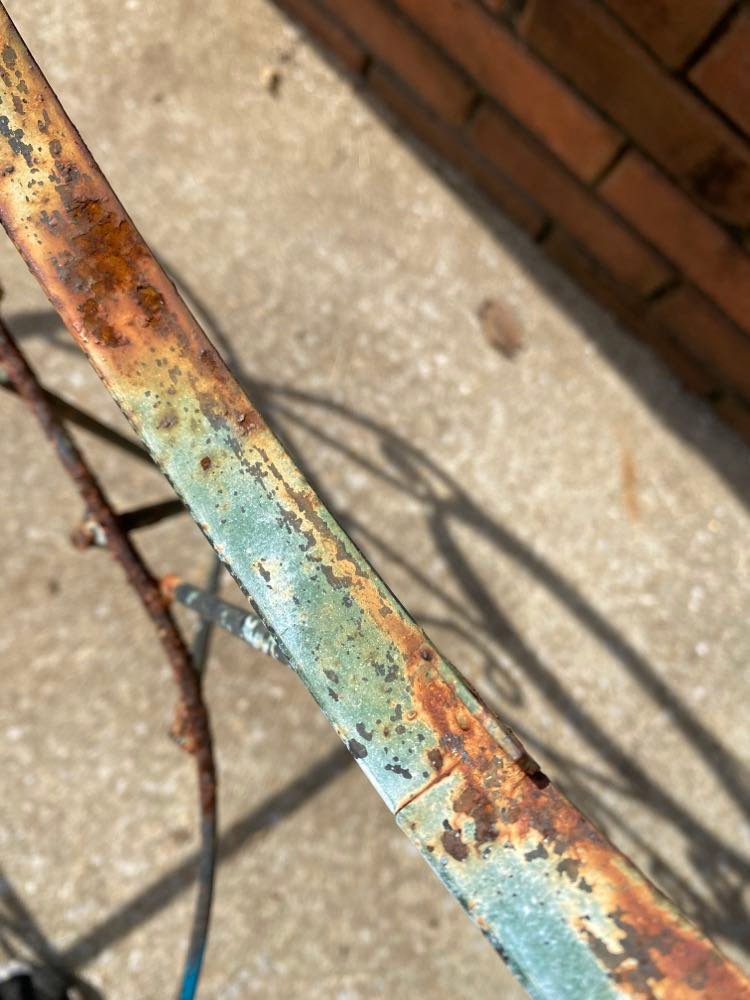
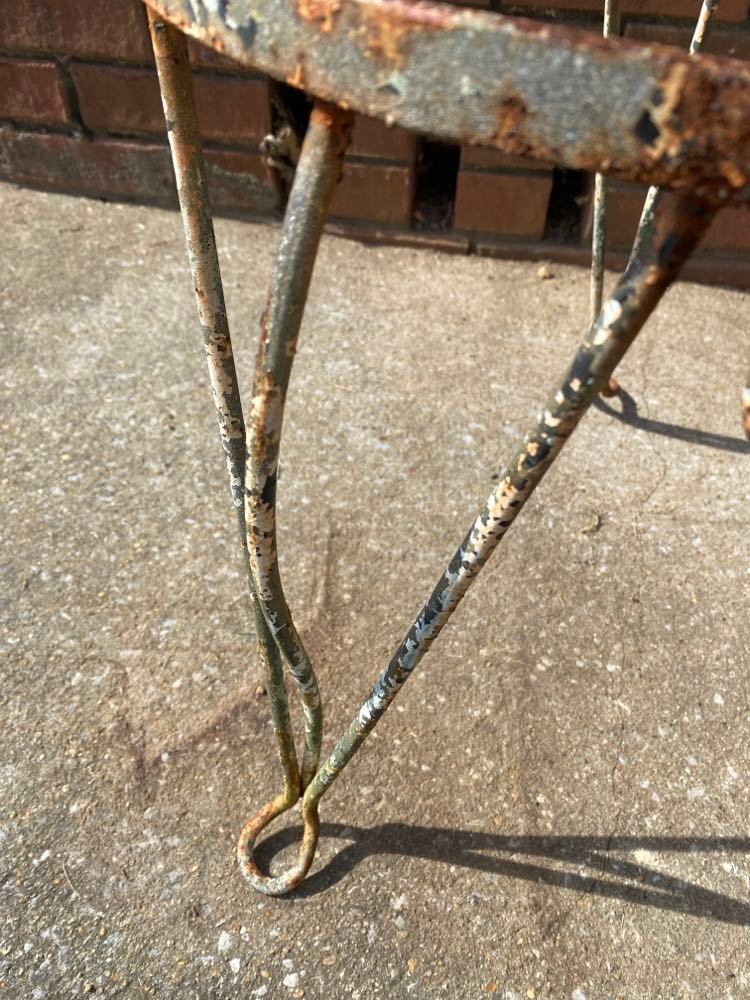
When I bought this bench, it had a good bit of white paint on it. Over the years, the paint has chipped and the bench has developed some rust. If you’ve been following my projects for any period of time, you know that I LOVE chippy, rusty, shabby, and primitive. In my mind, there is no such thing as too rusty or too chippy. So my heart was absolutely loving the patina and age on this settee. I mean, look at this…
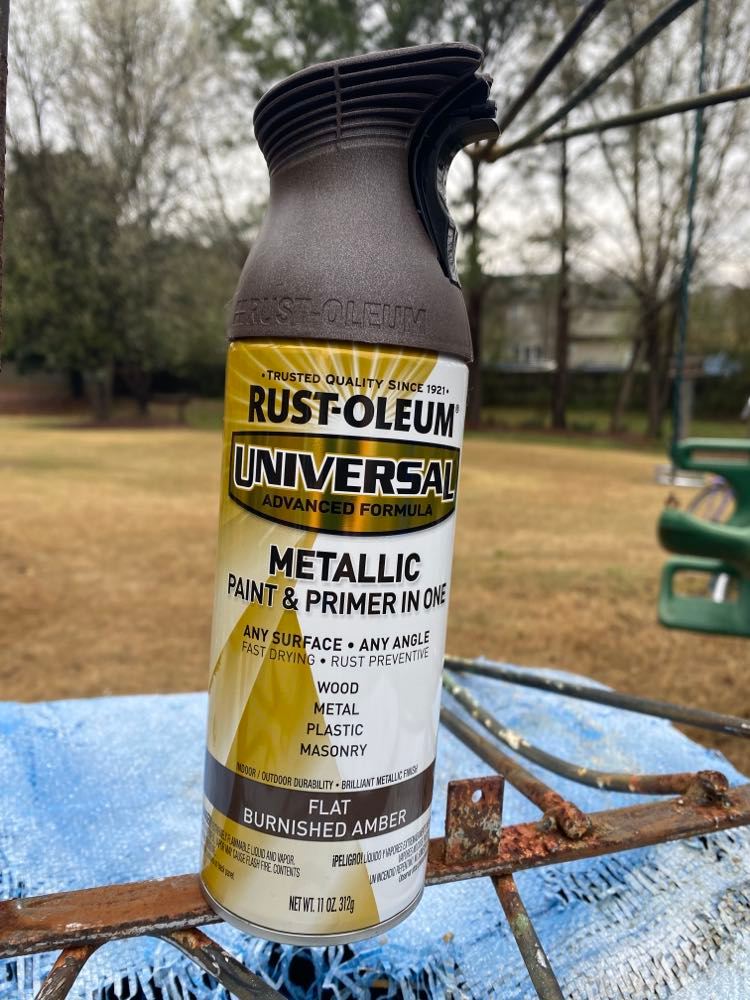
Mr. Blu is not so much of a chippy or a rusty fan. So I will be painting the frame. Our current deck furniture is white. So I selected a metallic brown for a change. Of course I’m using Rustoleum as it is my favorite spray paint. Rustoleum paint with primer has wonderful coverage is is very affordable. Here is the Burnished Amber…
ALWAYS Prep Before Painting
Before painting the frame, it was necessary to address the rust and existing white paint. As with all projects, your surface must be prepped to encourage the best adhesion of the paint. So in this case, I sanded the entire frame. I used my palm sander for flat surfaces. I switched to my Dremel for the curved and harder to reach areas. The process was quite satisfying as most of the paint and rust came off. After a wiping with a damp rag to remove the dust, I was ready to paint.
As with all spray paint, several thin coats are more effective than one thick coat. This prevents dripping and running paint which is a pain to remove. The Rustoleum covered nicely. The paint was dry within two hours.
Repairs to the Settee
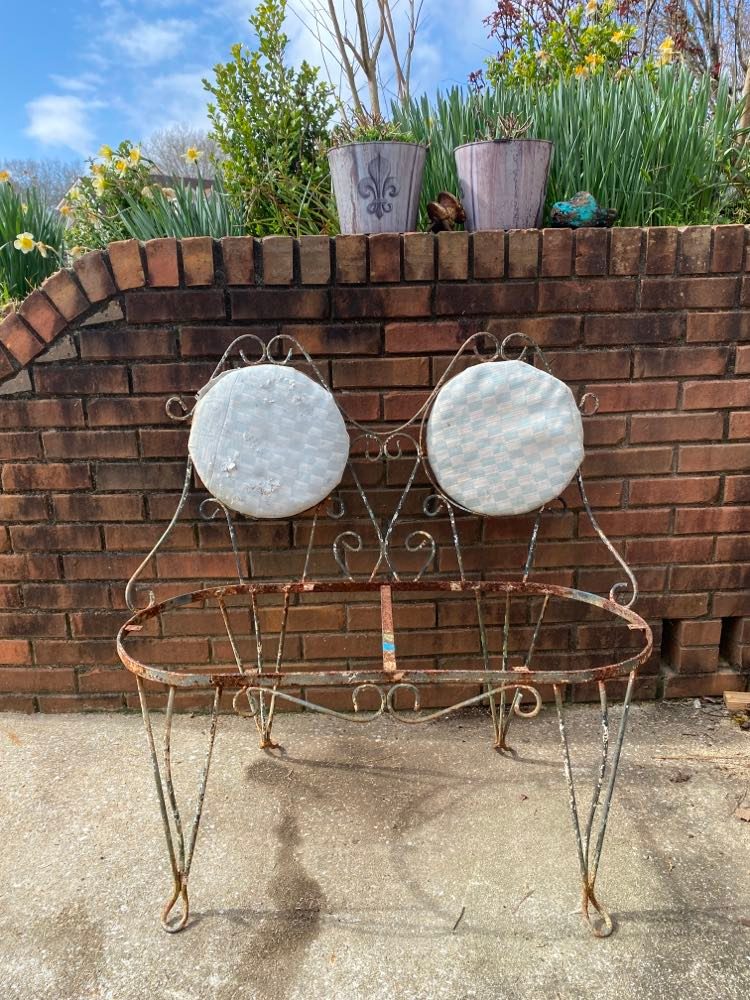
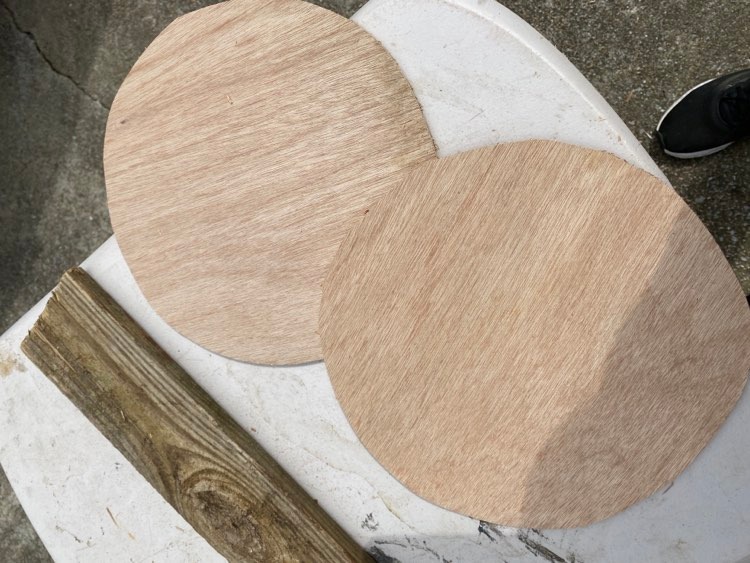
When I acquired the settee, it had the two back rests but the seat was missing. I can use the back rests as a template for the seat backs. But I will need to make a template for the seat base.
 An easy way to make a template for the seat is to turn it upside down on top of some cardboard, paper or onto the actual wood you will use. With a pencil, I traced the seat shape onto a piece of plywood. Or you can place your wood on top of the seat area and trace from beneath for the same effect.
I considered several finish options for the seat backs and base including concrete, mosaic, wood, and fabric. But since the bench will remain outside in the scorching Alabama sun and will be subject to Alabama rain, I decided to go with the logical choice of pressure treated wood.
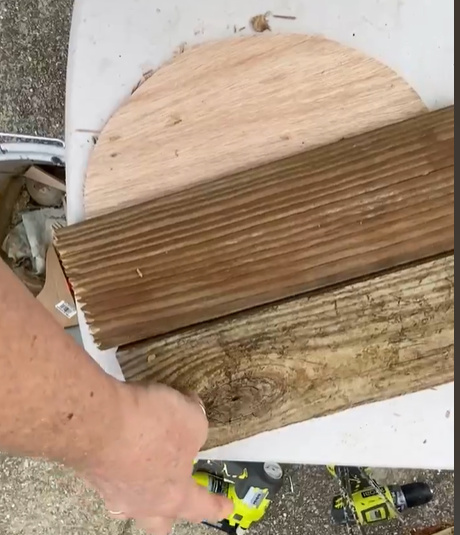
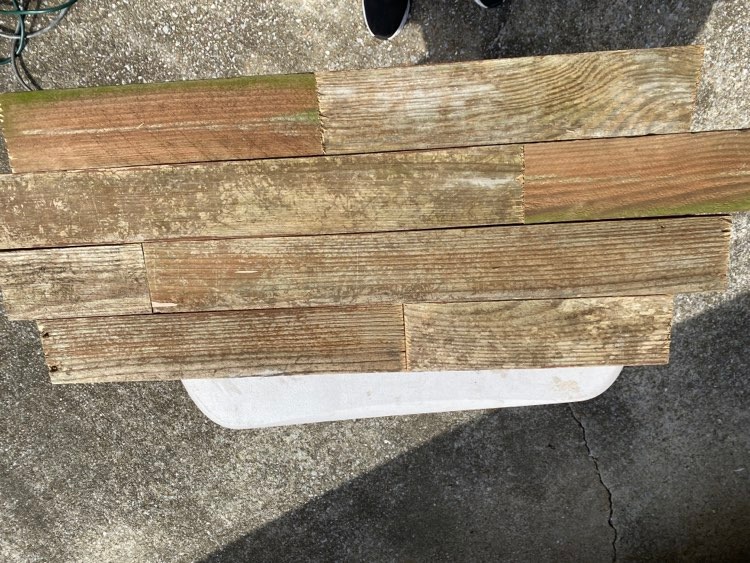
We replaced our deck last summer and still have a good bit of salvaged wood for projects. This is the perfect wood to rebuild the seat backs and base. You can read about the deck project here. I also used some of this scrap wood for this Pumpkin Project.
Here are the steps to create the seat base:
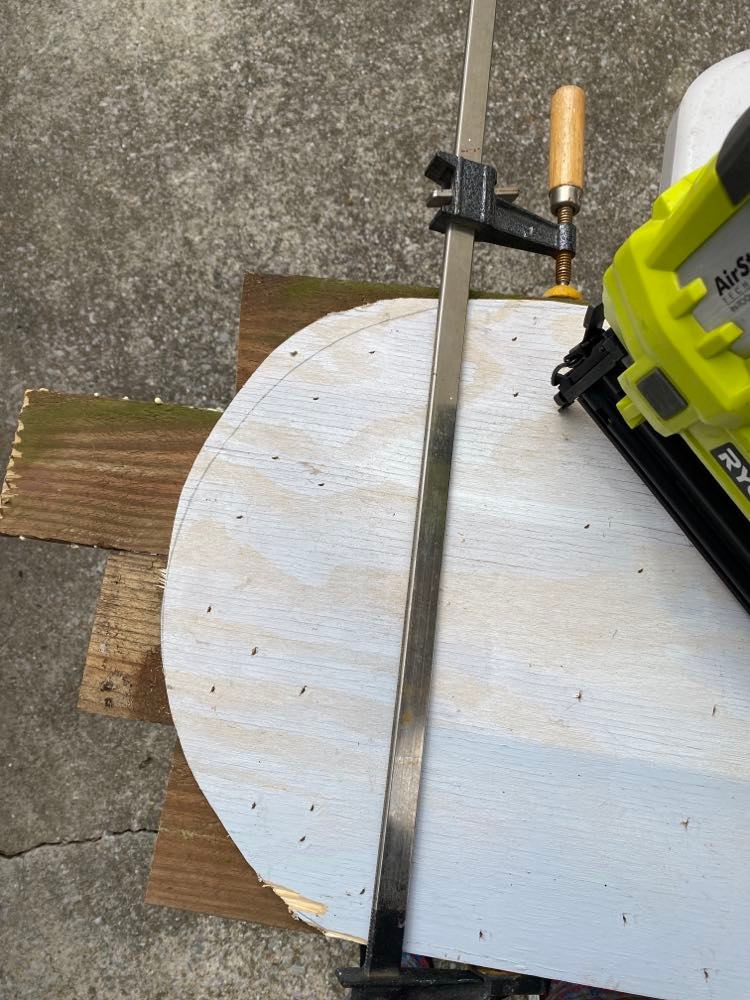
- Using the template as noted above, cut the seat base from some plywood. (I had some in the garage).

- Trim some of the scrap deck wood and fashion a design on the plywood.


- Glue the scrap pieces onto the seat base.
- Secure the pieces to the plywood back with small nails, screws or staples.

- Use a sabre or jig saw to trim the overage.
- Repeat for each seat back.
Always a Mid Project Pivot
You probably noticed in the photos above that I also cut out new wood for the seat backs. When I started to disassemble the backs, they were riddled with tons of staples and tacks. They were also ugly.
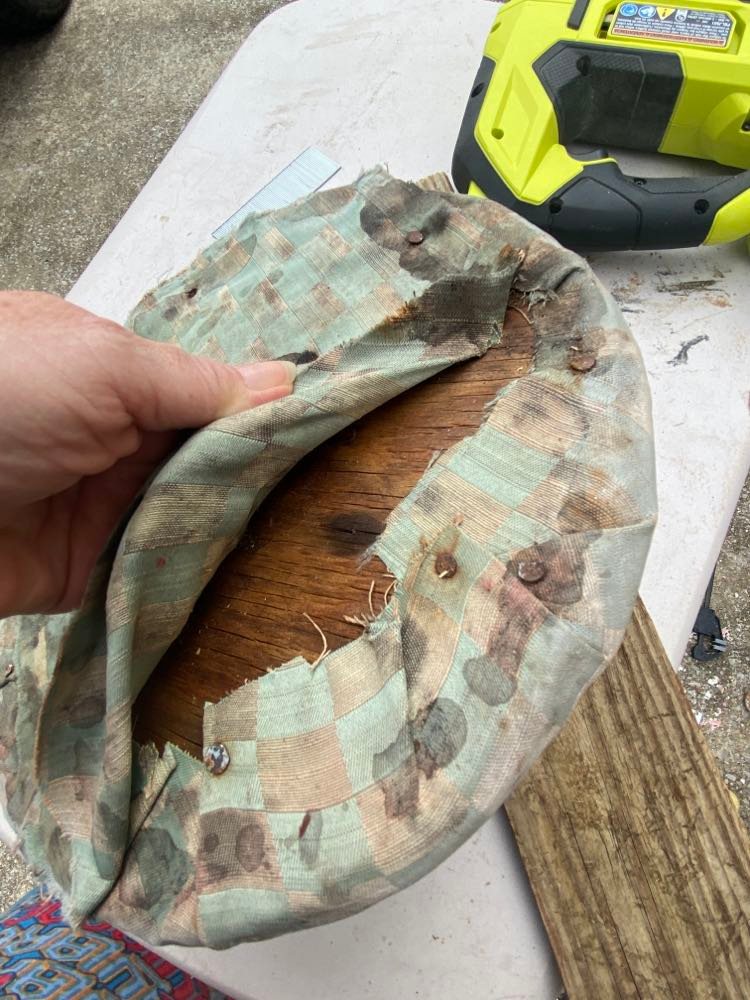
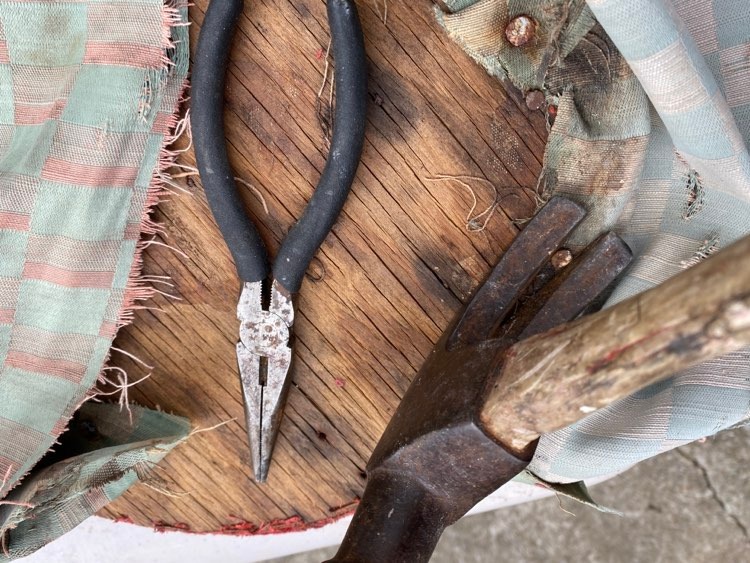
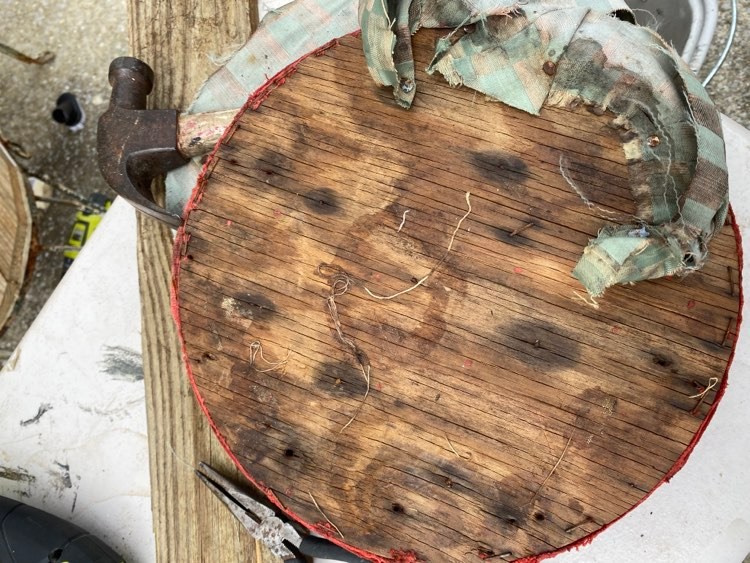
It was just simply easier to make new wooden backs than to deal with the time consuming task of removing the several layers of fabric and hundreds of staples and tacks (yes hundreds). So I ended up cutting out two seat backs and a seat base.
I popped the newly assembled seat backs and base into the bench to ensure that they fit and, once finished, will secure with screws.
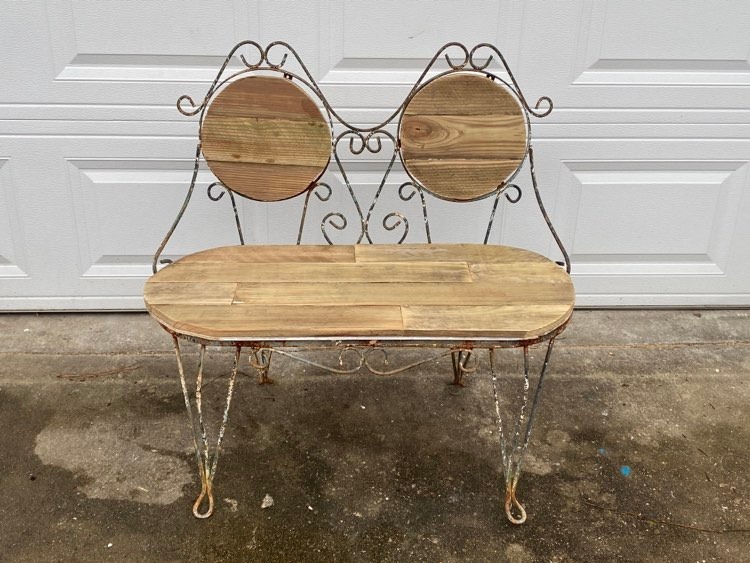
I think she turned out well! Now to decide on a finish! And don’t worry, I’m getting ready to pressure wash the driveway.
Deciding on a Finish for the Vintage Garden Bench Seat
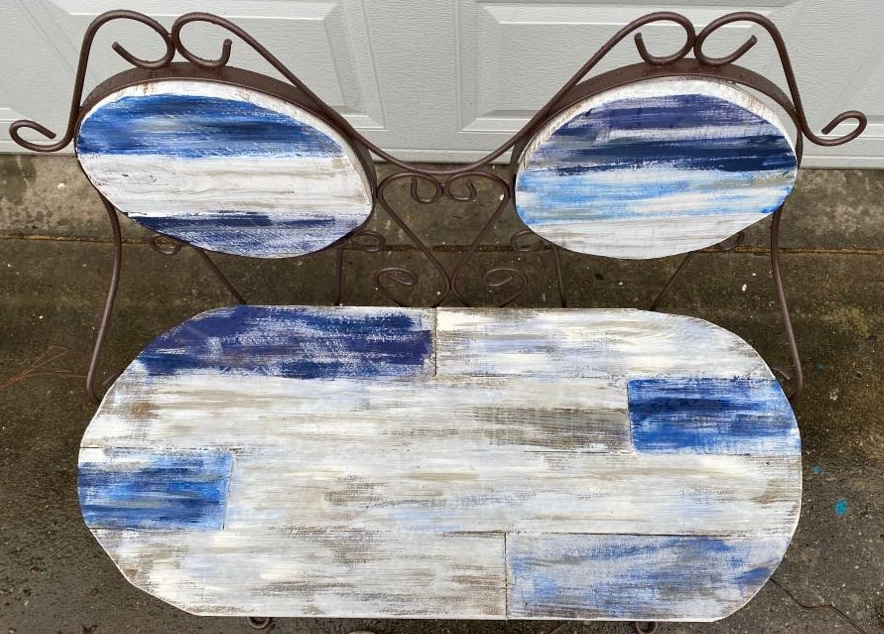
I’m a true wood lover so my first choice is alternating stain colors to make a lovely rainbow of wood finishes. But, I will probably put her on our new deck for which I am currently planning the decor. So, I went with a white wash look highlighted by, of course, my favorite blues.
I grabbed some of my favorite blues including General Finishes Klein Blue, (used on this dresser), Folk Art Milk Paint in Quaker Blue, (used on this wooden message board, and some everyday white, ivory and grey. I used alternating colors and the dry brush technique. I wanted the seats and backs to be mostly white to keep the bench cooler in the Alabama sun. I think I added just the right amount of color. .
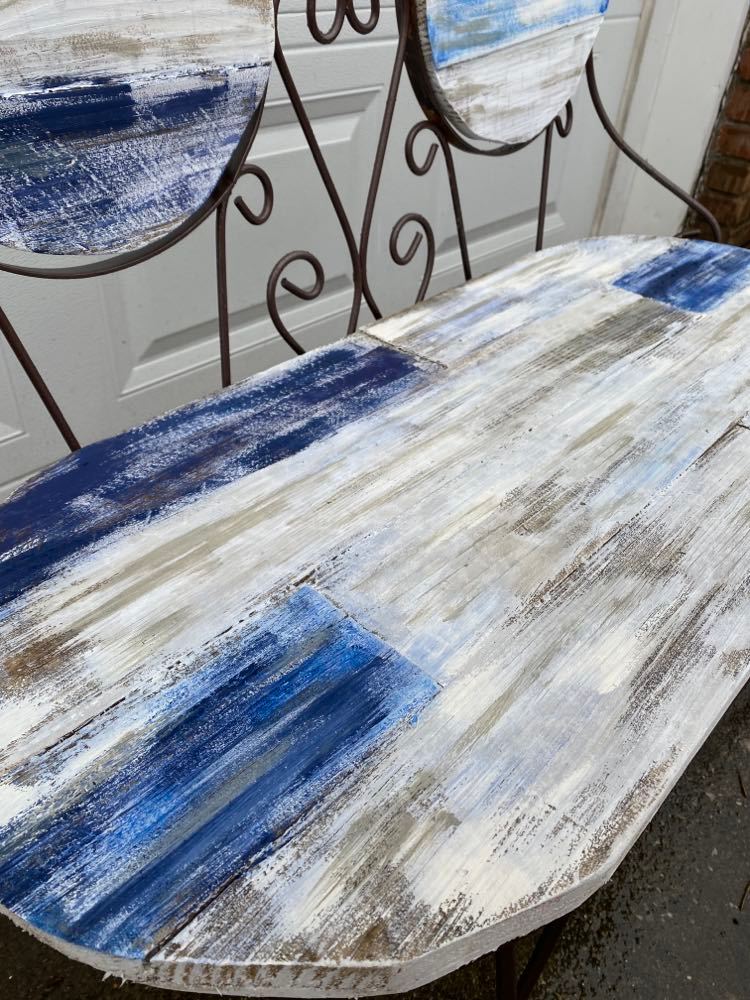
Here is how I achieved this look:
- Whitewash or dry brush the entire surface with a white paint.
- Randomly dry brush the brightest blue on 1-2 wood sections.
- Dry brush some navy on 2 more sections.
- Tone down the bright blue by dry brushing over it with some white.
- Dry brush the remaining sections with white. Follow up by dry brushing an ivory over the white once it dries. You can even add a 3rd layer of grey.
- Dry brush additional bright colors randomly to add interest (I’ll do this later in the season).
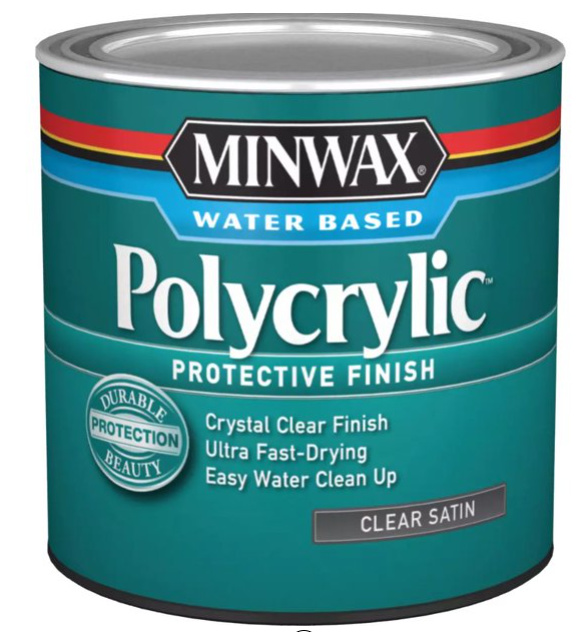
- Seal with Min Wax Polycrylic which is my go to sealer. Polycrylic is super easy to use and has super easy clean up.
More Color???
I was tempted to add some additional pops of color that will match our new deck decor. But I think I will add that update later. I think some bright coral or maybe bright green would be fun. I gave the wood a generous coat of Polycrylic, my go to sealer…easy to use and easier to clean up.
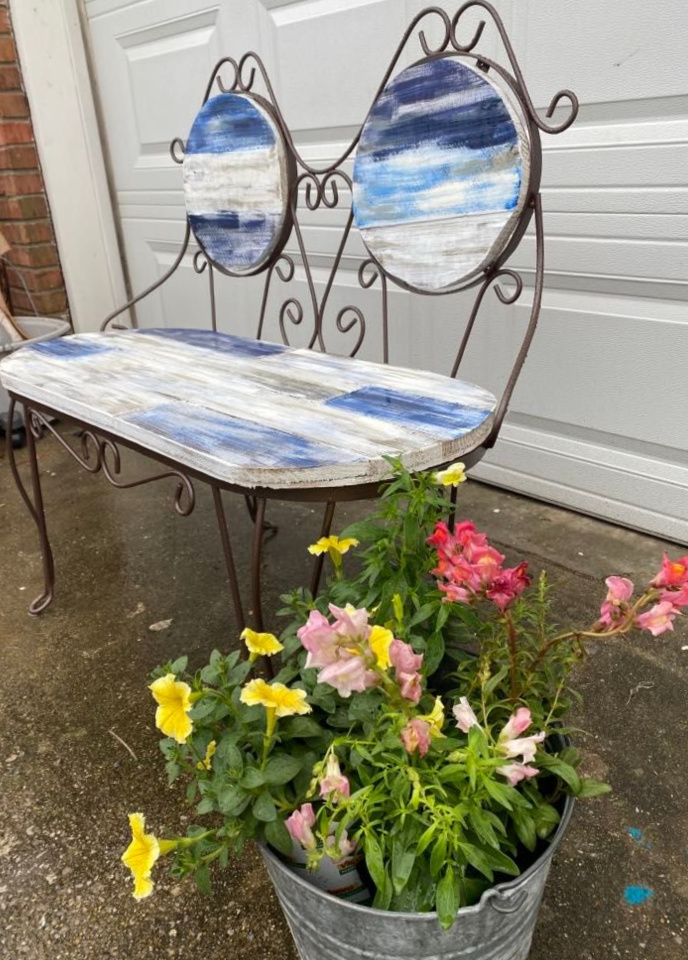
And here she is all ready for the deck!
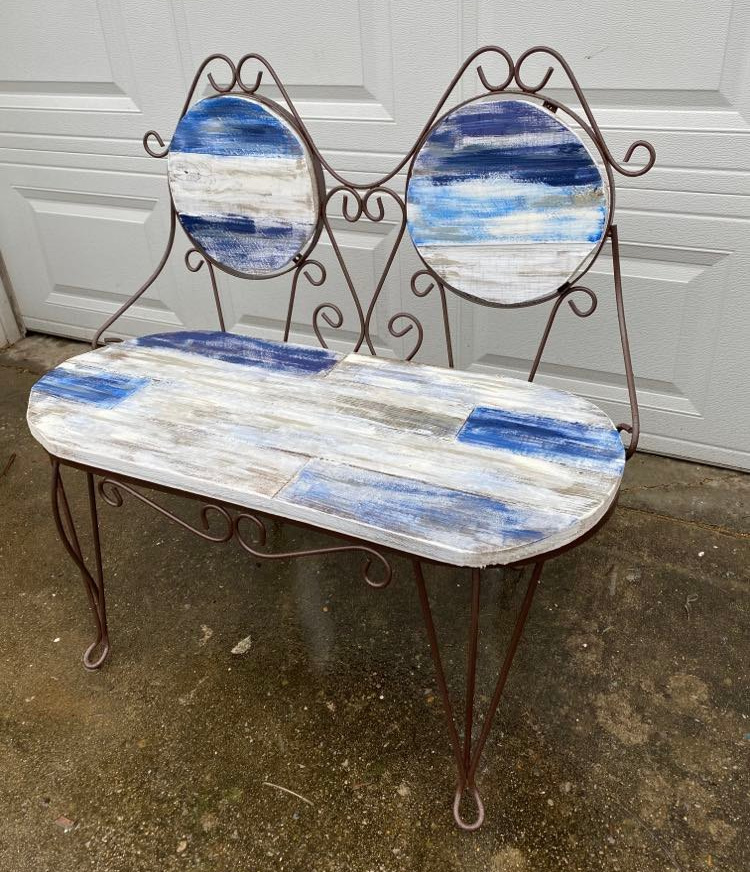
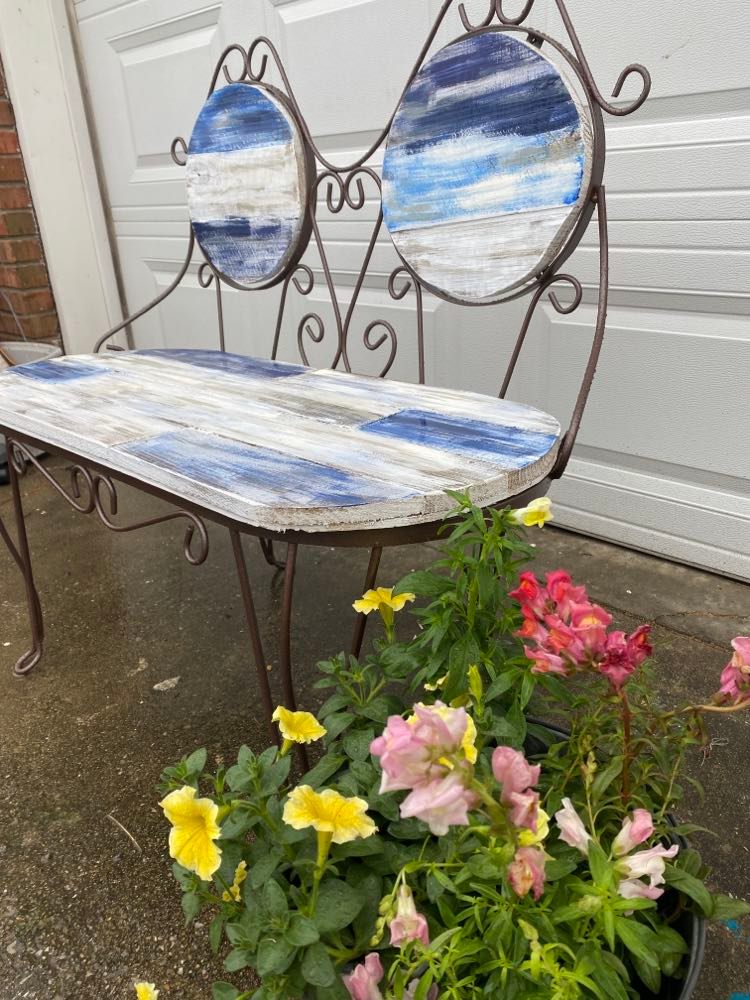
It’s been raining so I just took these quick photos in the driveway. I can’t wait to place her on the deck and have some fun with styling!
Our new deck furniture is due for delivery today so we have a lot of work to do!
In the meantime, she looks pretty grand sitting in front of that white garage door!
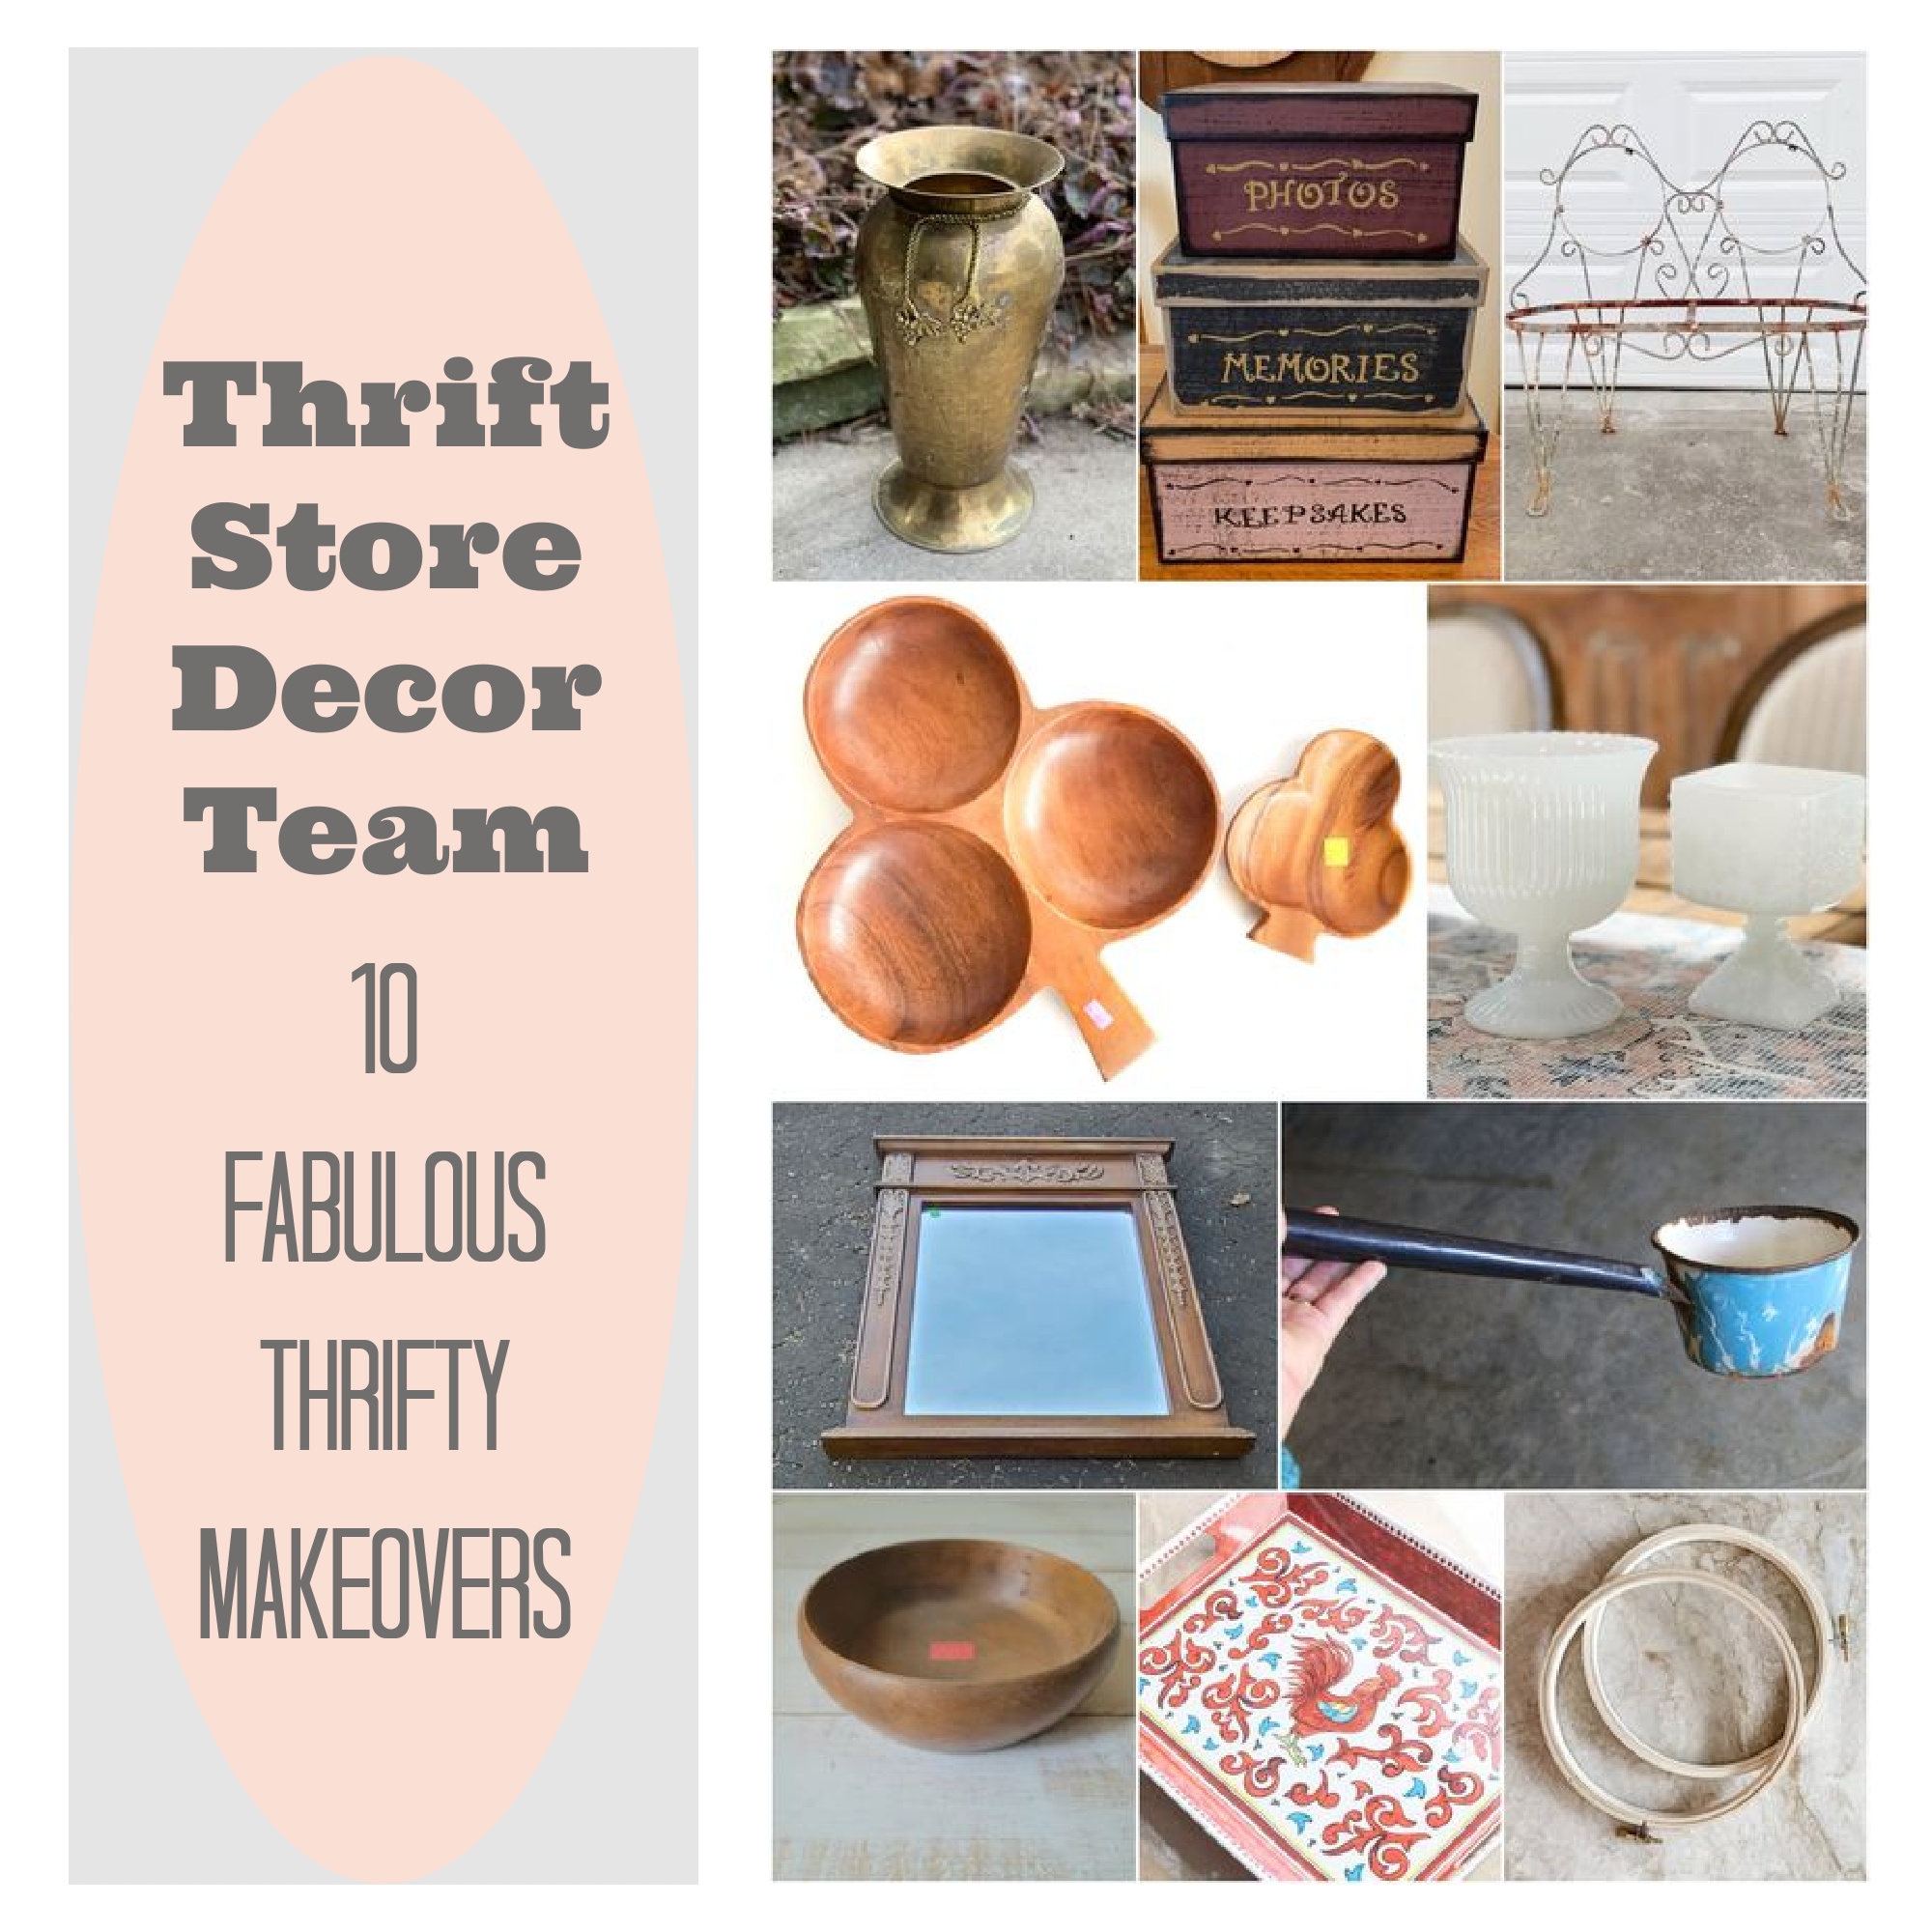
And here are the other projects from the Thrift Store Decor Team for March!
Be sure to leave comments on what you like as we love to hear from you! And please feel free to pin our pictures and share our posts! We appreciate you!
Pam at House of Hawthorns: Baking Soda Paint Thrift Store Makeover
Carlene at Organized Clutter: Thrift Store Stacked Boxes Makeover
That’s ME! You are here! Vintage Garden Bench Makeover
Sarah at Sadie Seasongoods: Shamrock Decor from Vintage Wooden Bowls
Christy at Our Southern Home: Thrift Store Urn Table Scape
Gail at My Repurposed Life: How to Paint a Wooden Mirror Frame
Kathy at Petticoat Junction: Bird Nest Vintage Water Dipper Display
Maryann at Domestically Speaking: DIY Wood Bowl Candle
Cindy at Reinvented Delaware: Melamine Serving Tray Makeover
Kristin at My Uncommon Slice of Suburbia: Succulent Terrarium using Embroidery Hoops


You really worked some magic on this piece. It turned out beautifully!!! Love the blue on it.
Thanks Christy! I’m happy with it.
Very cute makeover. I’m loving it.
Thanks! I appreciate you stopping by!
Super fun project, Suzanne! Colorful and rustic!
Yes! That was the goal. Thanks!!
I love how you finished it! I love those pops of blue.
Thanks! I’m such a blue girl!
What a unique piece, you really gave it an amazing updated look!
Thank you! I’ll probably add some more color once we get the deck decorated.
I love the colors of the reclaimed wood. The vintage bench is so adorable. Hope you get it on the deck soon. I’m so tired of winter!
pinned!
gail
Lol! Looks like one more cold spell then we are golden here!
Great makeover Sue! I love the blues you chose for the wood.😊 Pinned!
Thanks Cindy!
I always love your colorful projects! Thanks for showing us a great way to update an old bench!
Thanks Pam! I’m enjoying our team!