DIY Spring Door Wreath from Vintage Handkerchiefs
As an Amazon Associate and member of other affiliate programs, I earn from qualifying purchases.
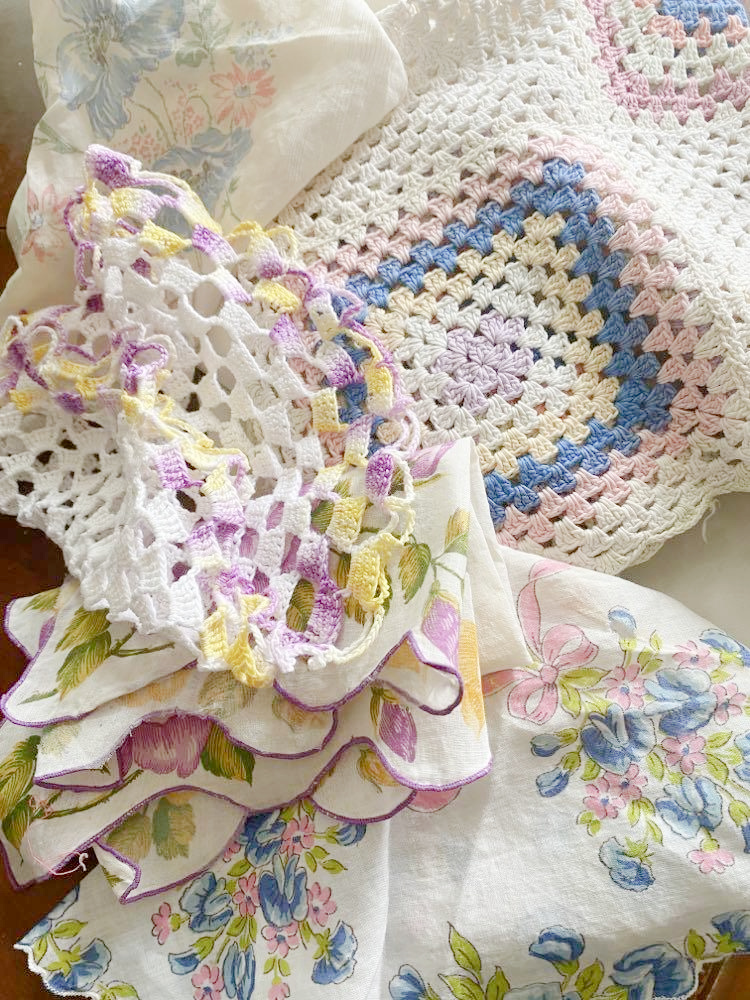
I recently stumbled upon a collection of vintage handkerchiefs that were in my garage. My vintage loving soul felt the need to create. So here is my tutorial on how to DIY a spring door wreath from vintage handkerchiefs.
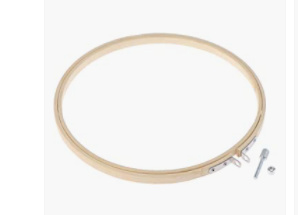
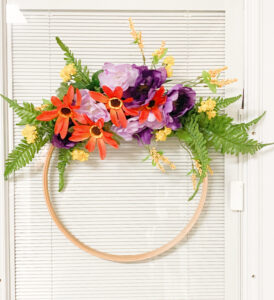
I am using a large embroidery hoop as the base for the wreath. They come in many sizes. An embroidery hoop is basically one unit consisting of two round wooden hoops. The smaller hoops nestles inside of the larger hoop. A piece of fabric is stretched between the two and clamped into place. It is an ideal tool for creating embroidery. I am using a 16″ hoop for my wreath. It really is the perfect size for a DIY spring door wreath!
If you don’t want to destroy the handkerchiefs, you can simply insert them into the hoop rather than cut them or alter them in any way. At the end of the project, tape the excess fabric to the back of the hoop.
Prep Work
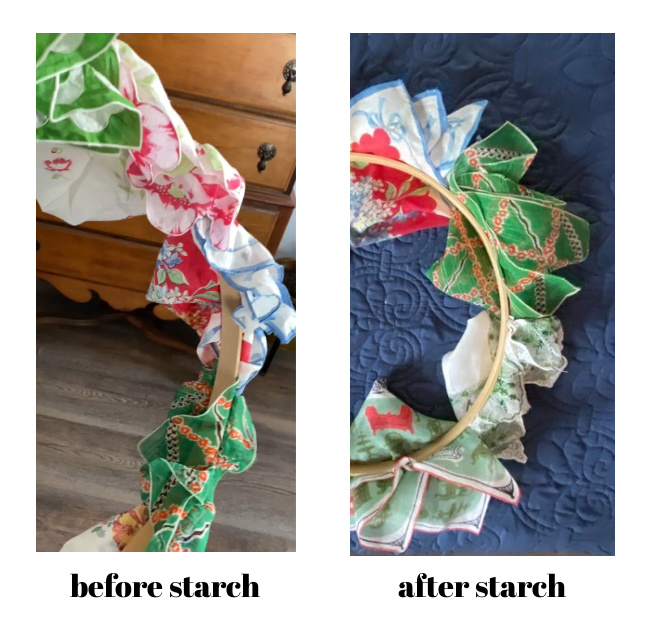
Start by ironing and starching each handkerchief. This will give them a stiffer texture allow them to stand up nicely along the edge of the hoop. Without the starch, they will be limp and will not stand up allowing you to see the patterns and colors. Who wants a limp and wilted DIY spring door wreath??
Assembly
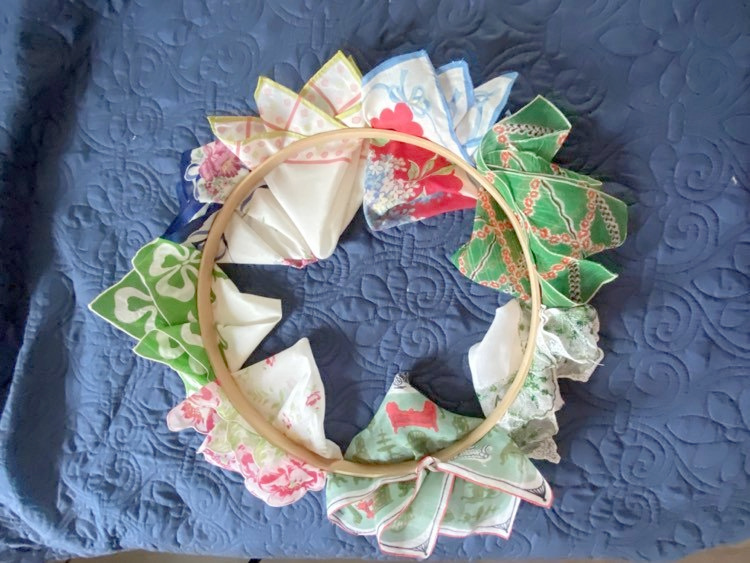
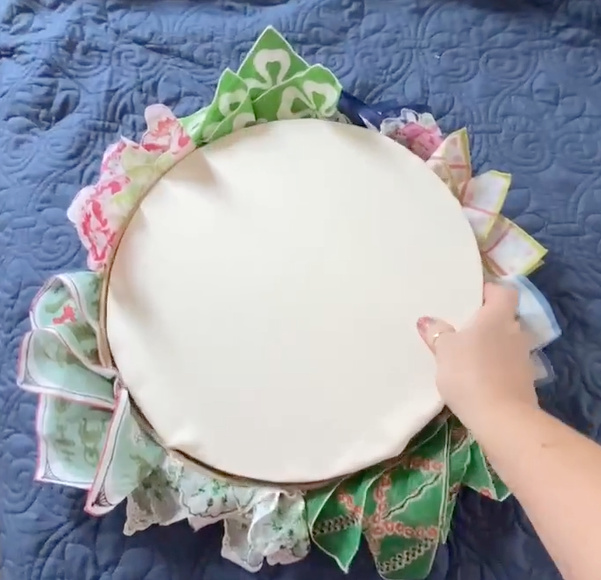
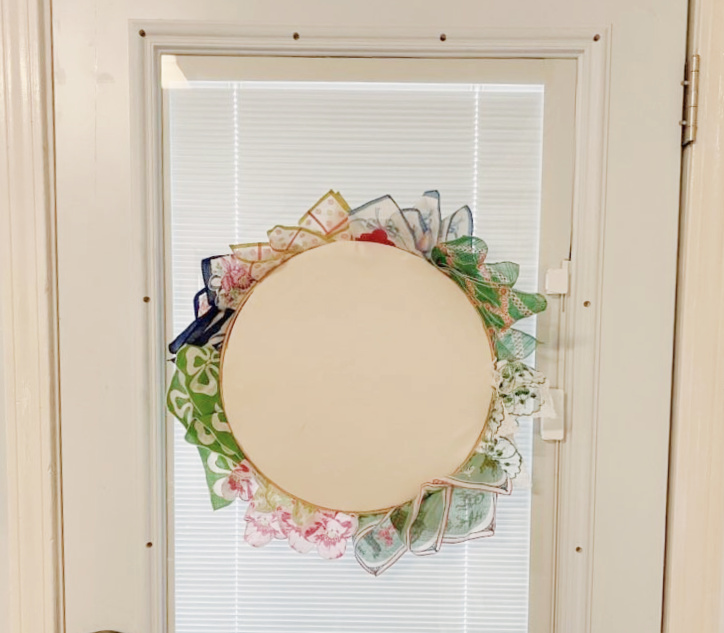
After ironing, fold or scrunch each handkerchief and lay it on the hoop laying the pointed ends facing outward along the edge of the hoop, essentially forming the circle of the wreath. Move the hankies around until you are pleased with the color pattern.

Once you have your pattern, carefully place the inner hoop inside of the outer hoop to secure the hankies into place.
Adding a center to the wreath will cover the excess fabric from the hankies. Trace the inside of the wreath onto some cardboard and cut out the circle.
 Next, cut a piece of fabric to cover the cardboard circle. Attach the fabric by stretching it across the cardboard and over the edges. Use hot glue to secure the edges of the fabric to the back of the cardboard circle. I used my Ryobi cordless glue gun.
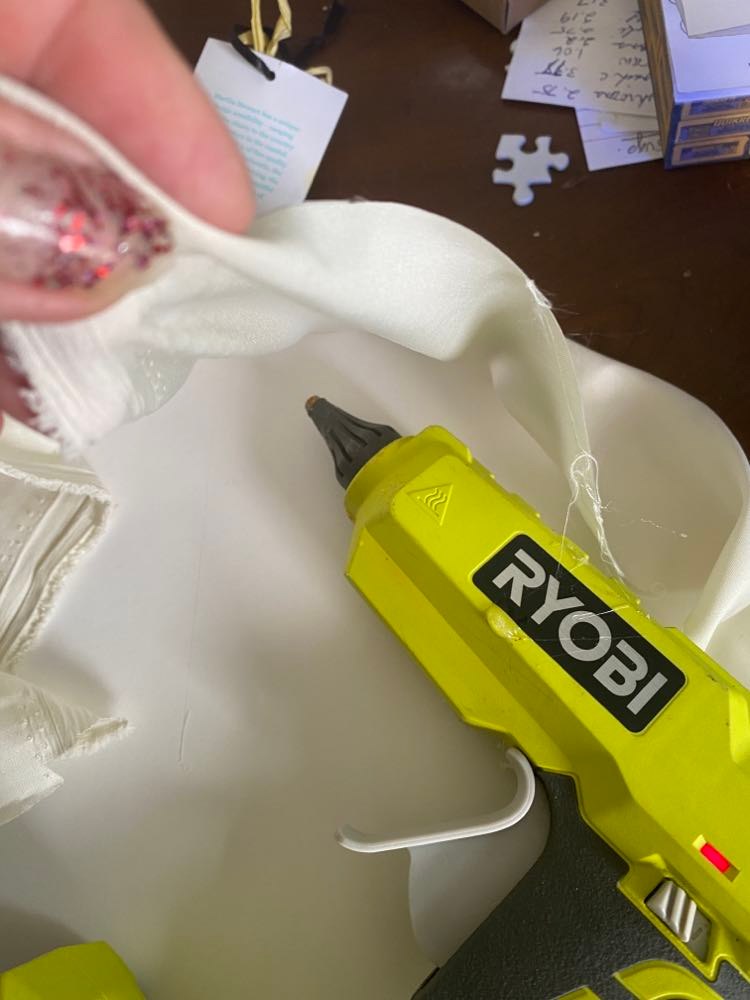
The fabric covered circle should fit snugly on top of inside of the hoop. Hot glue it into place by applying hot glue to the back edges and set it into place on top of the hoop.
Embellish
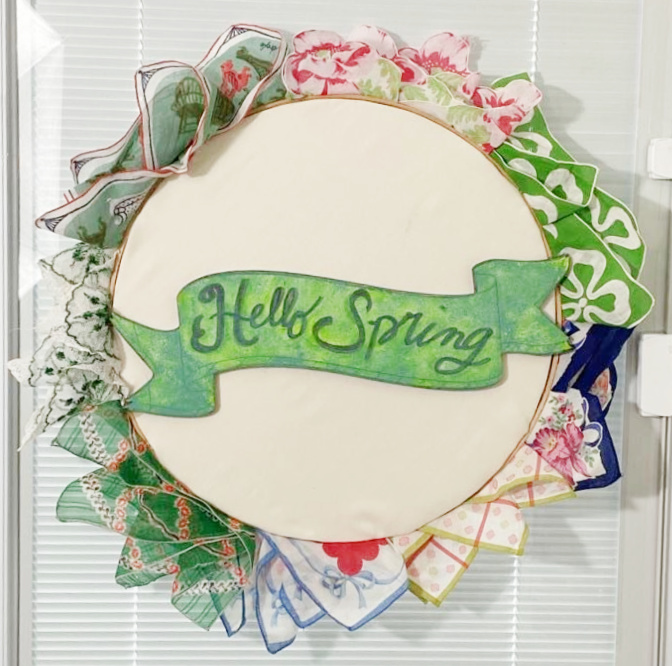
You can leave your wreath as is or add a sweet message to the center. I found this little wooden blank sign at Hobby Lobby.
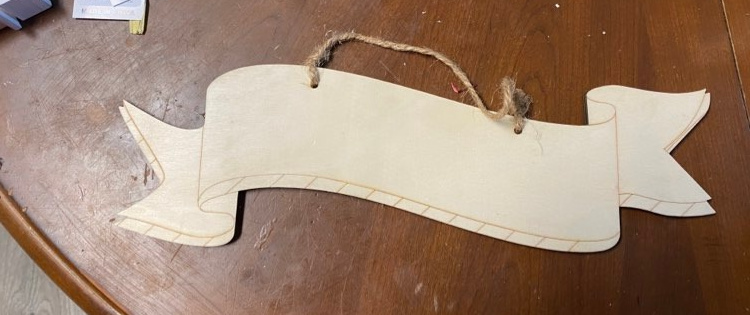
I filled the holes with wood putty and sanded the surface smooth. Two coats of Rustoleum2X white spray paint with primer and the sign was ready for a message.
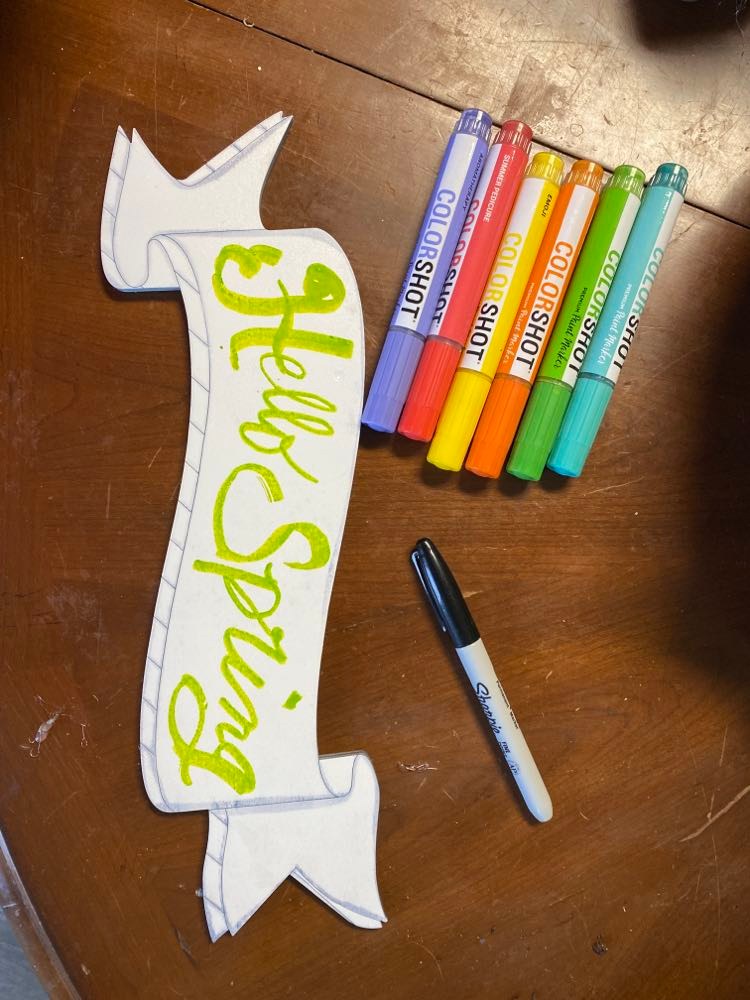
I used my Colorshot Paint markers to write a little message.
After the sign was completely dry, I hot glued it into place with my Ryobi cordless glue gun…one of my favorite Ryobi tools.
Since I didn’t cut the hankies, I used some packing tape to secure the excess fabric to the back of the circle to keep the extra fabric flat.
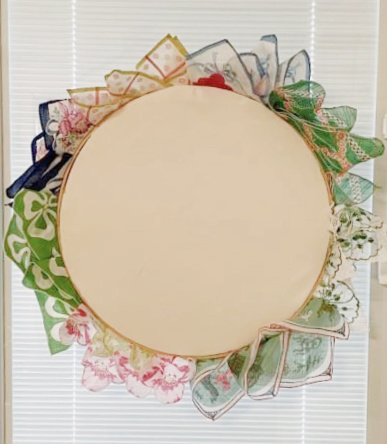
And here she is before the sign…
And after…
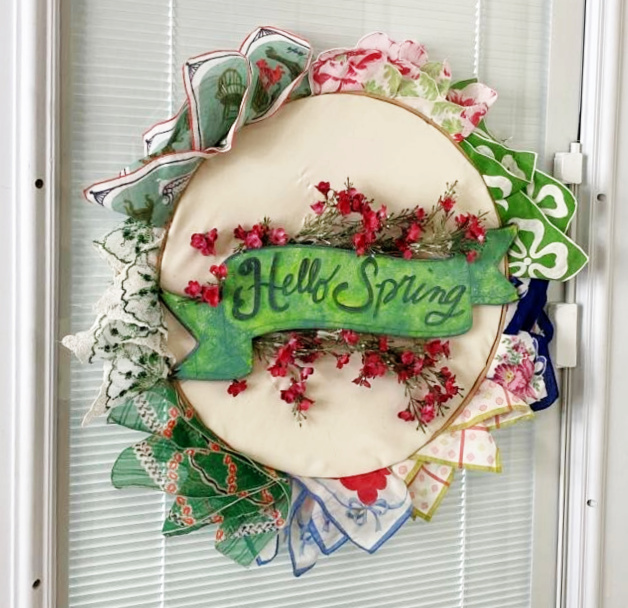
I thought the banner needed something more so I added some flowers. I’m torn between using the sign and leaving the center empty. What do you think?
Now I can enjoy these vintage beauties. So much more lovely than sitting in a box in a garage!
If you enjoyed this project, you will also love these other spring idea. Check out my post 5 Simple Ways to Add Spring to Your Decor.


Very Unique! So cute.
Thanks so much Rebecca!
This is such a beautiful and creative way to celebrate Spring, Sue! Hope your season is a special one, CoCo
Thanks CoCo! You too!
Cute wreath with the Vintage Handkerchiefs.
Thanks Tammy!