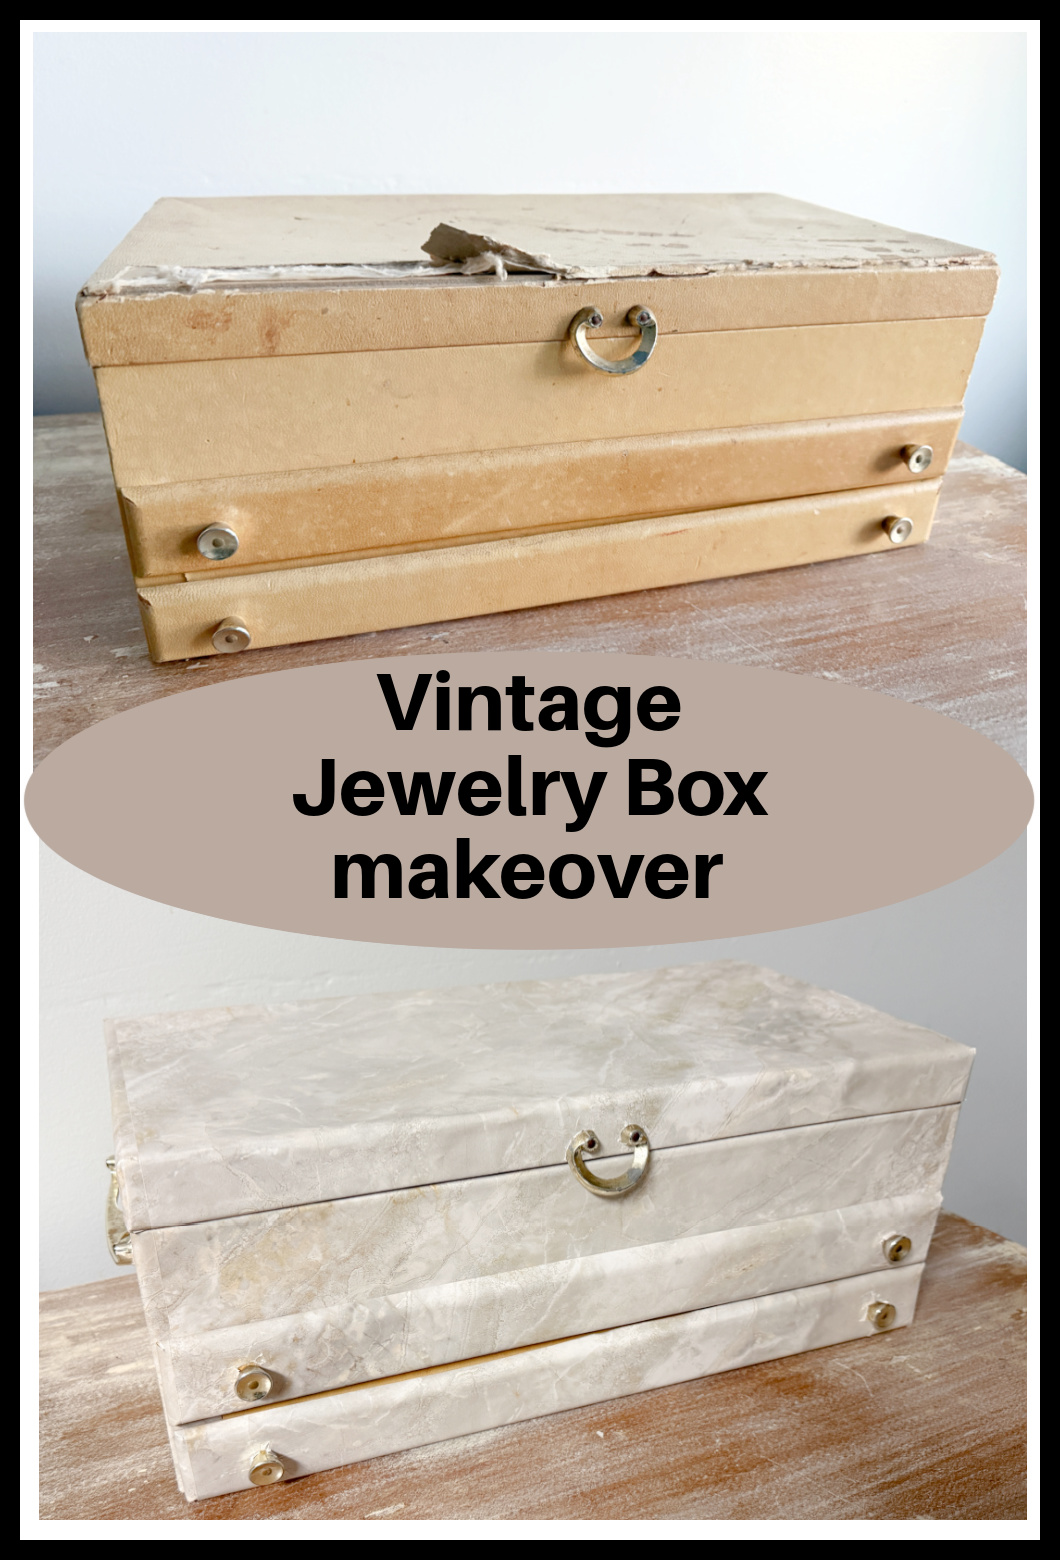
Mom’s Vintage Jewelry Box Makeover
As an Amazon Associate and member of other affiliate programs, I earn from qualifying purchases.
This vintage jewelry box has been in my closet holding bits and pieces of old costume jewelry that I have accumulated over the years. At one point, it held all damaged jewelry, earrings that had lost their partners, and a vast array of wonky jewelry that I could not discard. I mean, when I’m ready to finally start creating with all of this junk, I will certainly need that orphaned earring and the clasp with the broken lobster claw, right?
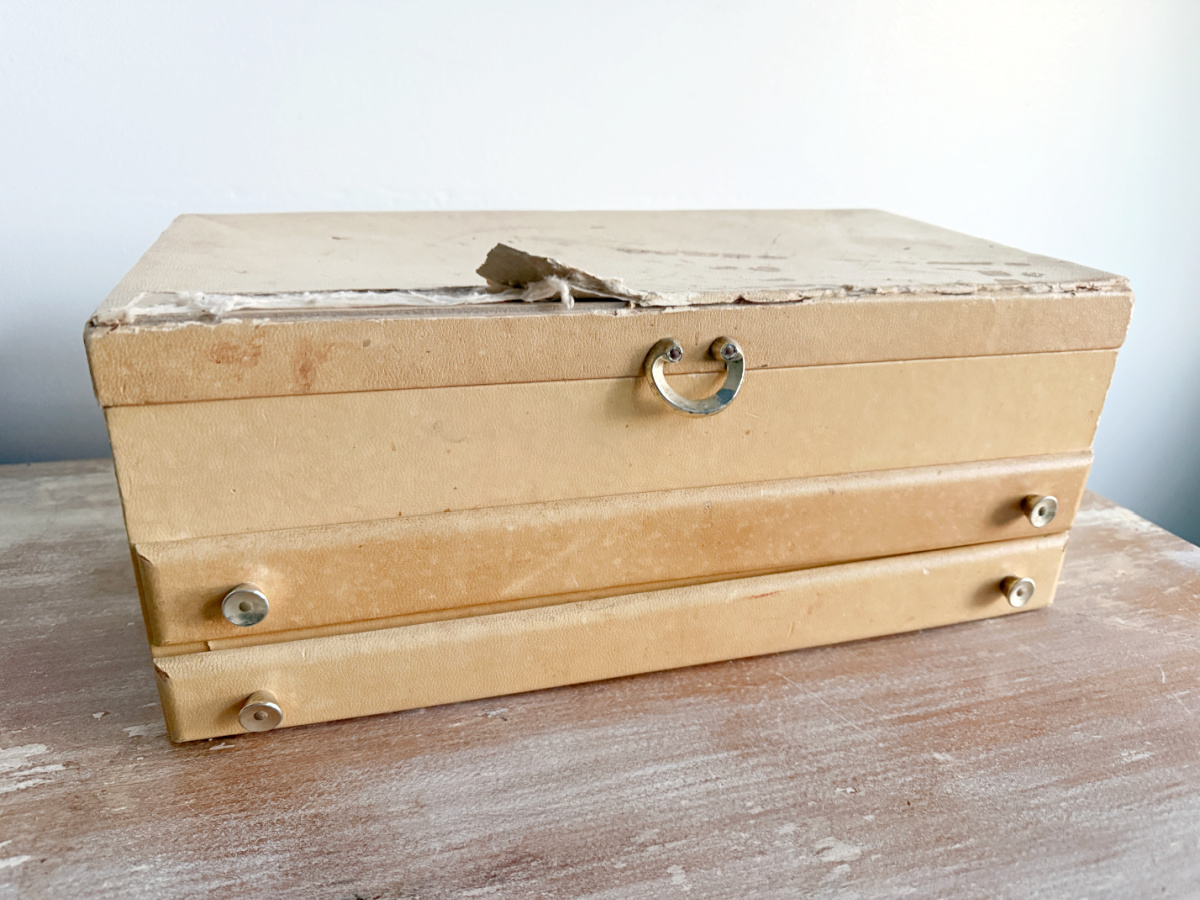
I am an only child so my parents entertained me quite a bit. When we weren’t playing games or in Dad’s workshop, I was seeking creative fun in all of the corners of our sweet Philadelphia home. I dug through closets, under beds, through sewing kits and cupboards. But my favorite quiet time was spent in Mom and Dad’s bedroom, perched on the end of their full sized bed sorting through Mom’s vintage jewelry box. Inside, I found the stories of Mom’s past. There were trinkets and memories. Each one had a history.
Years ago, in the ’80’s, Dad bought Mom a new jewelry box for Christmas. You know, one of those fancy wooden 1980’s taller jewelry boxes with the swivel carousel hook for necklaces and a fancy place to put your rings. Of course, I grabbed Mom’s old vintage jewelry box. Because I was documenting stories of my own.
Like those once gleaming pieces of jewelry, Mom’s vintage jewelry box has seen better days. Today is the day she gets her makeover. And, if we are talking renew, upcycle, and refresh, that means it’s time for this month’s Thrift Store Decor Team projects.
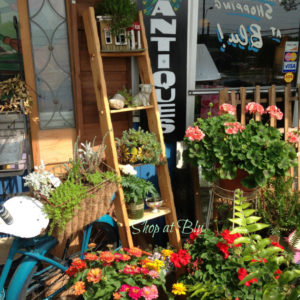
If you are new to Blu or the TSDT, we are a group of 9 creative bloggers who focus on the upcycle, repurpose, and reuse of older or previously used items. At the end of this post, you will find all of the other team projects. We share our posts on the second Wednesday of the month. This is our first post of the NEW YEAR! And we have some bloggers joining our fabulous group! What new skills will we share this year?? Tools, products, DIY skills and fabulous tips are our favorite. Hope to see you as a regular visitor. You can sign up for an email reminder at the top right side of this page! Let’s get to our project!
You see these vintage jewelry boxes at estate sales, yard sales, and flea markets. They are roomy and still the best way to store your jewelry. Mine will sit on a shelf filled with treasures when she has been restored.
Selecting a Finish
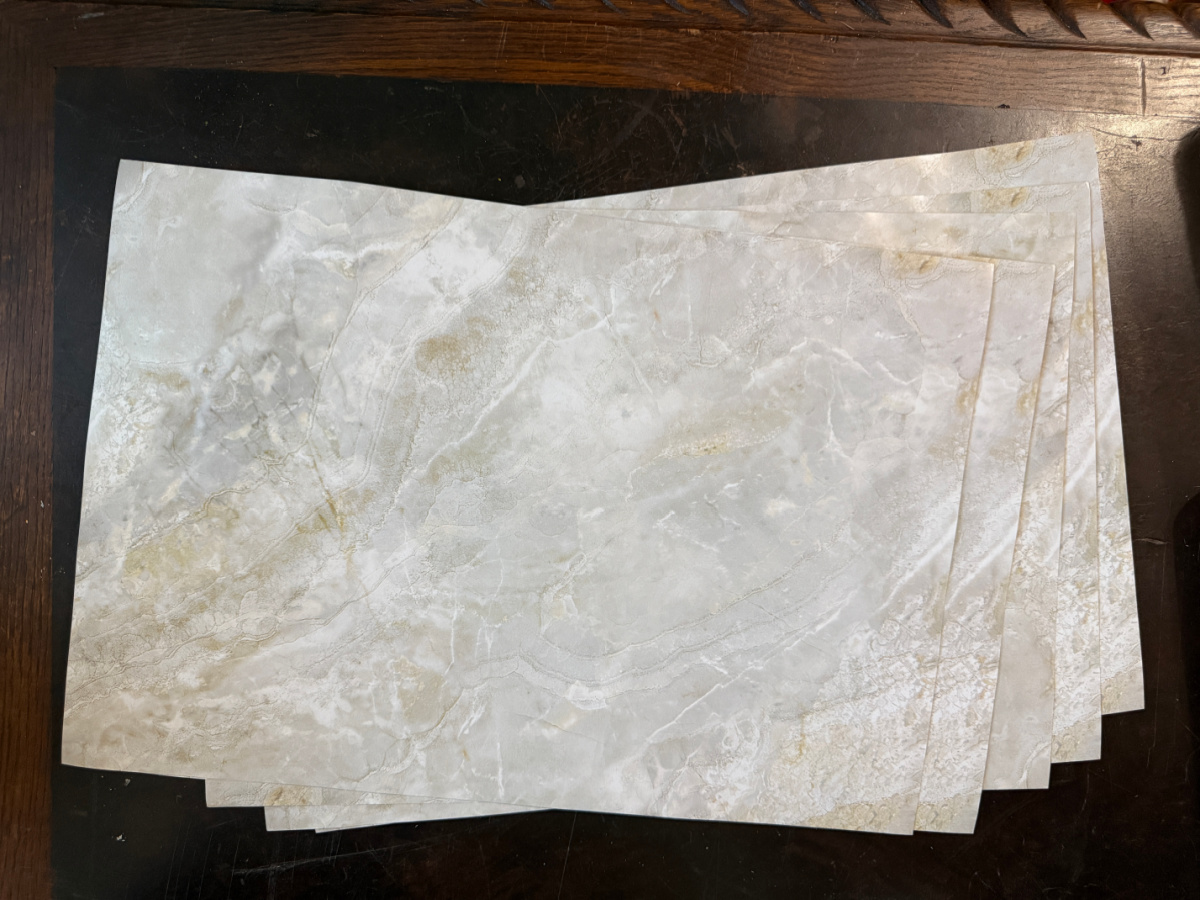
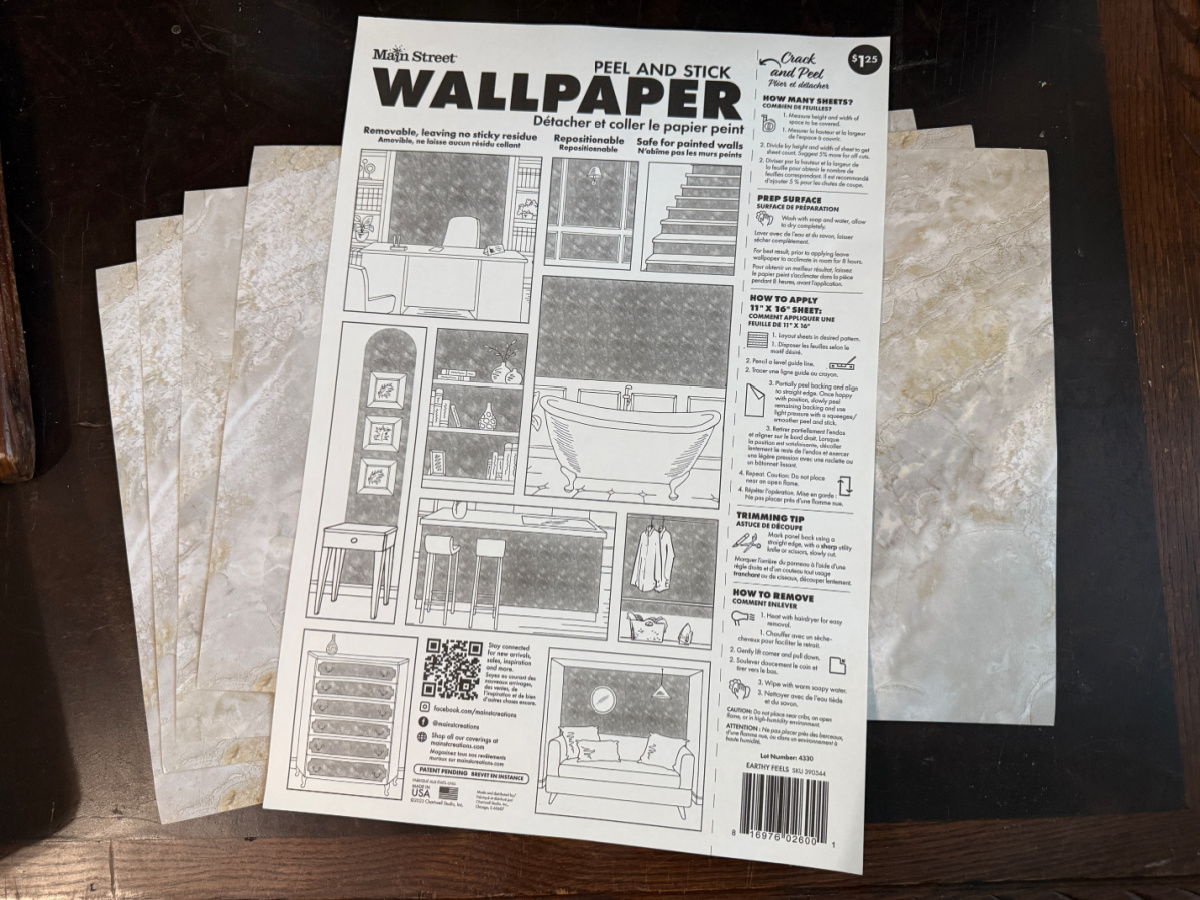
The Francophile in me loves loves loves marble. I didn’t want to paint this jewelry box so I decided to cover it. Dollar Tree had these removeable peel and stick wallpaper strips so I bought a few. Cheap, easy, and I think they will work.
The instructions are conveniently on the back and are very simple.
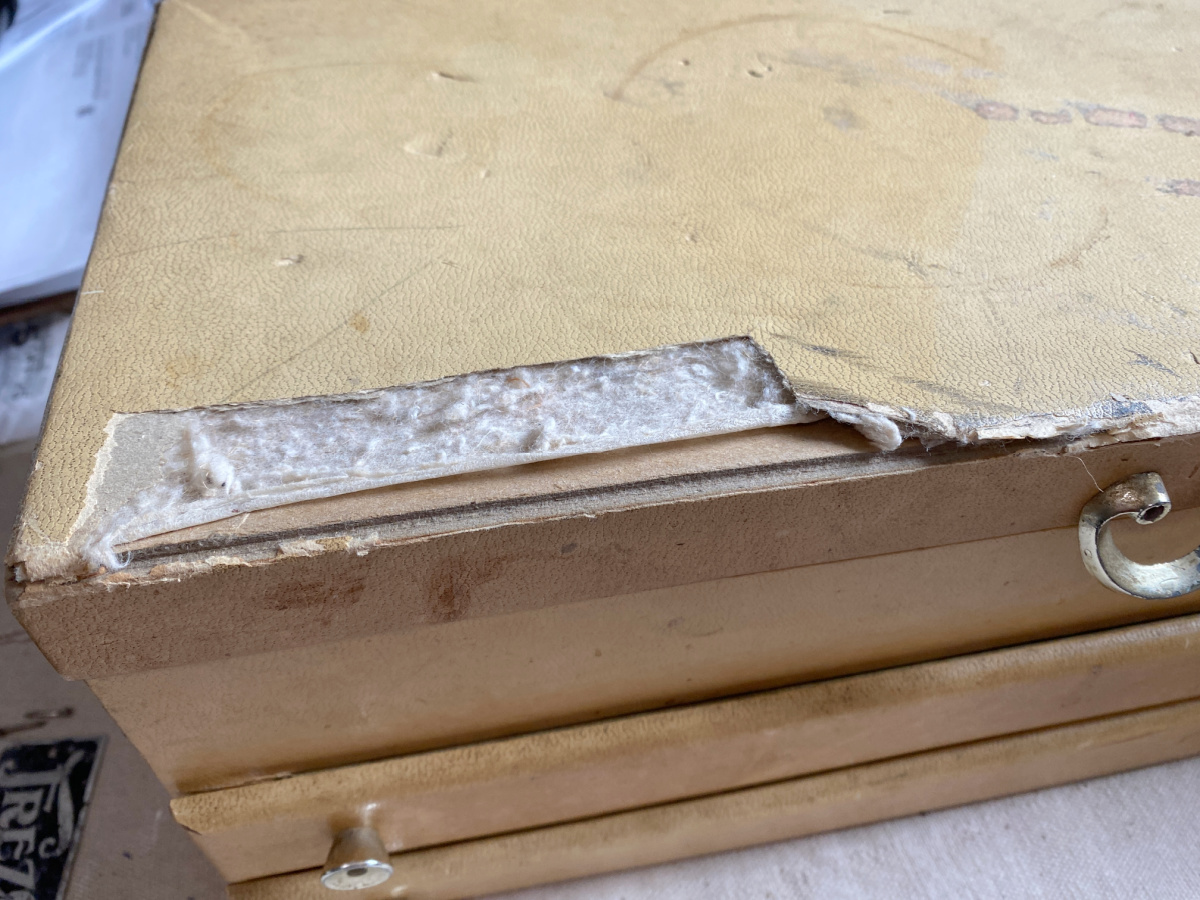
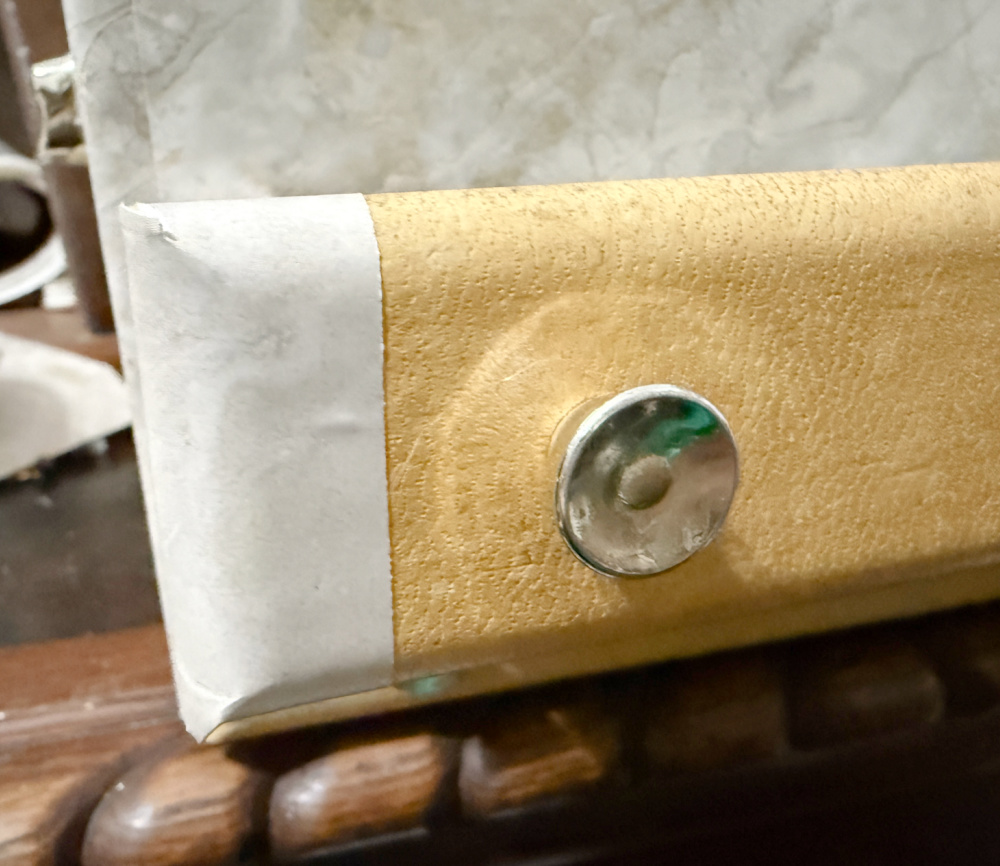
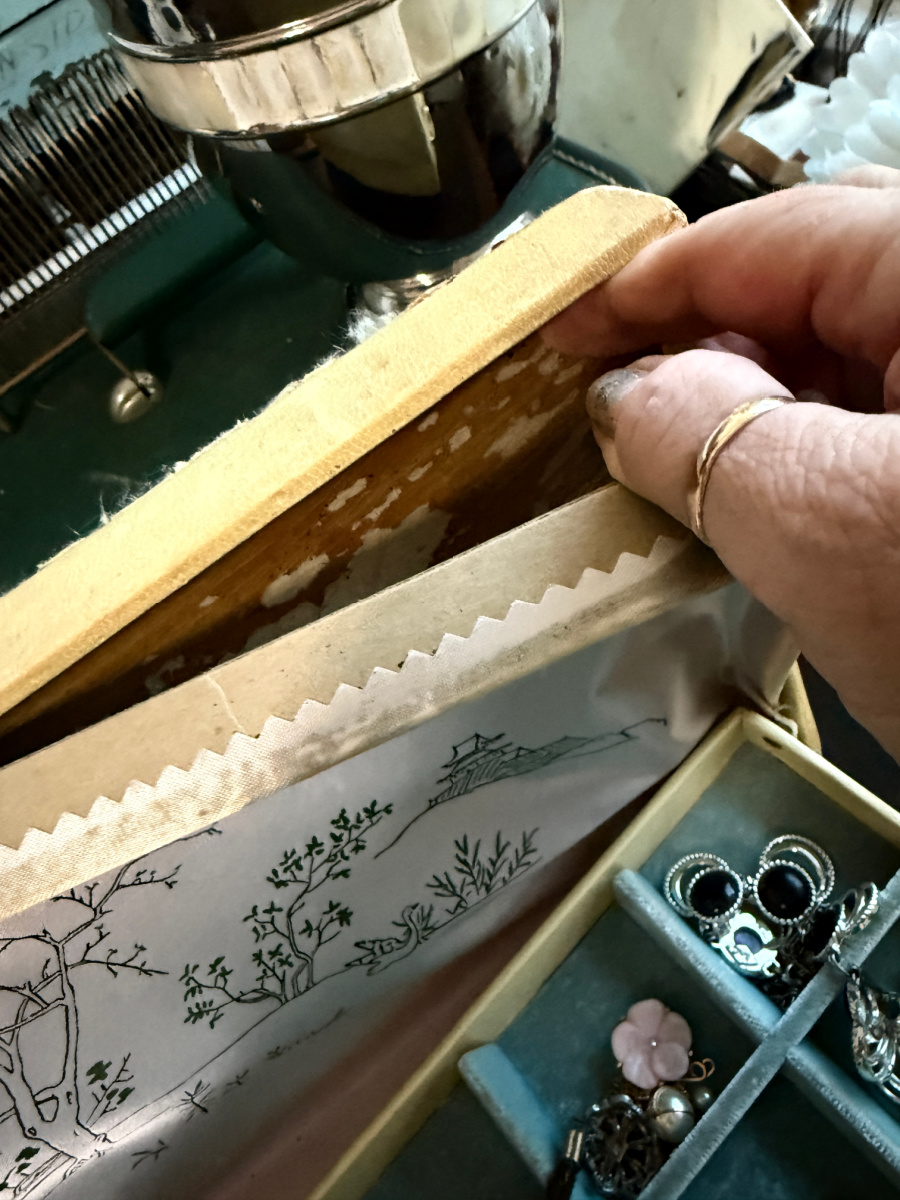
There is some damage to mom‘s old jewelry box. Somehow over the years, a corner of the top padding was actually ripped away. That is the part that is sticking up on the top.

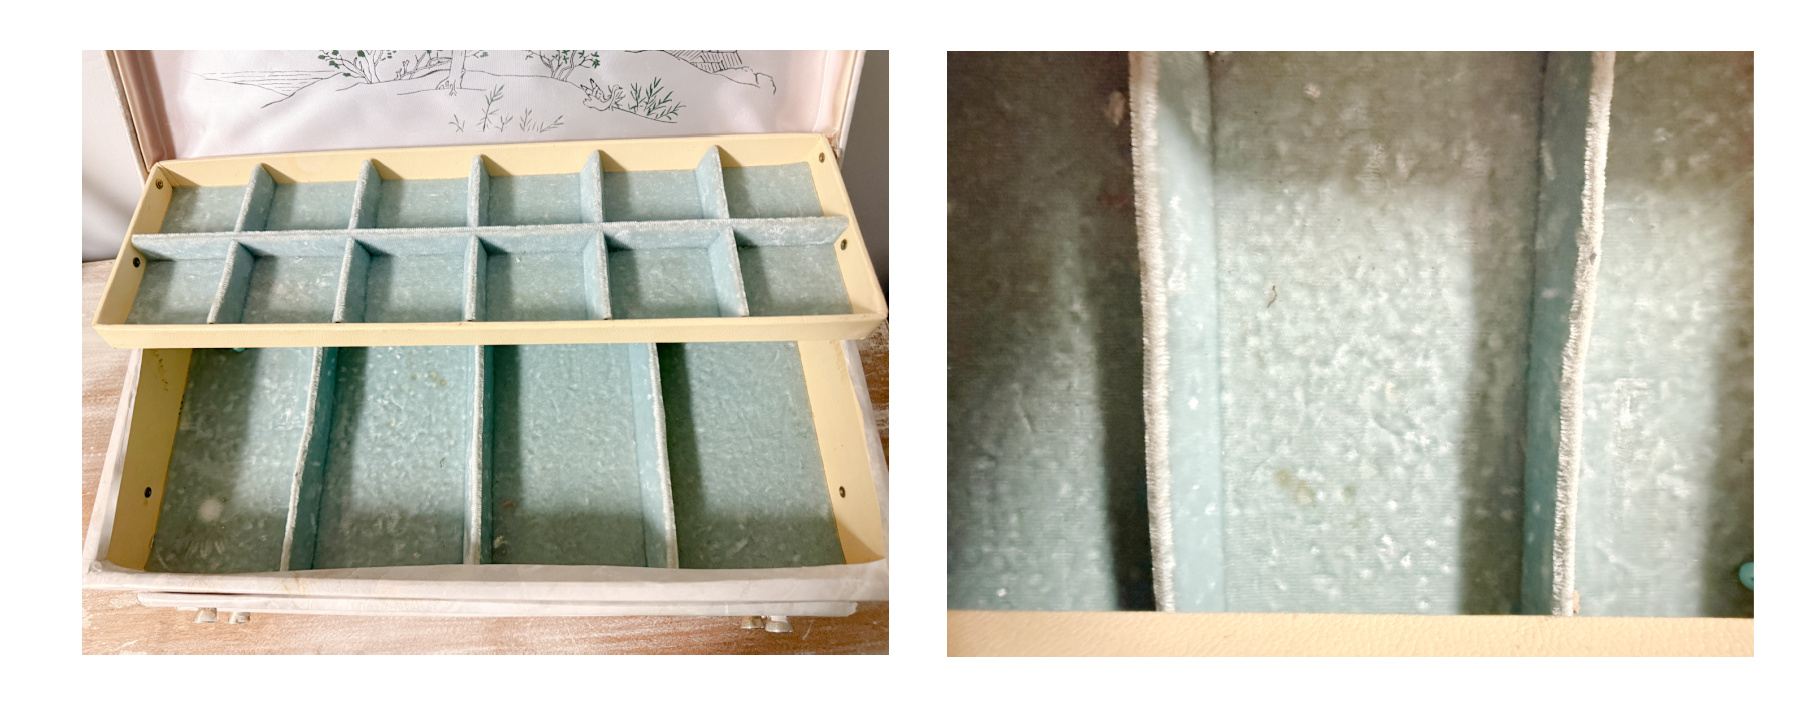
The inside shelf is a bit wonky so I’ll need to repair that.
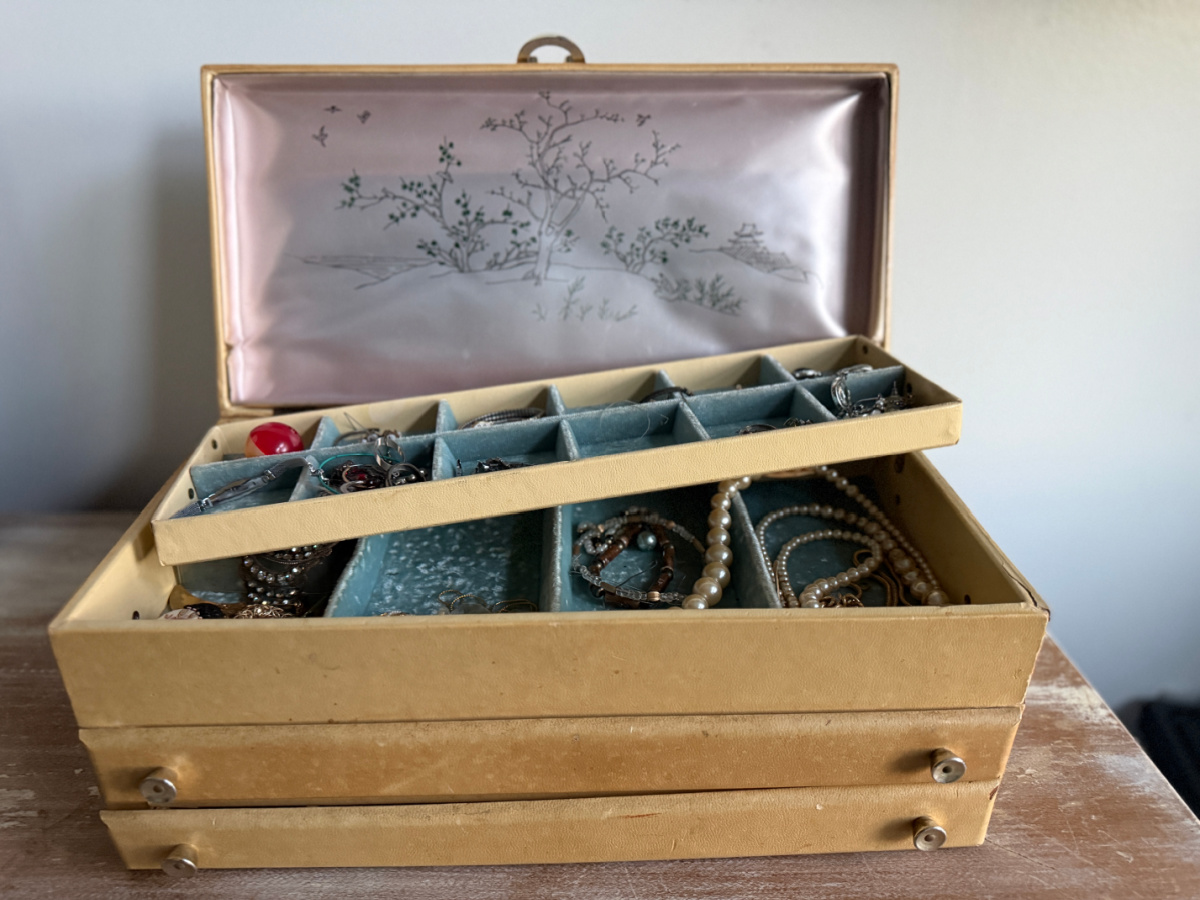
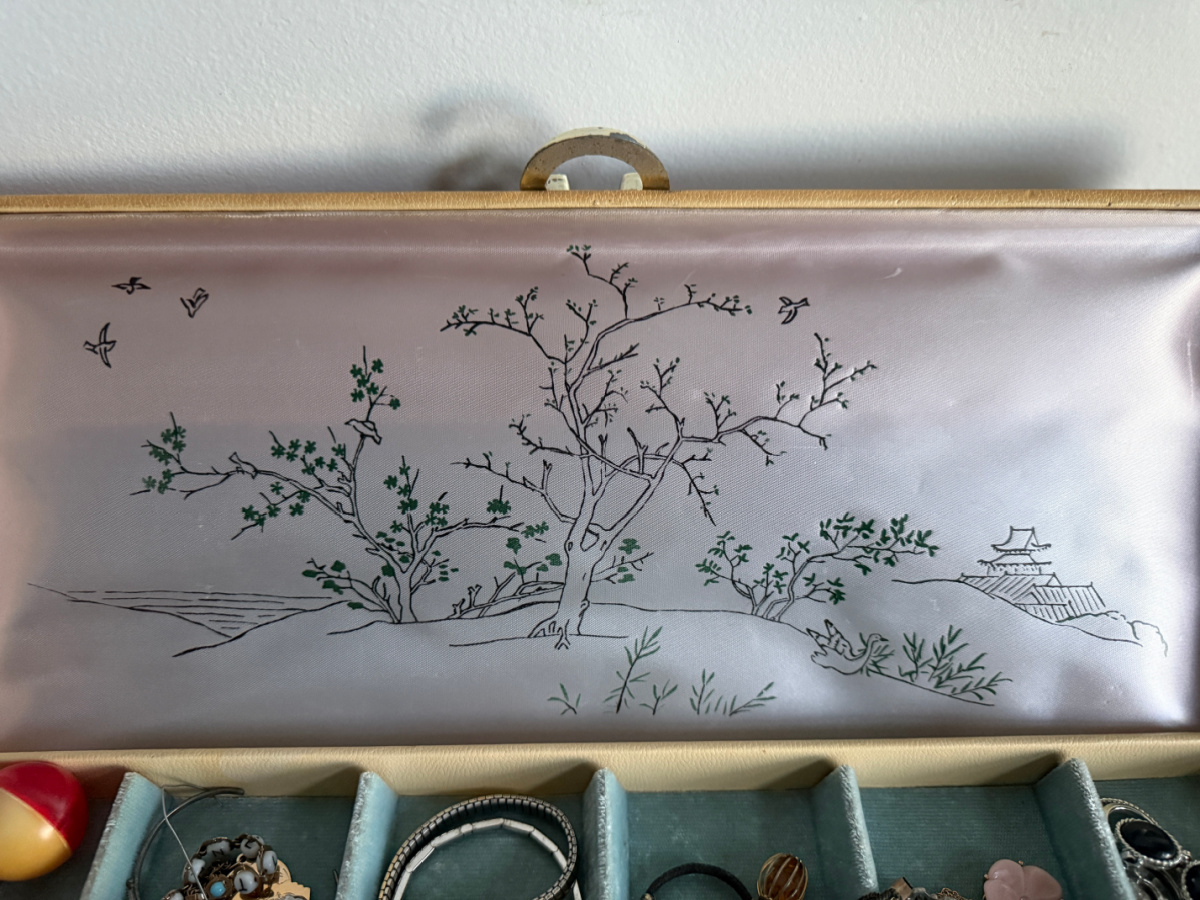
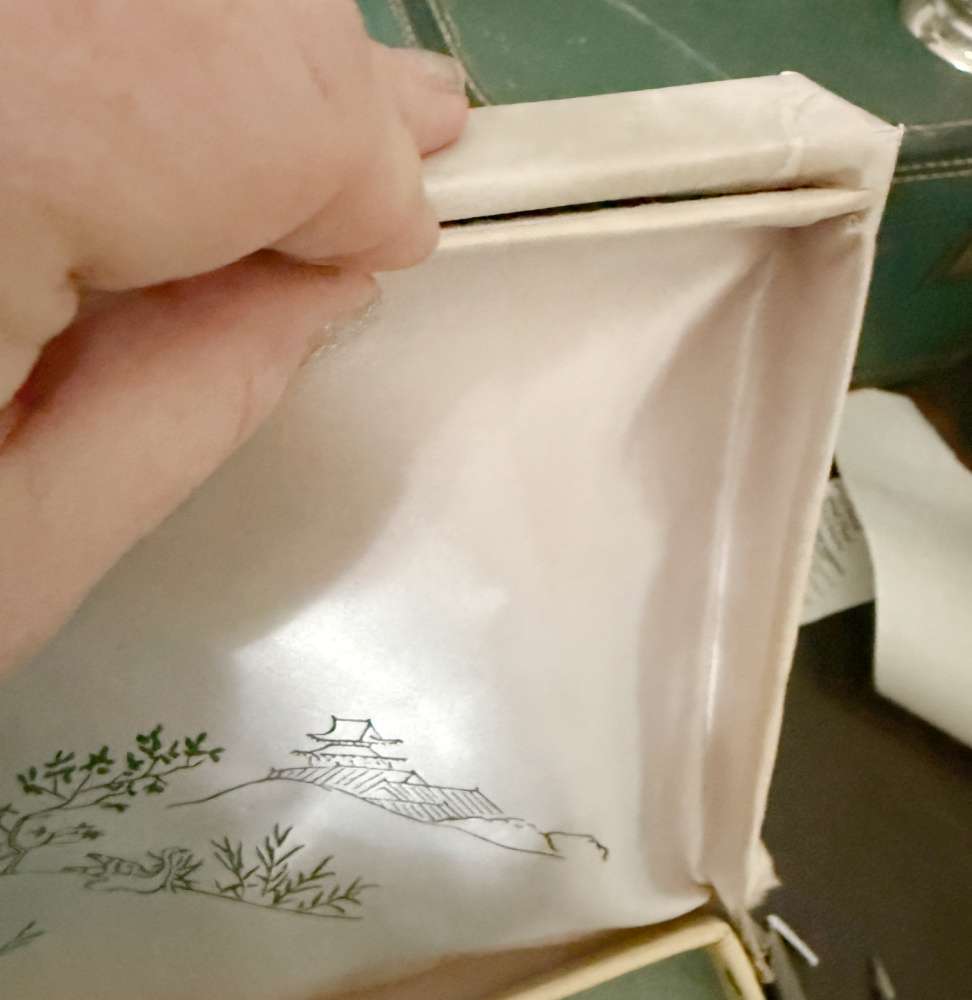
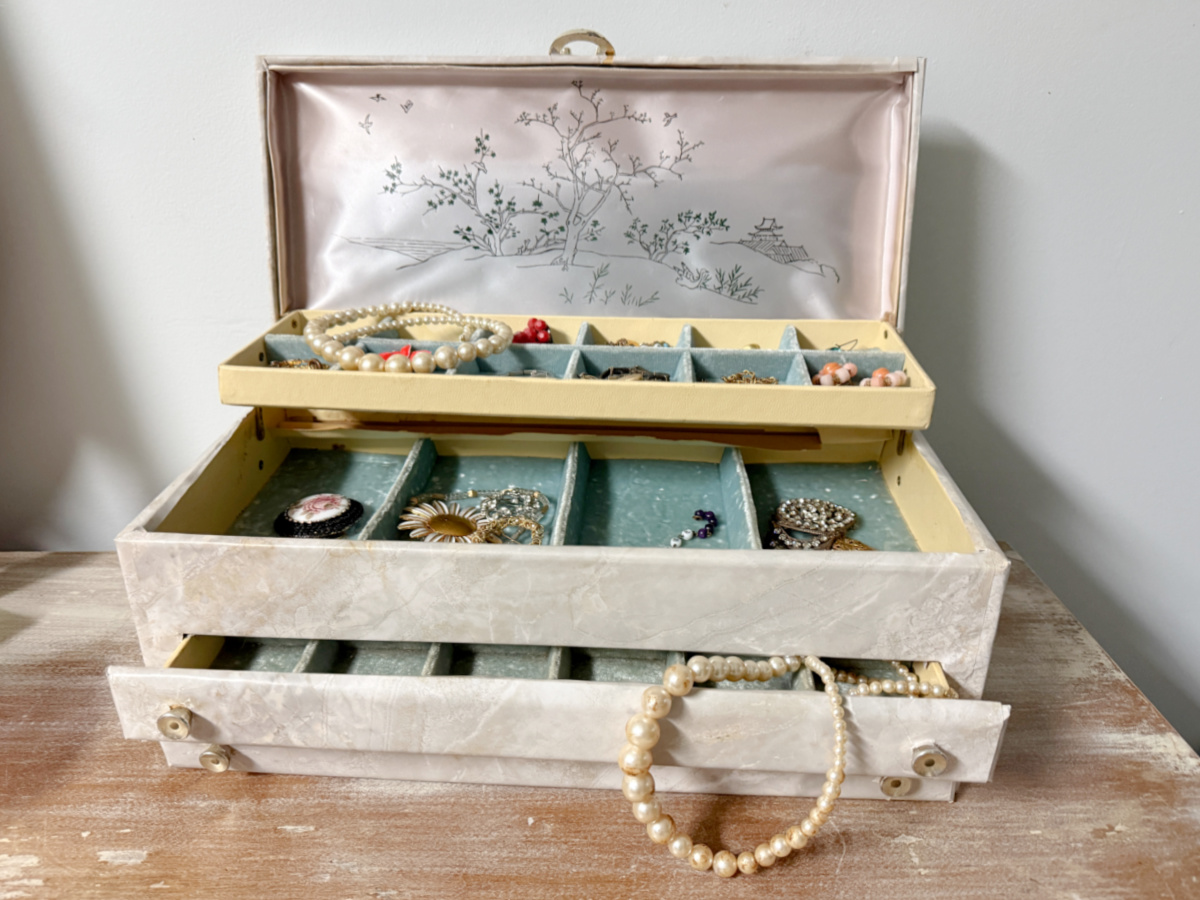
The interior is still lovely, for the most part. The beautiful Asian print on satin is just darling.
The velour is still a pretty aqua thought there are a few discolorations and some divots where weighty pearls and baubles have rested over the years. Other than that, I think she’s in great shape.
The length of this wallpaper sheet was just a bit shy of the total width of the jewelry box.

I will use one whole piece of wallpaper for the top and piece it underneath, hoping to match the pattern. When piecing I will want to minimize the seams. So I will add those smaller pieces first. We will see if I have enough product to match the patterns perfectly. Cross your fingers! Here we go.

I took a piece of the wallpaper and basically laid it over each drawer, each side, the back and the top of the jewelry box. The plan was to apply each carefully measured piece onto the surface and fold over behind the door fronts, the back, and the entire the jewelry box.
I folded the paper along each edge essentially making a creating a new panel for each surface on the jewelry box. Since the wallpaper was just a little short in length, I started with the section that would go under the longest sides. I measured and cut carefully. I began to lay the pieces into shape.
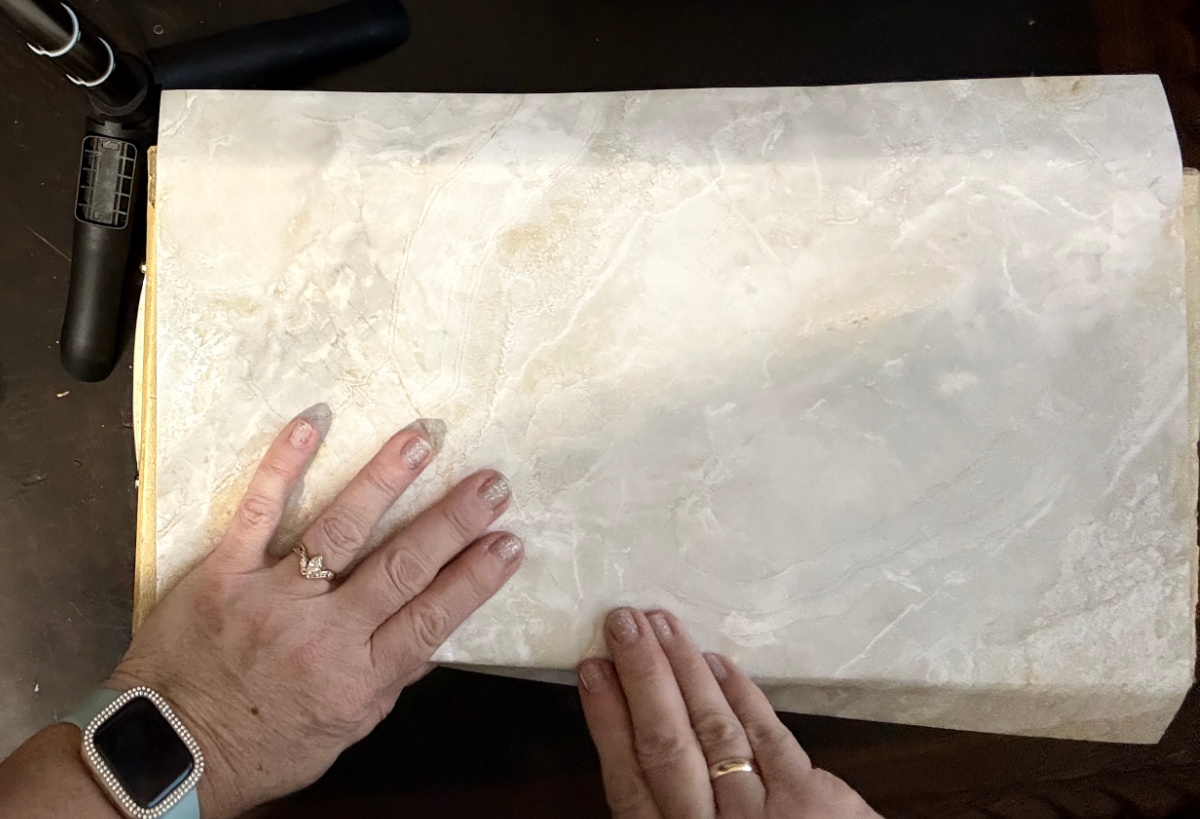
I made my way around the Jewelry box peeling, sticking, wrapping, folding, and tucking the wallpaper into place.
I took special care to wrap the corners smoothly.

And I was careful to try to match the pattern when the wallpaper had to be pieced.
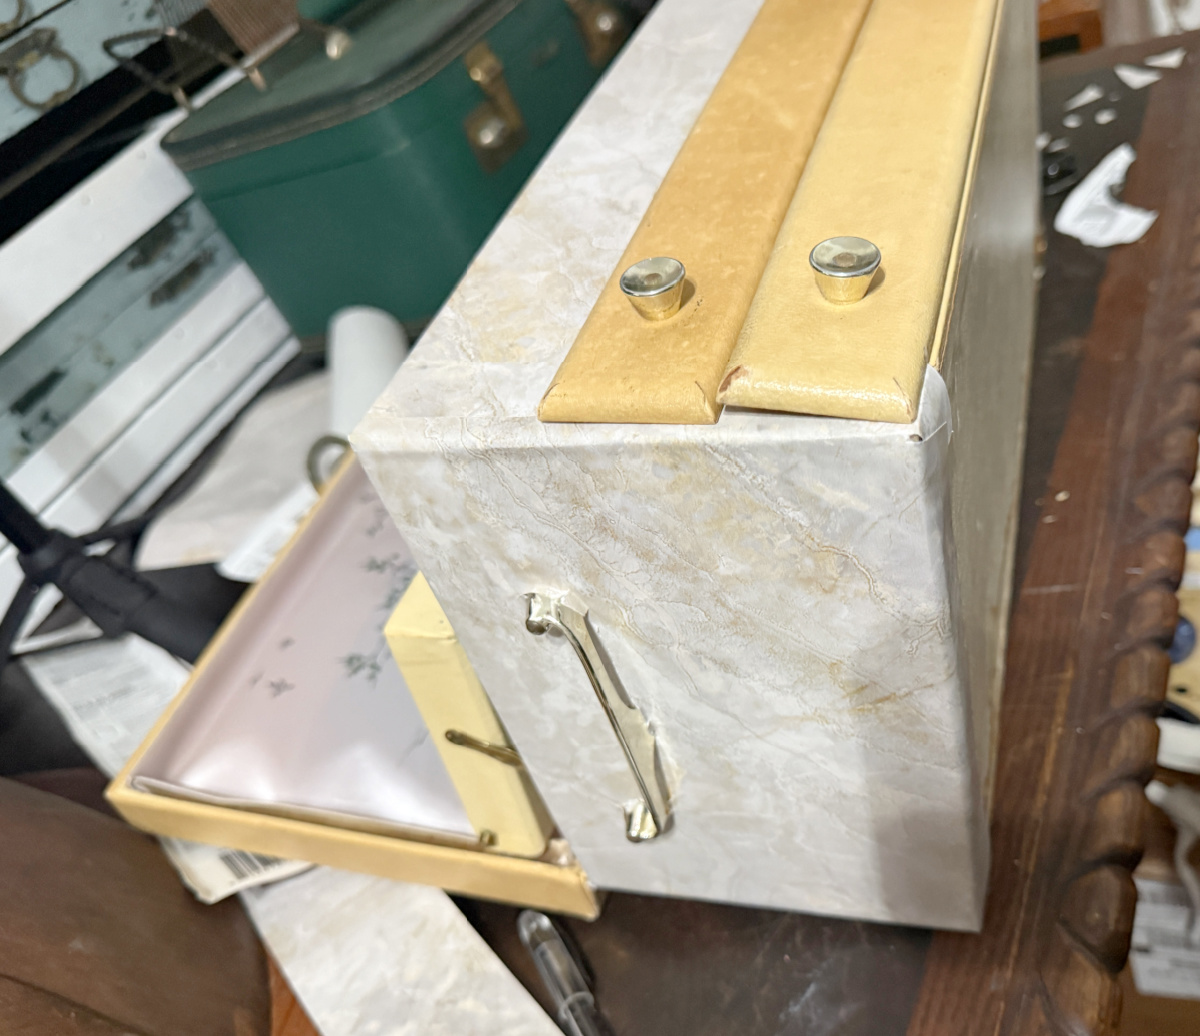
I did have to cut around the knobs and handles. But the process went pretty smoothly.
The beautiful decorative panel slipped off easily giving me access to the inside edges of the lid.
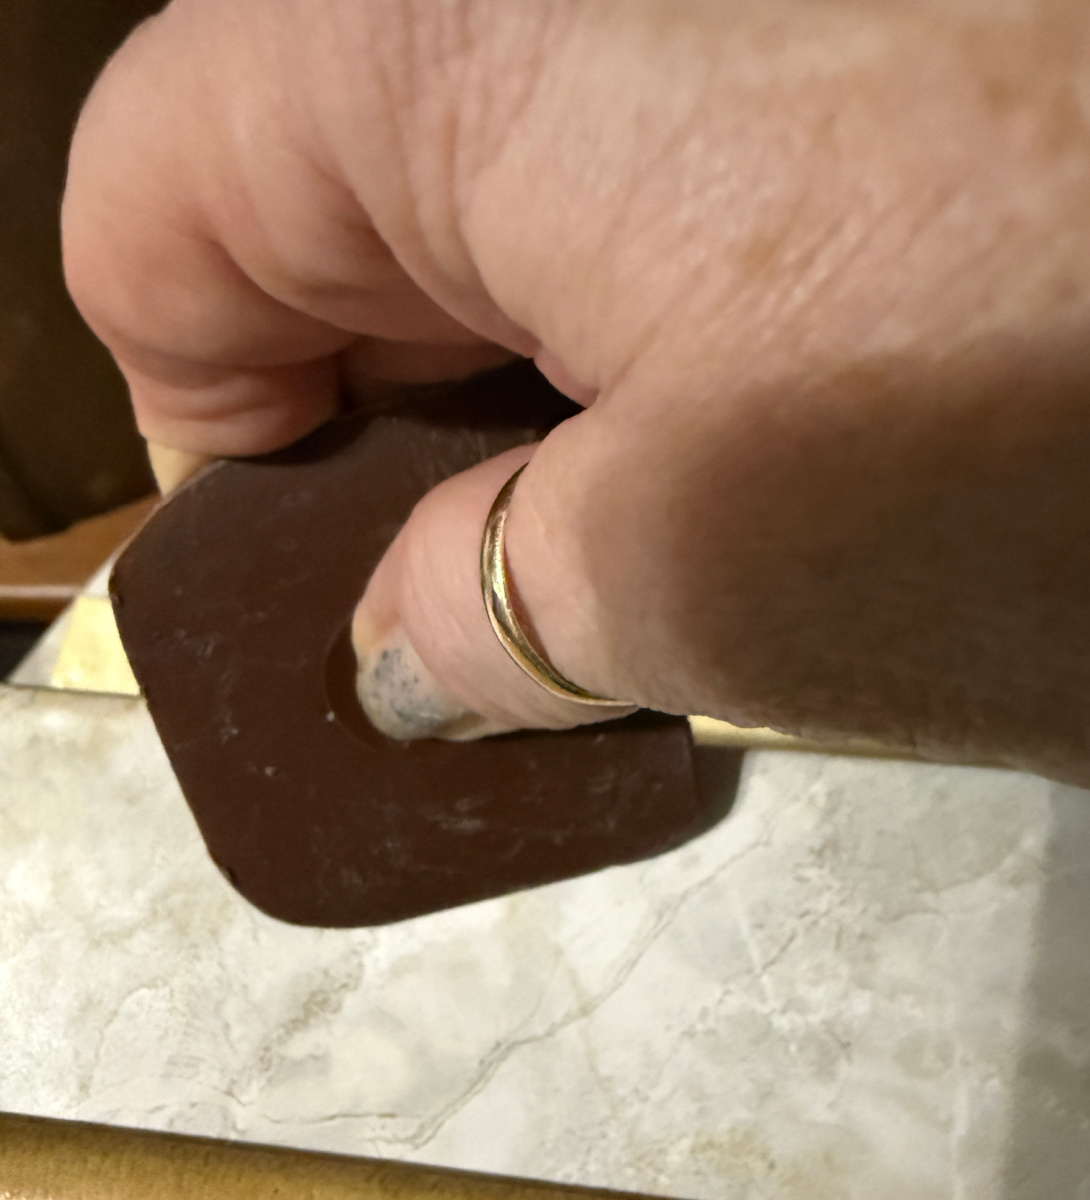
I used my handy dandy vintage Pampered Chef scraper to burnish the entire surface ensuring a secure bond of the wallpaper to the jewelry box.
And the decorative panel slipped right back into place once the wallpaper was installed.
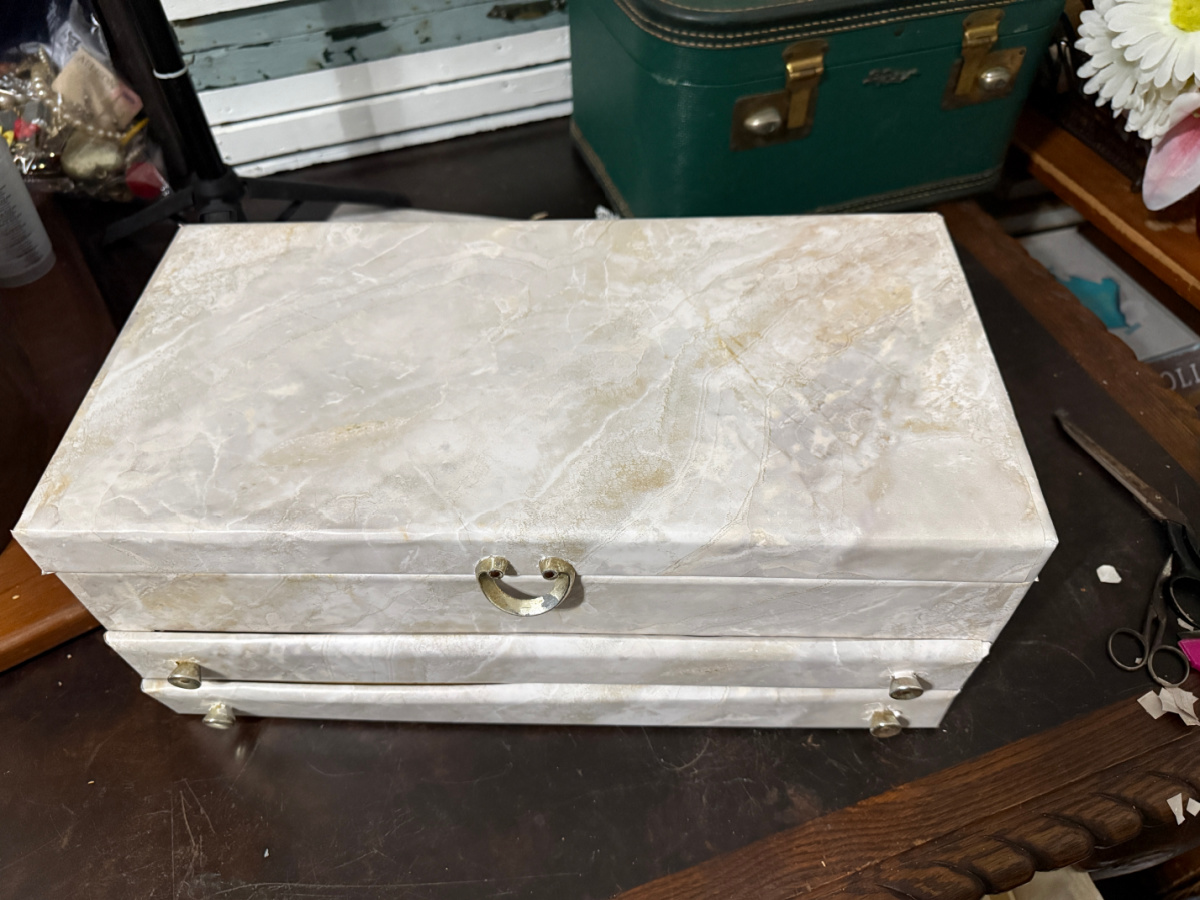
And here she is with her new look!
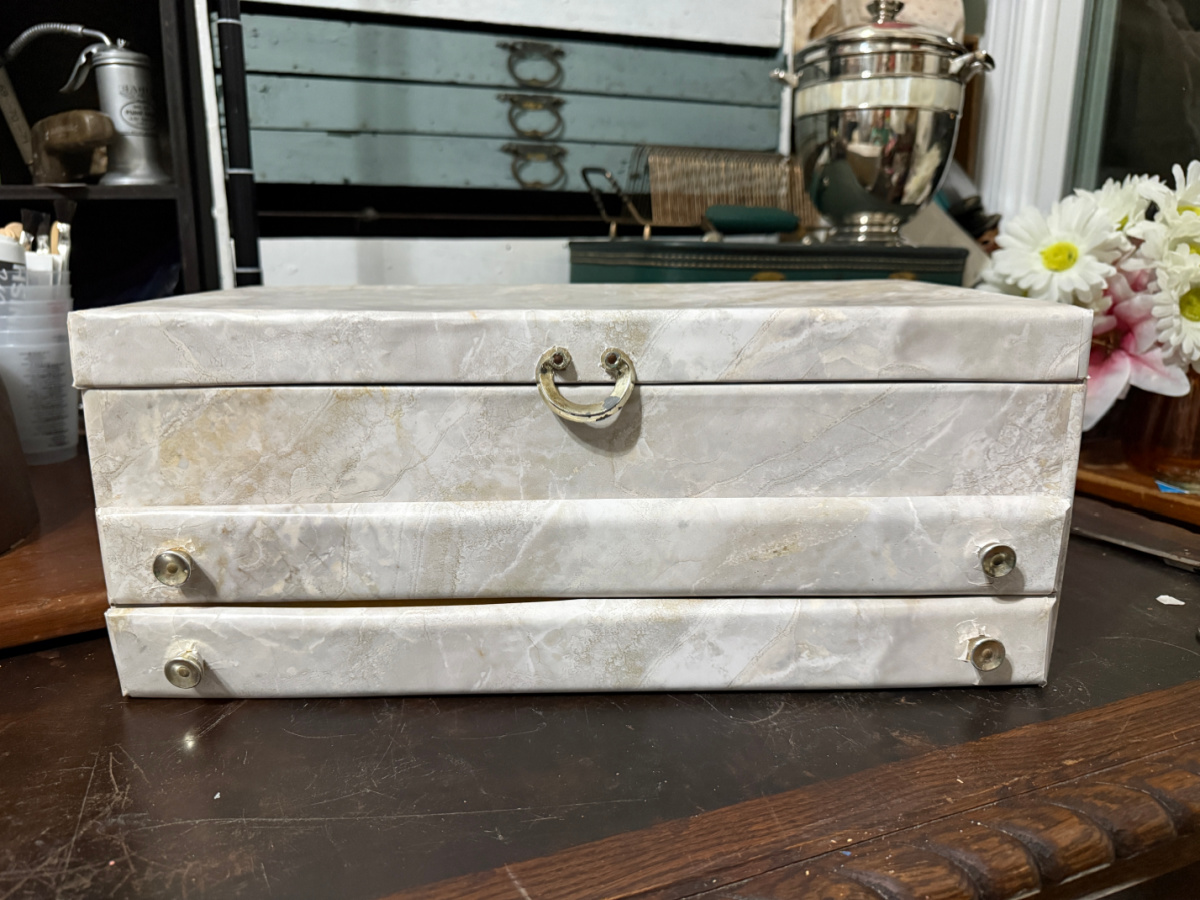
I have to say I am quite pleased!
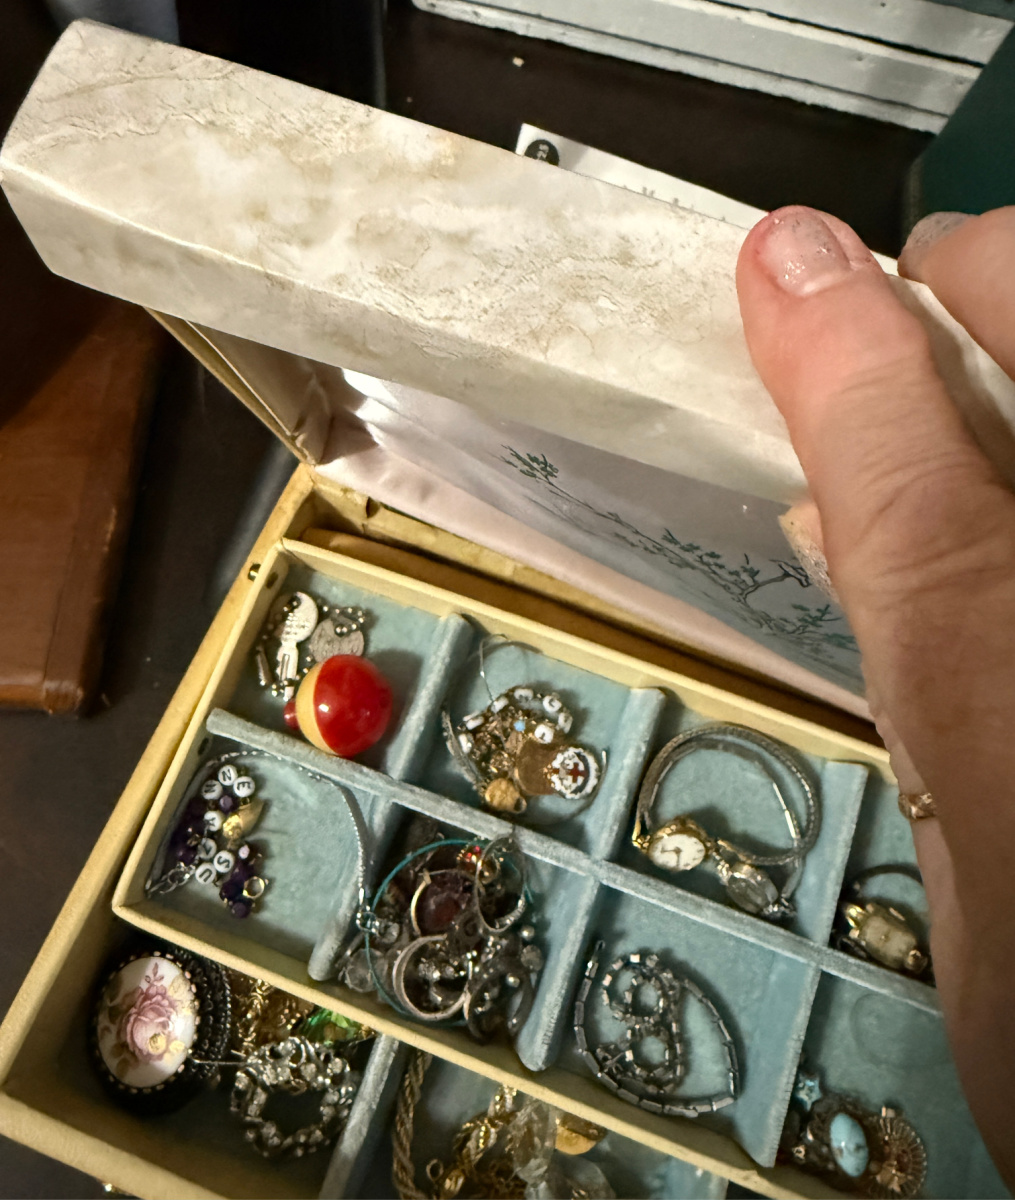
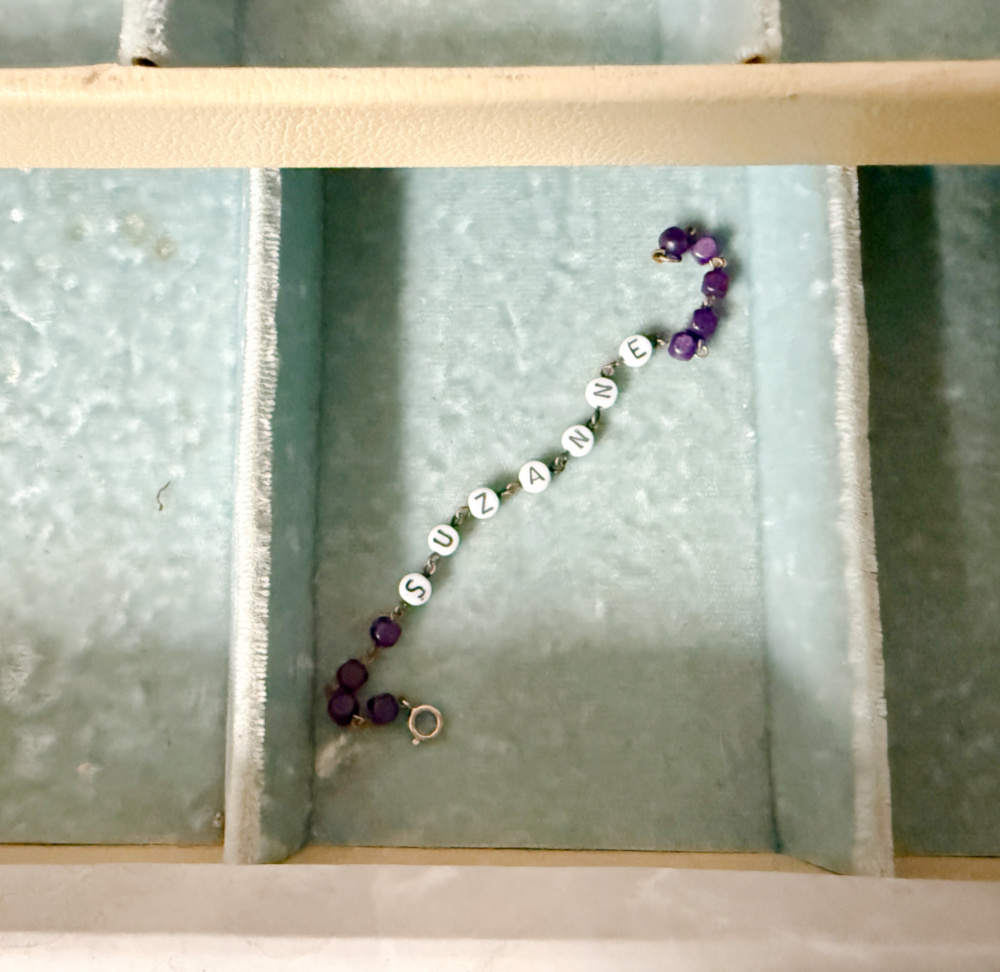
In this jewelry box, amidst the odds and ends, I found this little bracelet. When I was about 7 years old, my dad brought this home for me one day when he came home from work. My favorite color was purple. My heart is happy.
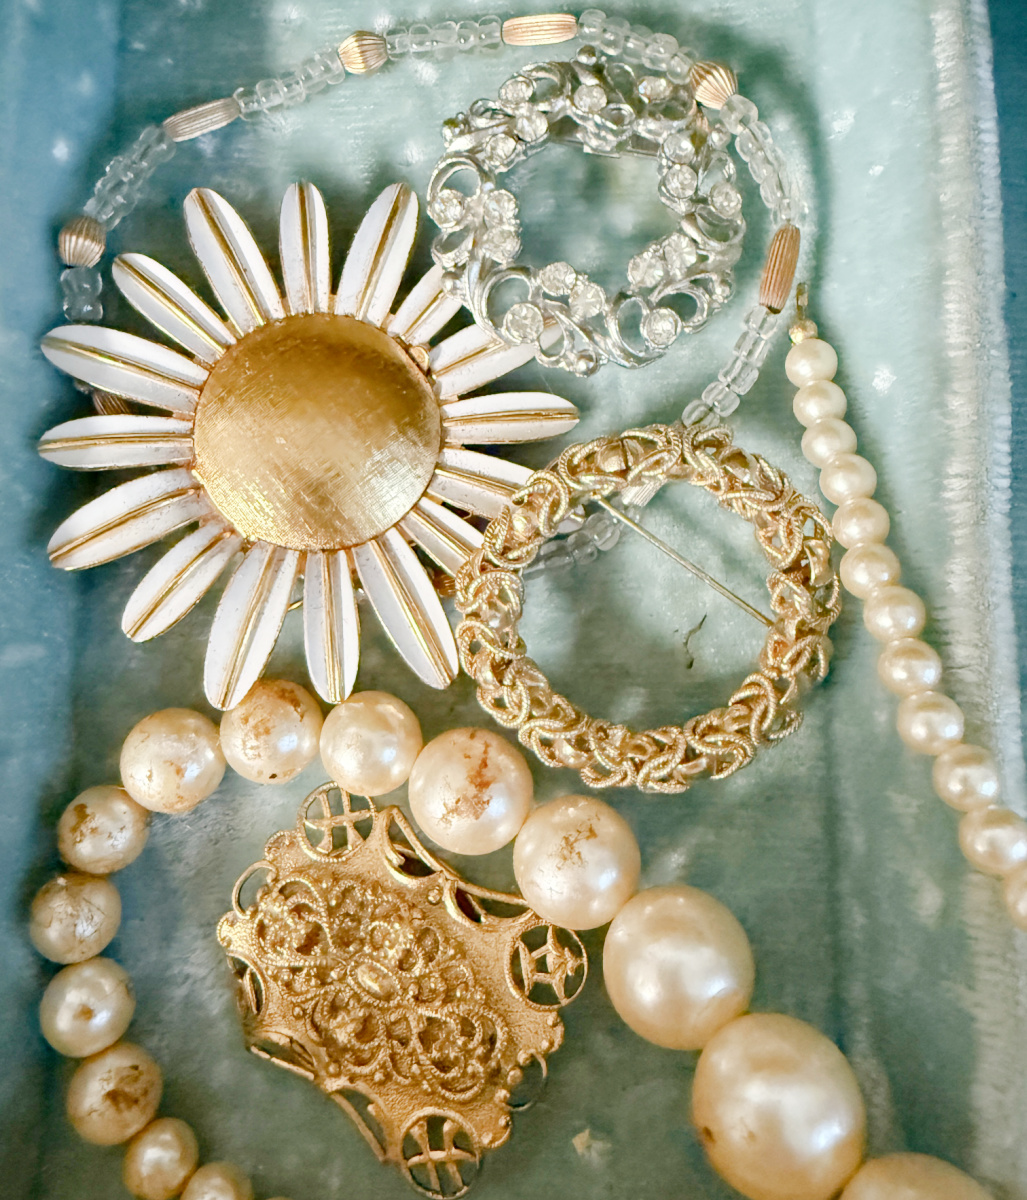
I also found a bit of my grandmother’s brooches.
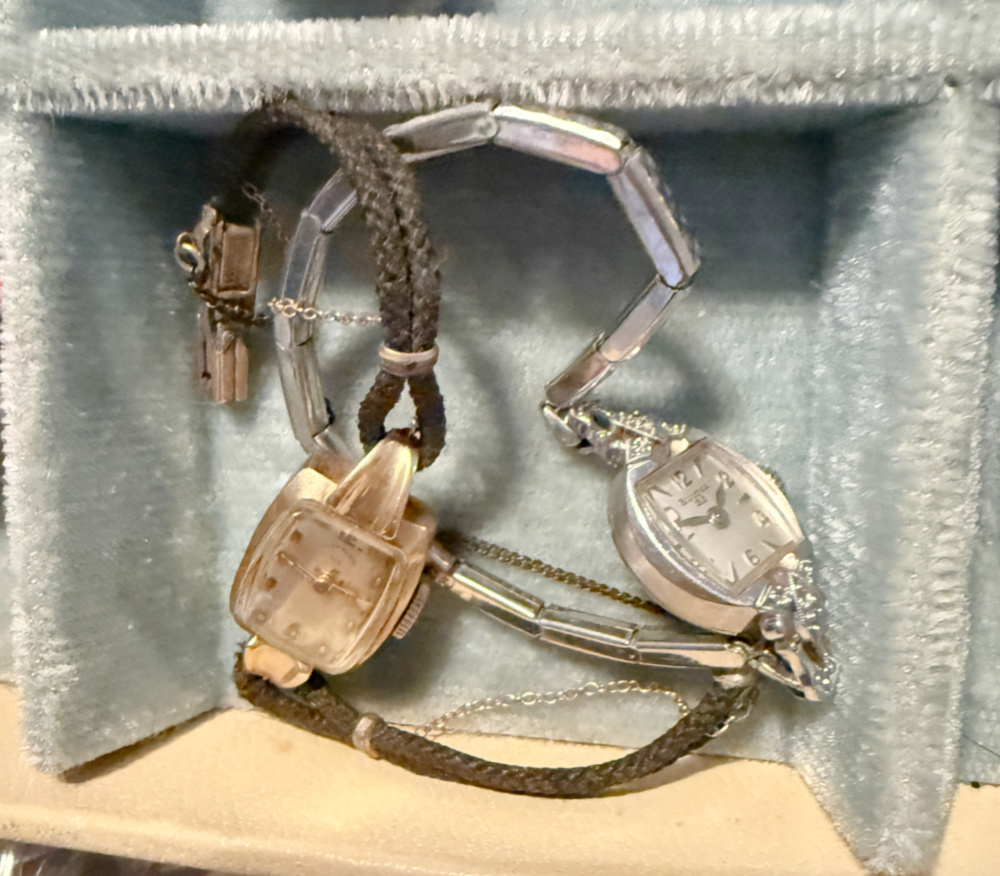
And my great-grandmother’s watch bands. I had forgotten I had these!
Now to decide what she will hold long term. For now, she is in my jewelry vault, so to speak.

You can read about my vintage china cabinet turned giant jewelry box HERE.

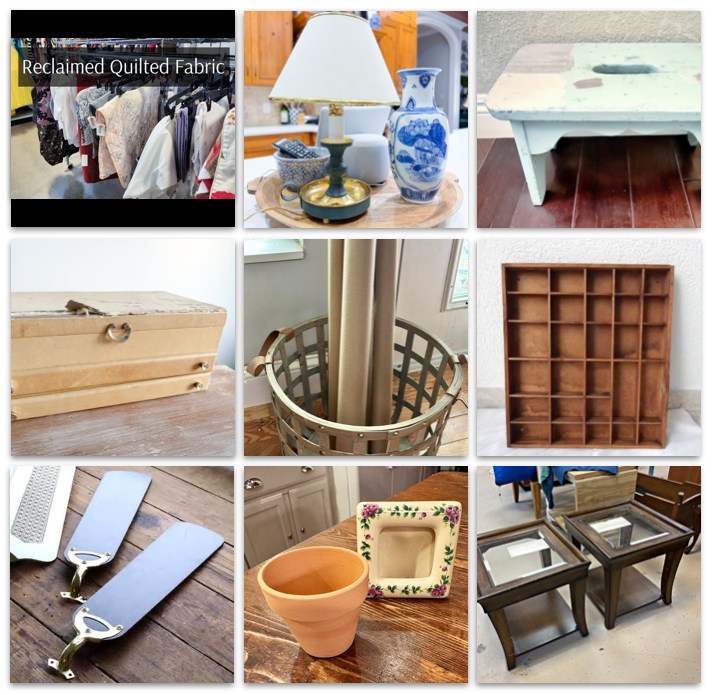
My Repurposed Life Quilted Casserole Carrier Ideas Using Salvaged Fabrics
Our Southern Home Thrift Store Lamp Refresh with DIY Pleated Shade
My Uncommon Slice of Suburbia Stool Dupe that Looks Authentically Aged
Shop At Blu Mom’s Vintage Jewelry Box Makeover
Our Crafty Mom Heart Shape Paper Craft From Wrapping Paper Roll
Songbird Rubber Stamp Storage Idea
Funky Junk Interiors Upcycled Ceiling Fan Blade Wall Mounted Coat Hooks
Exquisitely Unremarkable Adorable DIY Pin Cushions
Redhead Can Decorate My 91 Year Old Dad’s Thrift Store Living Room

That is a great makeover! And how fun to have such a jewelry box full of bling bling from you mother. I am sure there are quite a few projects lurking in there.
So many projects lurking everywhere! And you are right. I’ve got to do something special with some of these treasures.
Suzanne, I love your makeover! It’s perfect and I’m so glad you were able to give that sentimental piece new life. I also love that you shared your memories of digging through your mom’s jewelry. You just brought back so many similar and fun memories of my own. ❤️
It’s all about the memories for me. Thanks, Kim!
Sue, this is such a great makeover! I’m going to be on the hunt for the peel-and-stick at the Dollar Tree! xo Kristin
Thanks Kristin. They usually have some great textures. So many uses.
Beautiful family heirloom, with so many memories! You did a fabulous job Suzanne breathing life into a piece that most people would have tossed.
Great job, nice tips!
pinned!
gail
Thanks, Gail. Trying to hold on to those memories AND keep the landfills empty.
I was so interested to see how you transformed this jewelry box. What a great idea to use that Dollar Store wallpaper! I see jewerly boxes like this often that are all jacked up, next time I won’t pass one up!
Thanks, Tania. You could use a small jewelry box for hardware storage, sewing, supplies, etc. I appreciate you stopping by!
Oh my! You did an absolutely amazing job on this, Suzanne! It looks like it came that way and is brand new. I gotta tell you my dad got my mom one of those jewelry boxes with the carousel necklace holder, too! I also have a watch from my aunt Julie who was my grandmother’s sister that looks very similar to the watches in your collection. So fun to read about your childhood adventures as sn only child ♥️
Thanks, Julie! I love these mementos. They keep our loved ones close. Hi, Dad!
I need to make a trip to Dollar Tree. Those sheets of wallpaper were made for this refresh. What a treasure to have with all those memories. It turned out beautifully. I am so glad that you left the interior fabrics as is. The fabric under the lid is such a surprise.
Thanks, Christy! So many possibilities with this product!