How to Make Epoxy Resin Coasters
As an Amazon Associate and member of other affiliate programs, I earn from qualifying purchases.
It’s a great day here at Blu because I have a small resin project to share with you. I am making epoxy resin coasters. I still consider myself new to the epoxy resin world but you know my motto…practice makes perfect. As a beginner I figure sharing my mistakes can make your learning process go a little more smoothly. And I have made some mistakes! But these aren’t so bad for a first try, agree?
Here is my first post about Using Epoxy Resin from 8 months ago. I had a minor fail (more about that later) but isn’t that what learning is all about? If we don’t try you can’t fail. So by the end of this post I should be working my way toward the intermediate level.
And here is the follow up post to that one where I finished a Epoxy Resin High Gloss Tabletop.
Choosing an Epoxy Resin Project
When acquiring new skills, you should always start with a small project. I wanted my project to have an adequate sized surface so I can practice the marbling technique. So let’s make some epoxy resin coasters.
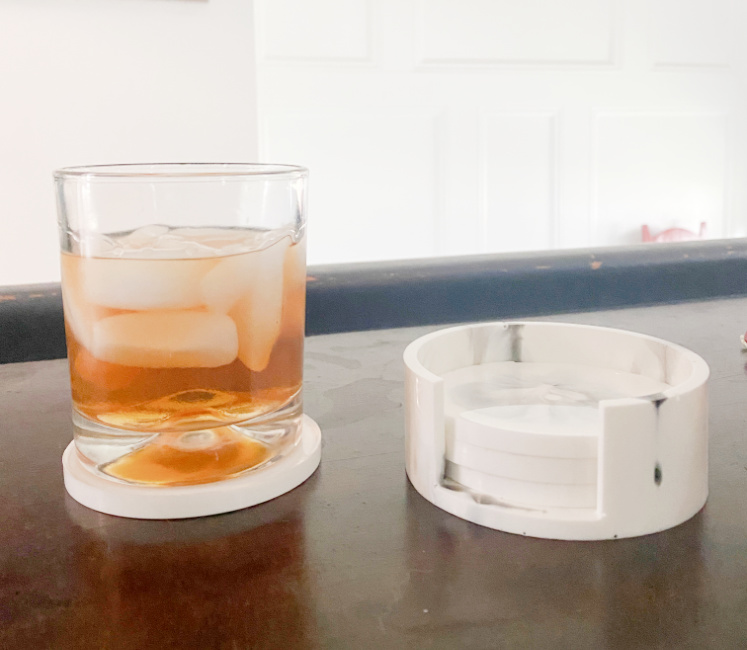
Resin Molds
I ordered these silicone coaster molds off of Amazon.
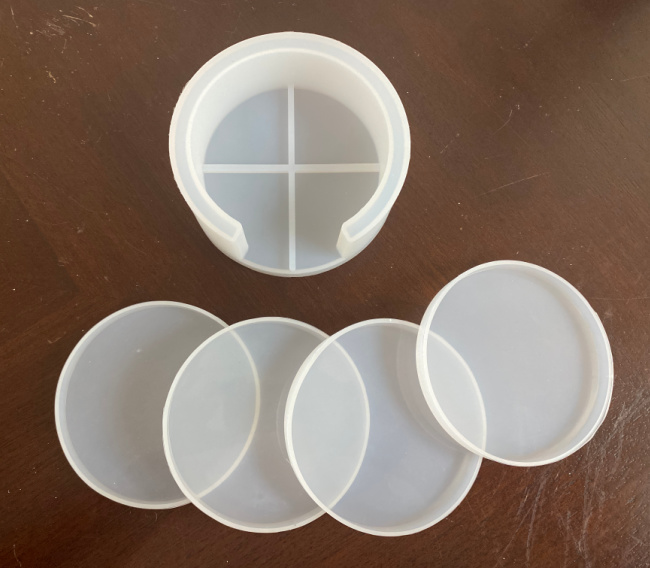
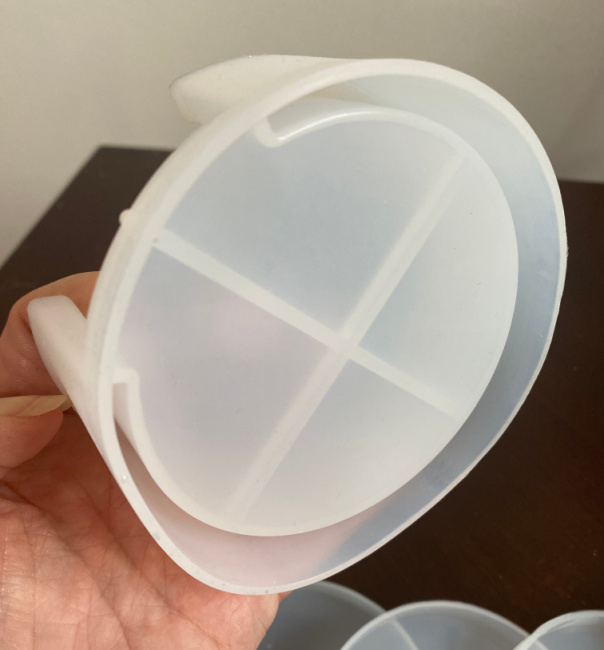
There are many sizes shapes and varieties. I figured I might as well make something functional while I am practicing. The four simple coasters will be great practice. And the coaster holder seems a bit more complicated so I can develop and polish my skills. Here is the holder mold:
Total Boat Epoxy Resin
I am using Total Boat epoxy resin. What I love about Total Boat epoxy is that you can mix it in a one to one ratio and it is self leveling. Epoxy actually consists of two parts, an epoxy and a hardener. When you combine them, the epoxy activates and you have about 10-20 minutes before the hardening process begins. 1:1 ratio means that means you use one part epoxy to one hardener for your project. And self leveling means you don’t have to worry about evenly pouring the resin as it will even out itself. Super simple. If you are considering an epoxy resin project, I highly recommend that you visit Total Boat’s website for information, tutorials, and safety cautions. Always follow their recommended safety procedures including use of PPE and operating in a well ventilated area.
Total Boat is a valued sponsor of the Haven Conference, a DIY and blogging conference held every summer in Atlanta. This year I was lucky to win the Total Boat epoxy prize package. Look at all of the goodies:
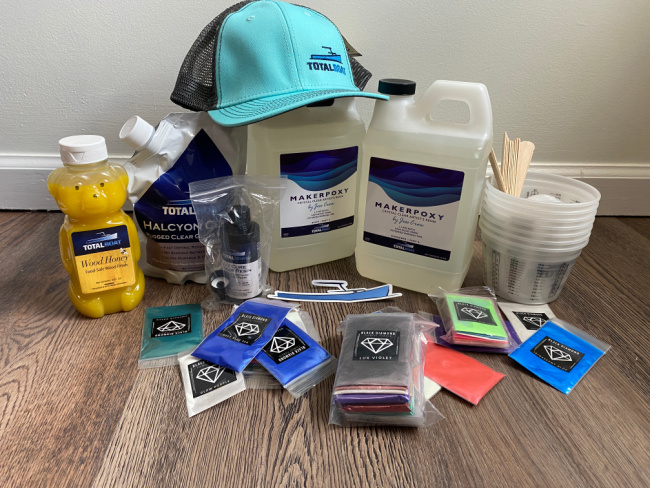
Supplies
- Maker Epoxy Resin, part A
- Maker Epoxy Hardener, part B
- mixing cups, size small, medium, and large
- stirring sticks
- pigment powder in desired colors
- pigment
- protective gloves
- Heat gun corded or cordless
- small fan to help with proper ventilation
- plastic to protect cover your work surface
- silicone resin coaster molds
Plan
- My plan is to mix enough resin for the complete project.
- I will need a larger mixing cup and 3 smaller ones for the color.
- Pour the coasters first since they are simple.
- Pour the holder last as it has a deeper mold and will require more resin.
- Add the color last and play with the design.
- Allow to dry overnight.
- Evaluate the process.
- Repeat the project if necessary.
Mixing Epoxy Resin
I estimated how much epoxy I would need and then mixed part A with part B. I needed about 8 ounces total of epoxy tinted white for the coaster and holder, plus 3 one half ounce portions of clear epoxy to tint with 3 different colors for accents. So I mixed enough epoxy in a larger mixing cup to have approximately 10 ounces of mixed resin for my project.
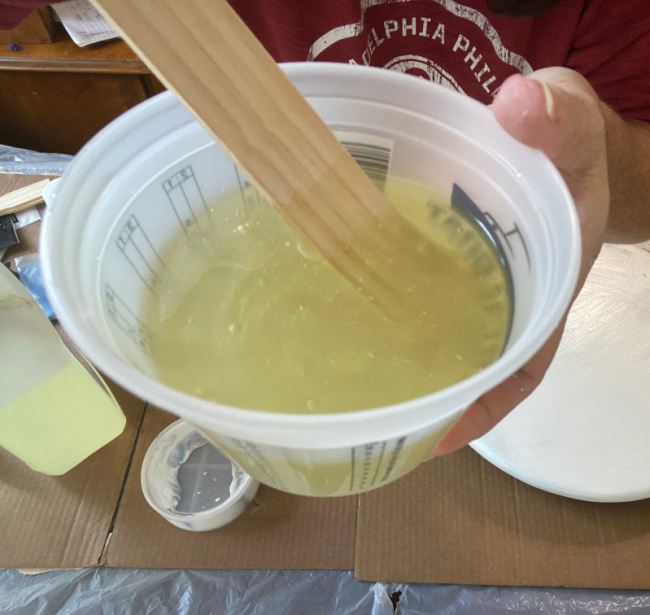
I stirred for about 3 to 5 minutes. Stir carefully and slowly to prevent excess bubbles from forming. This gave me my clear epoxy. I poured a small amount of clear epoxy into each of three tiny cups. My coasters will be basic white with a marble effect containing pigments of black, blue, and beige. So I added some black pigment powder to the first small cup and mixed for 2-3 minutes. I repeated the process with the second cup adding the blue pigment powder.

And finally I added some beige pigment powder to the third small cup.
I returned to my larger cup of clear epoxy resin and added a small amount of white pigment powder to create the white base for this project.
Be liberal with the pigment color as a little goes a long way. I stirred for about three minutes and ensured the color was dispersed throughout the resin.
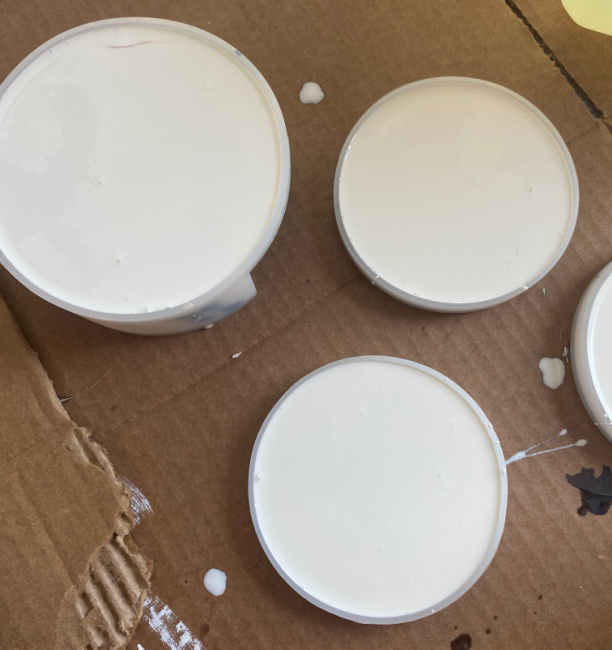
Then I poured the white resin into each of the 4 individual coaster silicon molds. I was careful not to overfill the molds since I couldn’t remember if the resin would expand while drying. I filled them just below the top rim to leave a little room for my colored resin design.
Removing Air Bubbles

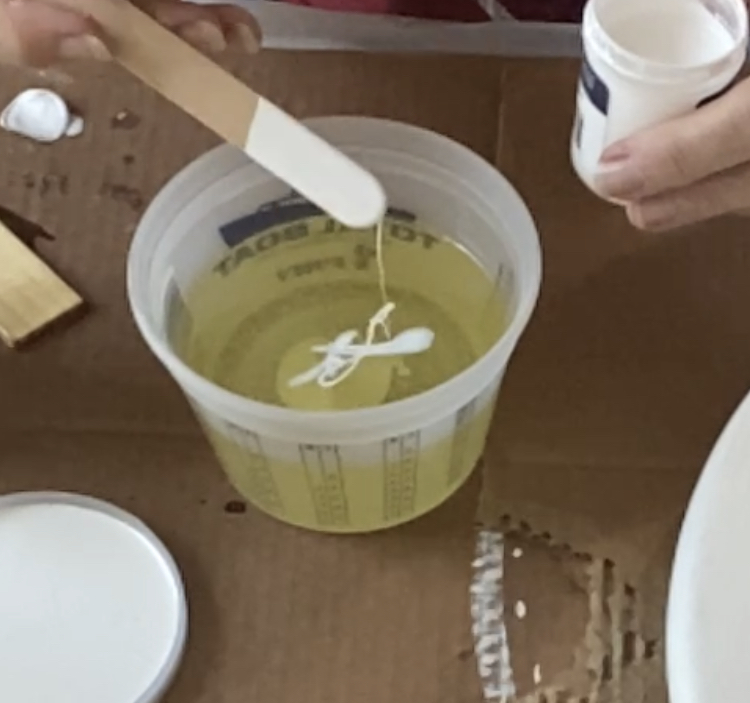
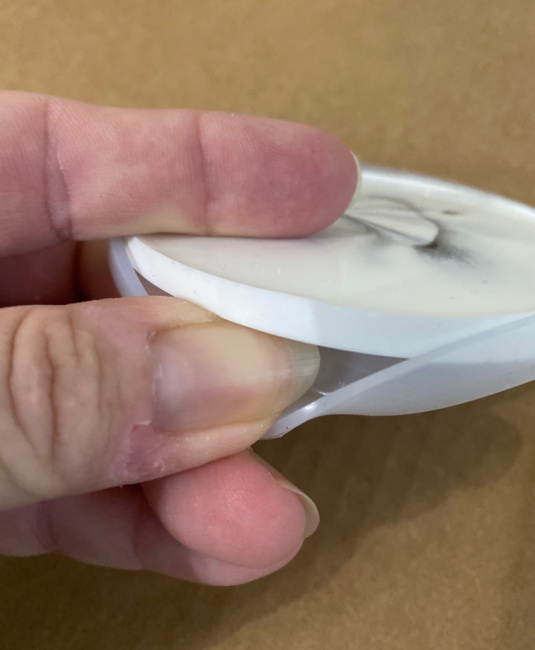
During the mixing process, air bubbles will form in the resin by the stirring process. I’m pretty sure that the chemical reaction helps this too. It is important with resin to try to remove any bubbles. The first step to removing the bubble and air pockets is to tap the outside of the mold lightly. I used my fingertips and gently tapped around the entire outside walls of each of the 4 coaster molds. You can see some bubbles in the next photo. As you tap the mold, the bubbles rise to the surface and pop.
Then I used the heat gun and held it about one inch from the top of each coaster keeping it moving in a circular motion. You will immediately see more bubbles pop.
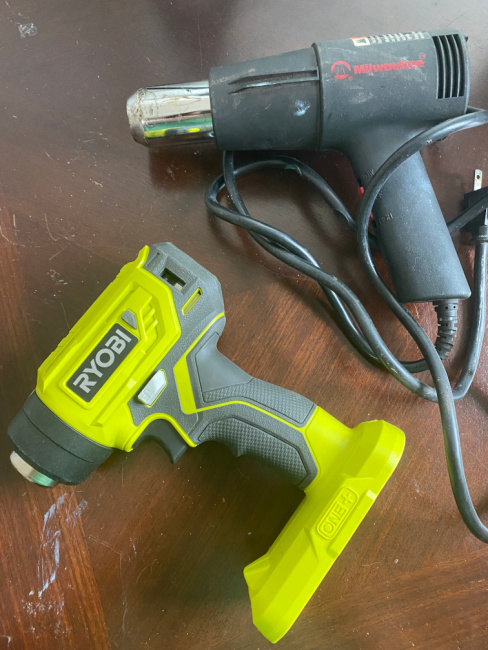
I used the heat gun for about 20 seconds on each coaster until all bubbles were gone. Skip to the heading Next Step below to see the continued process or read the next paragraph to see where I made my first mistake with this project.
Fail Forward
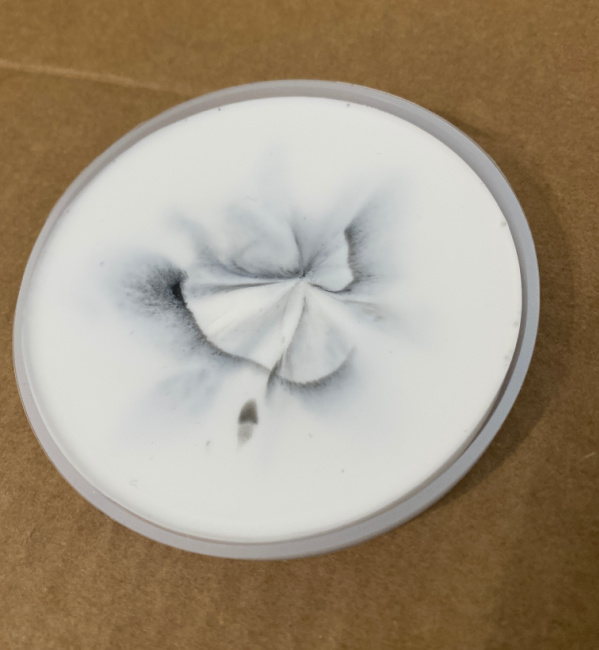
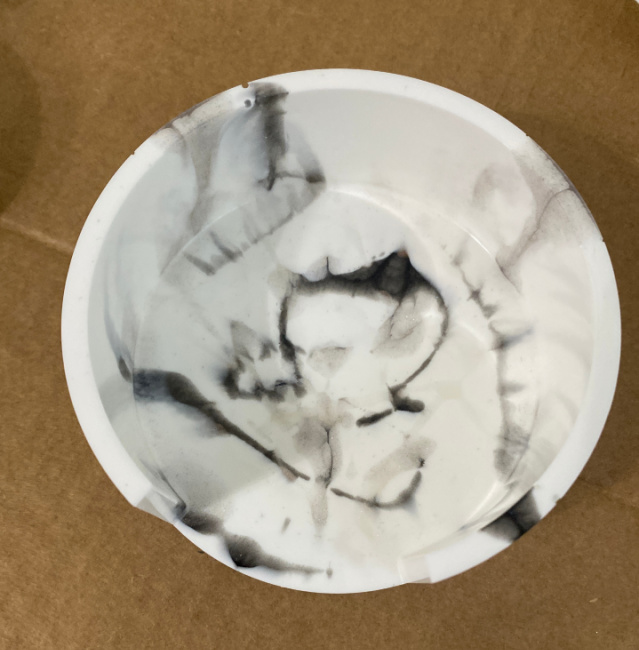
Did I mention that this is a learning process? Well, here is where I made my first mistake…I should have made this a two-part process. The first part would be to do an initial pour into each of the 4 coaster molds leaving room for an additional thin coat after the first coat dries. This second thin coat would be poured and the colors added to that. If adding a design, you should pour a first coat and allow that to dry. Once dry, you add a flood coat ( or a very thin coat) and then add your colored epoxy to that. When you don’t allow the bottom epoxy to dry, you pretty much lose the colored application once you start using the heat gun (more about that later in the process). The force of the heat gun pushes the color into the epoxy essentially forcing it lower in the coaster where you can’t really see the color. Your goal for small projects like this is to add color to about a 1/8 inch wet base, no thicker.
/Next Step
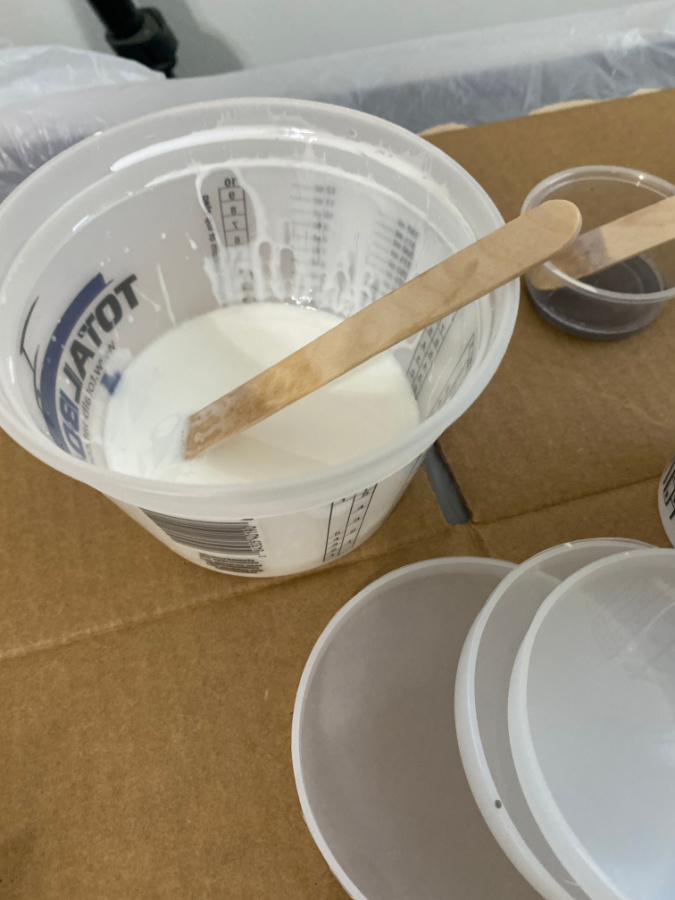
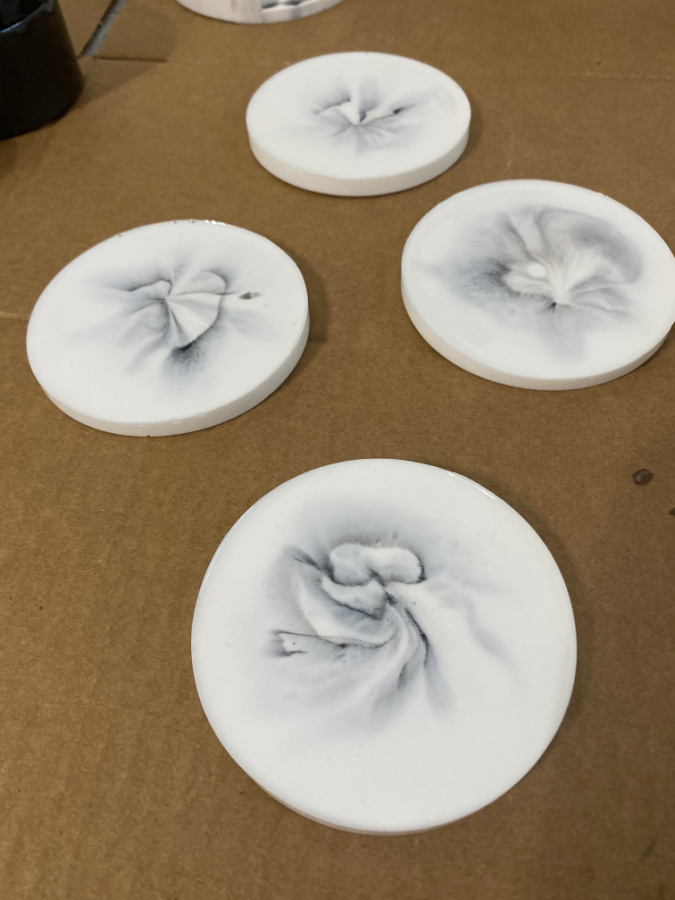
Allow this first epoxy application to dry overnight. Once dry, mix another batch of epoxy and separate into 4 small mixing bowls to make white, black, blue and beige. First pour a thin coat (about 1/8 of an inch thick, of white to top each coaster. Then add your colors in whatever design you desire. Use your heat gun to move the color around until you have achieved the desired design. Allow to dry overnight. This is the first set of coasters where I didn’t allow the resin to dry before adding a flood coat and then the colors.
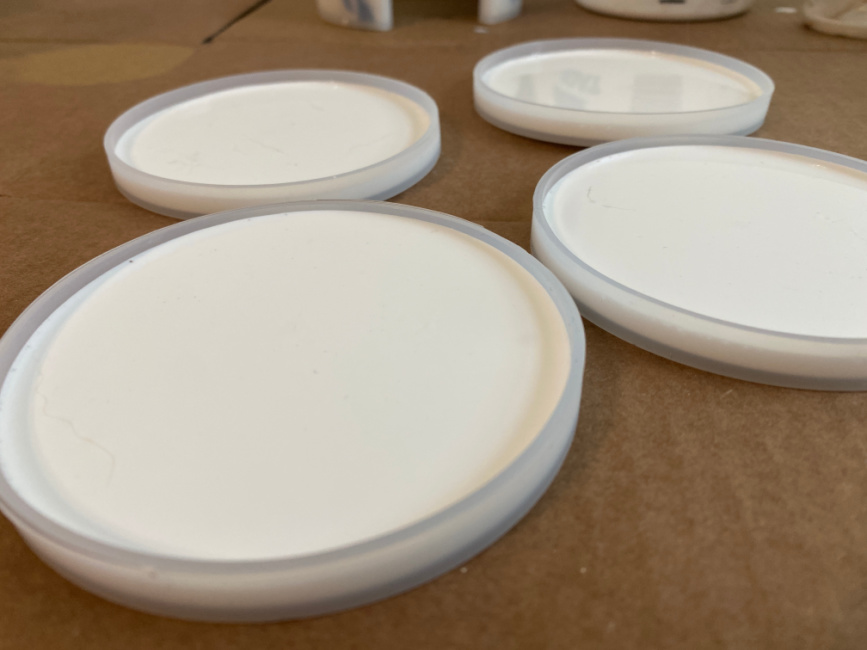
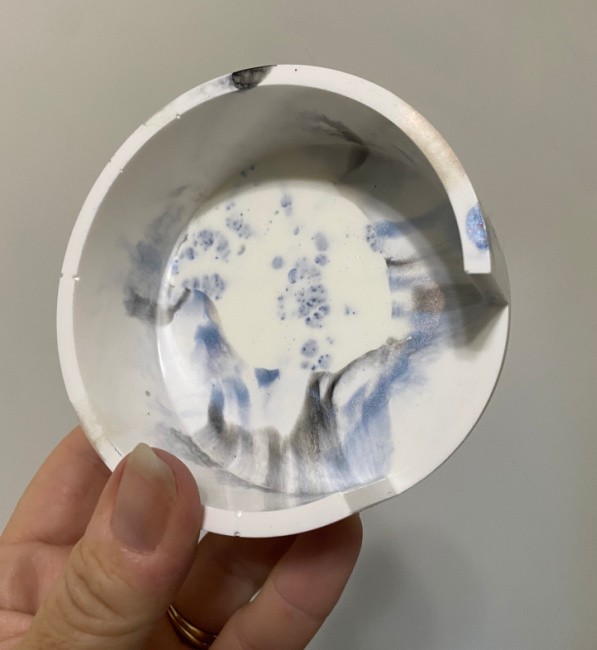
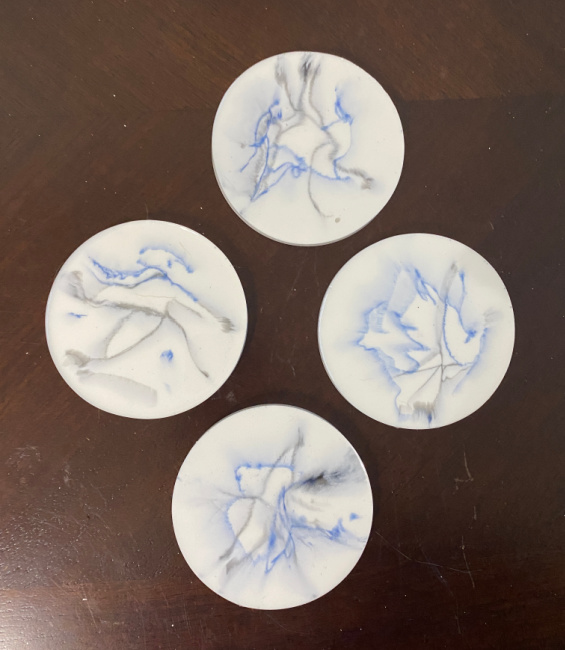
Here are the second set of coasters where I poured the second thinner flood coat over the first coat.
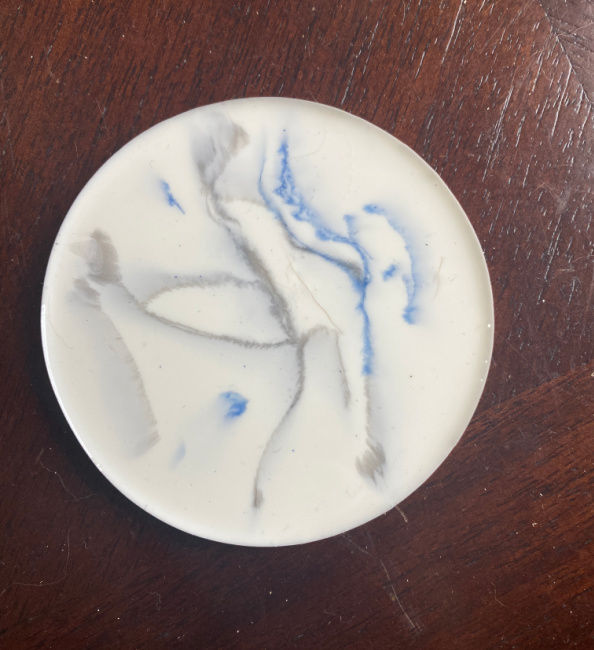
You can see how the pigments are better dispersed in the second application because of the thin flood coat.
Final Step
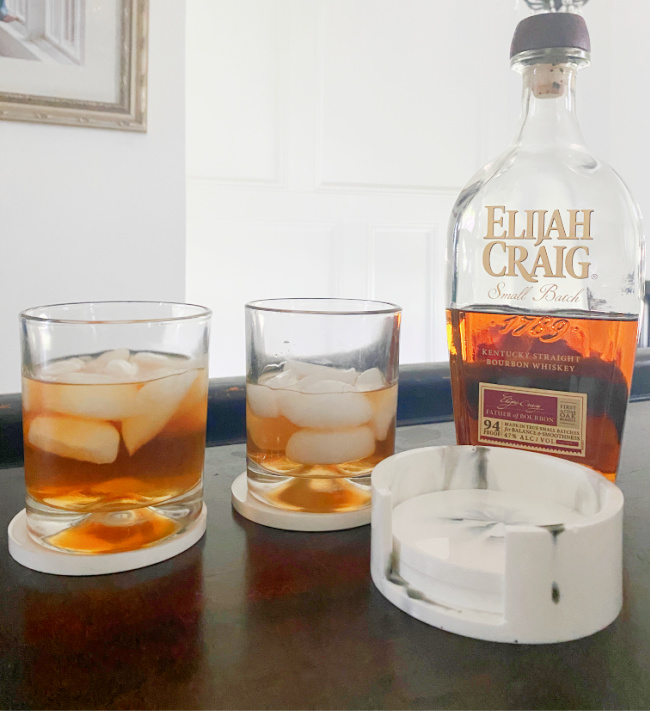
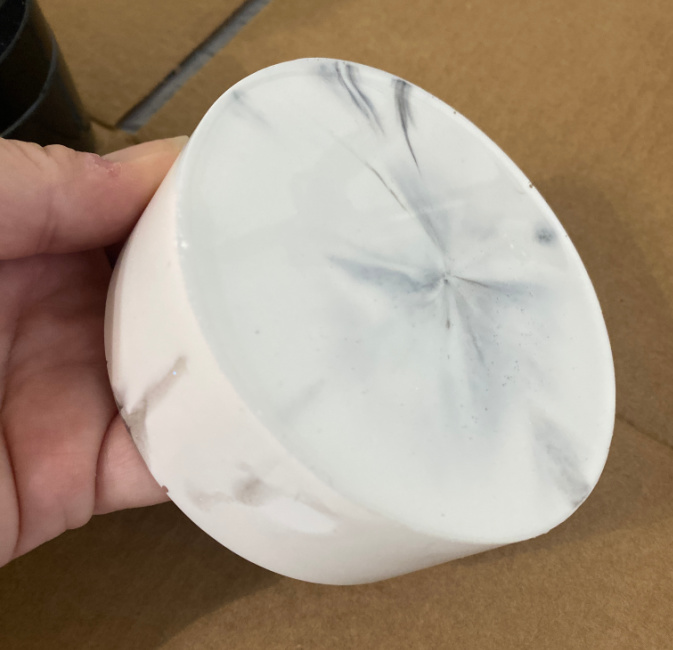
Simply remove your coasters from the silicone molds.
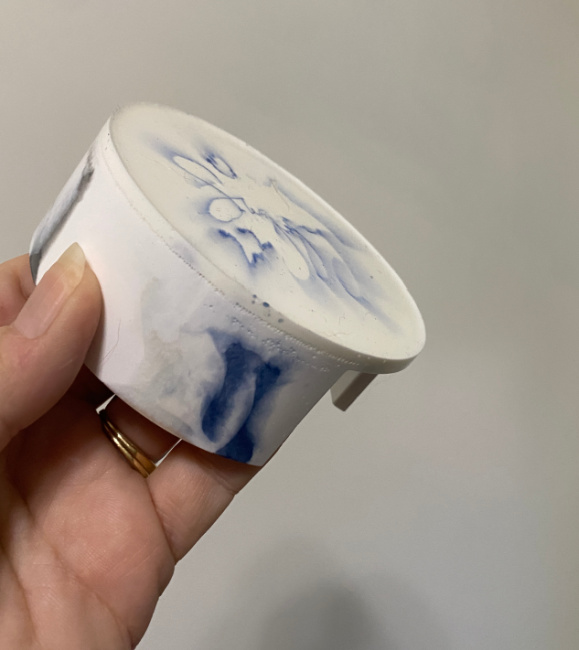
Creating the Coaster Holder
In an effort to prevent mixing several batches of epoxy, I mixed a larger batch initially to use for the coasters and the holder. The only difference in the process between the coasters and the holder, besides the larger volume of epoxy needed, is that I used some of the colored epoxy prior to the first pour on the holder. I completed just one pour for the holder. I poured the resin into the sides of the mold a stopped there. With a stir stick, I added some colored epoxy into the sides of the mold to add color so that the holder would not be completely white. I also added some pigmented color to the top of the holder before pouring the resin there.
I did make a second set of coasters that I created using a slightly different way to color the holder. Here is the first holder:
For the second set, I used two pours and then added the pigment color to the holder mold before the first pour. I finished the initial pour leaving some room at the top to practice my design with another thin flood coat after the the set dried overnight.
Second Pour on the Coasters
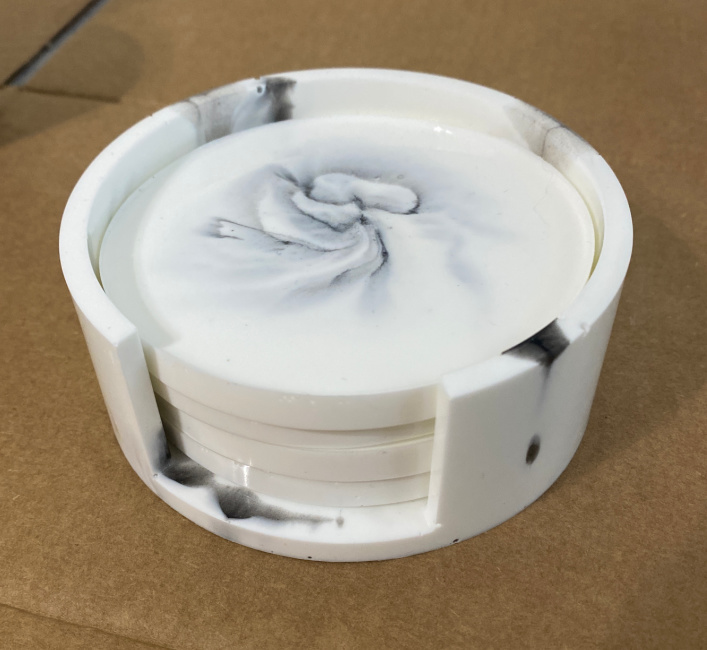
Here is the first set of coasters made with a single pour.
Here is the second set where I allowed the first pour to dry completely and then did a second thin pour followed by adding the small amounts of colored epoxy.
I like them both.


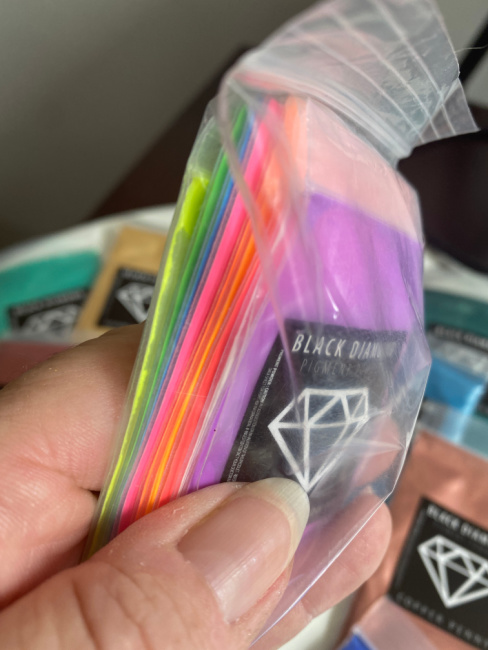
I am practicing for a project that will mimic marble counters so I am using mostly white with just a touch of color. When that project is finished I will play with the bright and vibrant colors. Here are some of the pigments I have on hand:

And how cool are these glow in the dark pigment colors??? I’m going to have some fun with these in the garden.
If I keep practicing with these coasters, the entire family will have a set for every home! Do you want any leftovers? Message me your address.
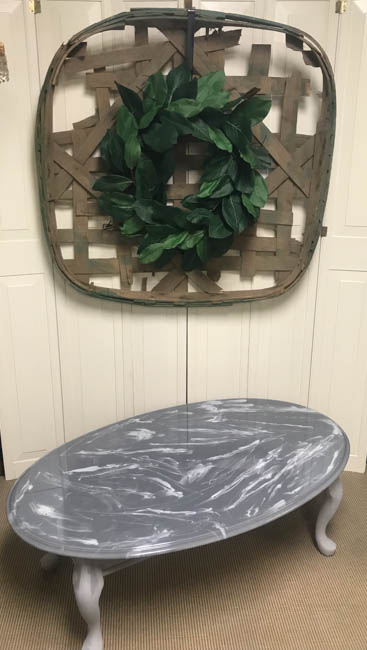
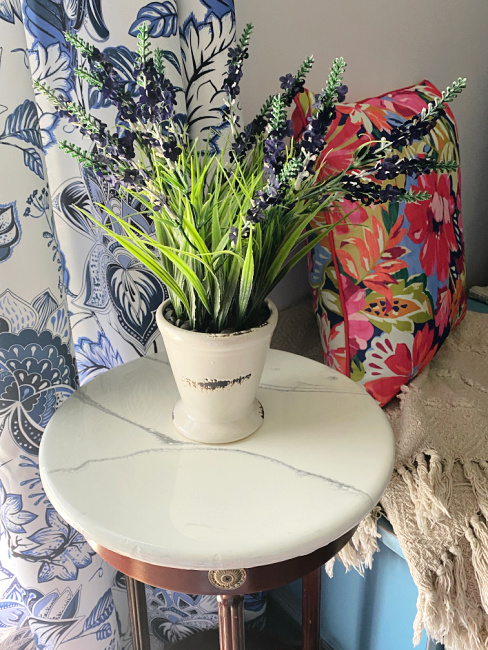
If you enjoyed this epoxy project, here is my first every epoxy project where I created a marble like coffee table. Or an epoxy tabletop.