How to make a plank wall for FREE!
As an Amazon Associate and member of other affiliate programs, I earn from qualifying purchases.
I have been drooling over every plank wall that I have seen on Pinterest, Facebook, and especially on the phenomenal blogs that I follow. I just never seem to have the time to pull out the tools and give it a go! I really wanted to try a pallet wall. There were 3 factors that fed my fire of procrastination…the thought of tearing pallets apart, the time it would take to put the project together, and the cost. Well, stand back friends cause I have just completed a plank wall in the entry to The Blue Building and it did not involve messy pallet wood! I was finished in less than 2 hours! And best of all, IT WAS FREE! Read on to see how to make a plank wall for FREE!
Here is the wall I wanted to plank:
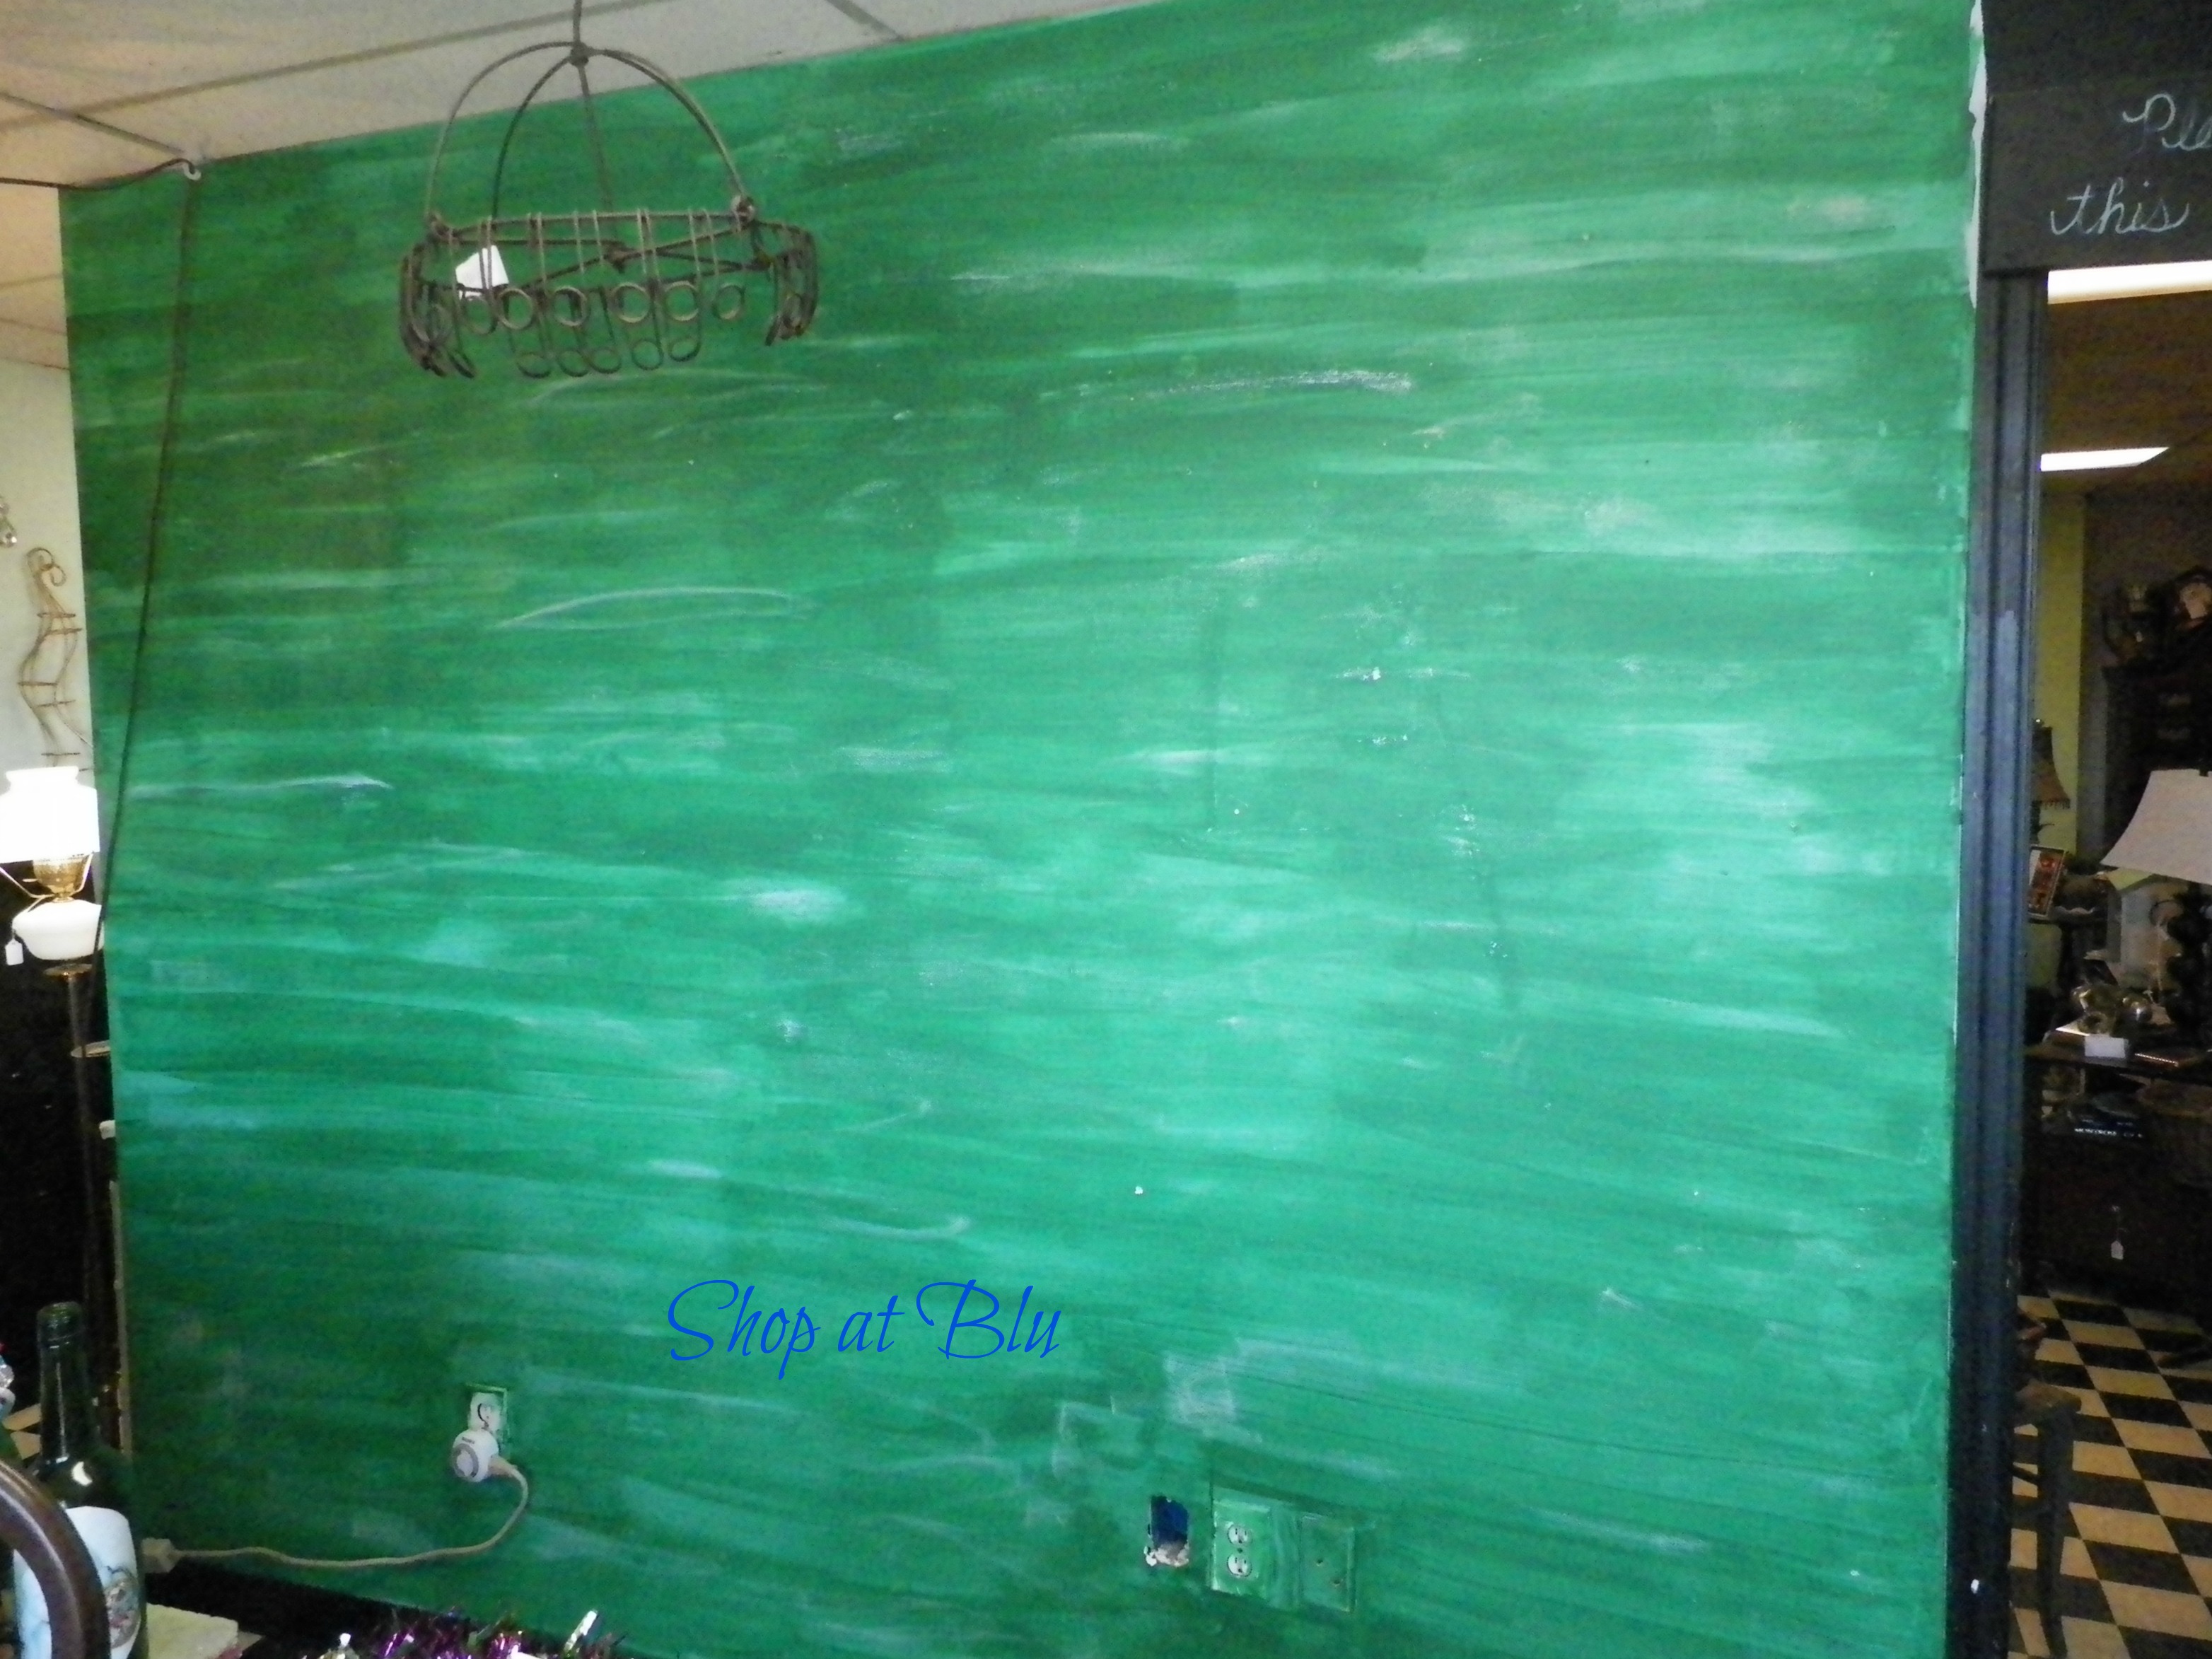
It is the first wall you see when you enter The Blue Building so as a rule, I like this wall to make a statement. This green has served me well for almost 2 years! I love the emerald so much that I have been hesitant to change it. But we were long over due for a change!
My goal was a look that could serve as the backdrop for several different themes: beachy, rustic, country french look. Depending on accessories or furniture displayed near the wall, I figured I could change the style of the look. How would I achieve this? With paint, of course! Those of you who know me or have been to my store, The Blue Building, know that I will paint anything and fortunately, my dad taught me how to move a paint brush when I was only about 8! Being Dad’s only child, I spent a lot of time with him in the basement watching and helping him with projects.
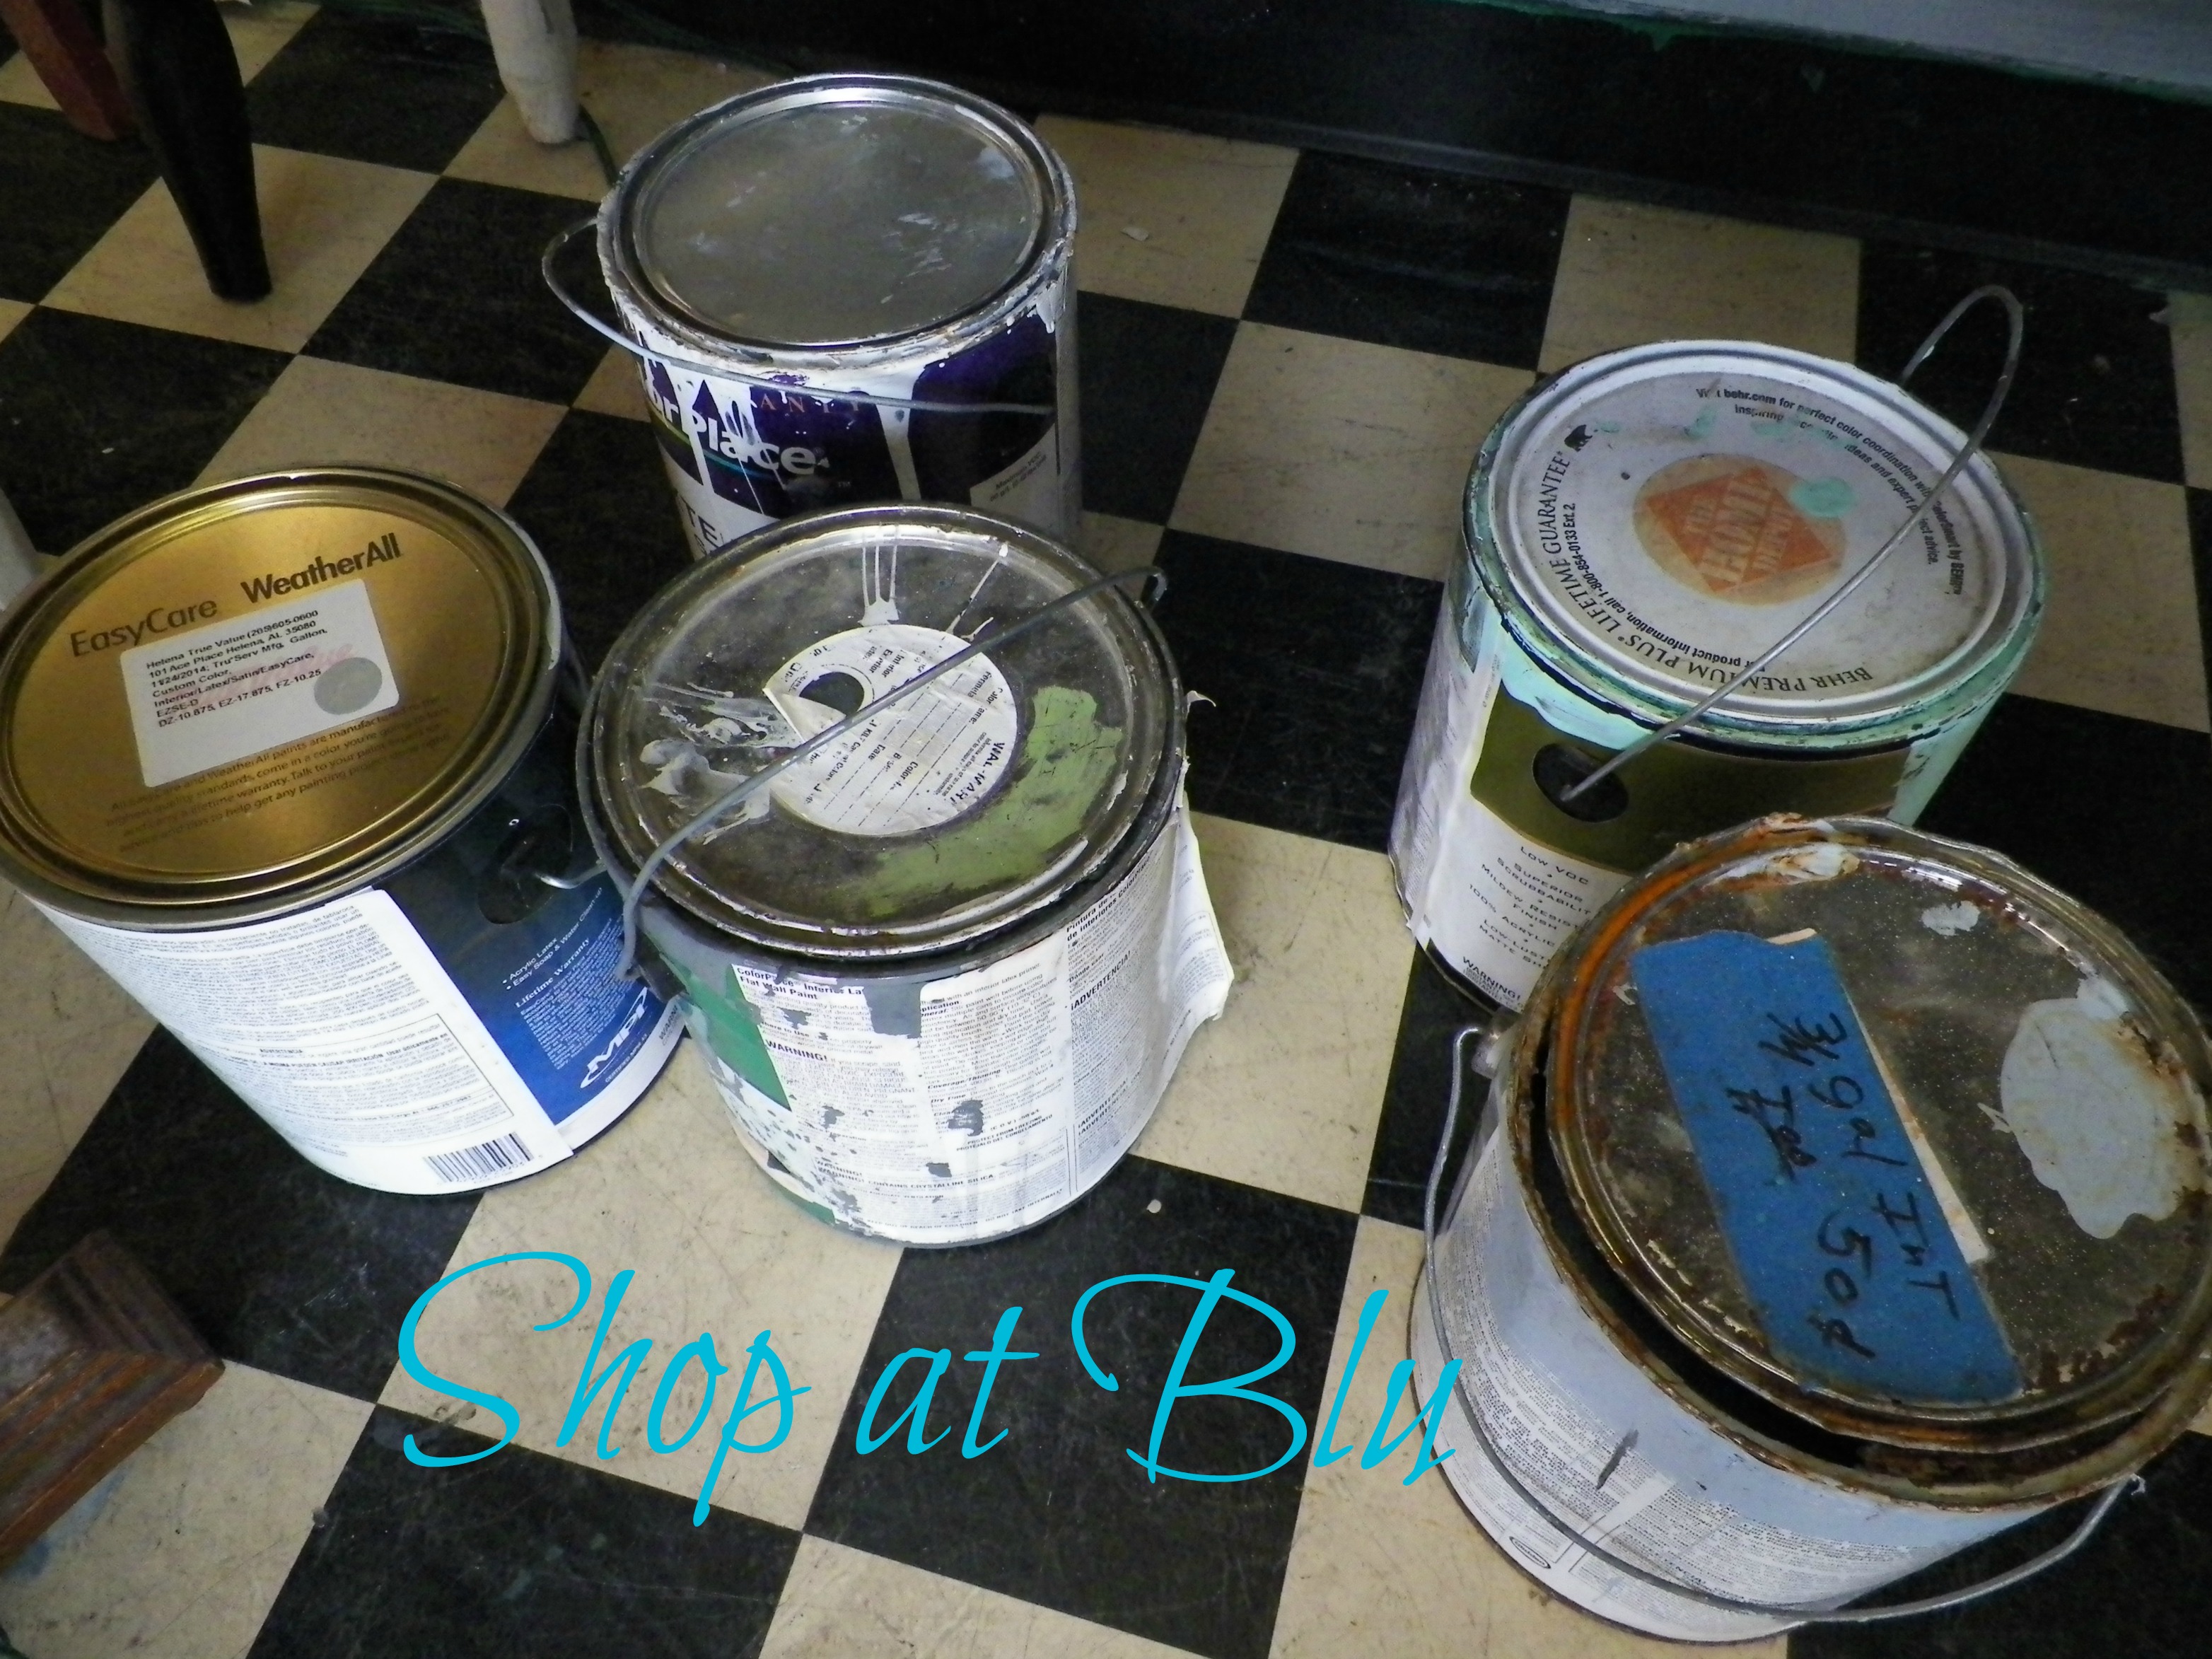
So, I grabbed 4 cans of paint, a small board to use for a guideline to keep my lines straight, two finishing nails and a hammer (or a pair of pliers which I used cause I couldn’t find the hammer…I am the queen of improv), a normal 2 inch paintbrush to use for dry brushing, a skinny artist’s brush ( just a normal skinny brush, not one belonging to a skinny artist, hee hee) to trace edges and define the planks, a step ladder to reach up high, a paint roller and tray, and I got straight to work.
I do have some experience in faux painting walls and furniture so let me say that this project might be a little difficult for a beginner or someone who is more particular about following steps directly. This may be categorized as an “eyeball” project…adjusting strokes and colors as you go along to get the look you want. Many of my projects start off with one specific look in mind and ultimately change mid course because I let the project guide me. For this specific project, you could vary color and width of the planks as desired.
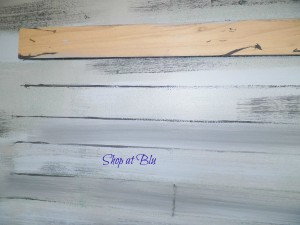
First step, I chose a pale grey paint and rolled one coat over the entire wall. One coat is sufficient because the ultimate goal is a textured, dry brushed, multi-dimentional appearance of actual wooden planks. To create more depth in the faux planks, you want to have several colors be very apparent. Thus, you DO NOT want to apply a second or third coat. Allow the under color to peek through.
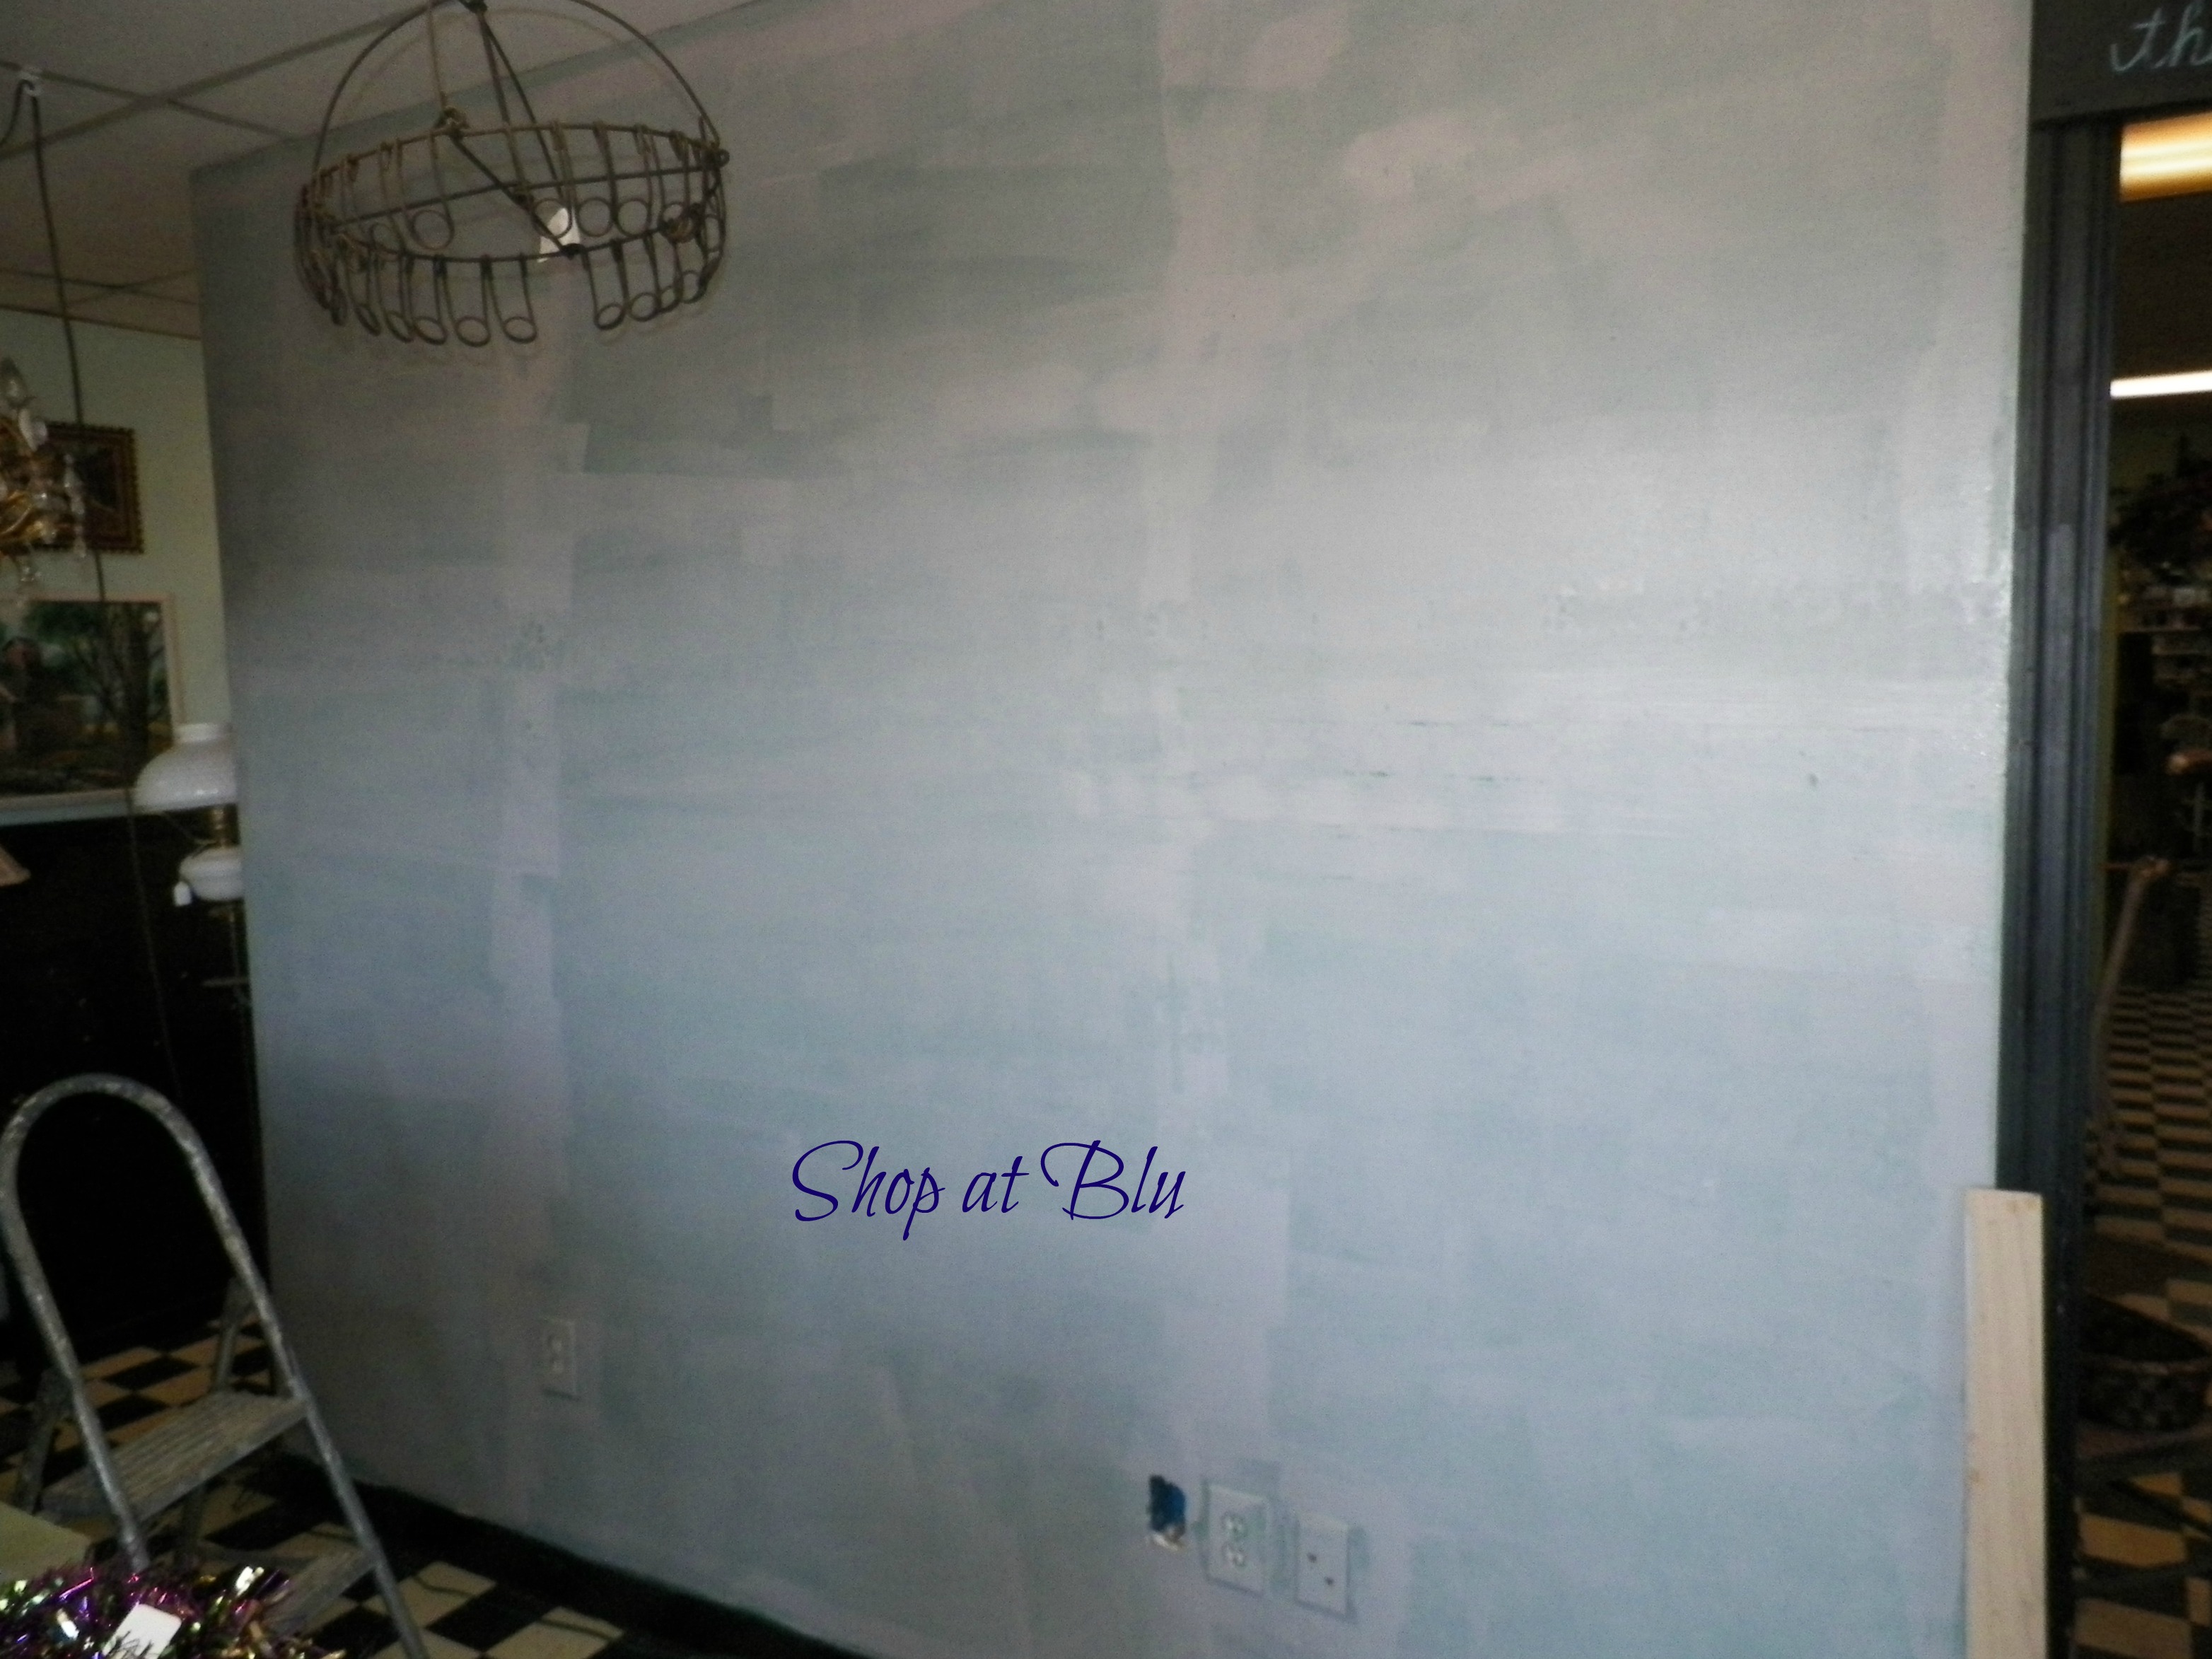
Next I selected a paint that was lighter than the grey, in this case I used white. I dry brushed horizontal strokes across the entire wall. My brush of choice was 2 inch brush simple because that’s what was closest to the paint cans! You could use a 4 inch brush for wider planks. This is simply a personal preference.
At this point, I was not concerned with these horizontal strokes being perfectly horizontal, although that was my goal. Realistically, unless you are a professional painter it is difficult to draw a perfectly horizontal line that is 10 feet long without a ruler or guide. Again, plank wood is not precise so neither should be your lines.
I repeated this process with a paint that was slightly darker than the original grey, in this case I used a pale blue. And finally, I repeated the process a third with a dark grey to mimic a more weathered wood finish. I went very light on the dark grey so I didn’t overdo it. It is always easier to darken the look than lighten it.
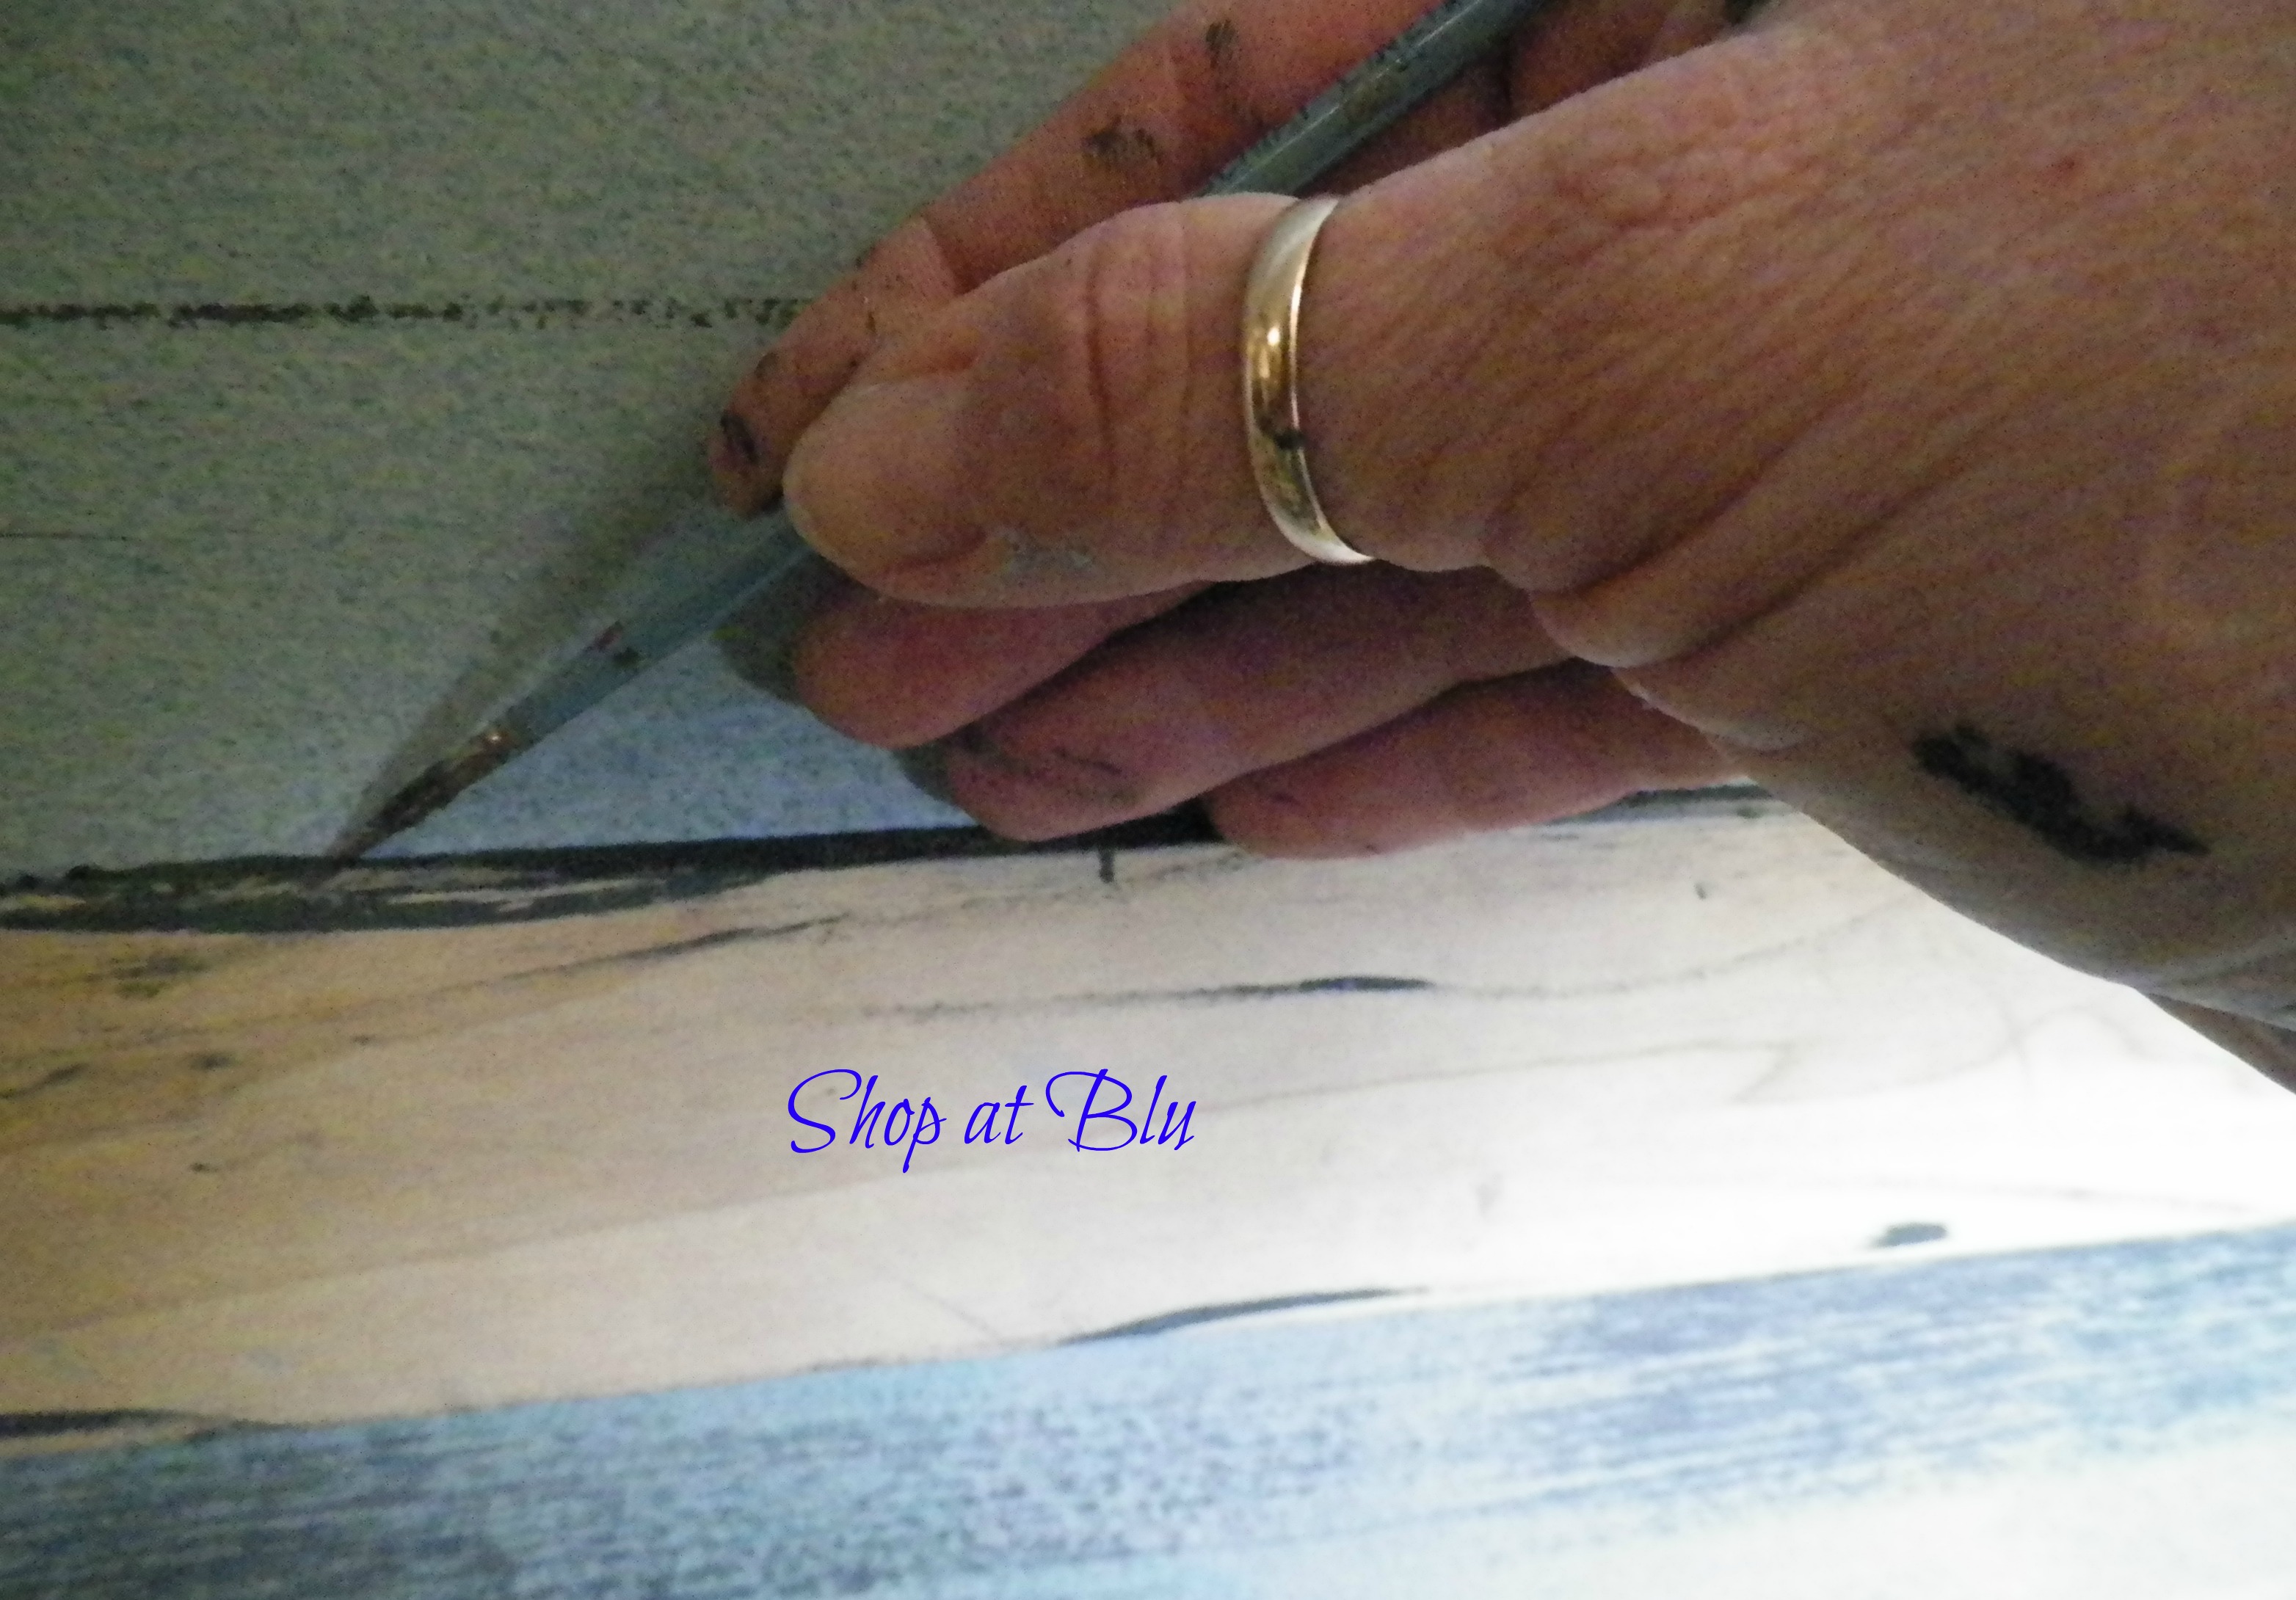
Next I took a slat of wood that was laying around The Blue Building. It measures 1/4 x 3 x 4. I think I had purchased it years ago to make some signs. I tapped one finishing nail into each end of the board. Next, I lined the board against the wall and gently tapped the finishing nails through the board and into the wall. NOTE: only tap the nail into the wall enough to hold the board gently in place. My nails went less than 1/4 inch into the wall. After this first application, I was able to easily pull the board off of the wall and reposition it.

With a gentle tap of my hand on the wood slat, the nails went far enough into the drywall to hold the board in place while I traced the edges of the plank for an authentic look. I was still able to remove the board with a slight tug and move on to the next position without much effort. Every four or five repetitions, I would trace the vertical end of the slat as well.
I used the dark grey paint and the skinny artist brush to trace the length of the board onto the wall. I loaded the brush quite well and dragged it along the edge of the slat until the paint was gone. I loaded the brush a second time and repeated the process. The goal was a dragged edge and weathered look to mimic the shadows of an actually wooden planked wall. I rested my finger along the edge of slat while loosely holding the brush and dragged it the length of the board for a somewhat smooth and less bumpy line.
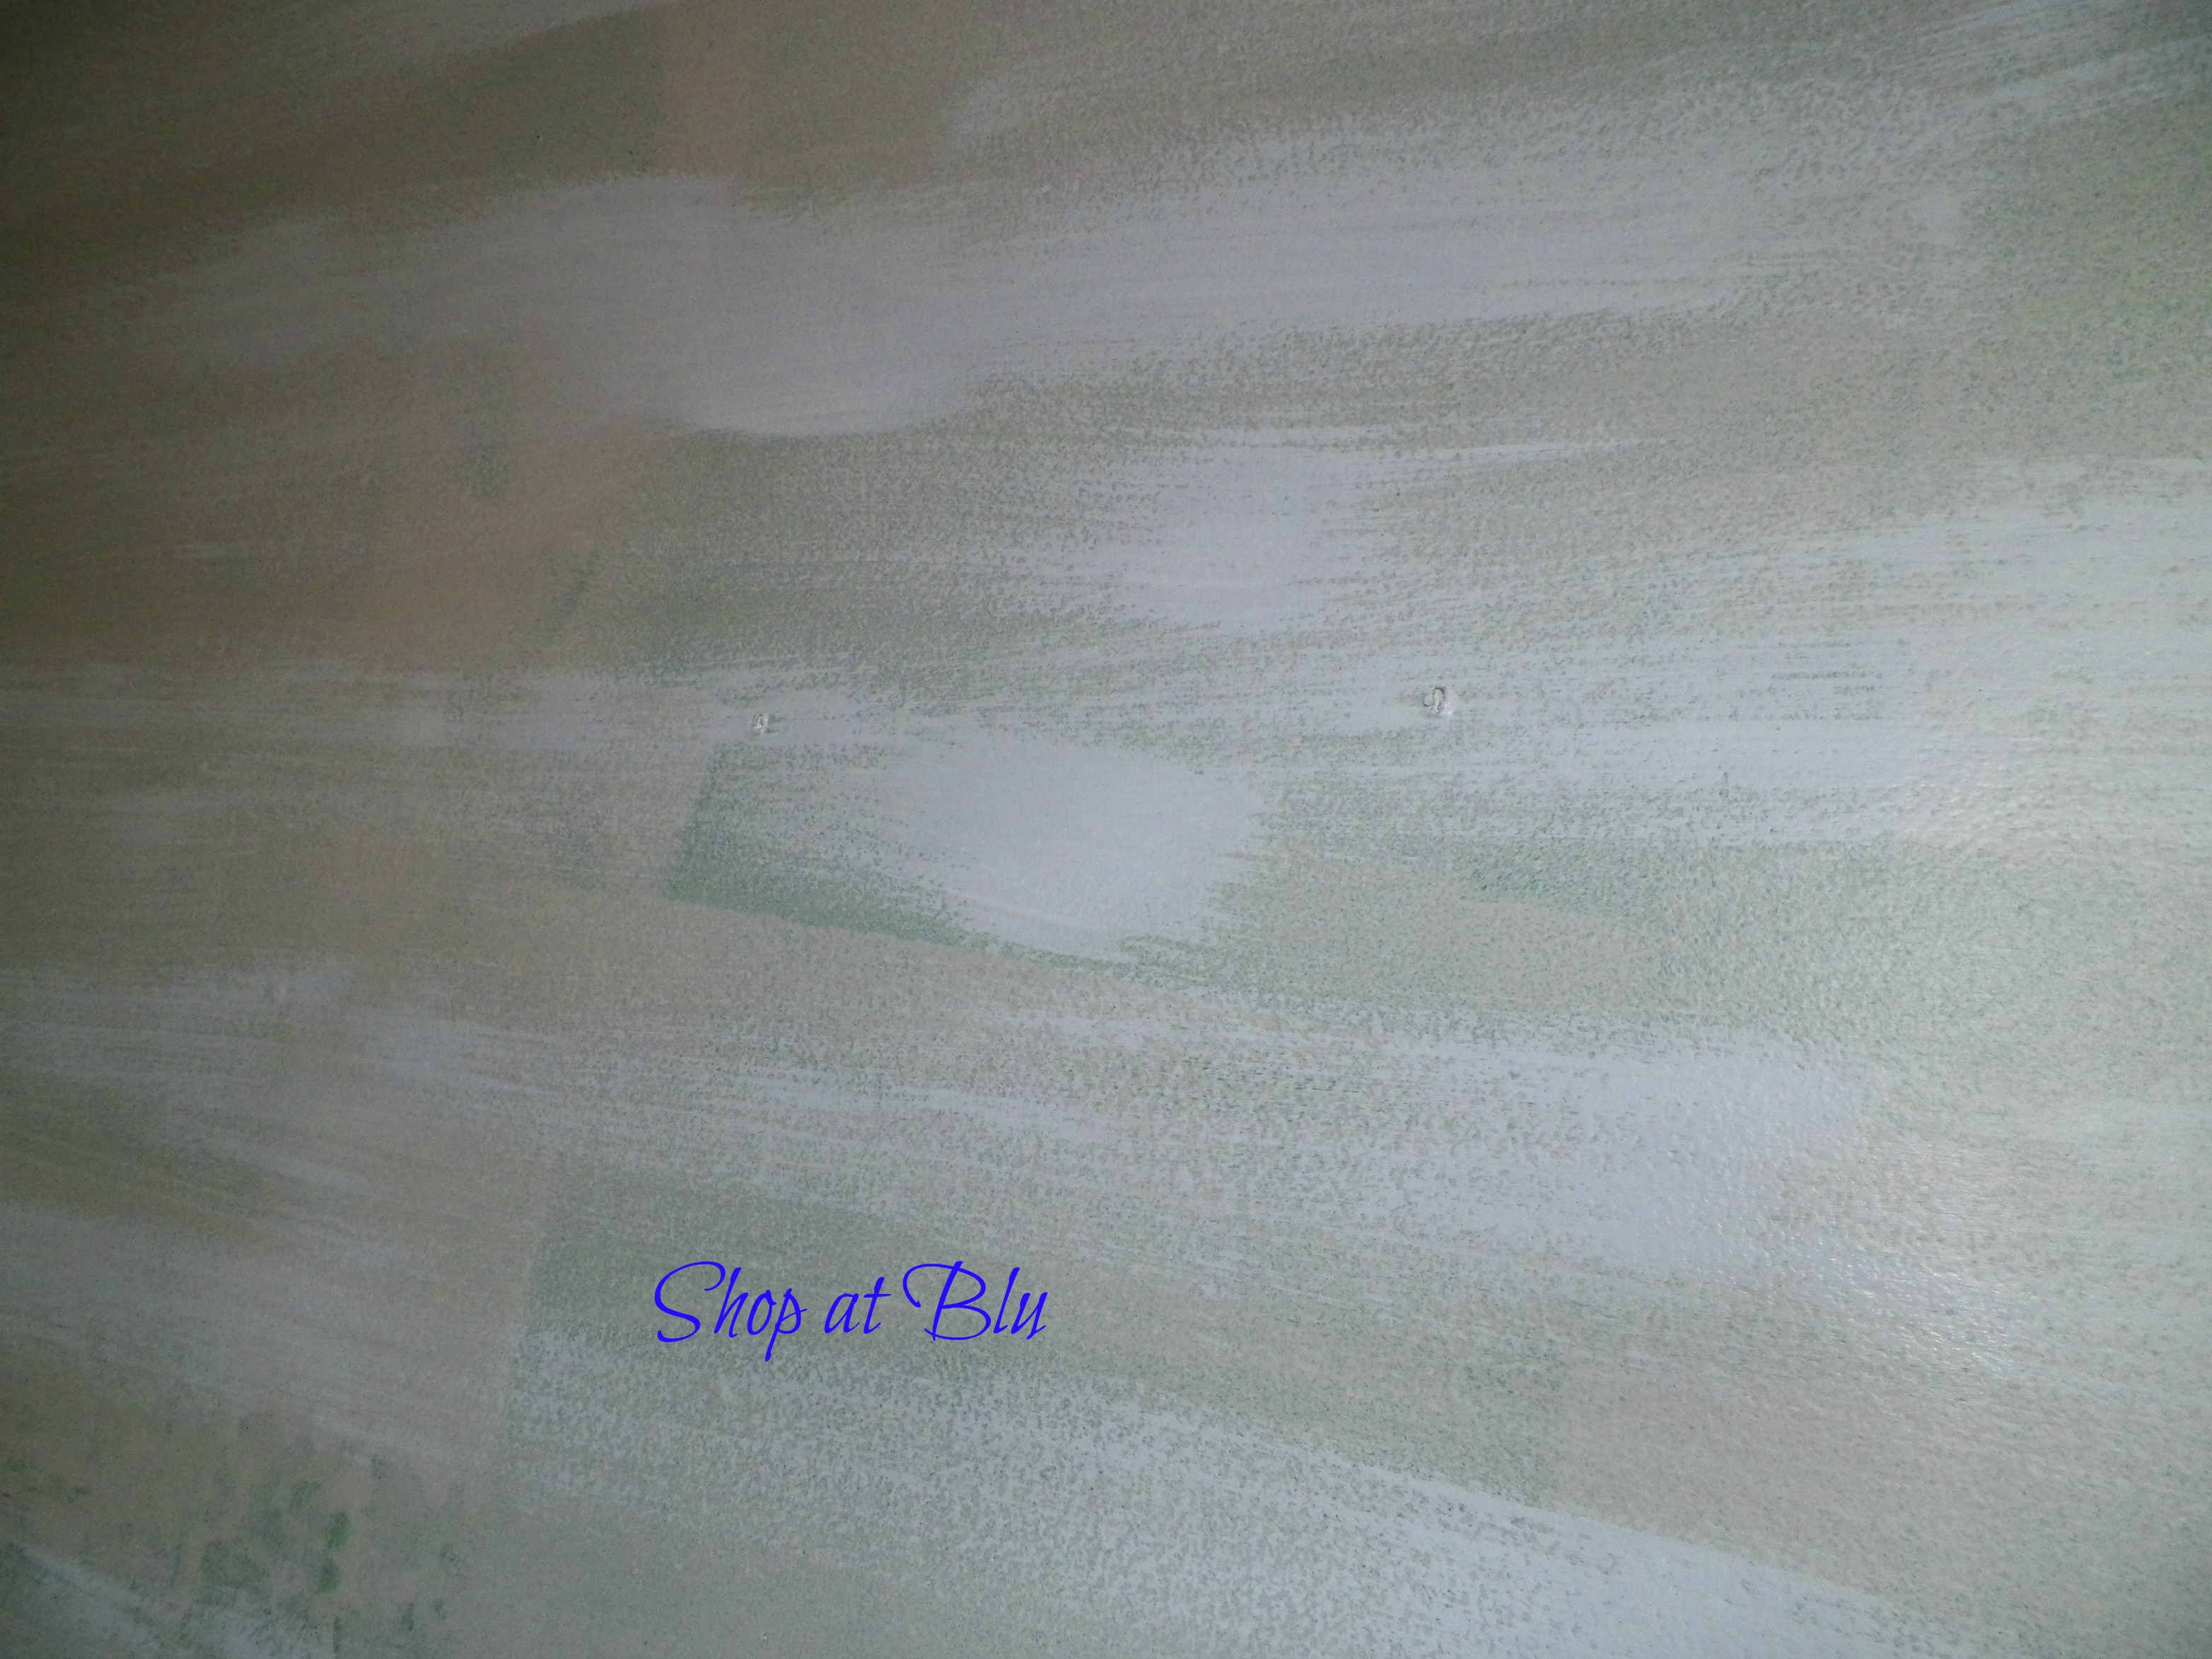
I started this edge defining process in the center of the wall and worked my way to the top, bottom, and edges. To break up the monotony, once I had completed about a 6-8 plank section I would grab the normal brush and dry brush my “planks” in varying combinations my 4 color choices to achieve the look of a variety of individual planks. In the picture below, you can see where the dark grey horizontal brush strokes lie outside of the “planked lines”. I used the dry brush technique to correct this. I used white, grey or blue to lighten the section of grey inside each plank so that each plank was consistent in color throughout that plank. I used a varying combination on the plank above or below that plank so that no two neighboring planks had the same appearance.
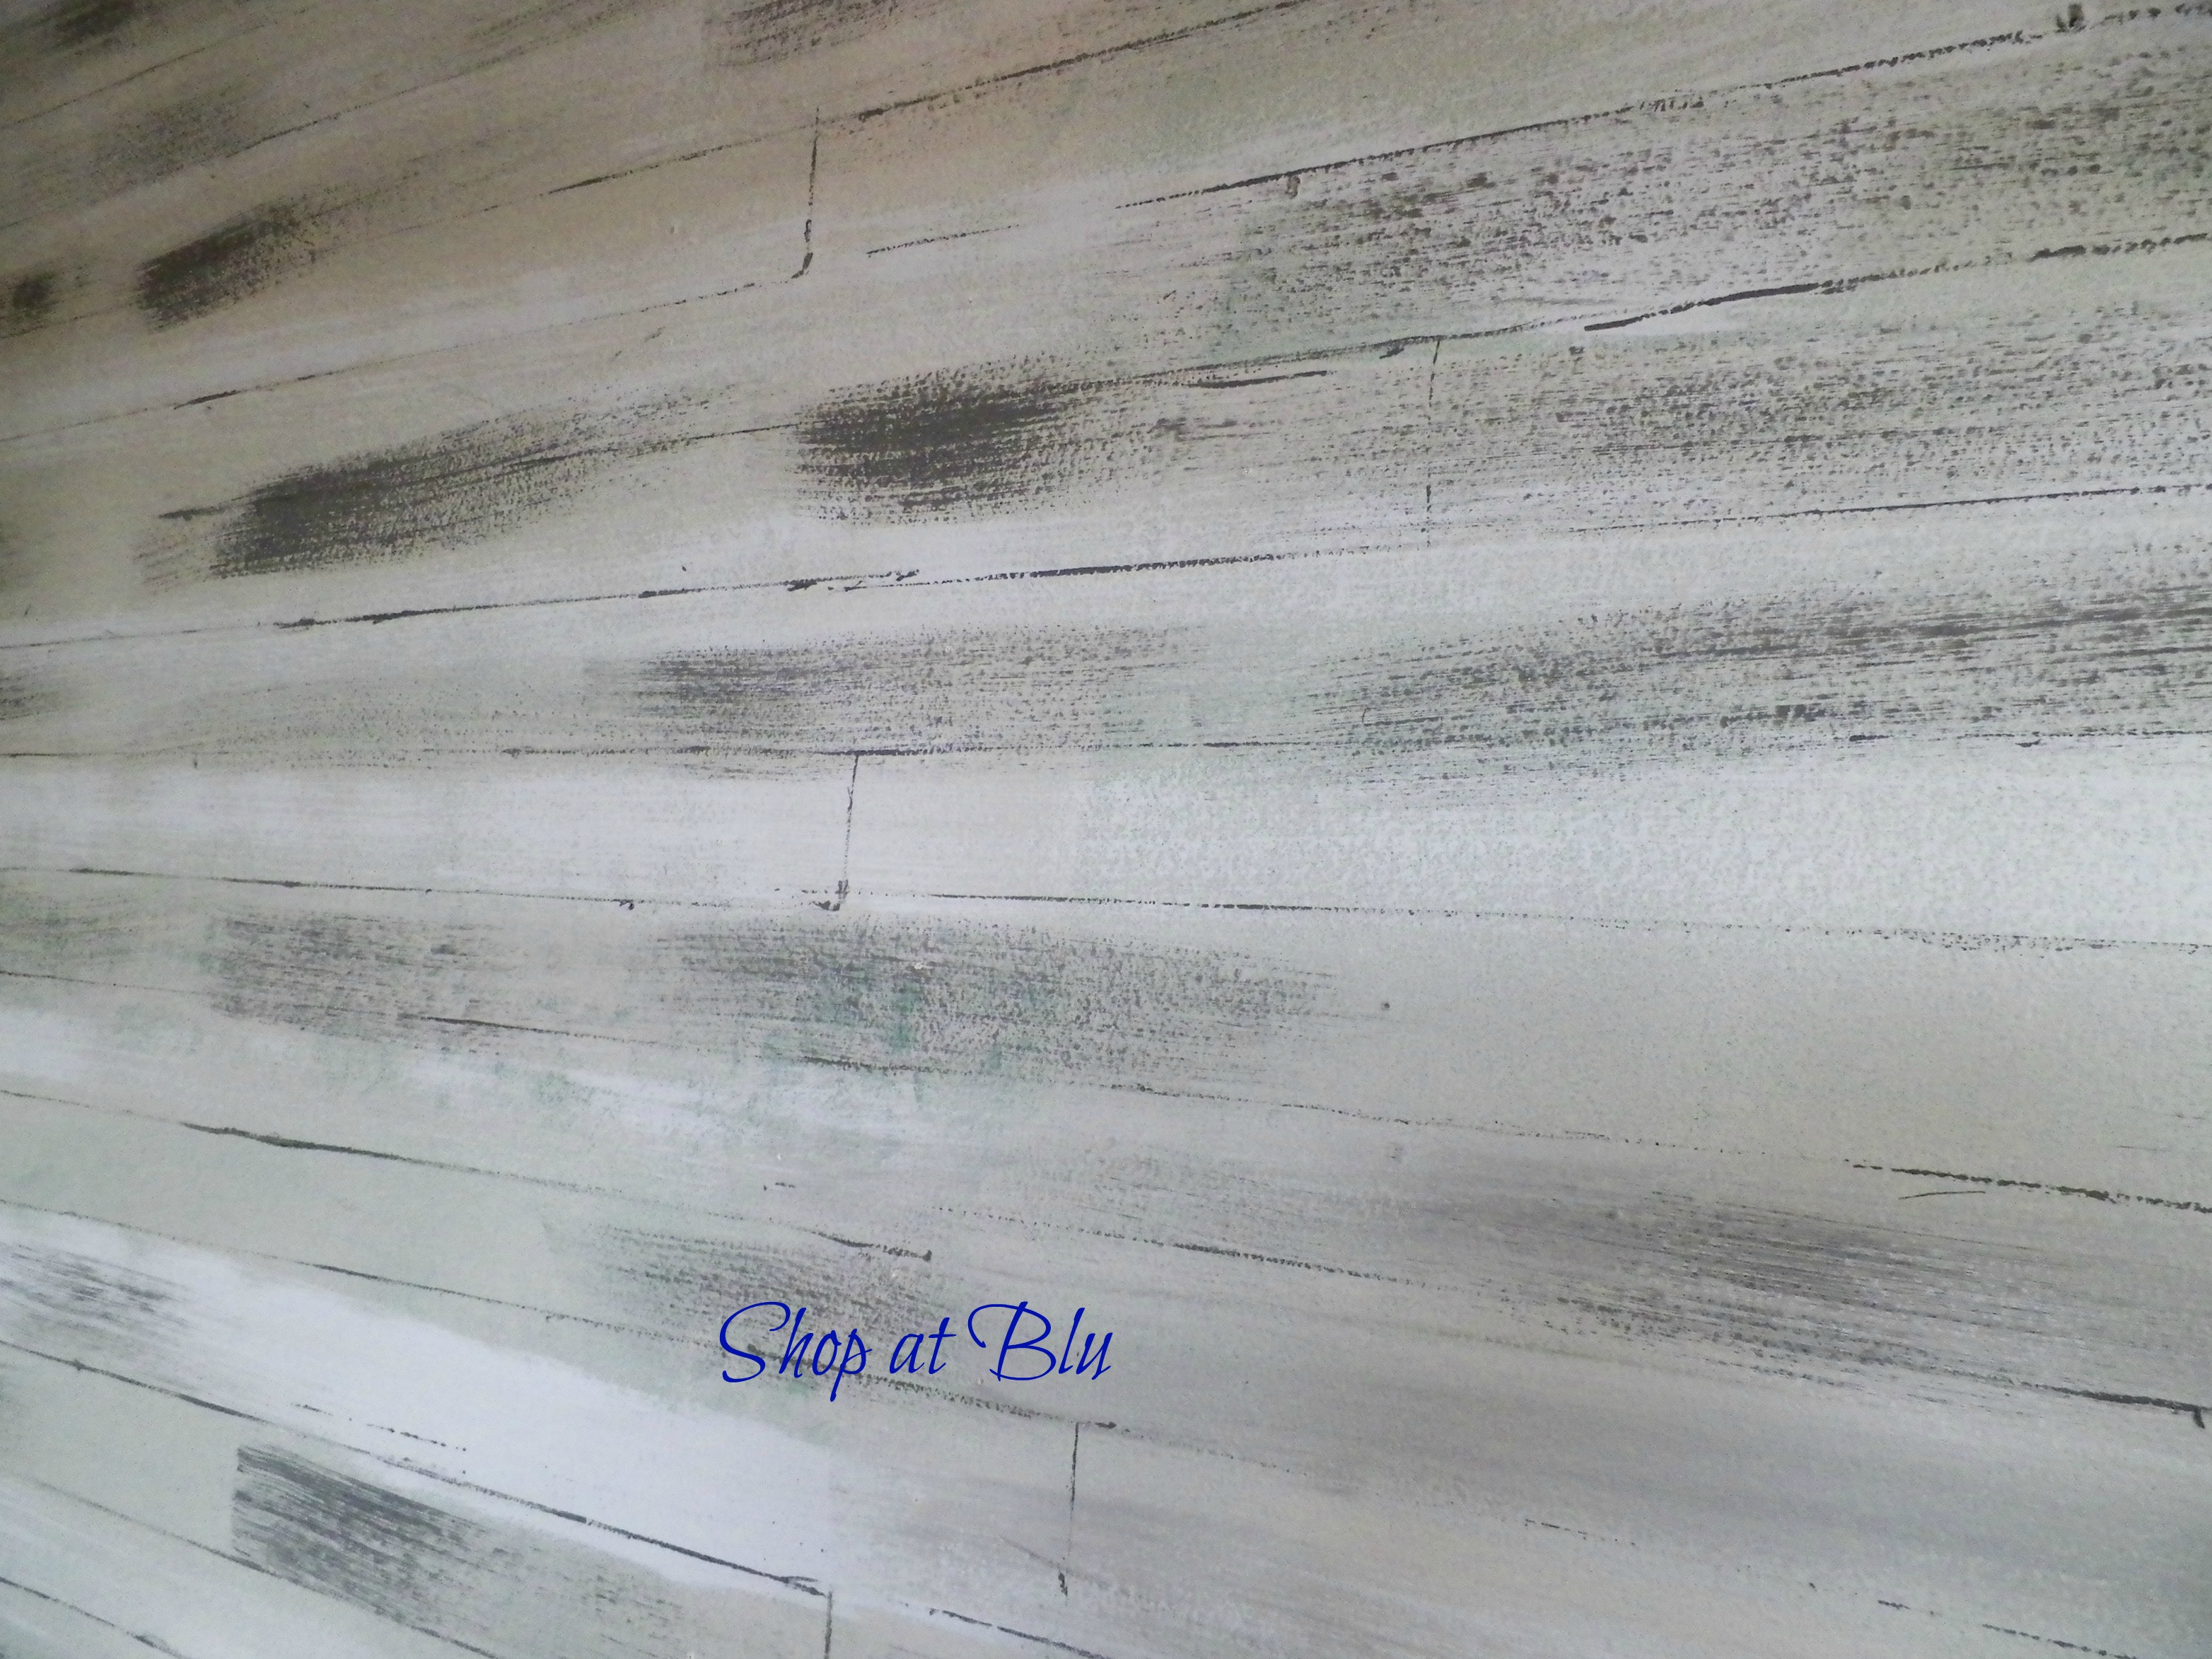
So, plank #1 would be painted heavy on the white with grey and blue dry brush strokes. The plank below it might be heavily painted blue with white and grey dry brush strokes. The plank below this one might be painted grey with white and dark grey dry brush strokes. The goal is to give the appearance of multiple wood sources. No two similar planks should be next to each other.
My wall is 8 feet tall by 10 feet wide. It took me 2-3 hours from start to finish, probably closer to 2 hours as I was talking to and assisting customers during the process. This was the perfect size wall for this project. And I literally used supplies that I had on hand so my cost for this project was $0, only time and brush strokes! Share your pics if you decide to try this project…I would love to see them!
I think this wall will work perfectly for a beach theme, a rustic look or a French country twist! I will post updates to each look on Facebook, Instagram and Pinterest. Stay tuned!


this came out great— I love it! pinned 🙂
Thanks Angie! I appreciate the pin!
Love this = now to find a wall to do.
Haha! I am gonna do some signs next! And maybe a chest! Thanks for stopping by!