Metal Outdoor Side Table Upcycle
As an Amazon Associate and member of other affiliate programs, I earn from qualifying purchases.
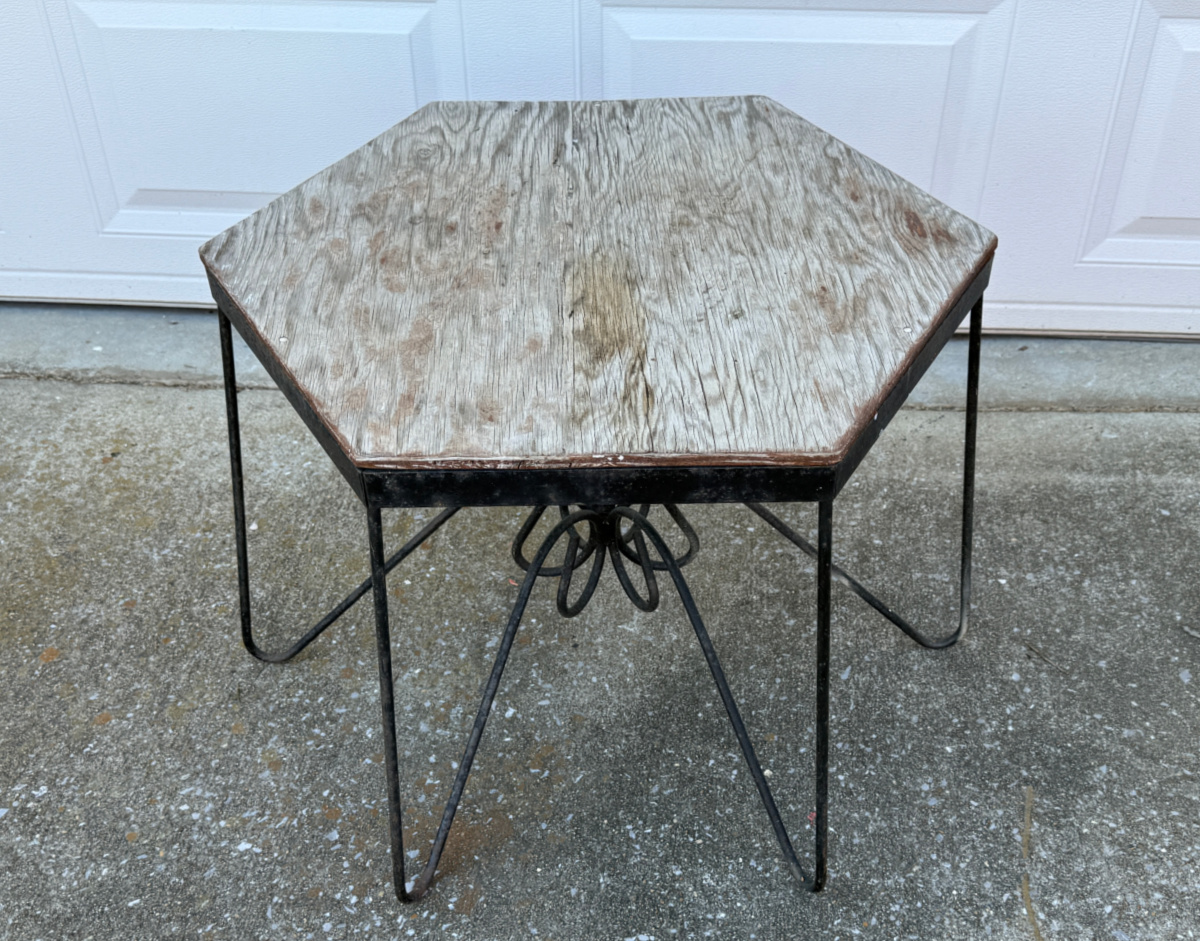
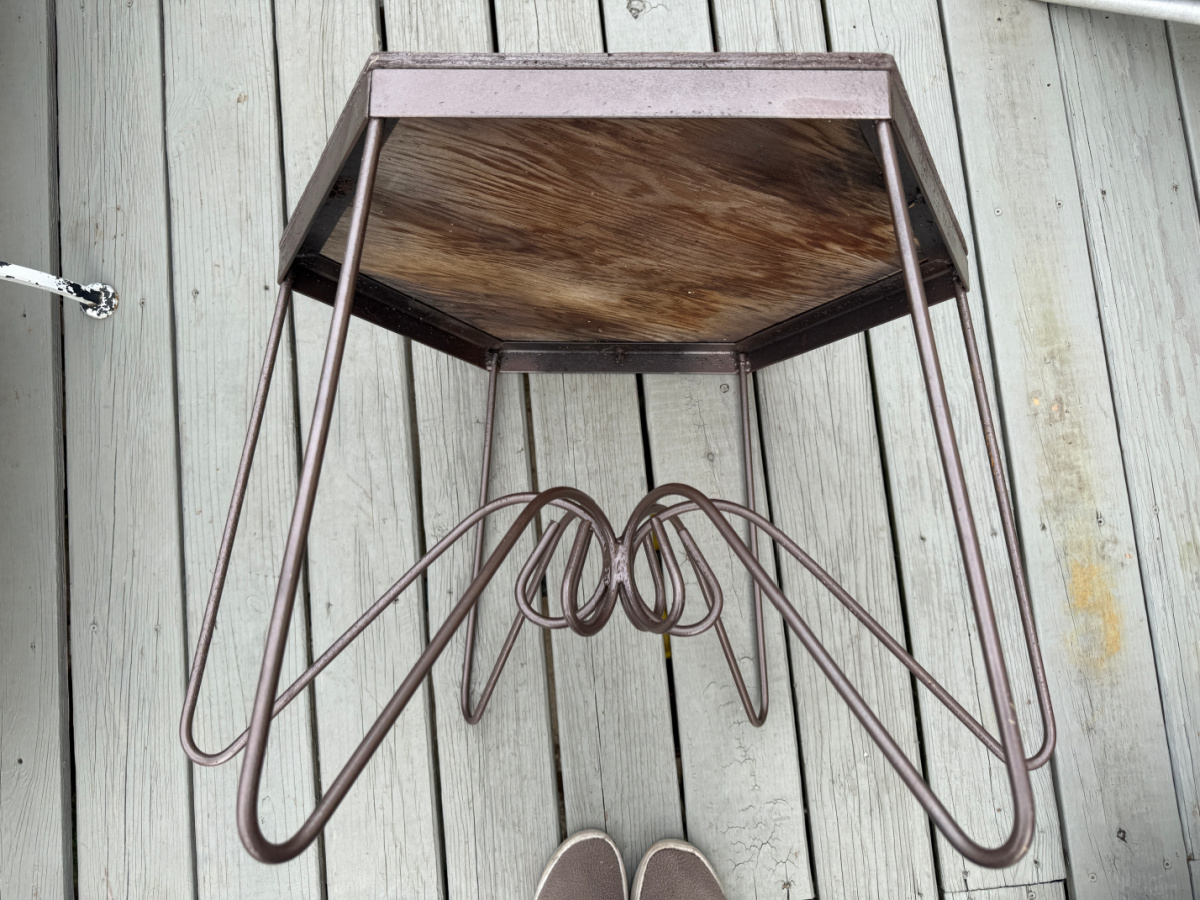
Once you find a great piece of curbside gold, your eye will forever scour the curb on trash day. This beauty was just sitting atop a pile of branches. I heard a very faint “SAVE ME” as I passed. So, I hit the brakes and loaded her into the van. A metal outdoor side table can last many many years. And when the base is constructed of wrought iron, she may just last a lifetime or two.
If I am upcycling, recycling, repurposing, or restyling dated decor, you know it it time for the Thrift Store Decor Team monthly posts. Join us here every second Wednesday of the month to see what we have restored/repurposed this month! You will find direct links to all TEN projects at the end of this post.

Each spring I upcycle some planters or table on our deck. I remain pretty consistent with the colors. Of course, my base color is almost always blue, usually a teal. And I will add a variety of accent colors depending on what flowers I have found so far at local nurseries.
I really wanted some fabulous color in this table so I decided to try the paint pour technique. This is my first time trying paint pour. I was quite surprised to discover that there are many different techniques, products, and styles. I started, appropriately, with simple. My plan was to add the paint, tilt the table and see what this created. Just the basics.
Prep Your Piece
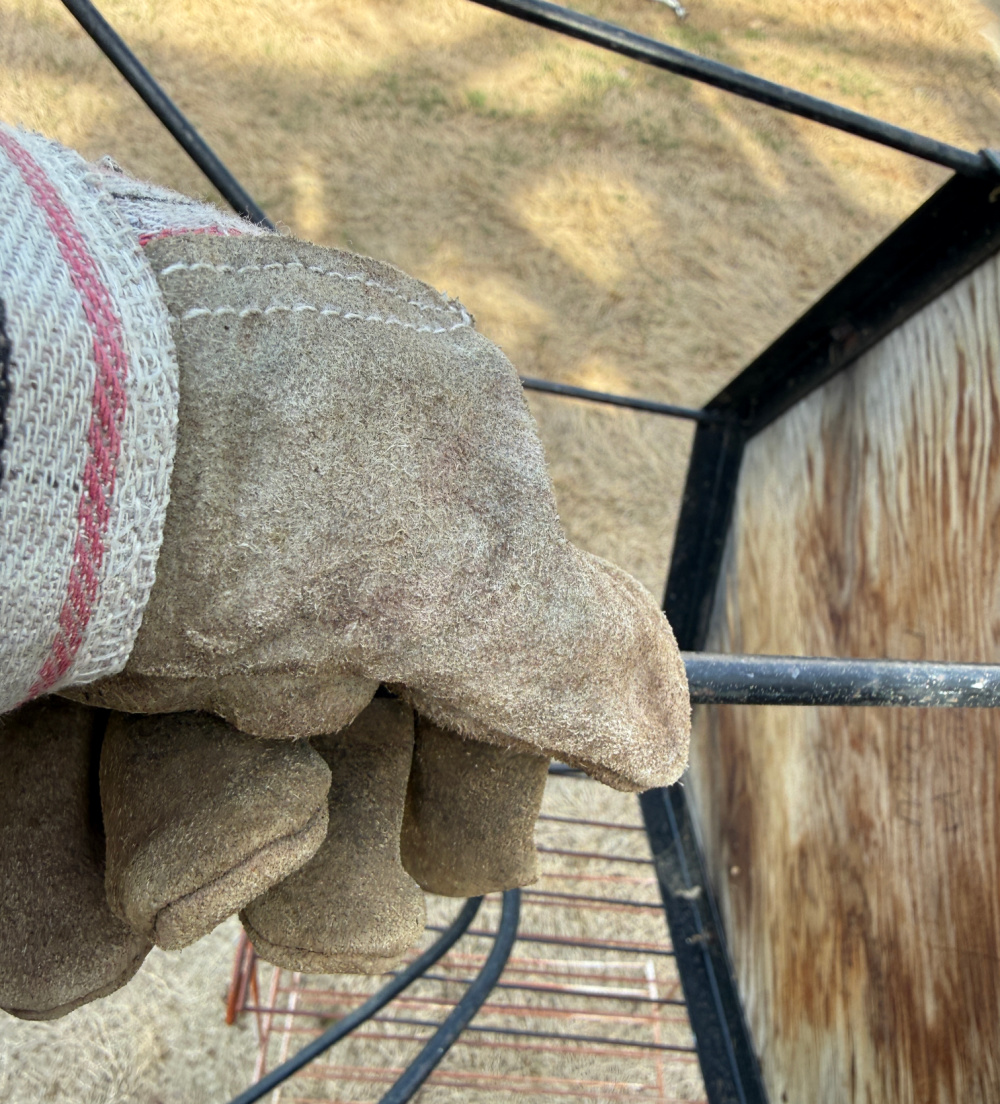
As always, I started by cleaning my table. I gave the wrought iron base a good wiping to remove any dust and surface dirt. I just wiped with a work glove. It worked pretty well.
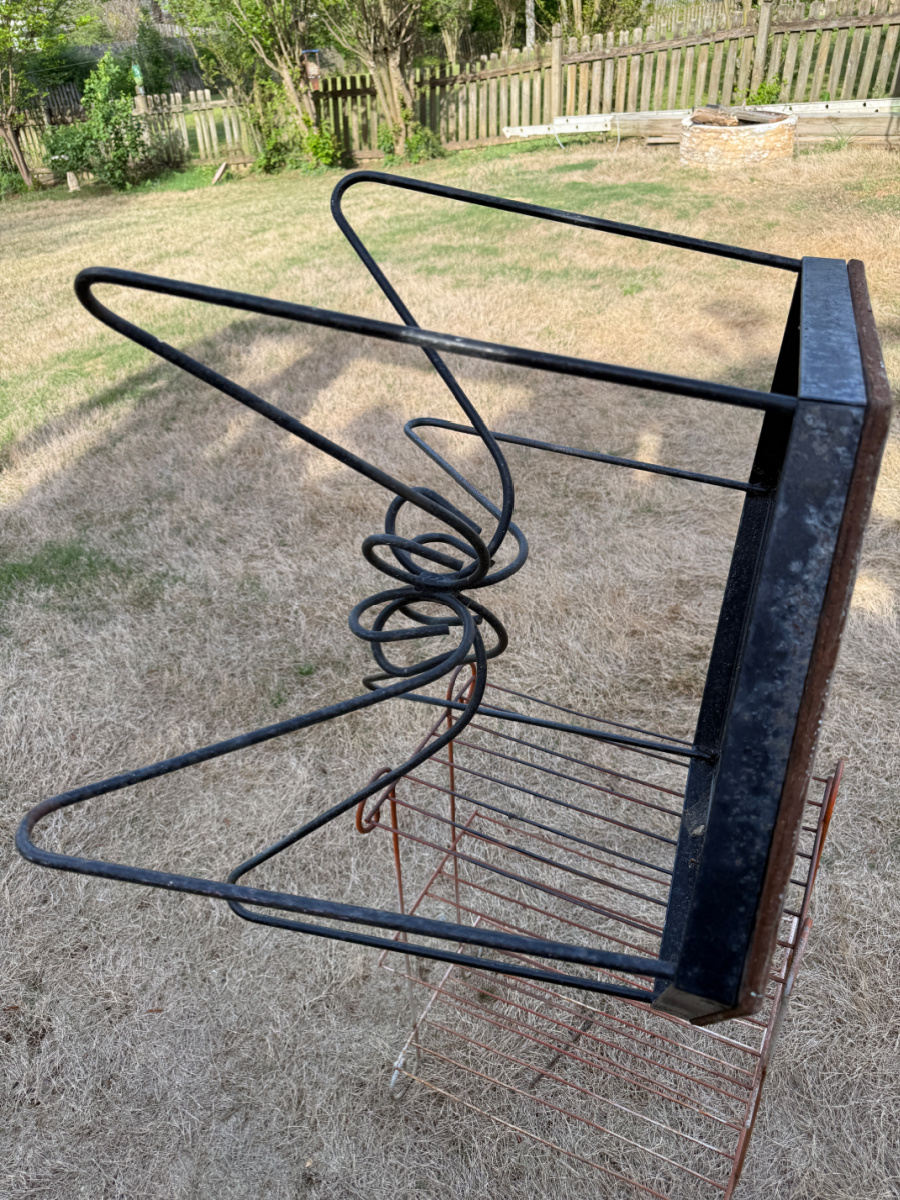
The base was in great shape with minimal surface rust so Rustoleum was a good choice.
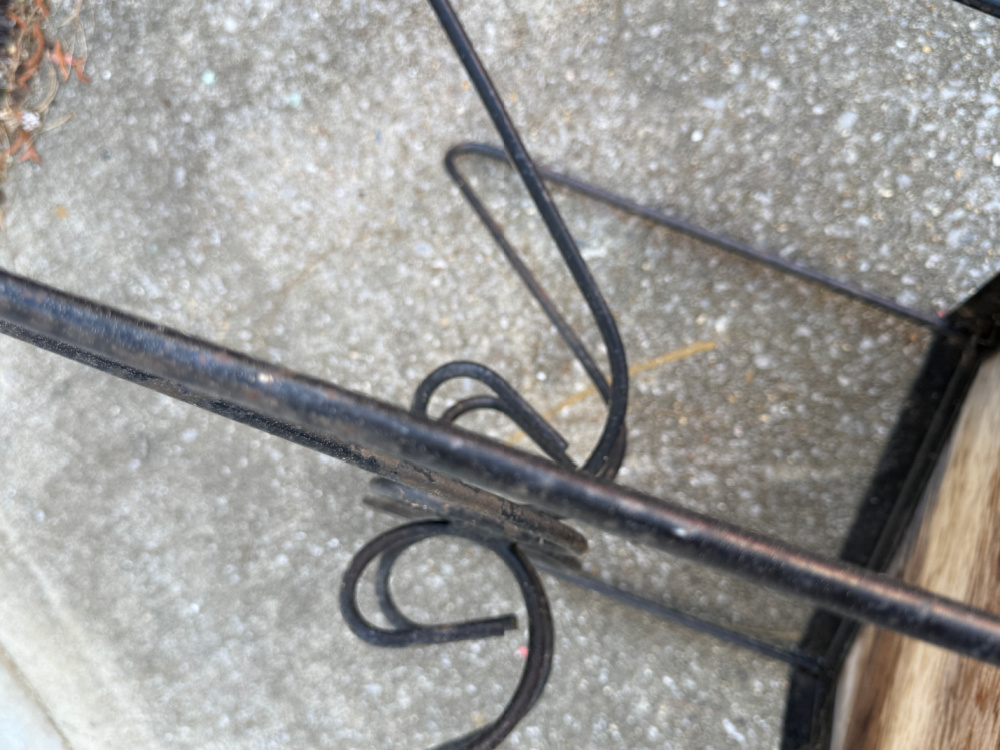
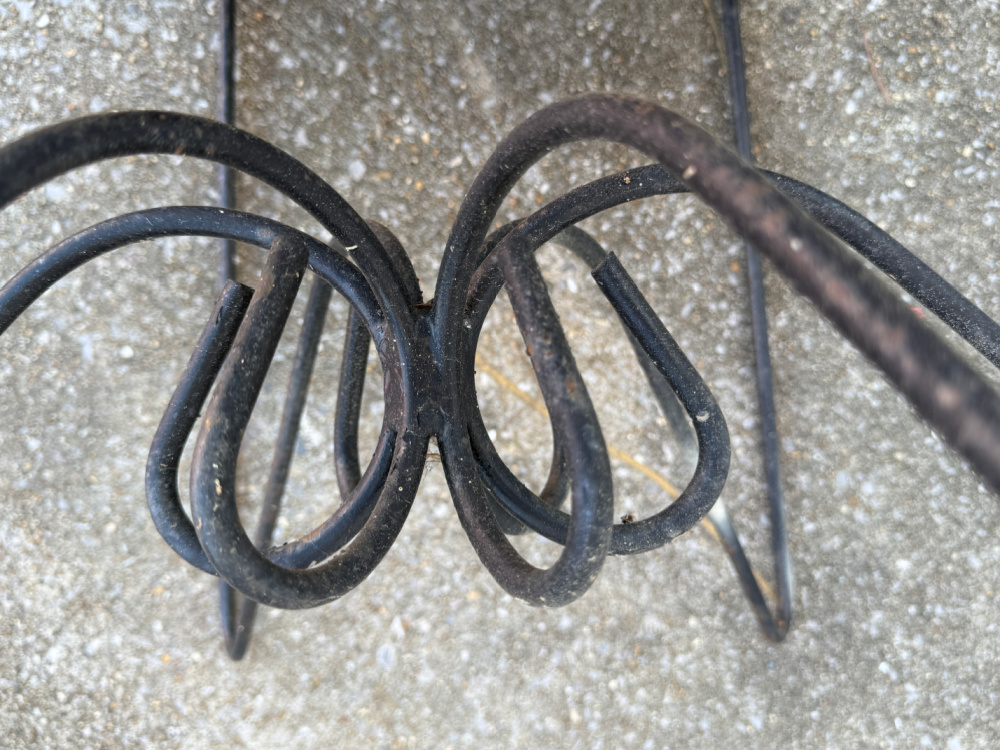
The base has really great features.
Then I sprayed the base with my go to spray paint, Rustoleum. Their hammered metal comes in a nice variety of colors. I chose brown to blend with our deck furniture. I have a little wire shelf that I use for all of my spray paint projects. I just set the project piece on top and apply a coat of spray paint. I let it dry, rotate the piece, and repeat until the entire surface is painted.
I allowed this to dry overnight. I wanted to make sure that the paint had cured because I would be taping off the base to ensure that the table top paint would not pour onto the newly painted base.
Rustoleum does not disappoint.

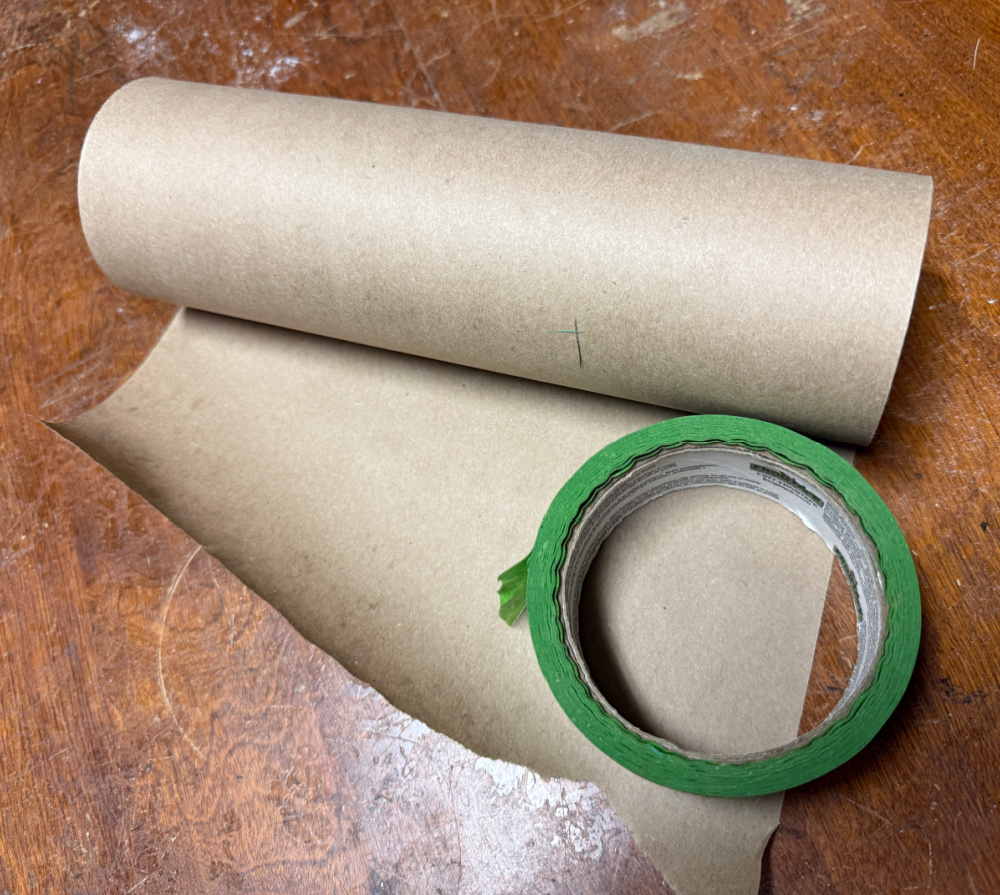
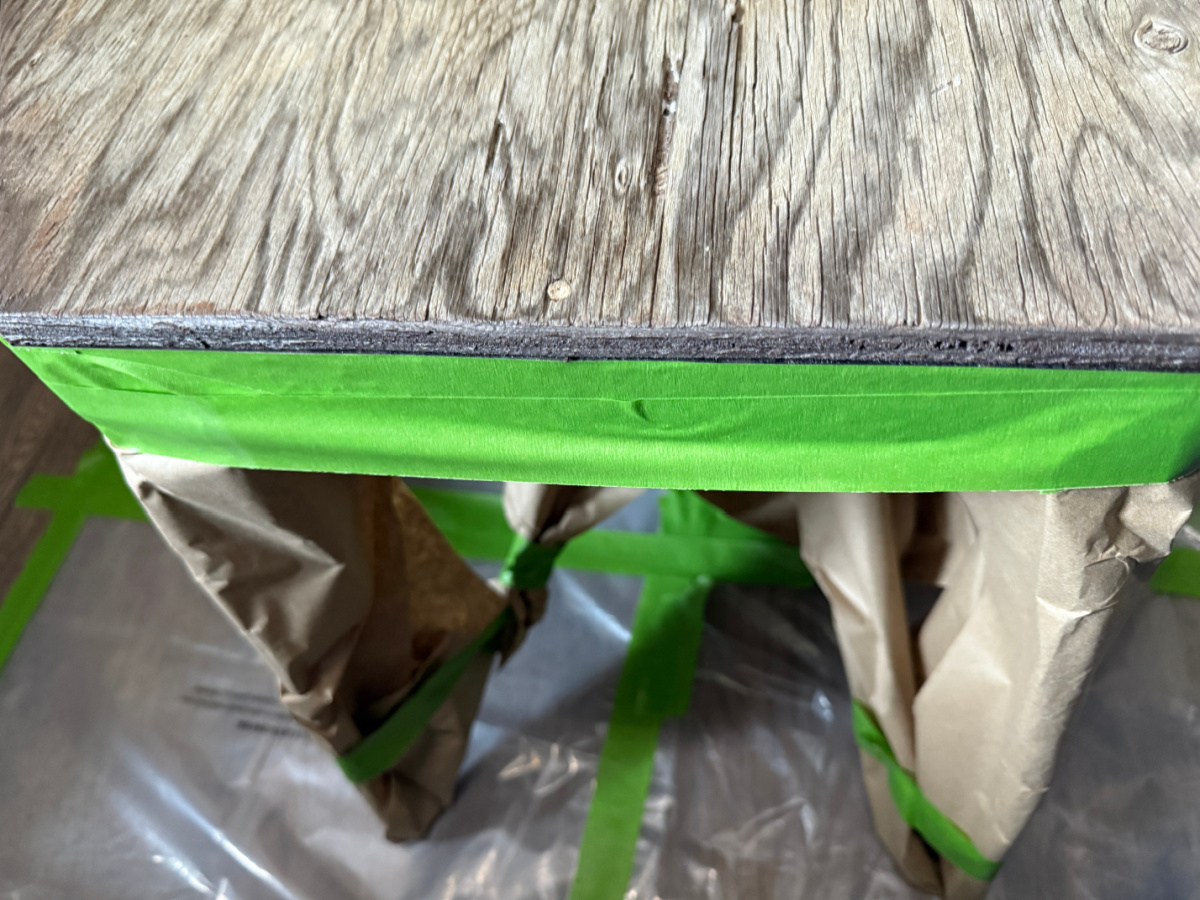
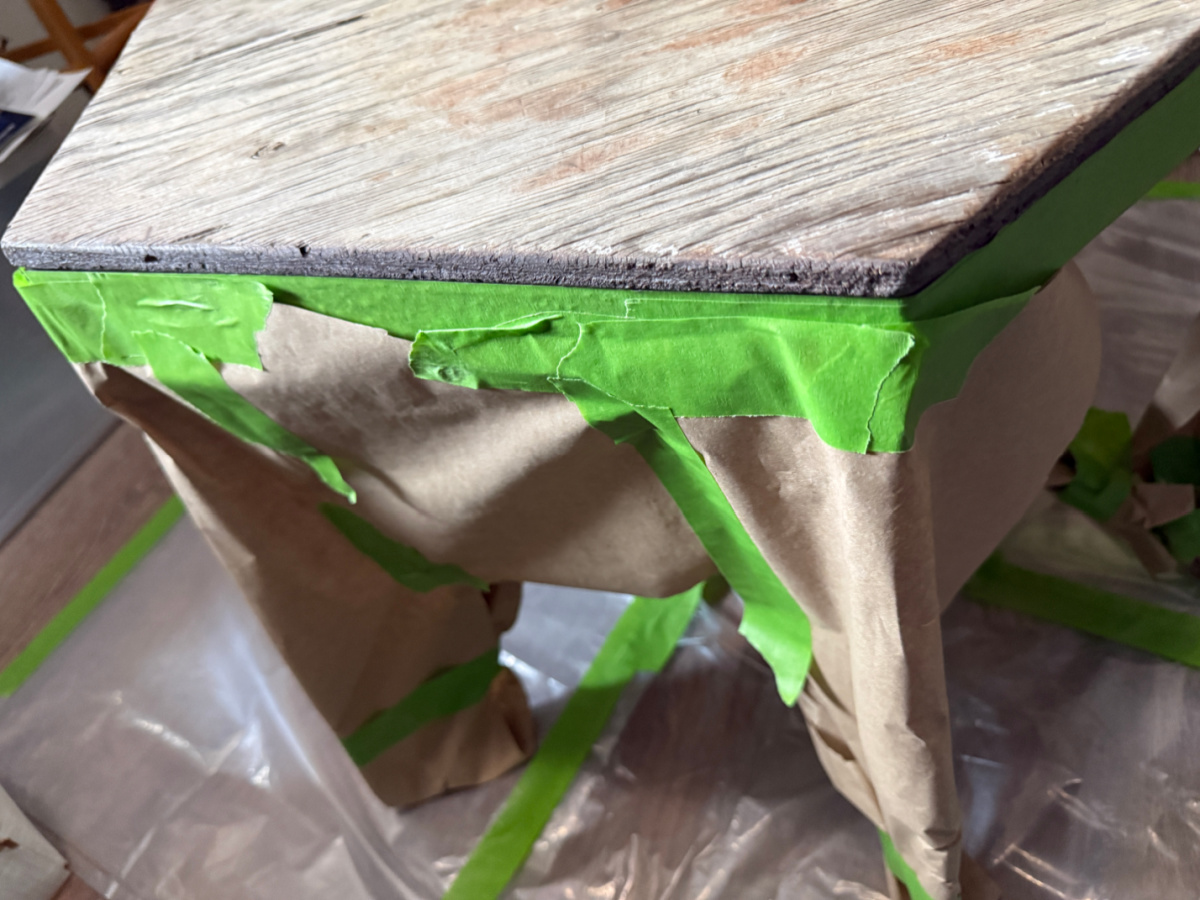
The next day I used brown craft paper and frogtape to mask off the entire base and the rim of the table top.
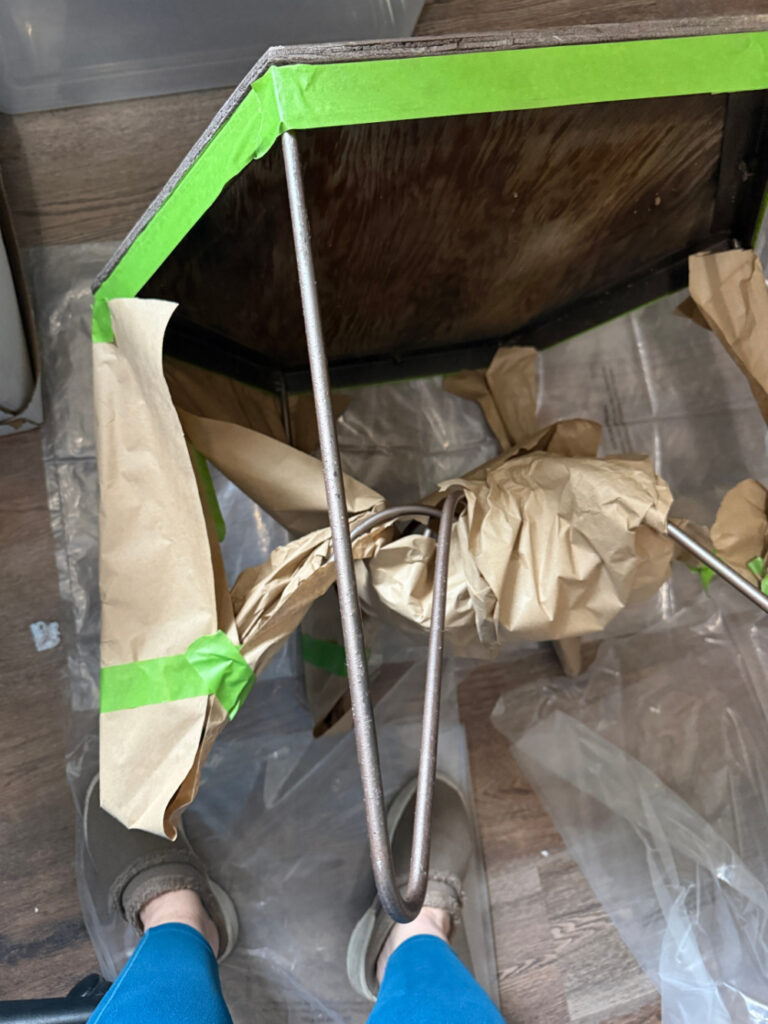
I made certain that the FrogTape was secure and left no spaces through which paint could seep.
It was not pretty but it was efficient.
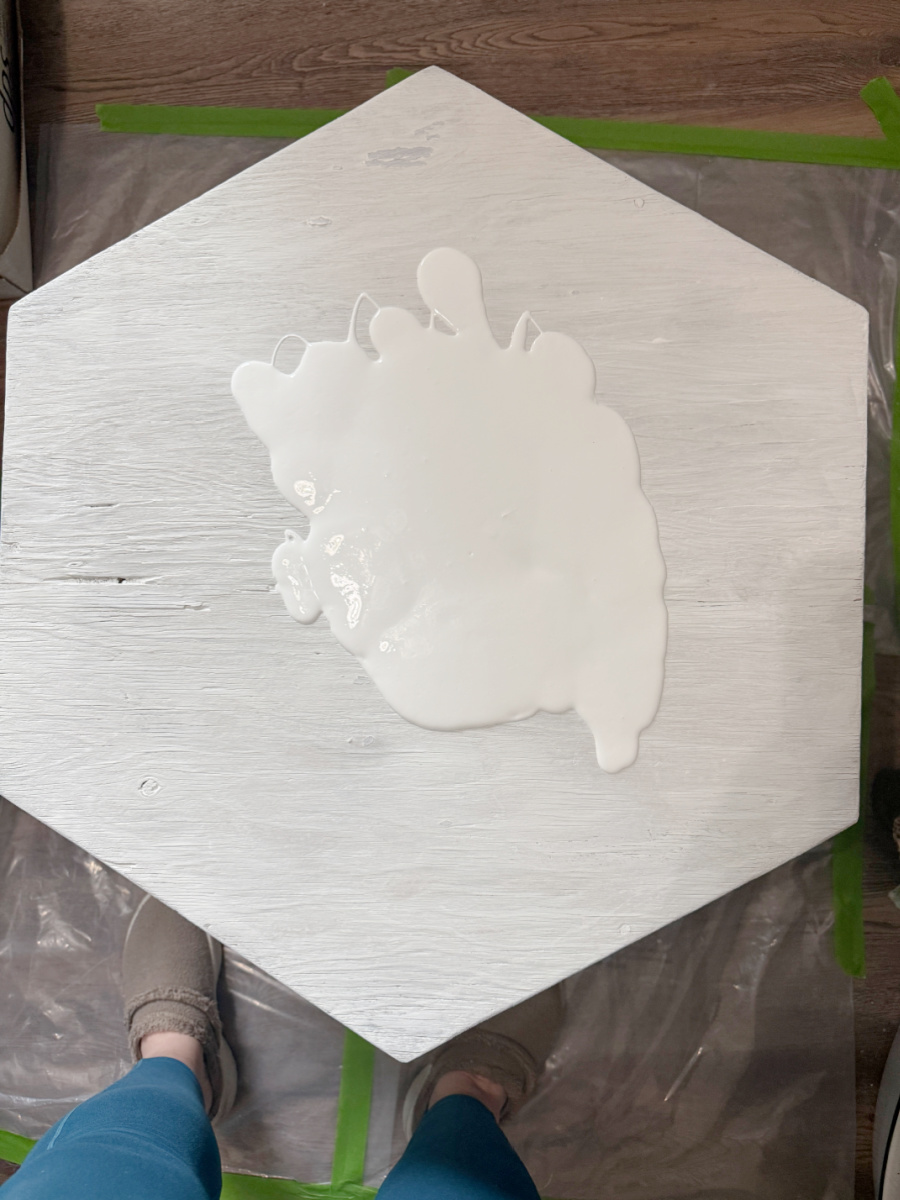
Next, I prepped the wooden surface of the table top with a base coat. I used Black Dog Salvage Furniture Paint in Clean Canvas.
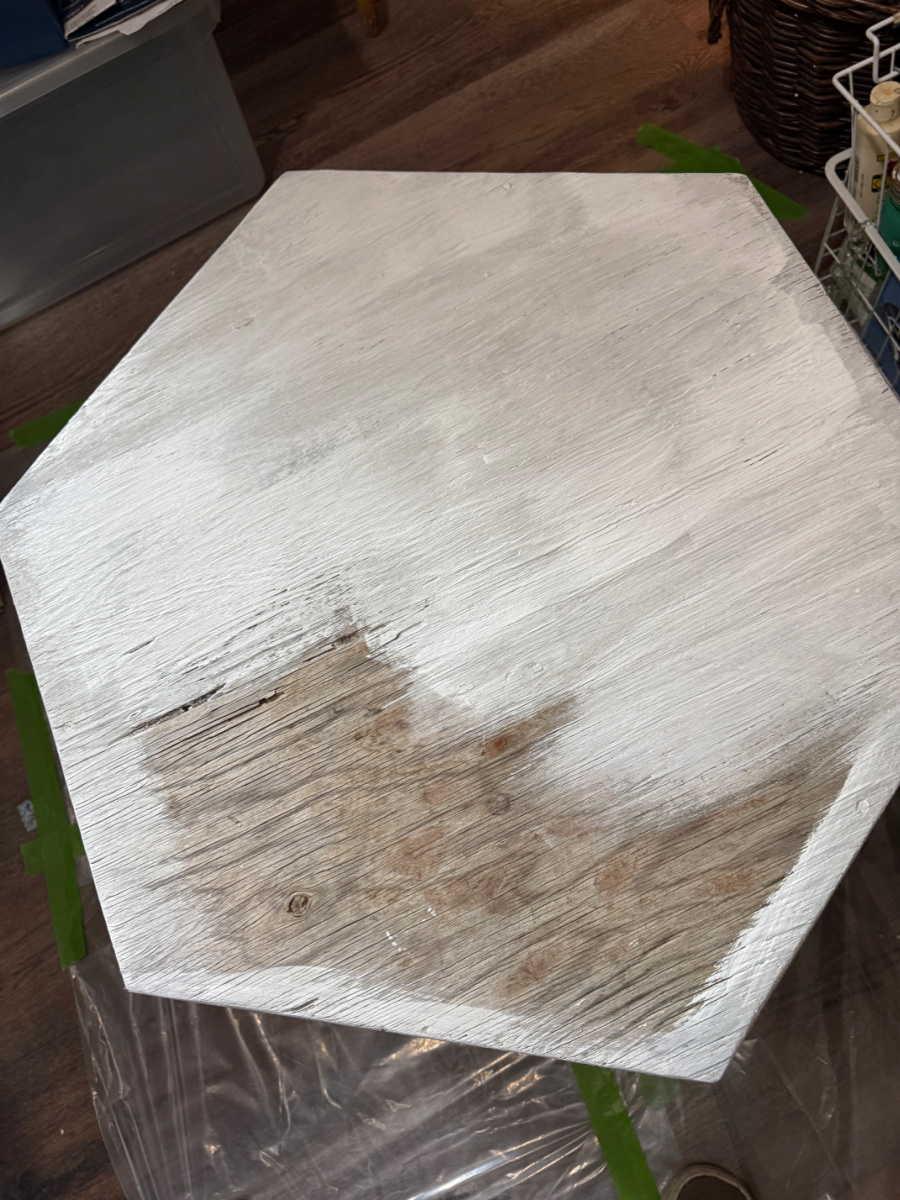
After this dried, it was time to pour on the white acrylic.
Commence the Paint Pour
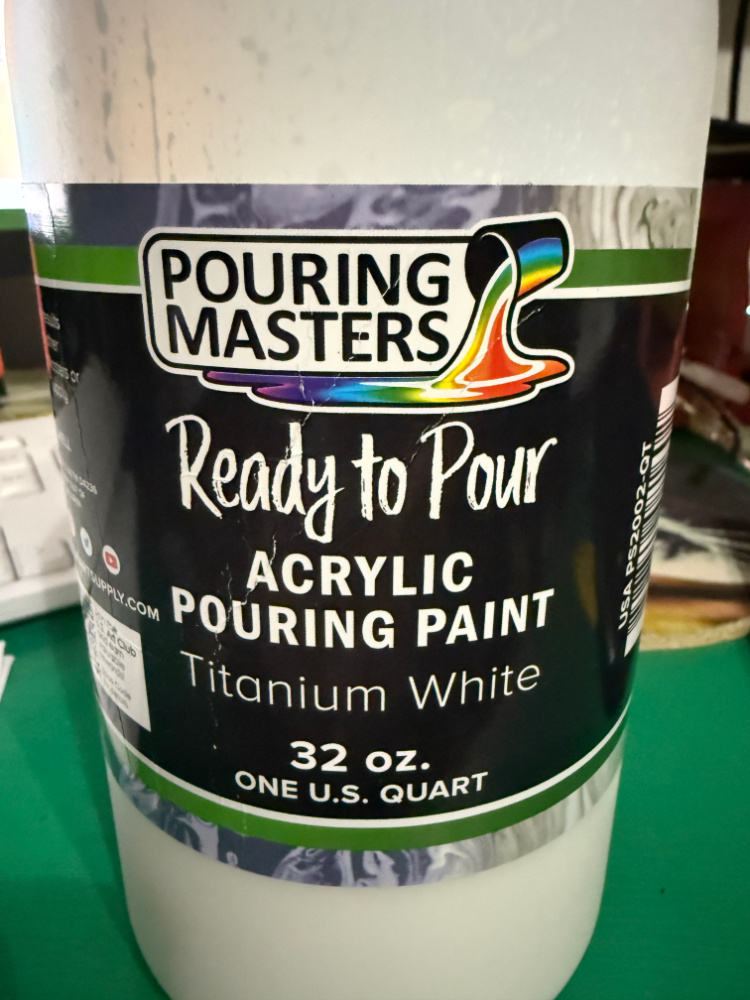
I ordered the acrylic paint from Amazon. I decided on a background coat of white and found this larger 32 oz. volume white for the background color.
I grabbed this variety pack of 18 great colors. Bonus as it was from one of my favorite suppliers, DecoArt. If you need paint for any craft project…DecoArt is your source.
Aren’t these bold colors fabulous?
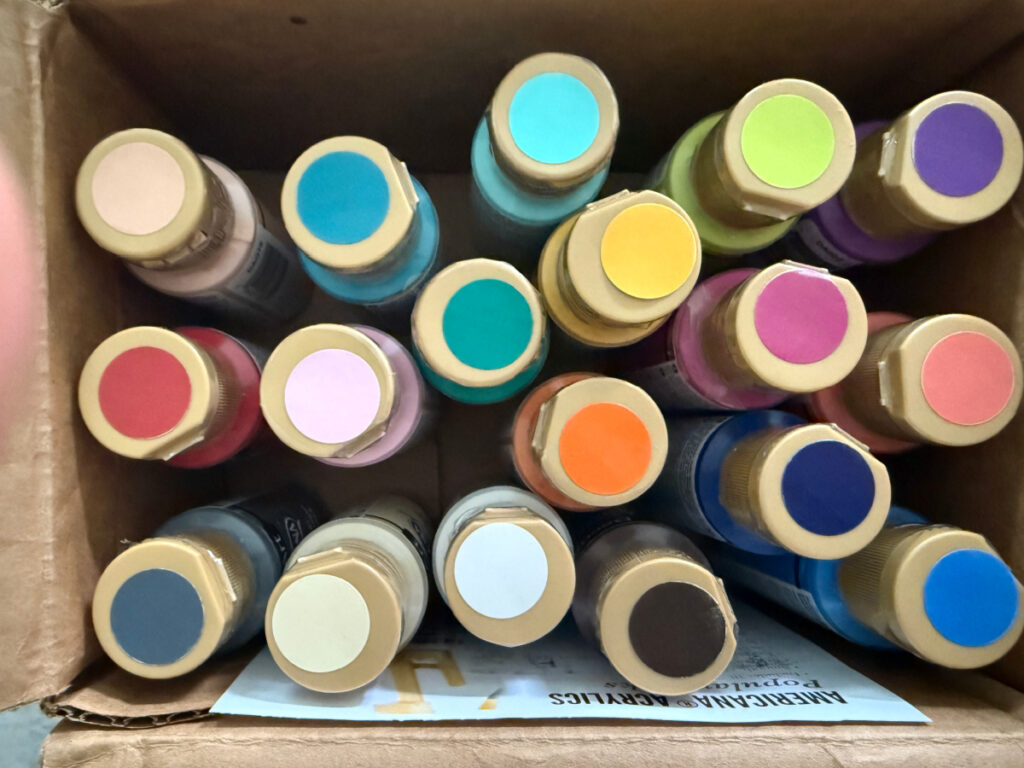
It was so difficult to narrow down the colors but I decided on:
- Ultra Blue Deep
- Ocean Blue
- Bahama Blue
- Purple Pizzazz
- Royal Fuschia
- Coral Blush
- Cadmium Yellow
I watched a few tutorials but tried to stay with the basic beginner projects. Some of the instructions recommended using Floetrol to keep the paint fluid and extend the drying time to manipulate the color across the surface. While I did have Floetrol on hand, I really wanted to start with the basics and try a simple approach on this first project. Yes, I was fairly certain going in that this would be the first of many paint pour projects.
So I did not use the Floetrol and I did not have a problem in applying the white.
Once I had all of the white added, I lifted the edge of the table closest to me and tilted it at a steep angle. The paint immediately began to run toward the opposite edge.
Once the paint ran over the edge, I set my side of the table down and grabbed the adjacent edge. I followed the same process until the top was covered with paint.
I did add a bit more white at one point to cover one of the edges. But the process was easy.
The paint did seem to be drying quickly so I was a little worried about adding the bright colors.
What I did not do, was photograph the process of adding the colors. I was a bit nervous that the paint would dry and I would be stuck with a bunch of wonky circles. It was also difficult to stop the process to grab the phone for phots since it was a quite messy. Next time I will try to set up video because even using the remote shutter gadget would entail messy fingers on my equipment and I was not going there.
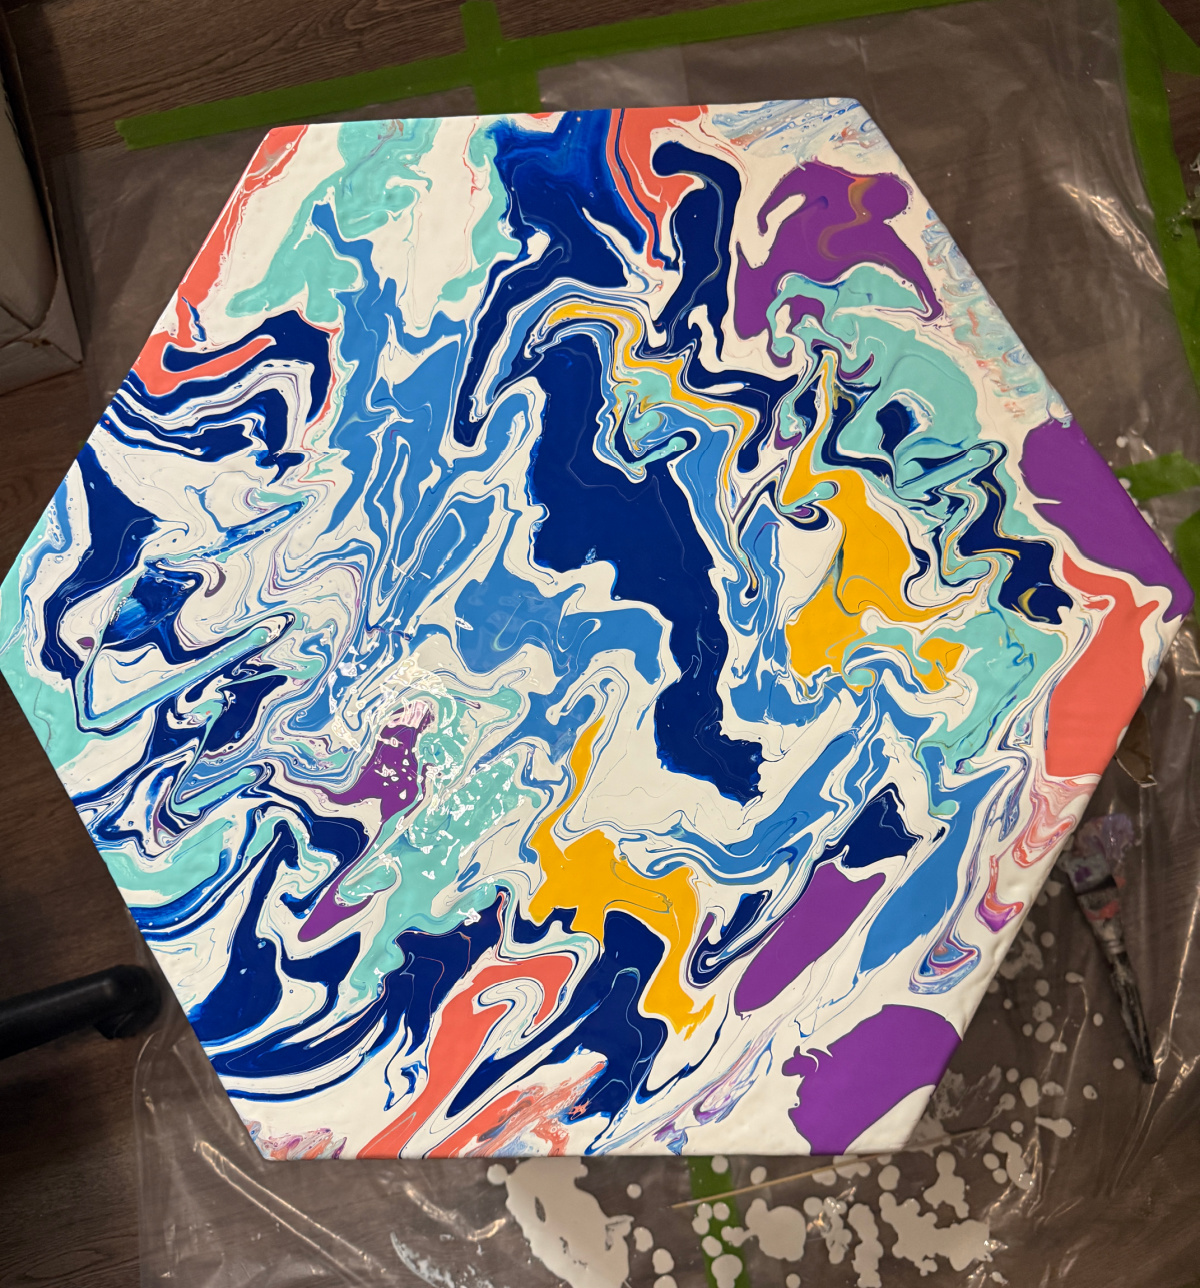
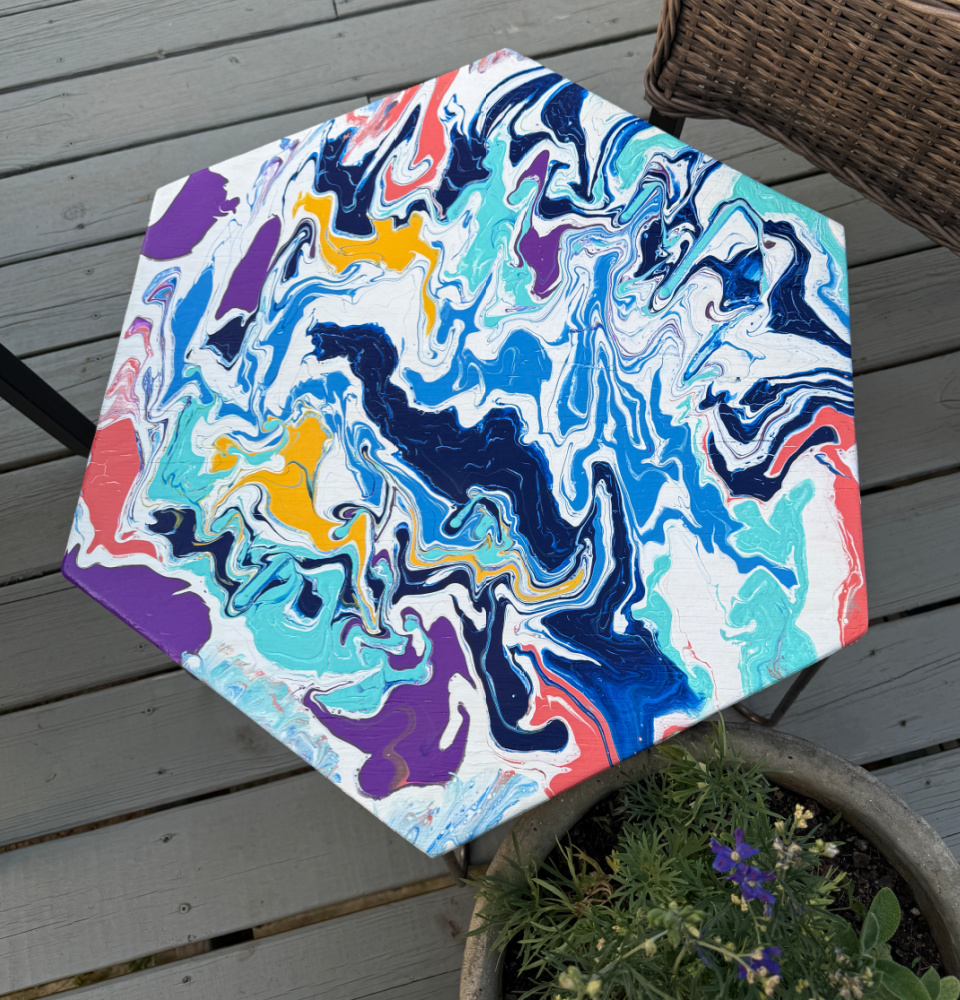
My design was basically as follows:
- I put a large circle of blue in the center.
- Added smaller light blue around the large blue circle.
- Added more teal circles.
- Made a few squiggly lines randomly in
- Added some random small dots of purple, pink and yellow.
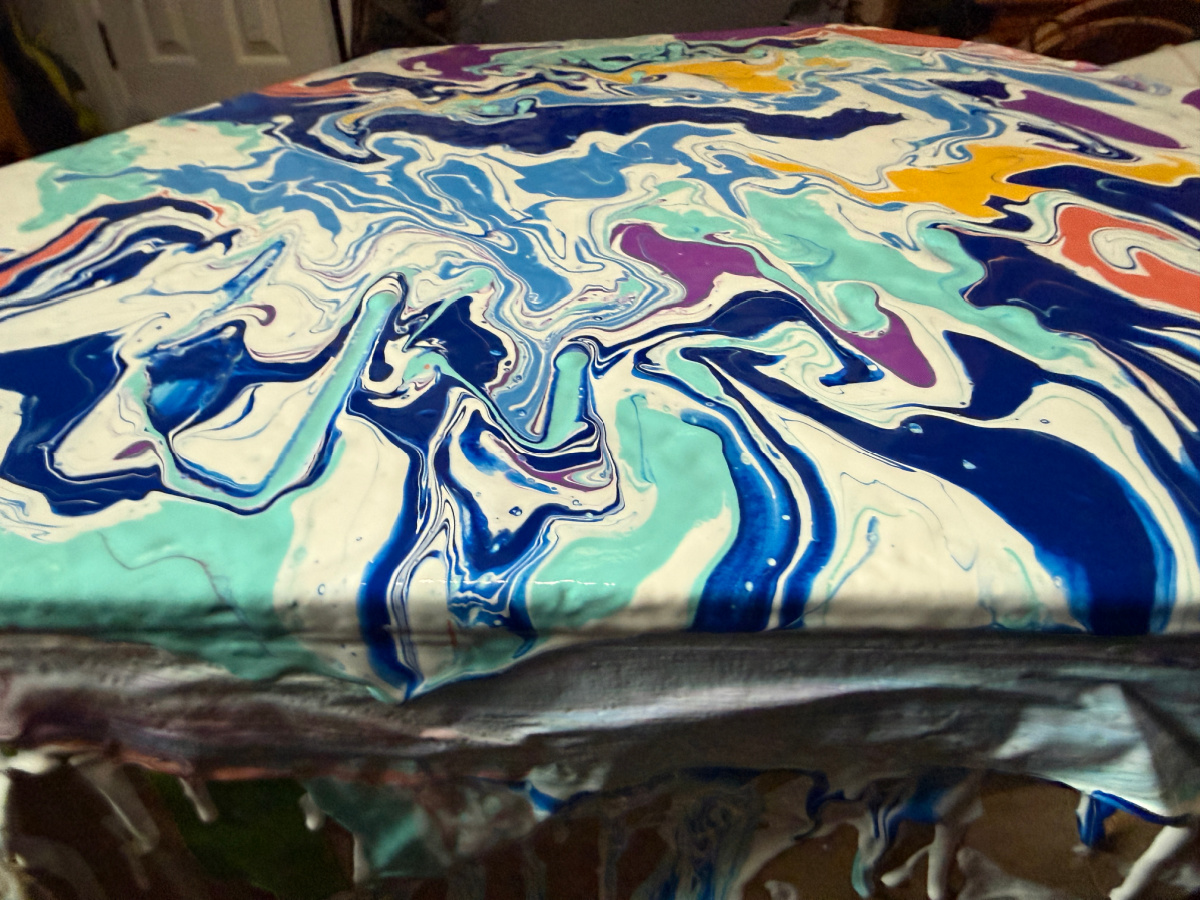
I used a skewer and pulled it through the circles to add dimension and disperse the colors across the table top. Then I started the tilt process.

I repeated the table tilt process until the color had dispersed to my liking.

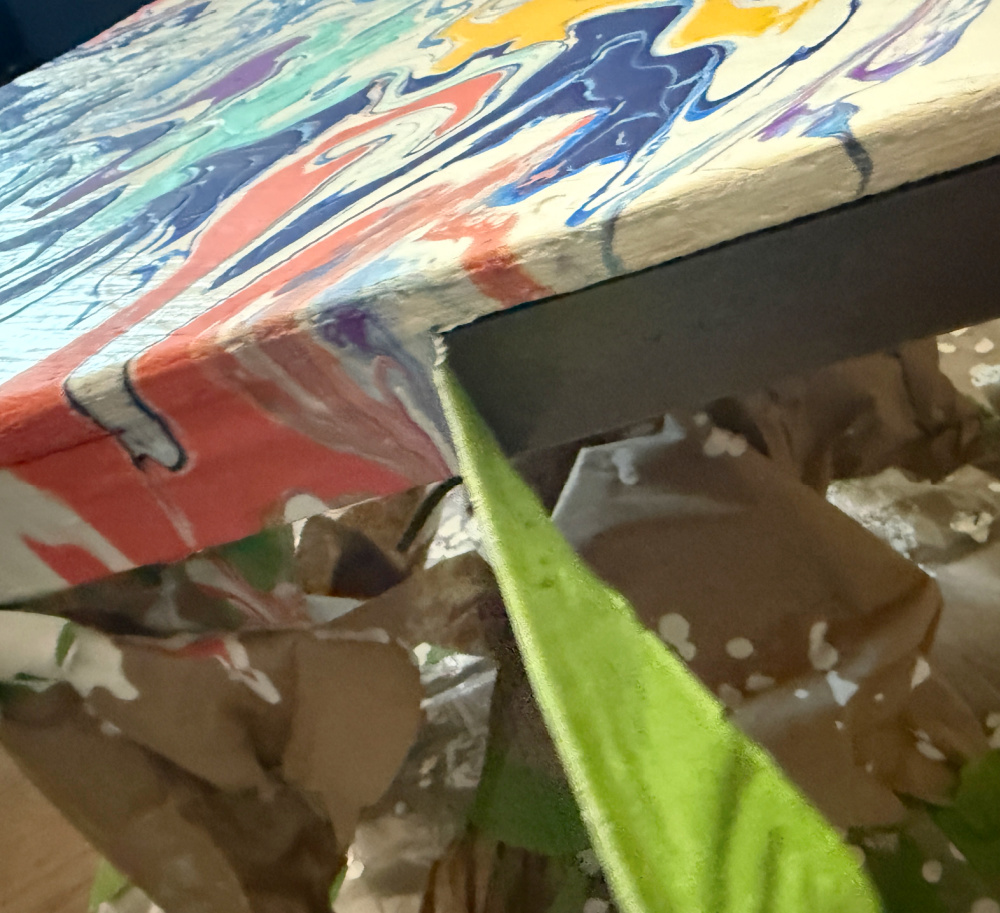
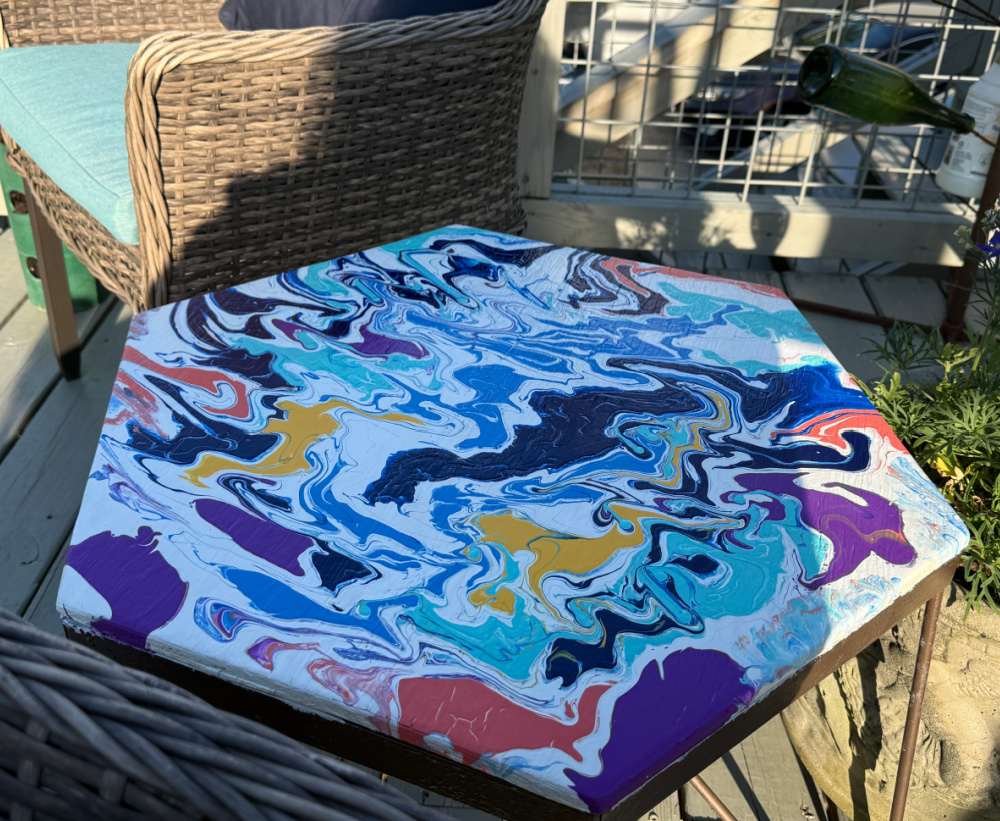
I was careful to make sure the sides were covered completely as the paint ran over the edge of the table top.
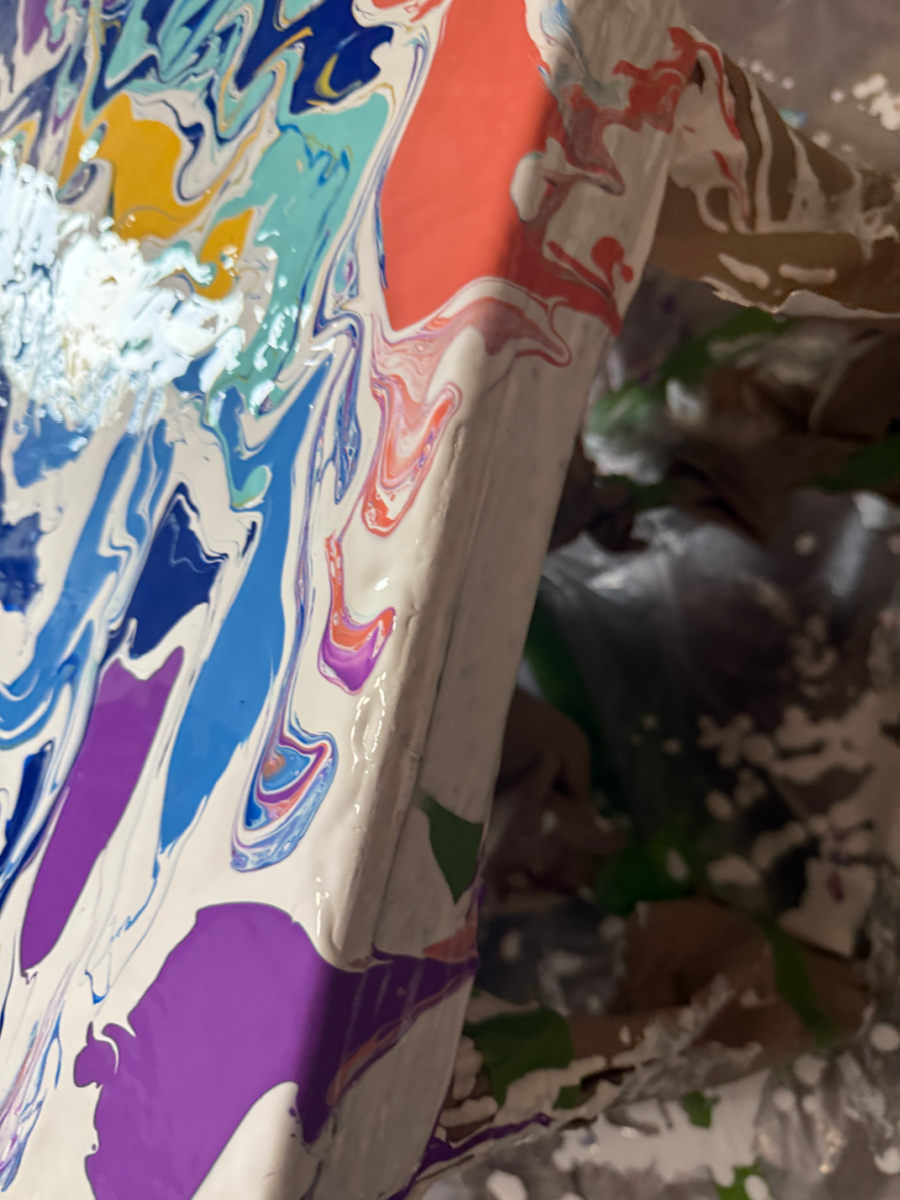
There were six sides on this table so I checked them all.
I turned on the ceiling fan and left her in the room to dry overnight.
The Frogtape came off easily and there was minimal paint seepage.
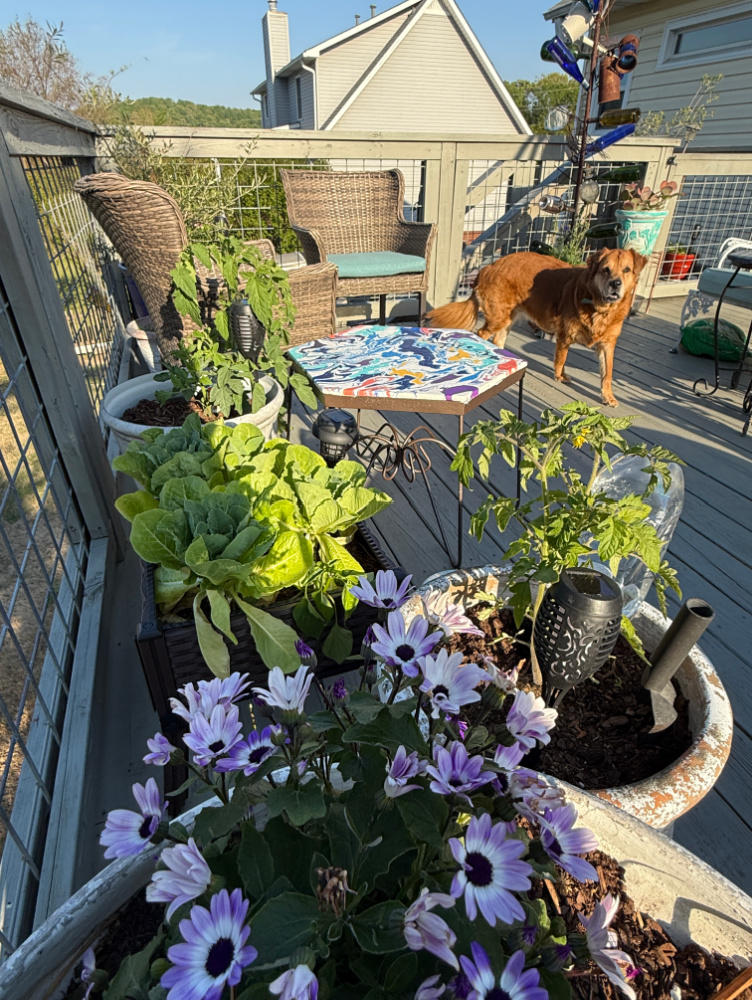
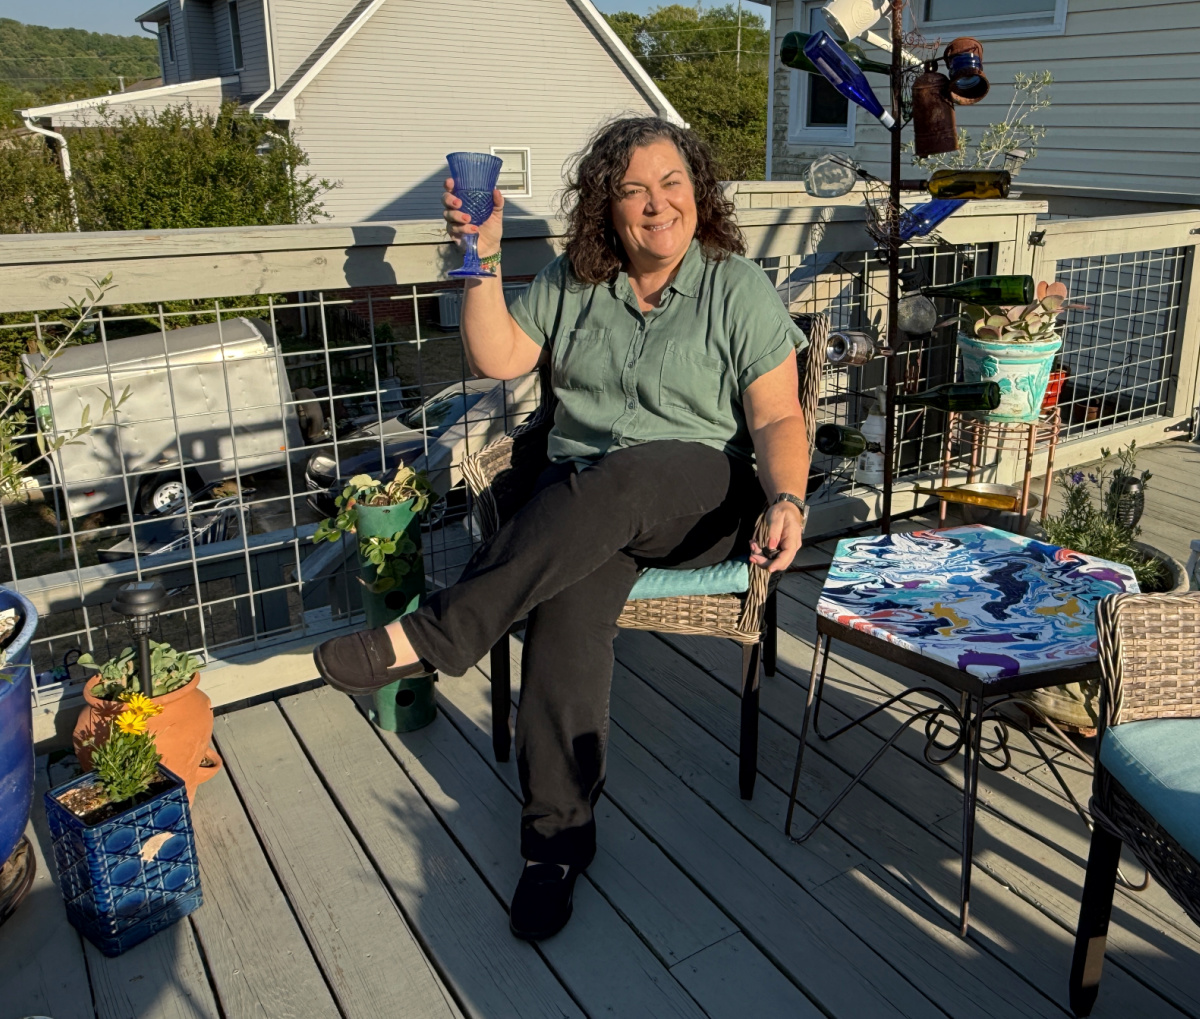
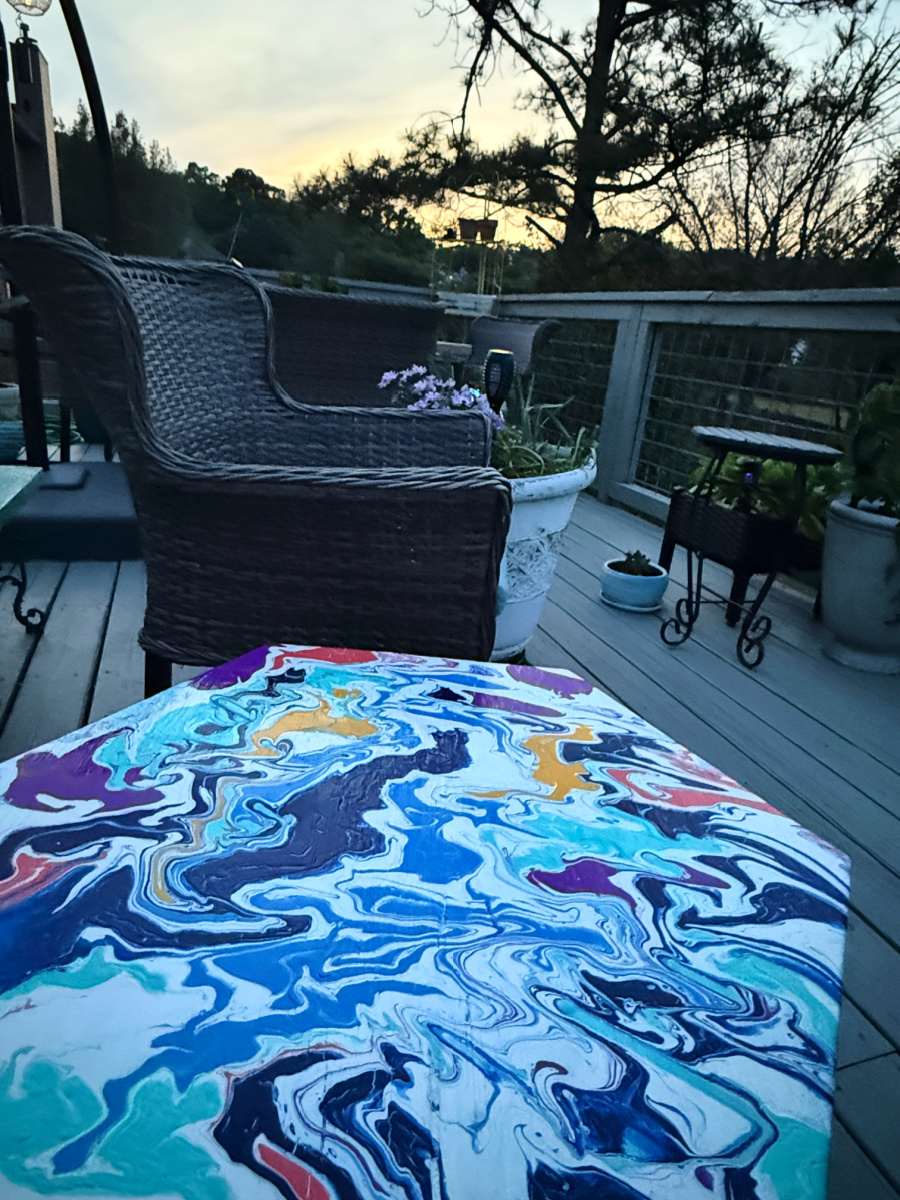
And she looks great on the deck.
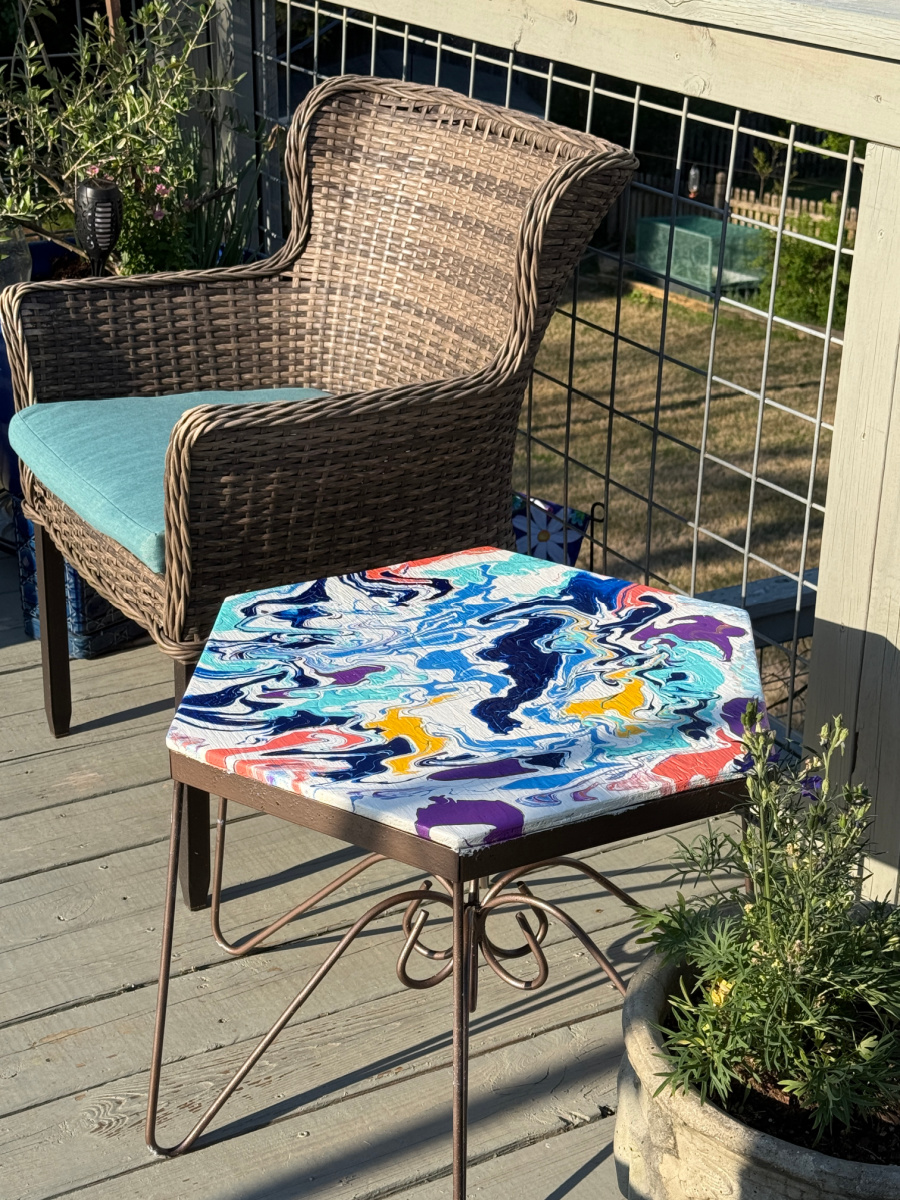
Another Mia approved project.
This technique has peaked my interest:
- I am interested to learn how to make different designs.
- One tutorial said to add rubbing alcohol to some of the colors to create a more dramatic effect (the paint would separate creating a different visual).
- Small projects would be really fun.
- I can see a resin finish for indoor projects.
- So many possibilities.
Cheers!

Shop at Blu Metal Outdoor Side Table Upcycle
Exquisitely Unremarkable DIY Decal Pitcher Makeover
My Uncommon Slice of Suburbia Easy Decorative Moss Balls for Spring
Redhead Can Decorate How I Transformed Our Foyer with a Thrift Store Room Divider
Sadie Seasongoods Geometric Abstract Art from a Collage Frame
Our Southern Home Piano Bench Makeover with New Color and Fabric
My Repurposed Life Can This Become a Lamp?
Funky Junk Interiors Rustic TV Stand Dresser Makeover with Easy Wood Strip Drawers
Our Crafty Mom DIY Rope Vase Pottery Barn Dupe
Songbird Vintage Tool Decor Idea
How fun is that!?! Wow, I love this technique and the result. Now I need to find a table to play with in the same way. Immediately! 😉
Thanks, Kim. It really was fun not knowing what to expect. I can just picture the beauty of reds, whites, mauves, greys, and beige for your space.
What a fab makeover, Suzanne! I would have been hardpressed to pass it up had I seen it on a pile of branches, too!
Thank you, Sarah!! My rule is no new picking until the garage has been purged. But I snuck this one in.
This is so creative and colorful, perfect for your gorgeous deck!!!
Thanks, Kristin. After a few years with the new deck I’m finally finding my preferences.
I watched a video of this technique years ago, and totally forgot about it. You did a great job for your first time, you should be really proud of your new table Sue!
I love the colors, and I found myself immediately finding “subjects” in the paint colors. The first one that jumped out at me was a genie!
Pinned!
gail
Thanks, Gail! I didn’t even this about searching for patterns. How fun!
Suzy…this is SPECTACULAR. I want to try it ASAP. I love the details on the iron too!
Thank, Julie!! My mind was racing throughout the process. I want to try different colors and different patterns and new surfaced. LOL.
I am so fascinated by the whole paint pouring thing. Currently though I don’t have a good place to actually try it out. However, I am also very interested in the pole you have on your patio. The one with all the bottles. Where should I look to find tips on the “ingredients” for one of those?
Hi Adie! It was raining the day I had to do this project so I actually did it in my office. I laid tons of plastic down and it all cleaned up nicely. You are talking about my bottle tree. This was locally made many years ago .but you can now find them on Amazon!