Wine Bottle Centerpiece
As an Amazon Associate and member of other affiliate programs, I earn from qualifying purchases.
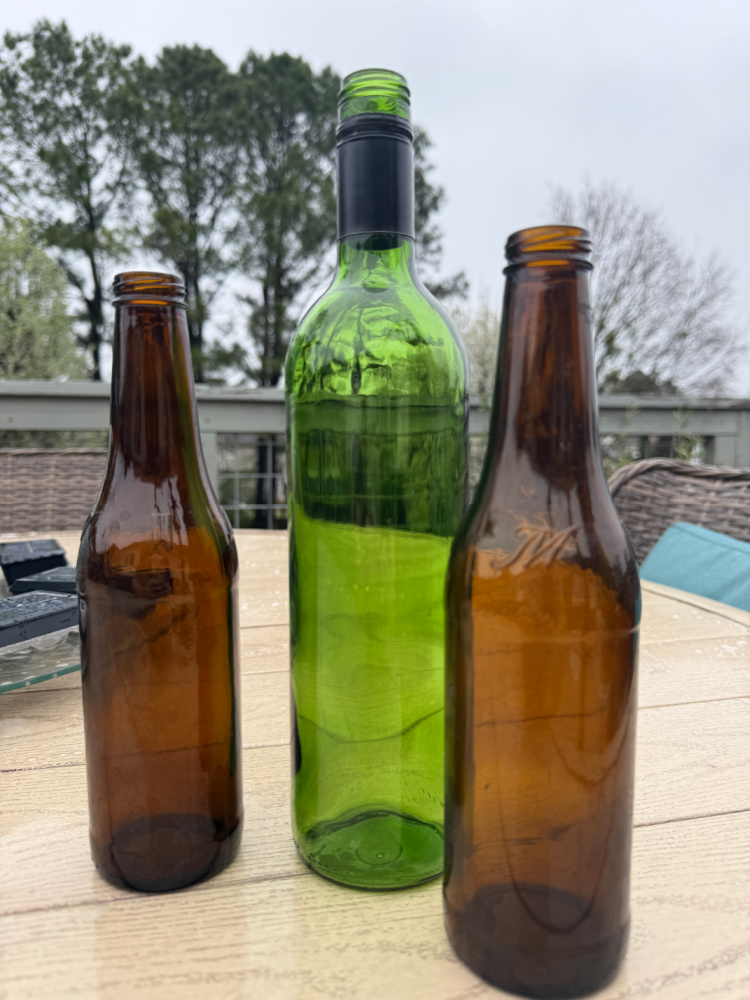
I’ve been saving wine bottles for quite some time. You know the sentiment…”That’s a great bottle! I should use that for something.” And the stash pile grows. Well, we had a taste of deck season this past week so today is the day to use those wine bottles. Let’ make a wine bottle centerpiece!
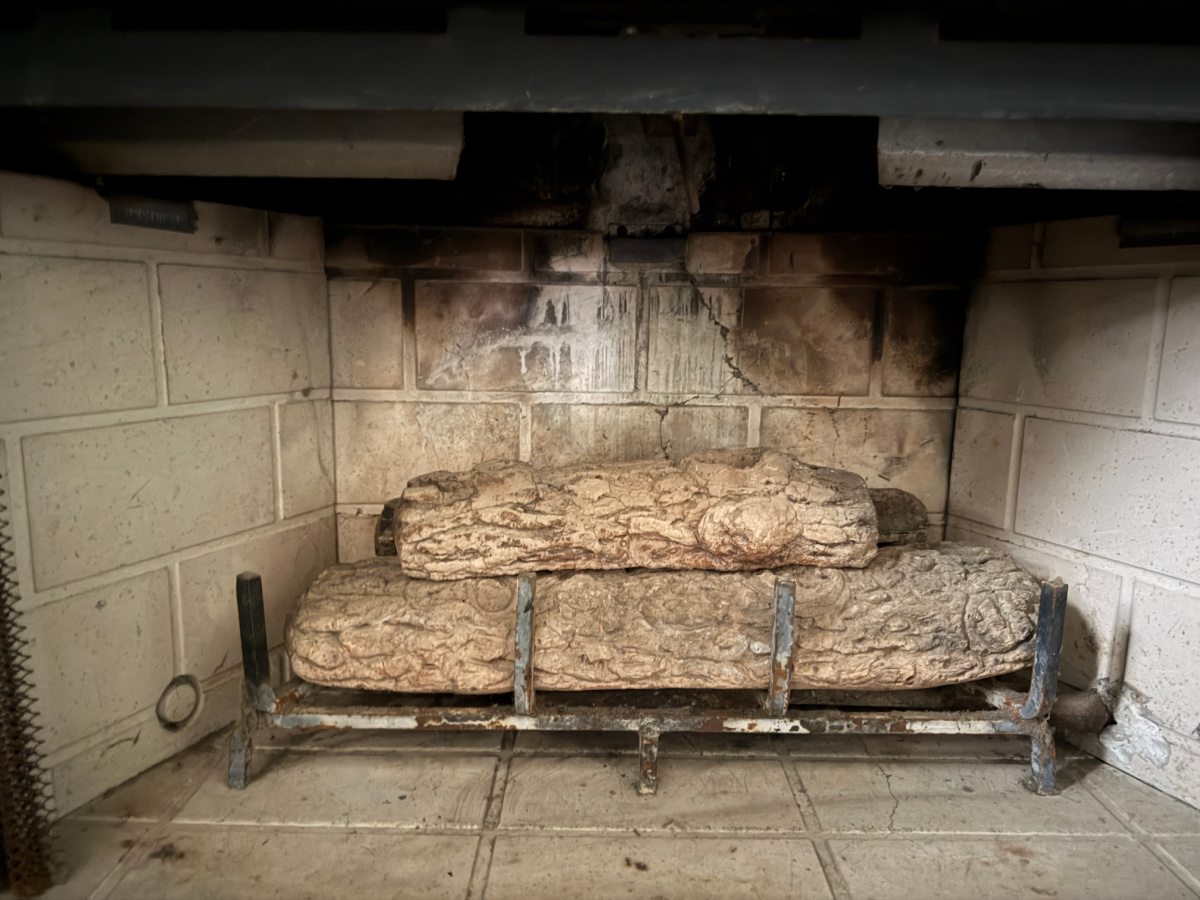
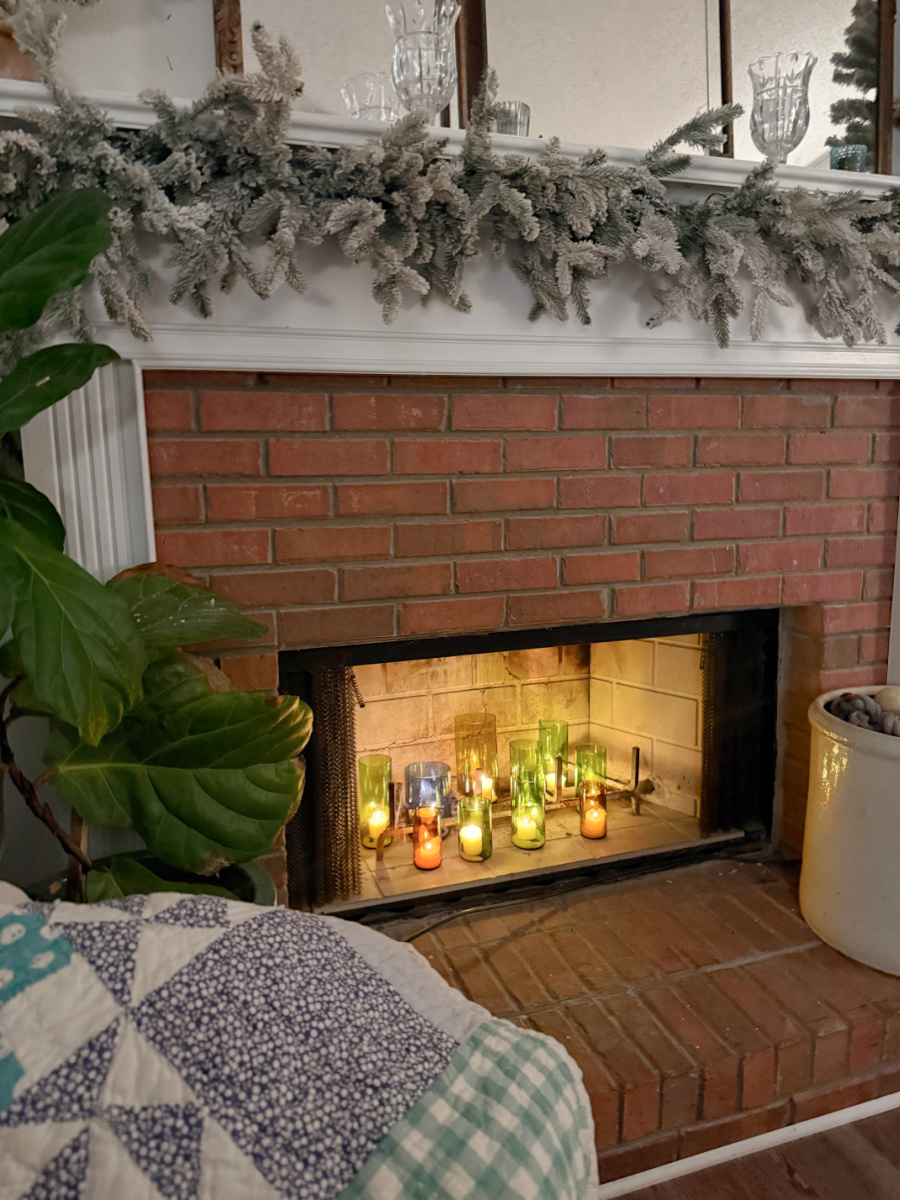
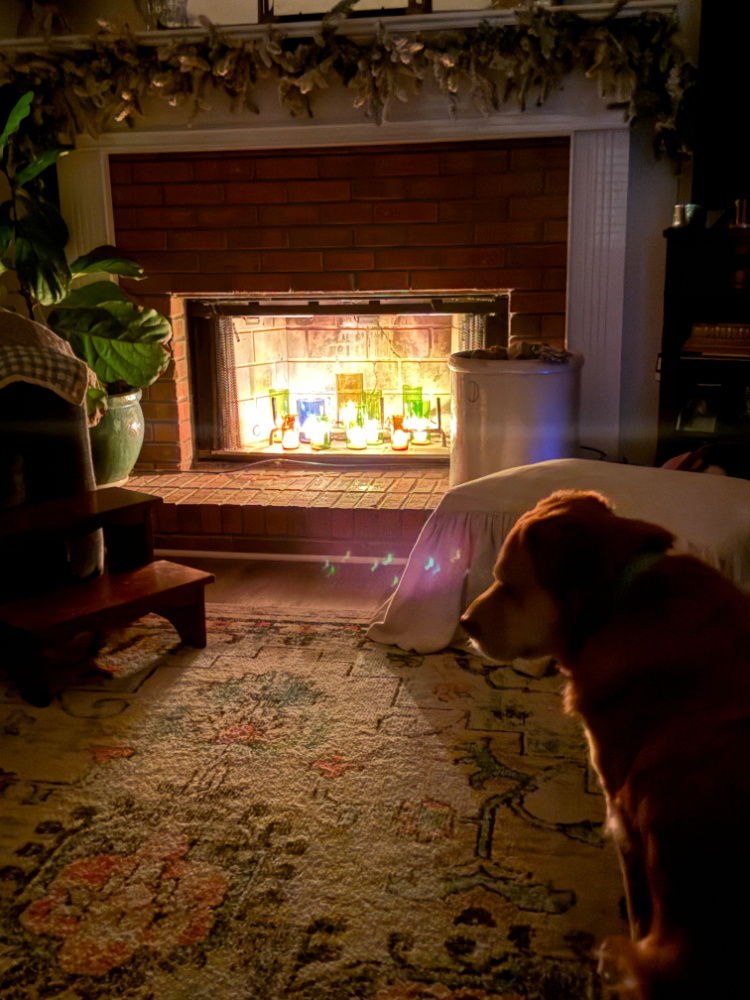
Originally, I wanted to use these bottles in our fireplace. We have a gas fireplace but have never used it. 24 years in this house and we’ve never used the fireplace. I guess these mild Alabama winters just don’t call for a good roaring fire…says the Pennsylvania born girl.
When I got down into the fireplace, it was not so pretty. The walls, as many fireplace are, is soot stained. I considered painting it for this project but I’d rather do it right than do it quickly. When I rush a project, I usually end up redoing it. Do it right, not fast, correct? The fireplace restore will fall in line for proper attention. DIY is ugly sometimes, like this firebox.
So, my wine bottles will be used a a table centerpiece instead.
Prep Your Project Piece
With any project, prep is key. So, I washed the bottles and removed the labels. Here is a link to a previous post on How to Remove Labels from Glass Bottles. You will find some great tips on how to CLEAN old bottles as well.
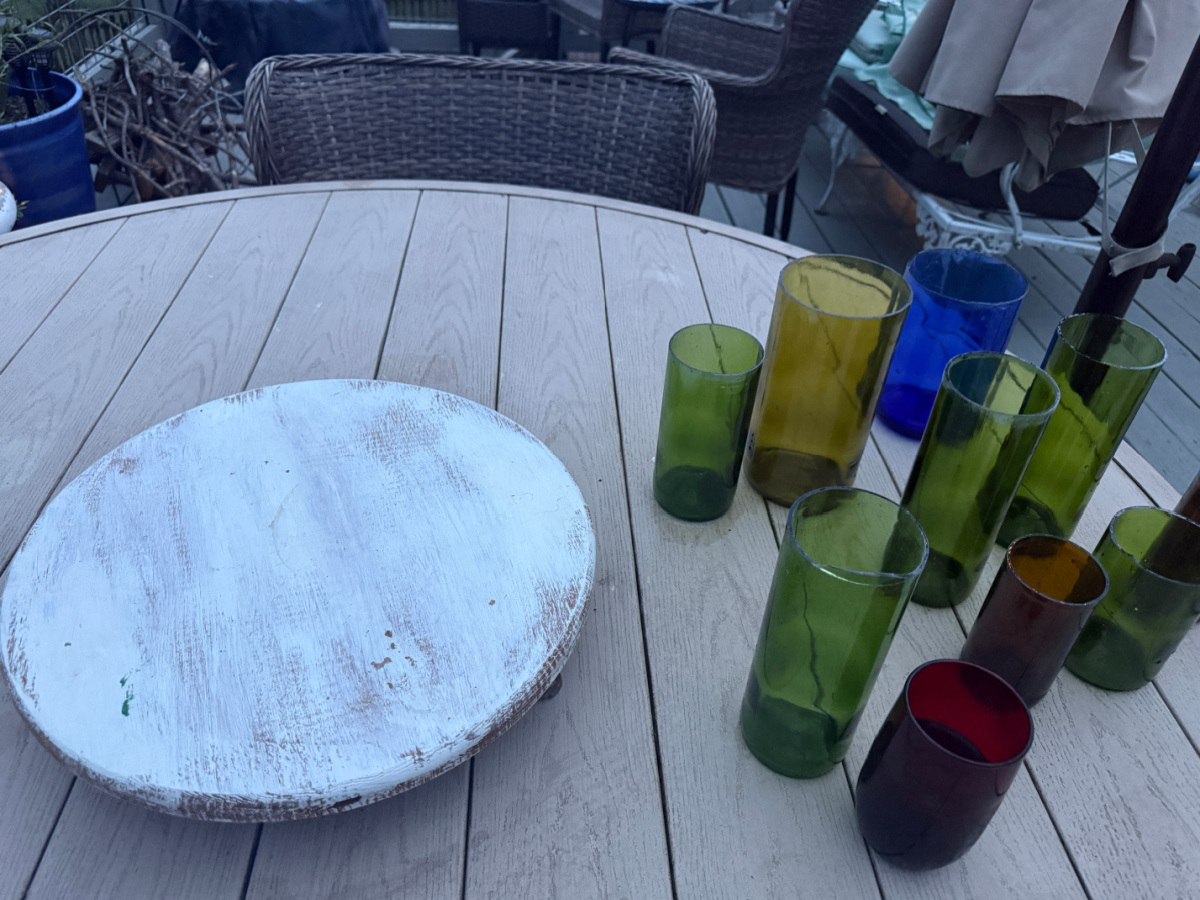
Once the bottles were clean and dry, I lined them up to be cut. My plan was to cut them at different heights to lend dimension and interest to the centerpiece.
TOOLS
I did some research and ordered a bottle cutting kit from Amazon.
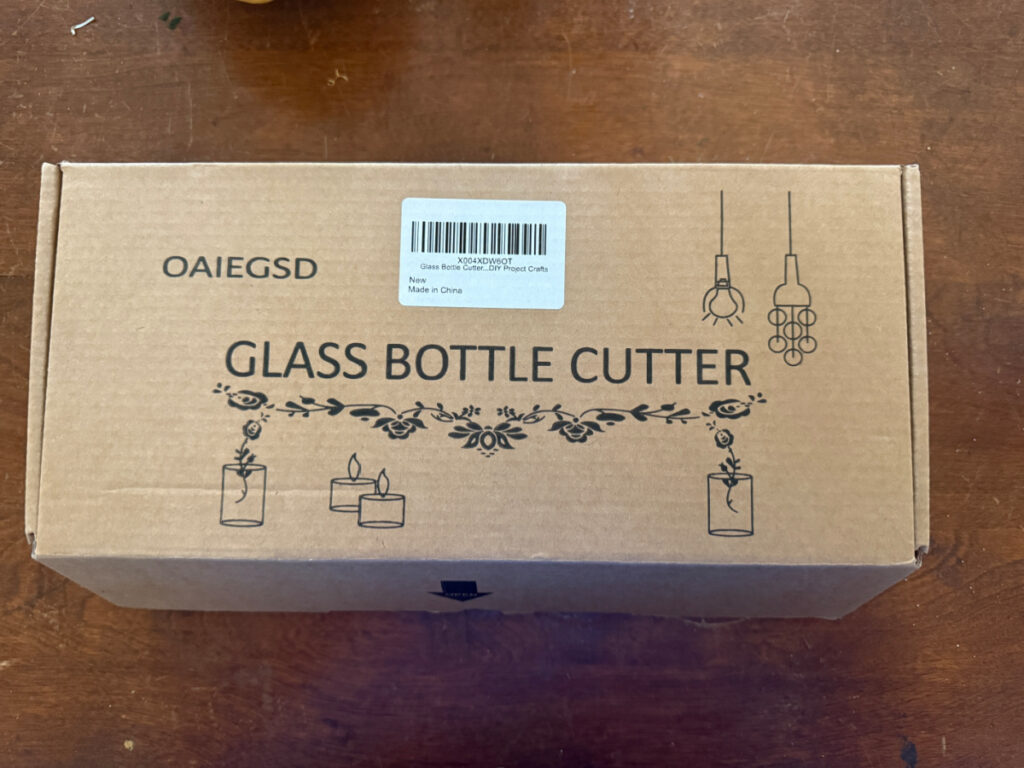
It came with everything needed to cut your bottles, including safety gloves!!
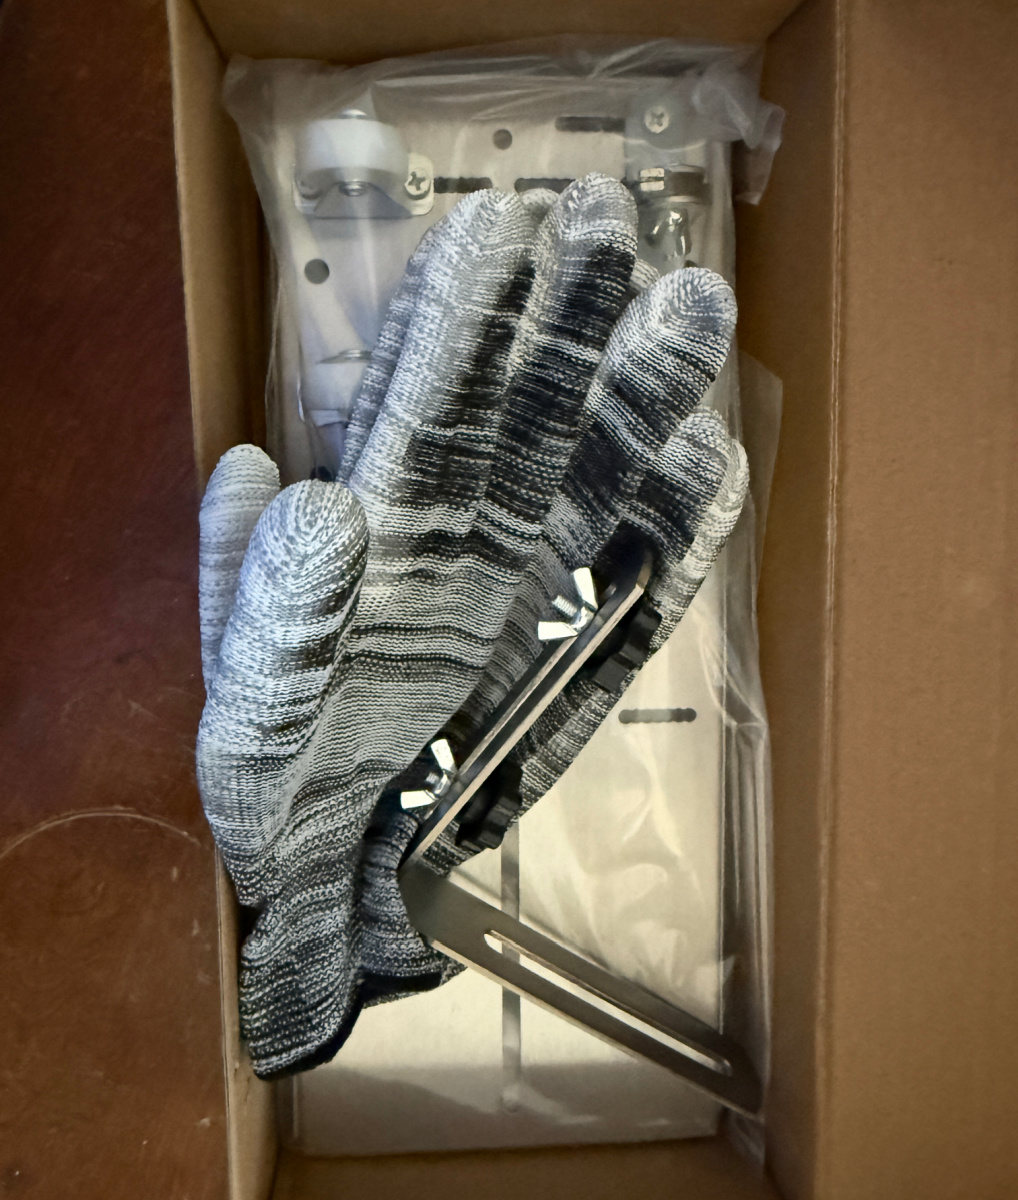
Proper safety gear is so important! Wear the gear!
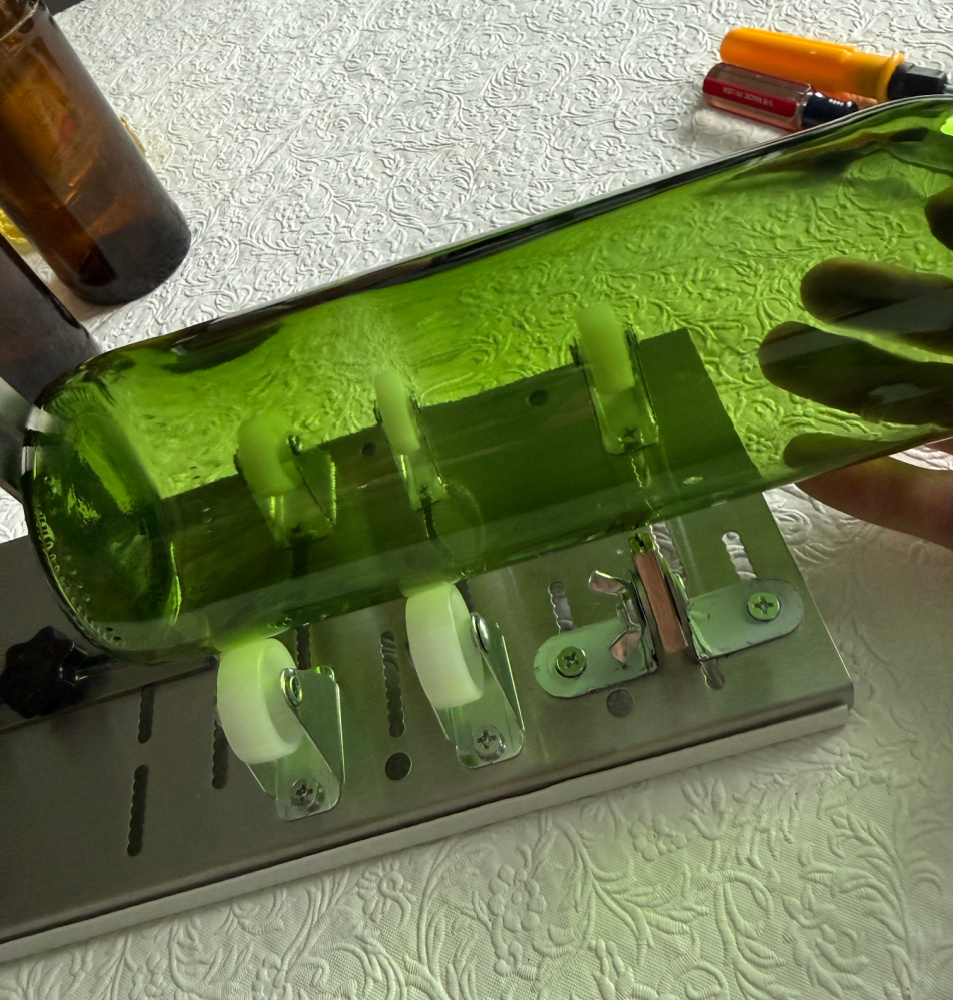
I assembled my new tool and started scoring the bottles. The instructions said to score once and not score over the original mark. This is to ensure a clean cut. Jagged glass edges are scary.
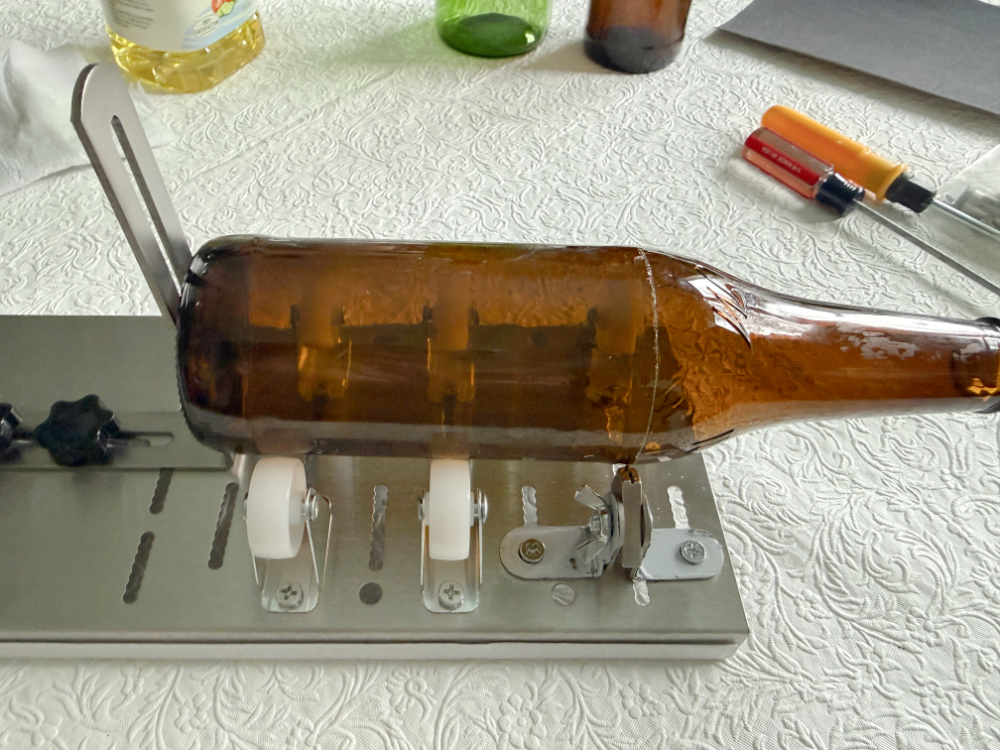
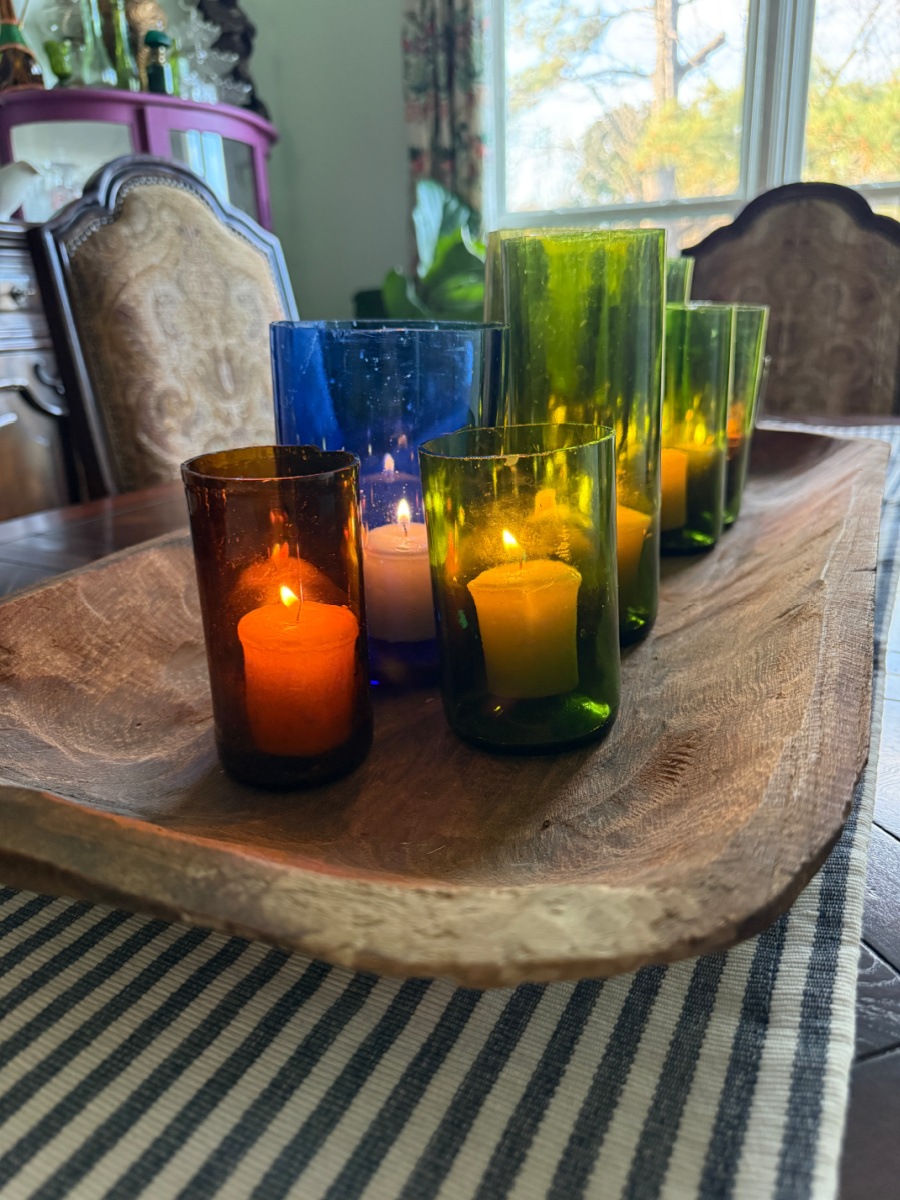
The bottle cutter is adjustable so I made those adjustments for the larger and smaller bottles. The green bottles are wine bottles and the brown bottles are beer bottles.
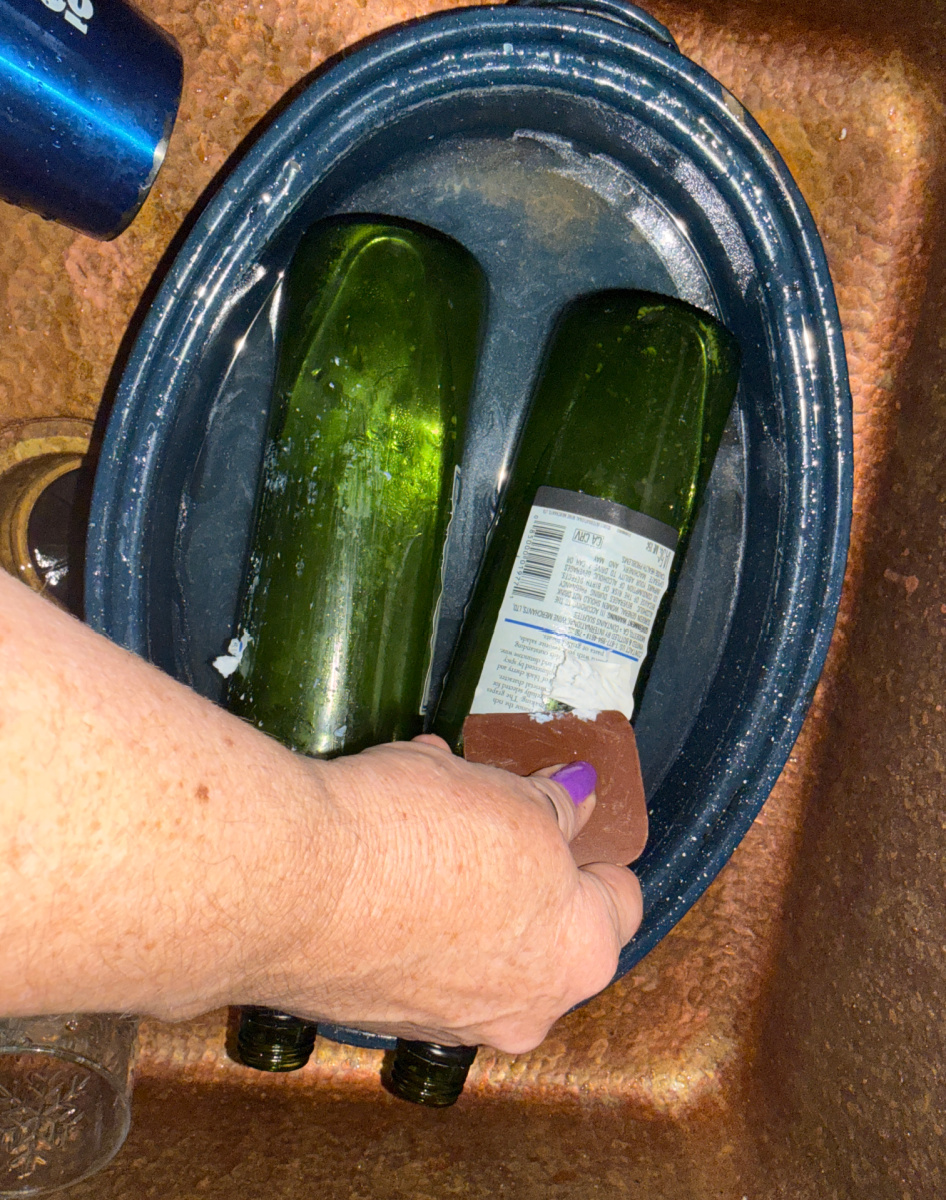
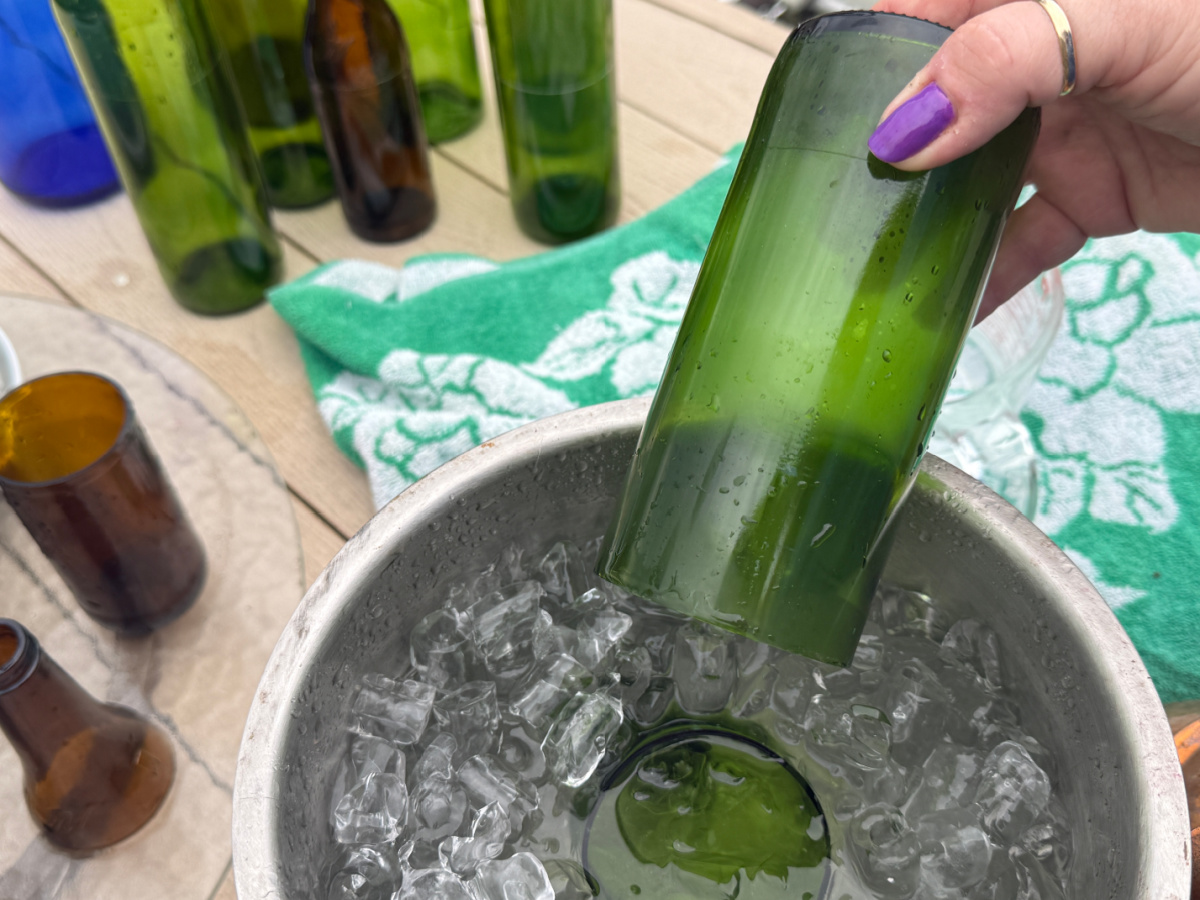
Once my bottles were scored, I took my show outside to the deck. I had boiled water in a teapot.
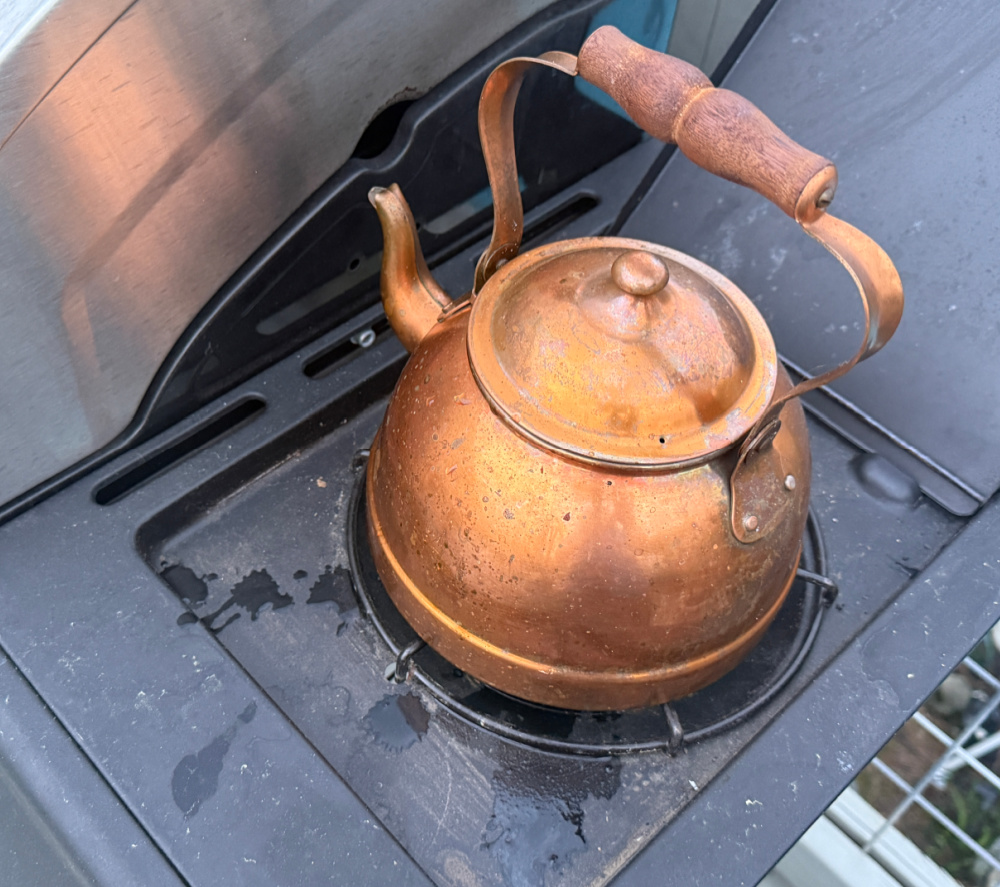
And I filled a tall vessel (a wine chilling bucket) with ice water.
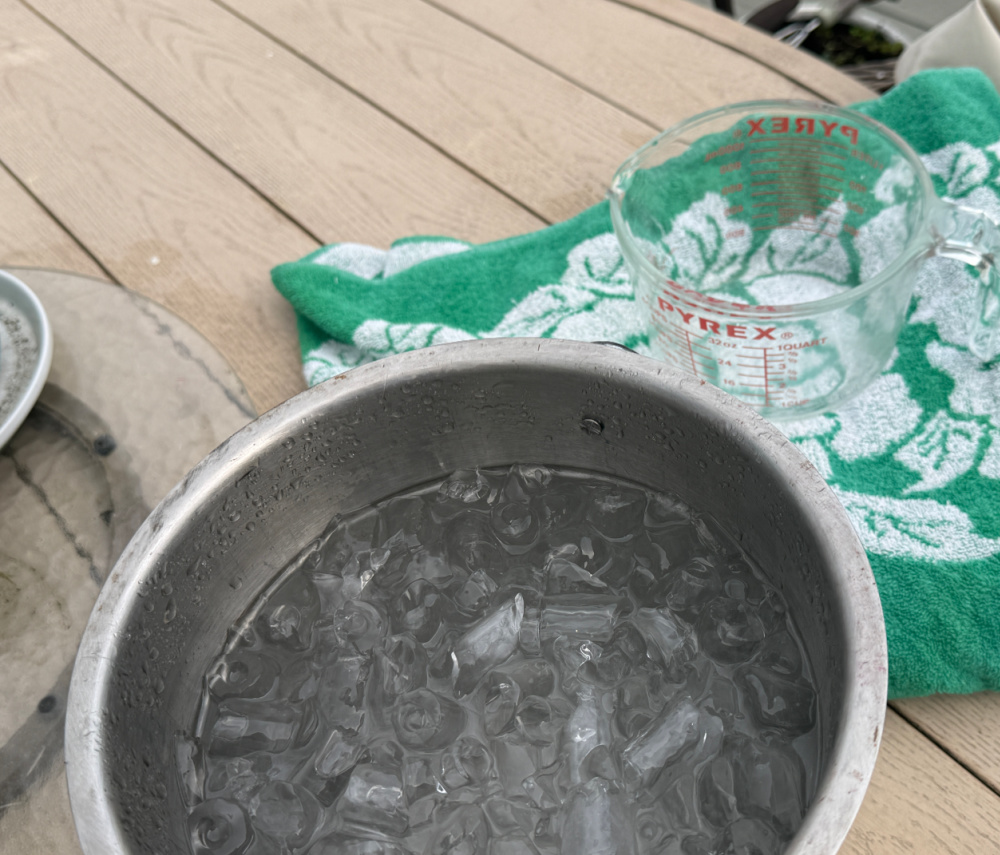
I held the bottle over a bowl and poured the boiling hot water over the score mark rotating the bottle so that the water was flowing over the entire score mark.
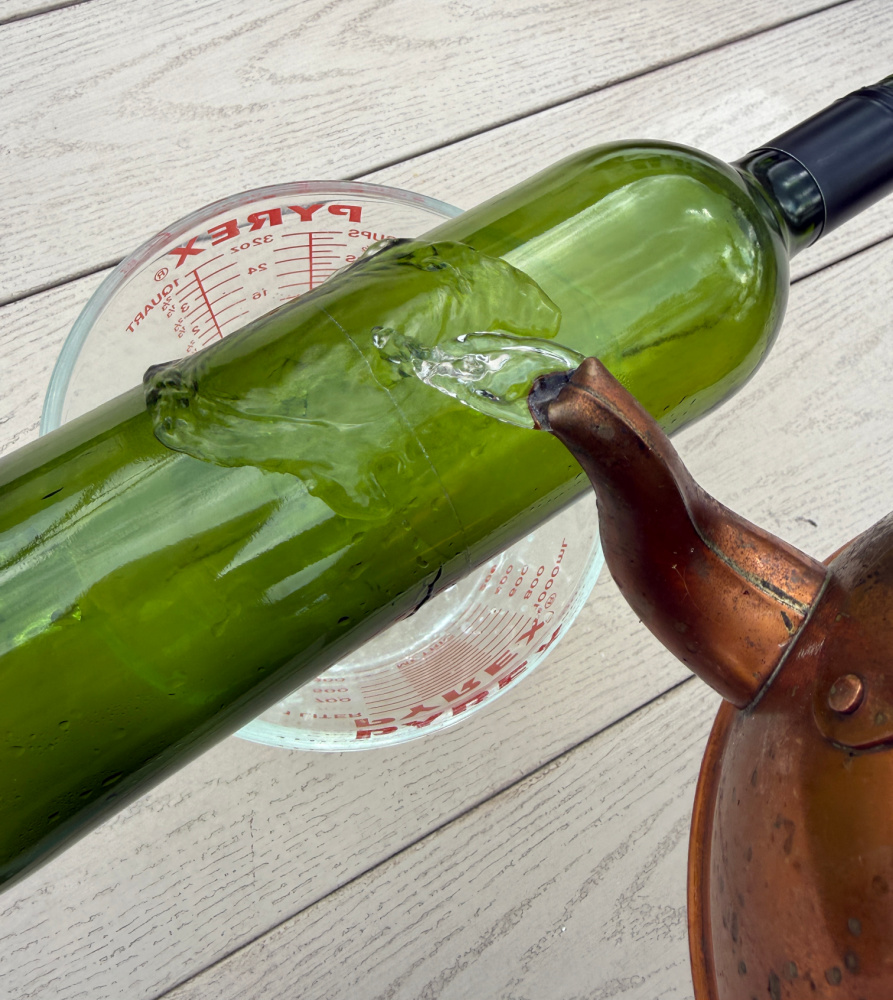
I poured over the score mark for 20 seconds and then immediately submerged the bottle into the ice water.
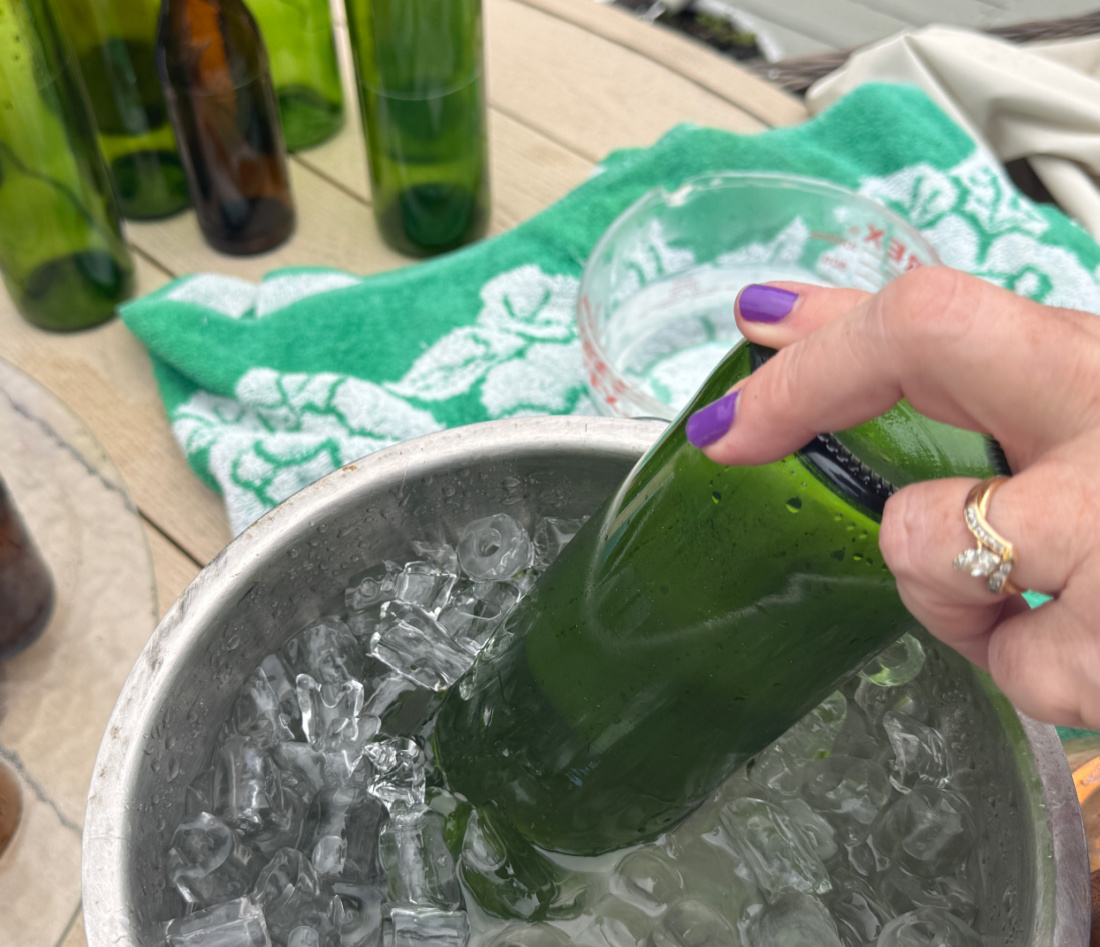
After a few seconds, I could feel the bottle jump as the score gave way and the bottle split in two.
The first bottle snapped cleanly. The second didn’t snap right away so I wiggled it and tapped the chilling bucket with the bottle. It did snap but the snap was not clean.
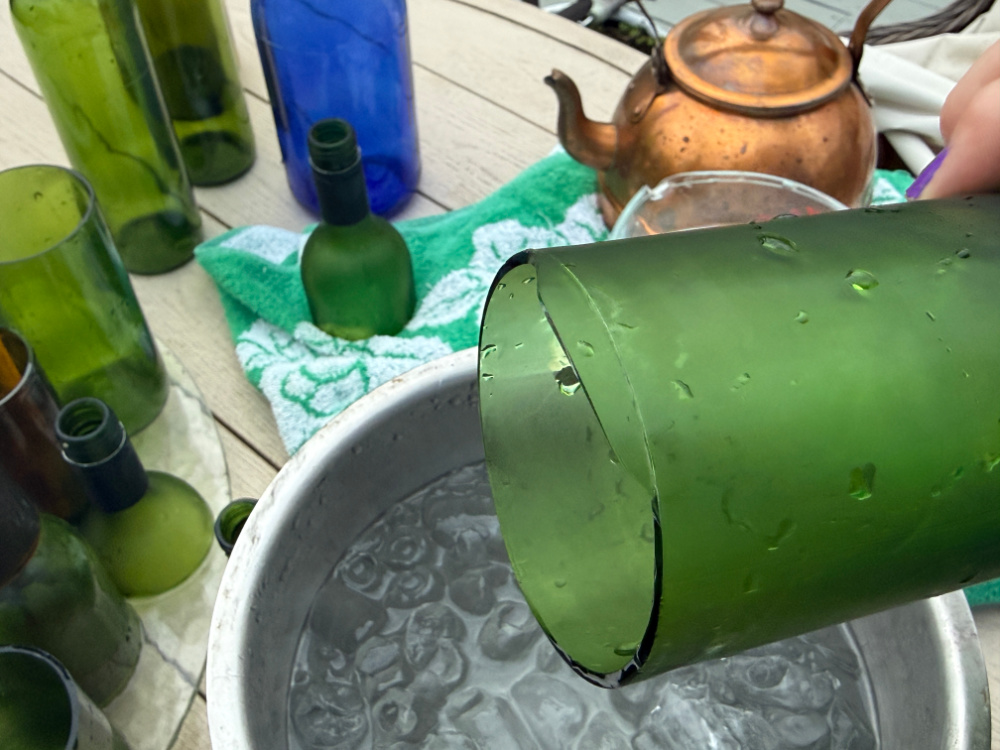

The next time a bottle didn’t snap immediately, I moved it back to the boiling water pour and repeated the process. This time, it did snap when submerged into the ice water. Don’t rush the process, just repeat. Good life advice: don’t wiggle and trust the process.
Finishing the Bottles
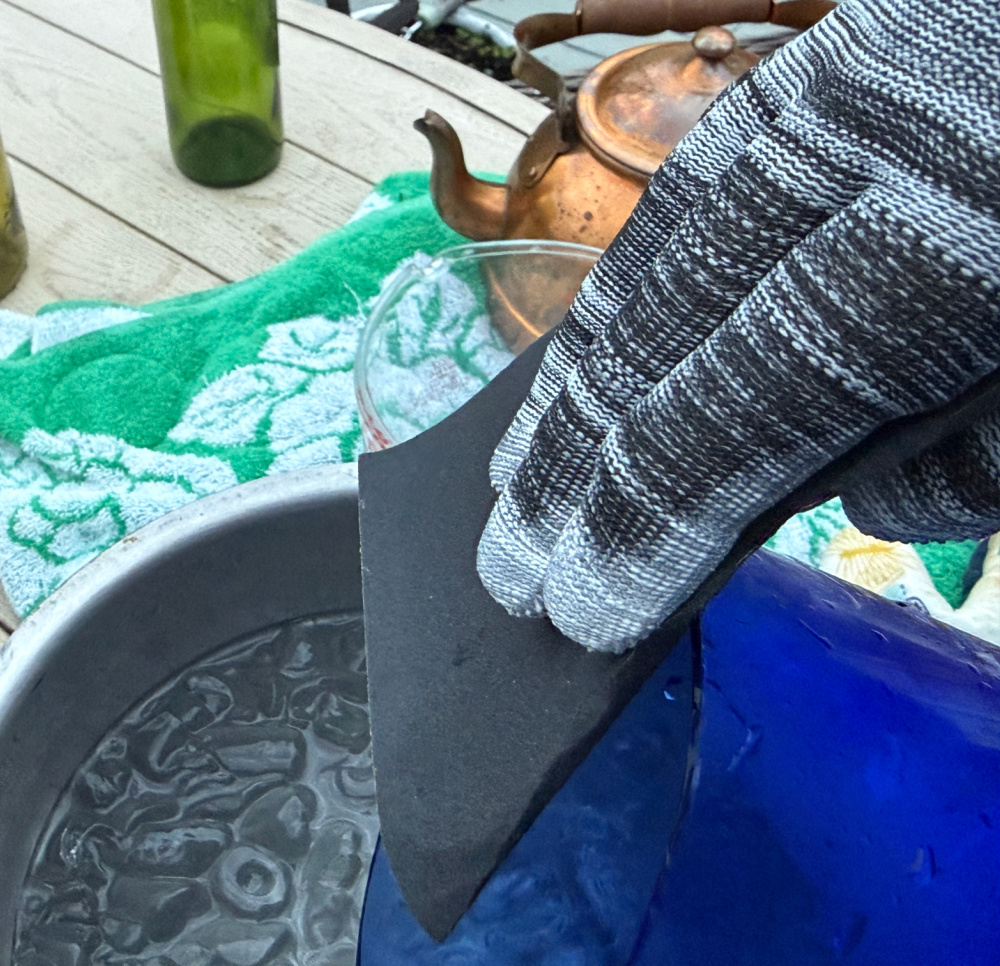
Once my wine bottles were all cut, I sanded the edges with fine grit sandpaper to remove the sharp edges.
Be sure to wear the gloves as the glass is quite sharp.
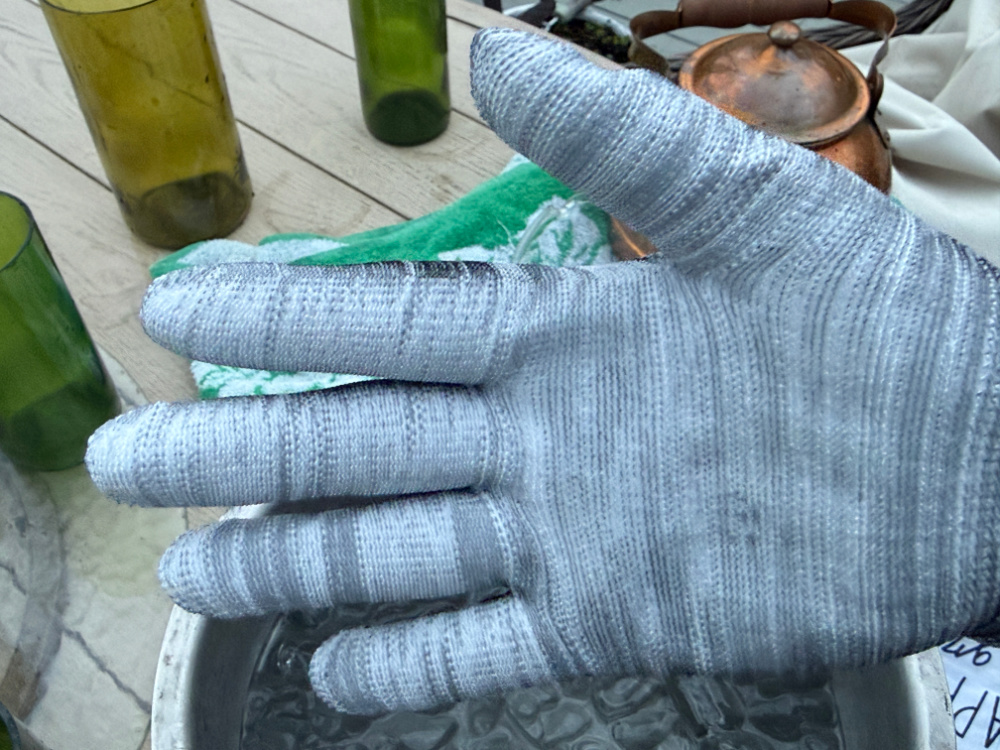
Even with the gloves, be gentle and careful in sanding.
Once all of my bottles were cut, I dried them all.
I grabbed some votive candles.
I arranged the bottles on a riser at the center of the table.
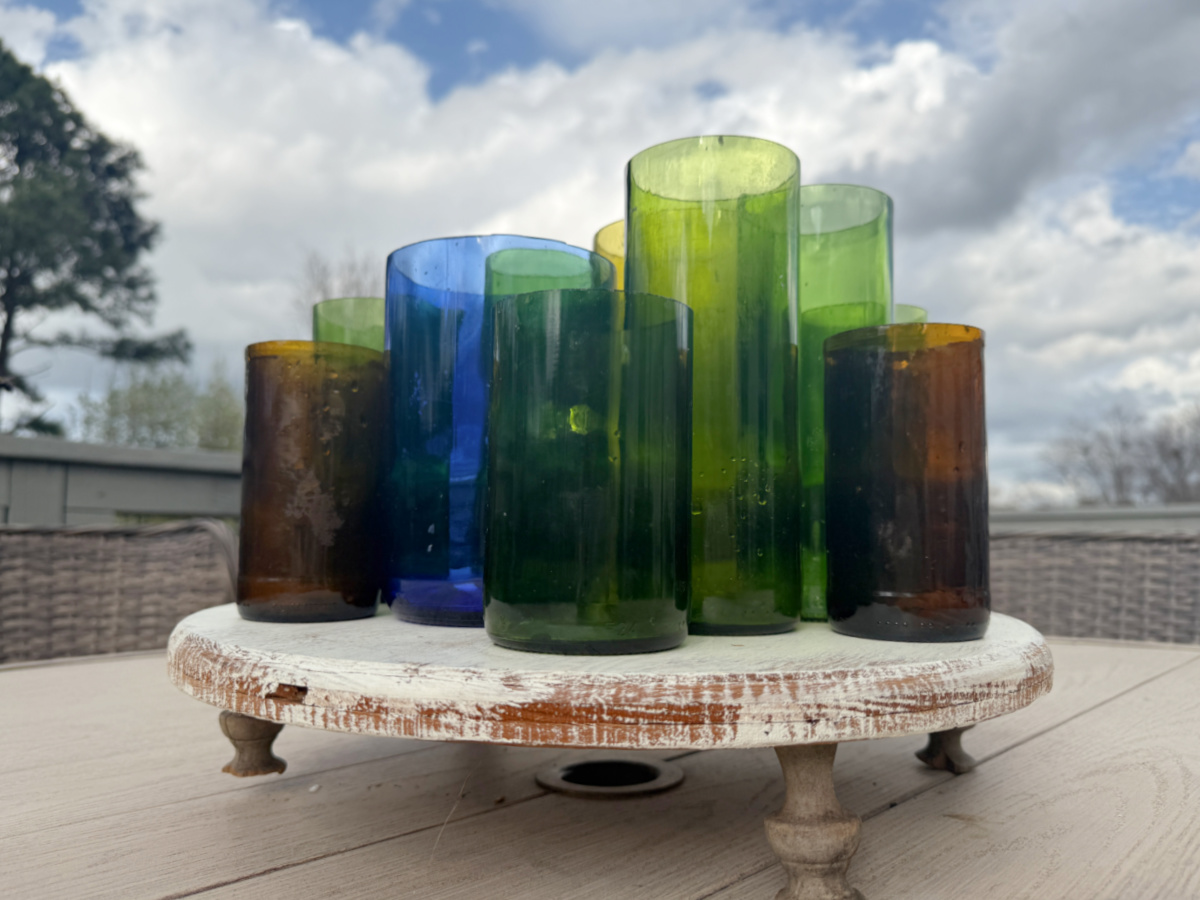
I dropped a lit votive candle into each bottle and arranged them on the table. Voila…a centerpiece!
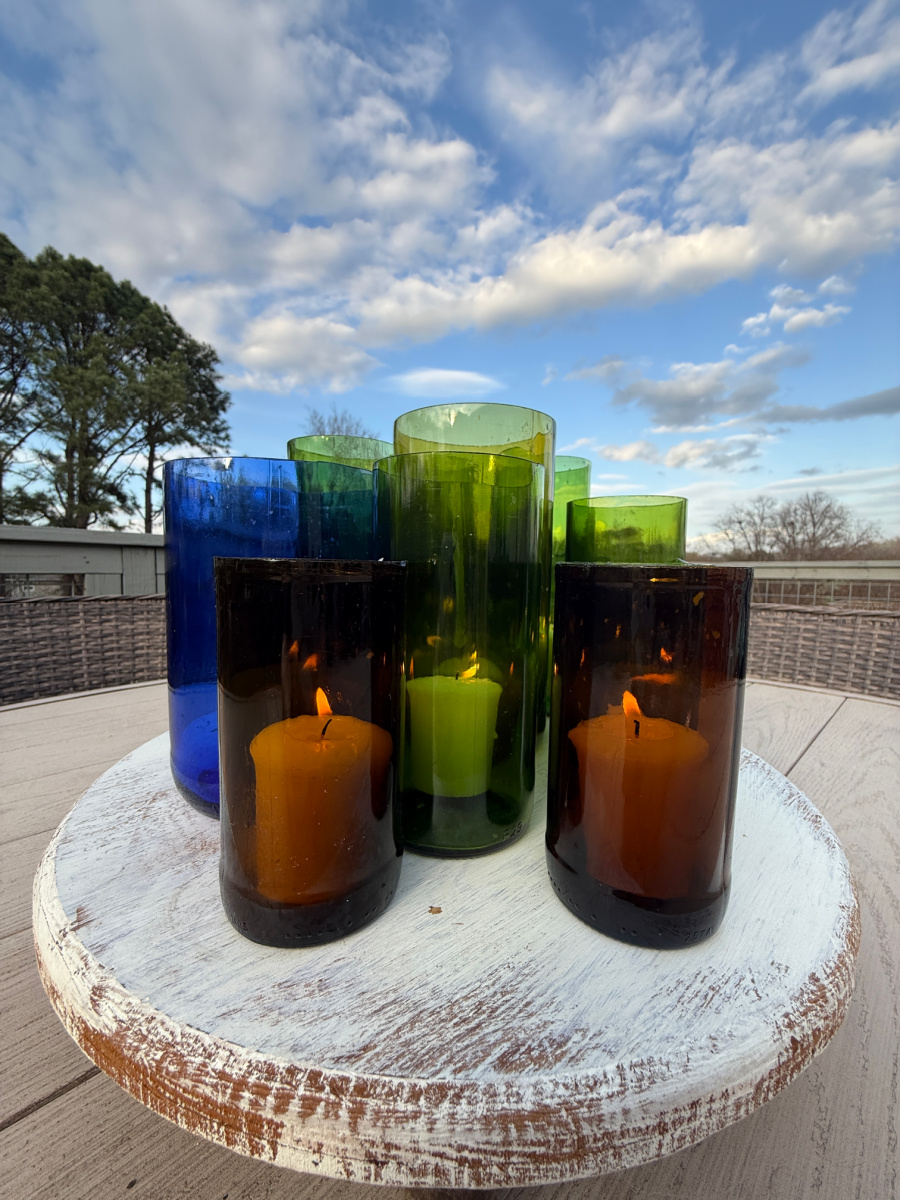
Of course I had to see how this would look on our dining table.
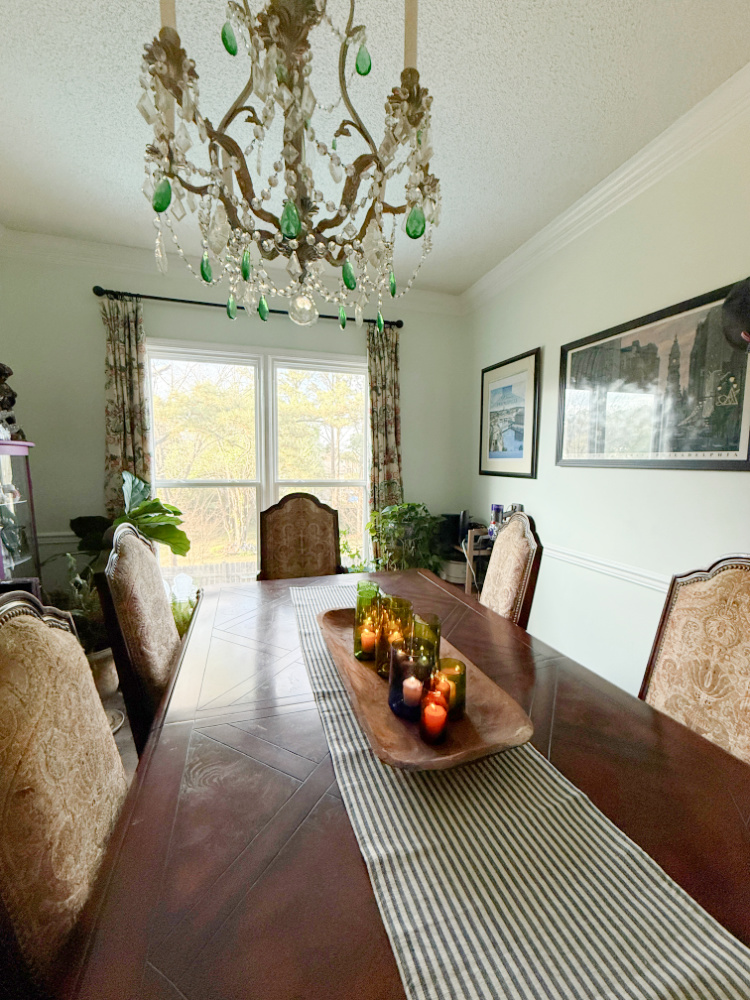
I like it!
And, lastly…the soot covered firebox…
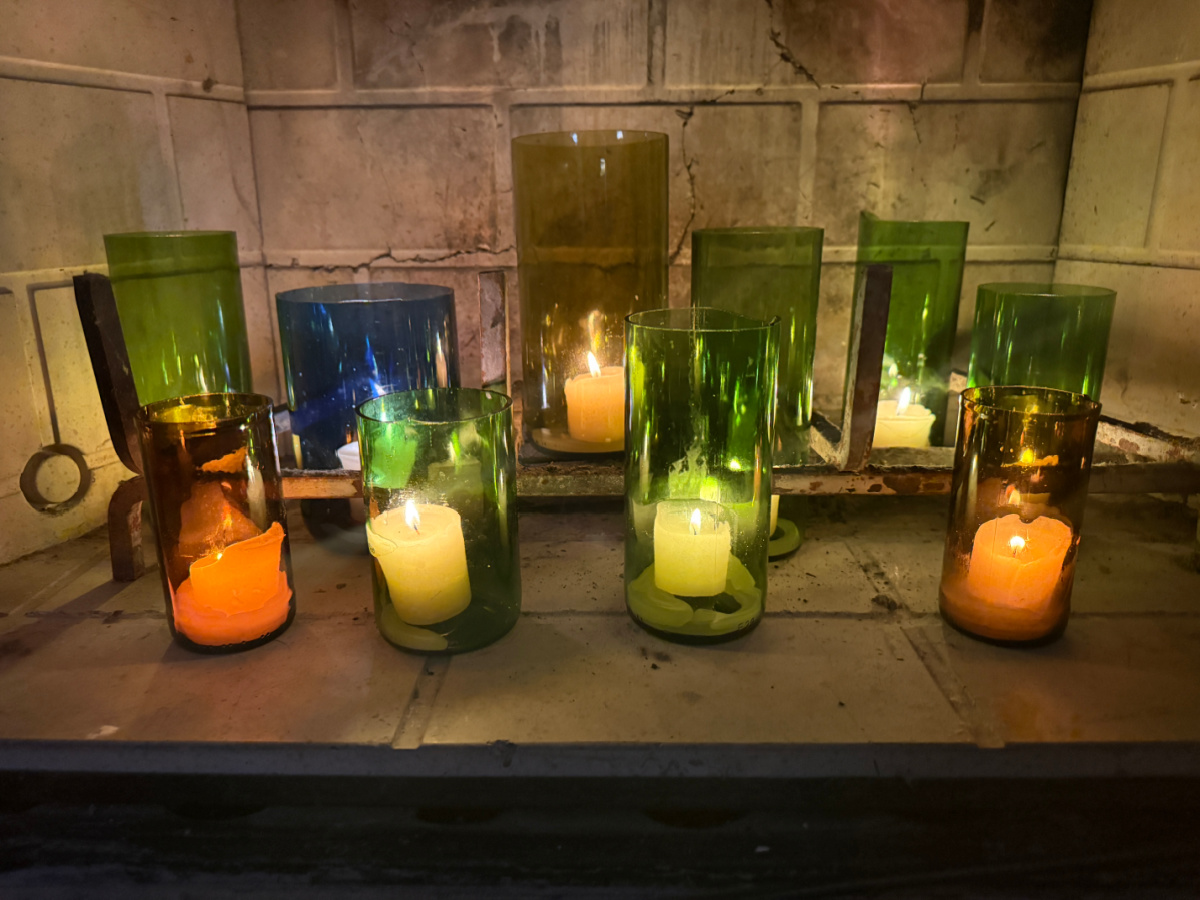
Not too bad! But definitely on the project list!
Mia approves!
And here are this month’s projects from the TEAM!

Thrift Store Cat Boxes-Decoupage Makeover
Style a Classic Coffee Table with Thrifted Items
How to Apply Gold Leaf to Canvas
Vintage Suitcase Storage Cabinet

What a great project! I actually have a lovely painted bottle that I’ve been saving. Might have to try your DIY and create a centerpiece of my own. Love the colors and candles in your fireplace…no painting necessary after all!
Thanks, Kim. Yes…so easy with minimal steps.
This is so pretty Sue, I love them on the table, outside, and the fireplace; they are perfect! My neighbor bought one of these many years ago and had such a hard time with it. Sounds like they have really improved, I might just need to buy one now, so many possibilities! Thanks for the tutorial!
Thank, Kristin. I’m sure the tool has improved. I remember using my dad’s old glass “key” on panes of glass for picture frames. What a nightmare. LOL.
That’s cute. I cleaned out an old to and put a mirror in the back. That would reflect the candles.
Great idea! I bet the colors would really pop. Thanks for stopping by!
This is ABSOLUTELY INCREDIBLE. I had no idea you could do this with wine bottles. I am totally trying this.
Thanks, Julie. So easy!
Sue,
That’s awesome! I love how the wine bottles (candles) look in the dough bowl on your table.
I tried this years ago, and had the same mixed results. I should give it another try!
Pinned!
gail
Thanks, Gail. I think the varying colors and height helped.