Simple projects to build with 2x4s
As an Amazon Associate and member of other affiliate programs, I earn from qualifying purchases.
I’ve seen so many projects recently where folks design an entire living room suite to build with 2x4s! I built a wonky planter once for my kitchen! It was basically a window box on legs…wonky wobbly legs. But since it was tucked between a backed bench and a window, no one saw the crazy contraption, just the beautiful foliage it contained! I was so proud of it and my neighbor still brags about it!
Gina Luker from Shabby Creek Cottage challenged a group of us to design a project to build with 2x4s! I thought why not??!!!!!!! I can use a saw, drill, kreg jig, etc. My biggest concern was finding time to complete the project because of the time constraints of my store The Blue Building Antiques and Consignment. So I decided to build small!
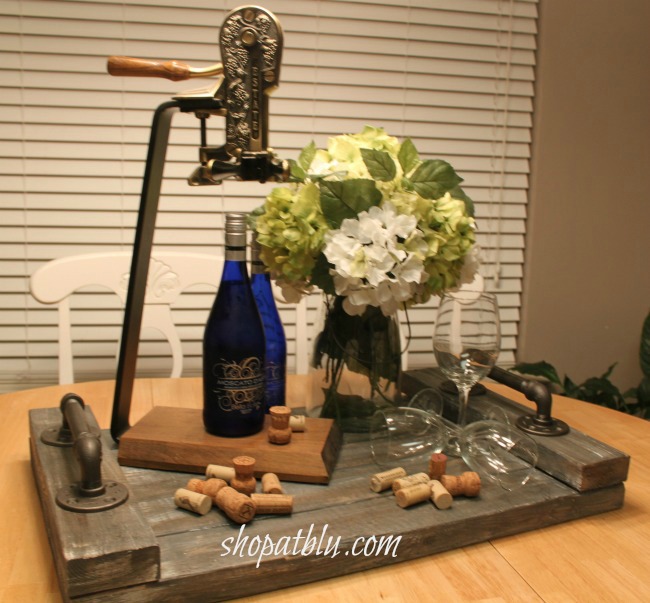
I thought about easy projects that anyone could build! And I came up with a serving tray! With a super simple design, I figured it is virtually a project that anyone can do! And in my life, simpler is better! Plus, aren’t alot of folks AFRAID to try things like this? What better way than to start with something simple!
So my intricate, complicated design is…a serving tray!
Supplies:
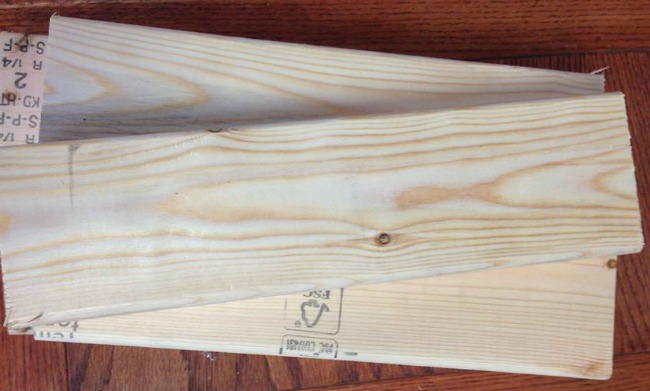
- 3- 2x4s ($2.69 each)
- 16- wood screws 2 1/2 inches
- Kreg jig
- 20- Kreg jig screws 2 1/2 inches
- jig/saber saw or a miter/chop saw
- drill
- clamp
- wood glue
- 2- handles
- paint or stain of your choice
Planning:
My first step was to decide how big to make the tray. We have a huge ottoman at home! The top is fabric and it would be nice to have a solid surface on top of it on which to place a glass or other items. Due to the width and weight of the 2×4’s I felt a larger tray would be more desirable so I decide on 28″ x 17.5″.
Cutting the wood:
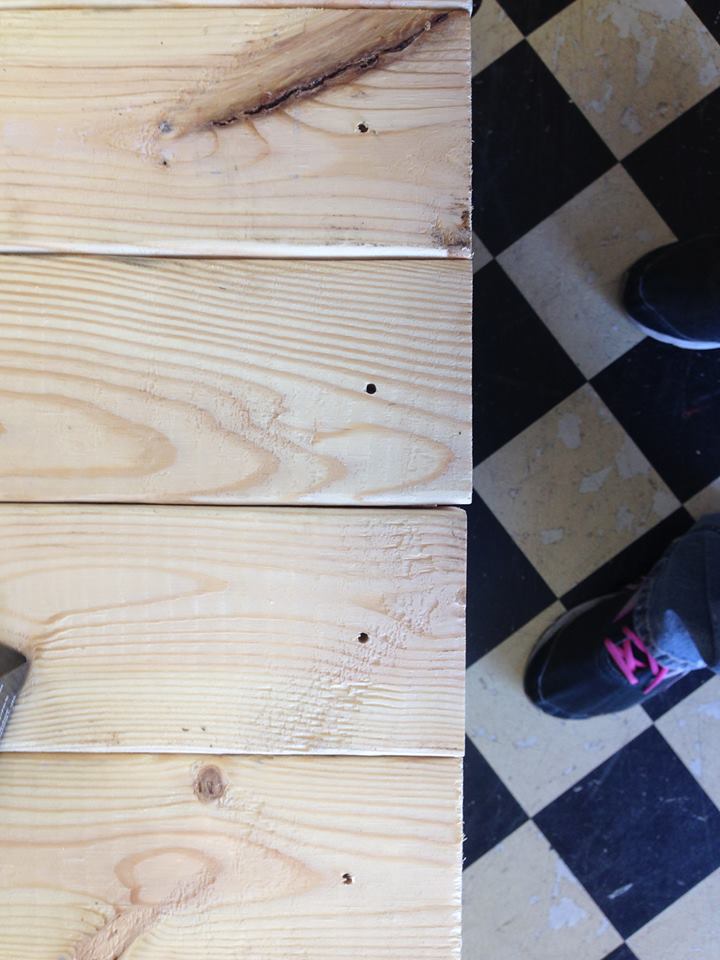
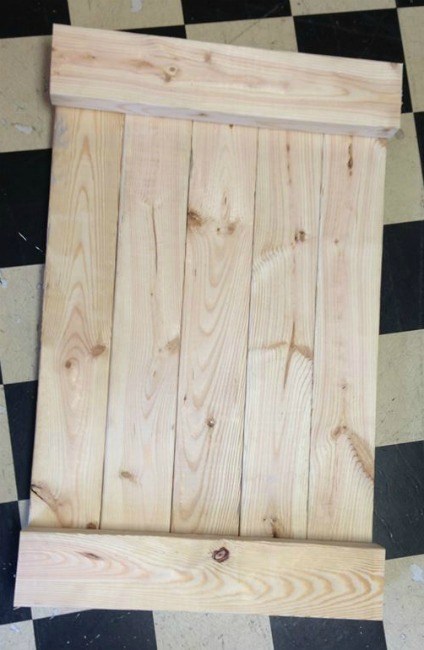
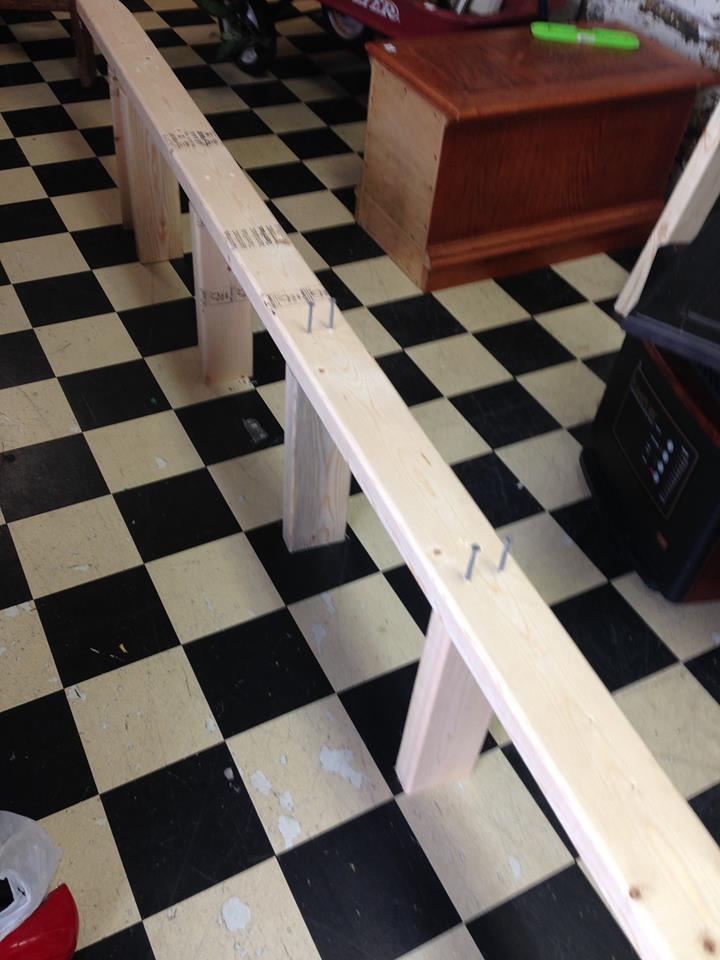
I cut five 28″ sections and two 17.5″ sections from the 2x4s(the width of the five 28″ sections laid side by side). I used my chop saw, also called a miter saw. But you could use a saber saw, also called a jig saw.
Assembly:
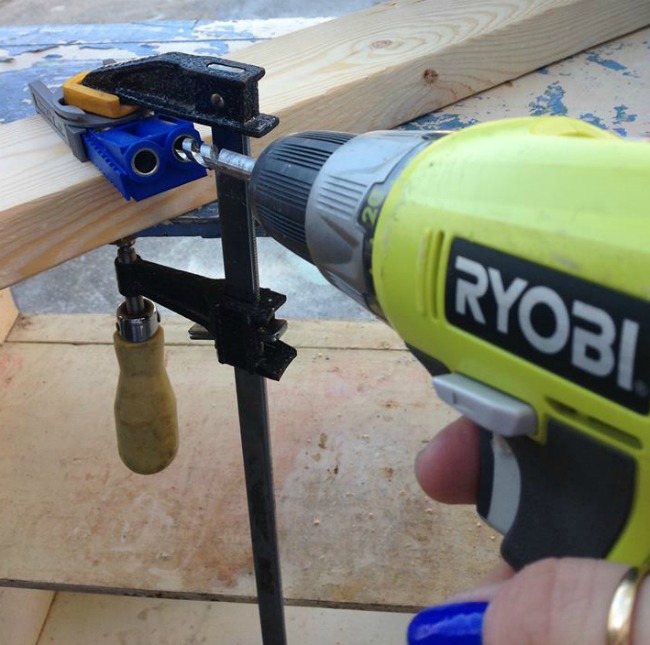
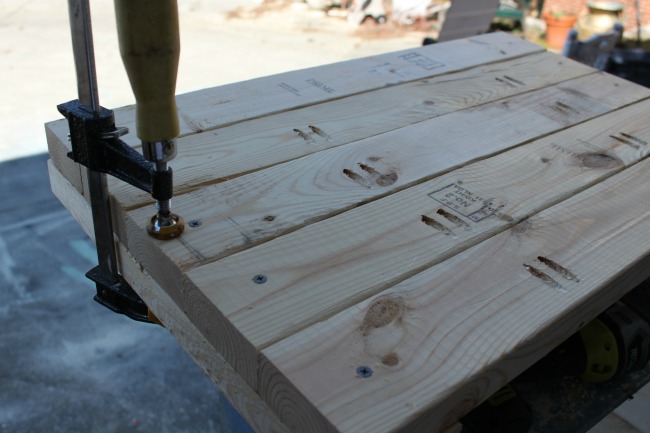
The next step was to assemble the bottom of the tray. I used my Kreg Pocket Hole Jig for this. Bless the day I saw the first post about The Haven Conference (an annual DIY Bloggers conference held in Atlanta, GA) which led to me buying a ticket which resulted in attending 3 Haven Conferences (soon to be 4) which resulted in my discovery of the Kreg Pocket Hole Jig! If you even remotely want to consider building signs or honestly any project of any size out of wood, INVEST IN THIS TOOL!
I drilled 2 pocket holes about 6 inches in from the left side, and 2 pocket holes about 6 inches in from the right side of each 28″ section. Then I attached each 28″ section with the Kreg pocket hole screws.
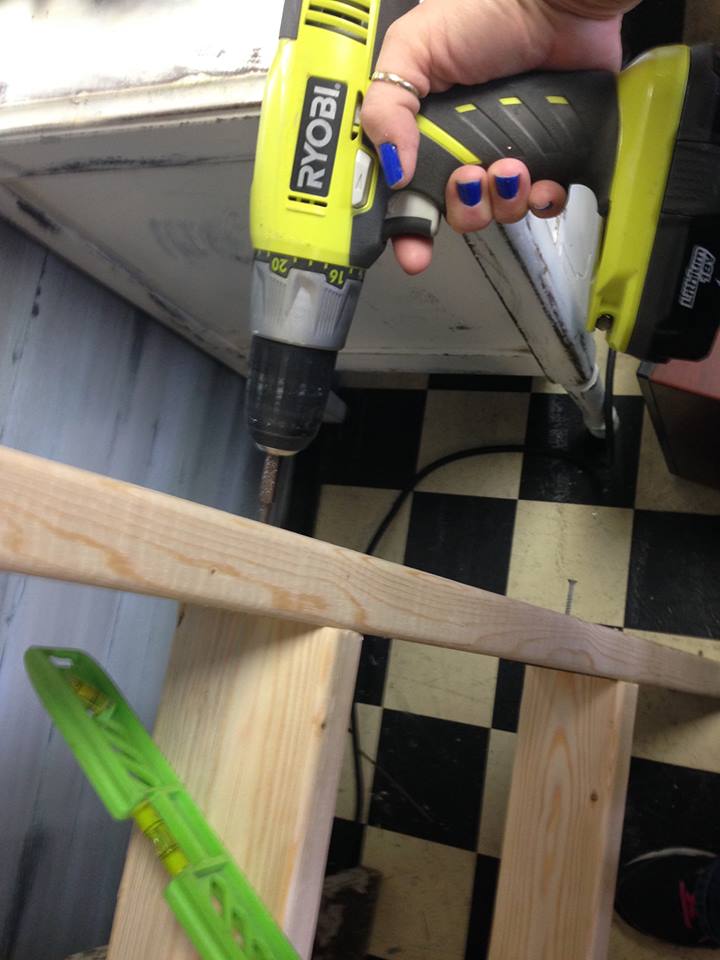
The next step was to attach the end braces upon which the handles would be attached. Since I wanted a cleaner look for this tray, I decided to screw the wood together from the bottom of the tray so the screws would not be visible from the top view. I drilled pilot holes to make this easier.
My Dad always uses wood glue when building things from wood. It provides extra stability should your screws or staples loosen or fail. I thought this project definitely needed wood glue because of the weight of the 2x4s.
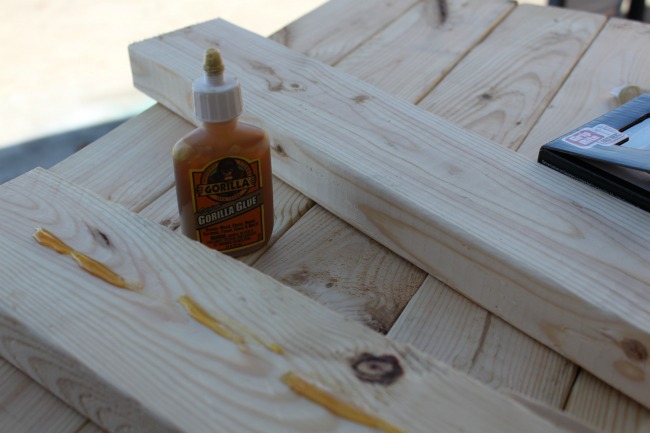
I added wood glue to the end braces and clamped them into place. I flipped the tray over and inserted the screws through the pilot holes to attached the end braces.
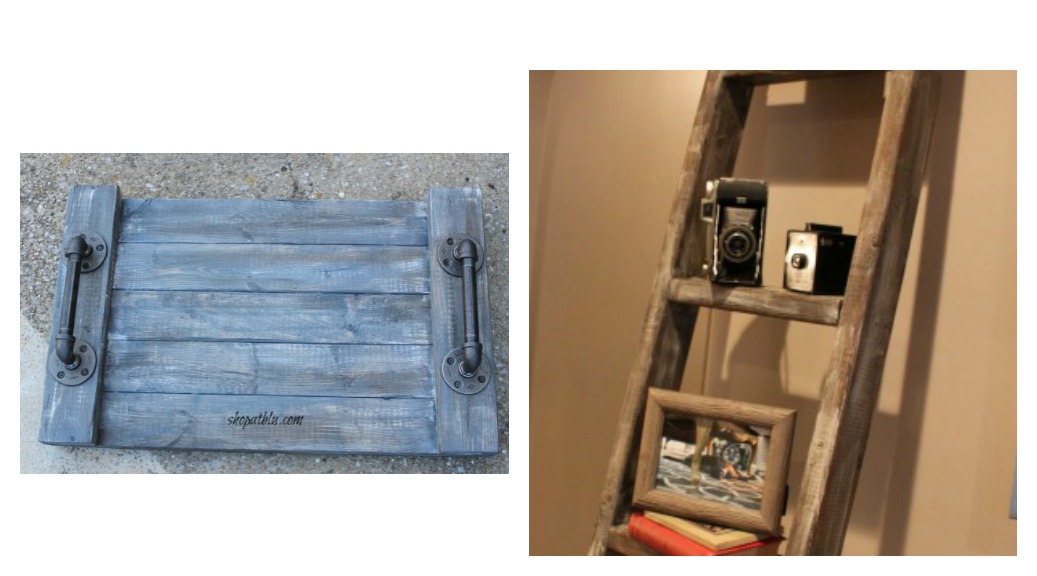
At this point, I had one of two choices. Leave the tray as it or rip a 2×4 in half and insert edges between the two side braces.. Functionally, a tray should have sides to contain items and prevent them from sliding off of the tray. Decoratively, these sides are not necessary. And, honestly, for a beginner it is mentally a rather scary task to have to operate a table saw (in reality it is easy peasy). So I finished the tray without the side braces to show that it looks super that way!
At the end of the project, I added the side braces to show the other option (see picture at end of post). Just a personal preference…the finished product looks great either way!
Finishing the tray:
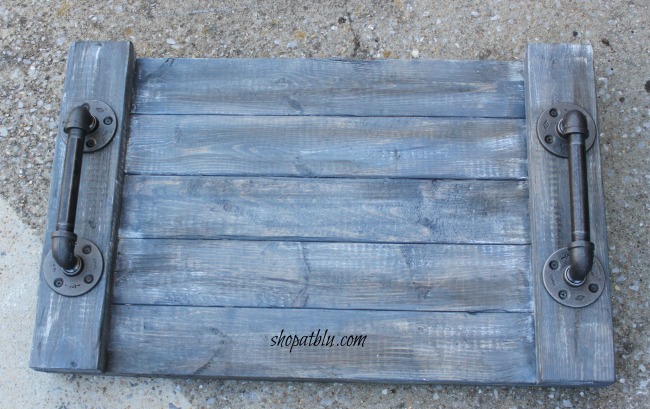
I wanted a beachy weathered look for this tray so I pulled out the General Finishes grey gel stain that was left over from a previous project. Read about that project HERE, and see how to create this finish yourself!

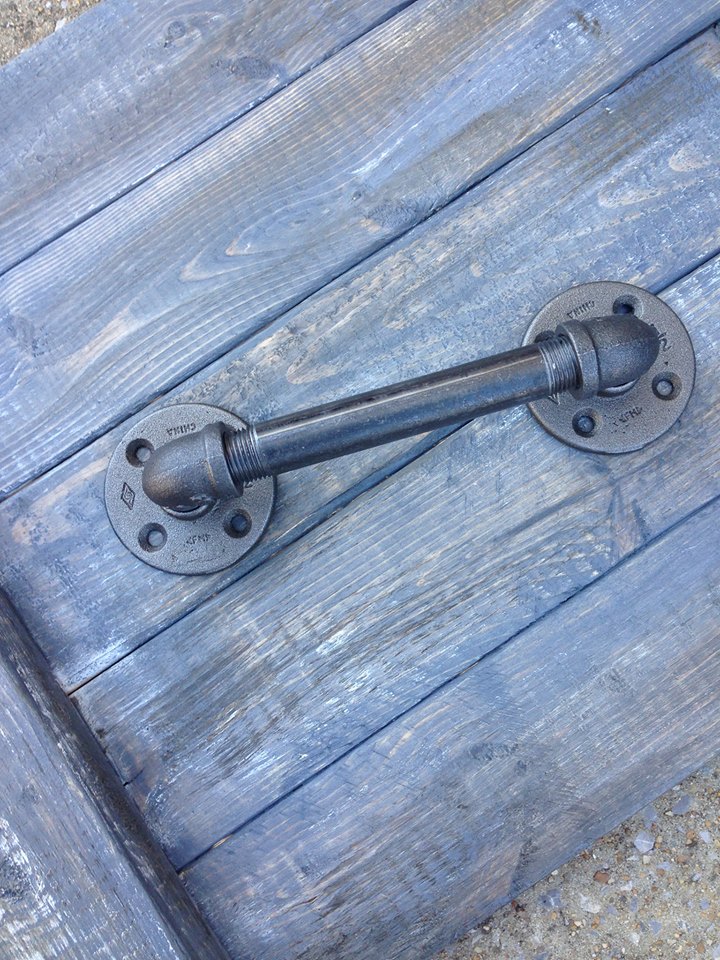
I painted the tray and added some industrial looking handles that I assembled out of plumbing supplies.
And the finished project:
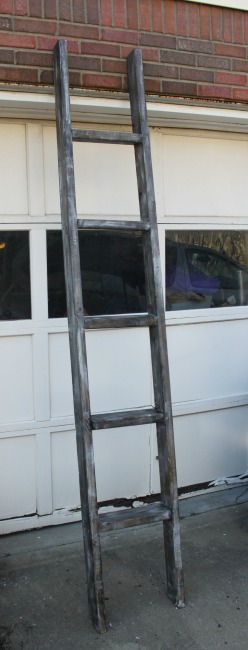
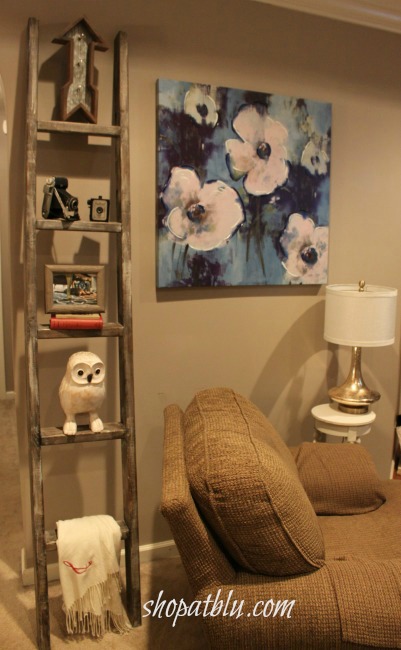
Ok, so once I got the tray completed, I started thinking about some of the other bloggers who would be building. Gina had built an entire porch full of outdoor furniture! Suddenly I thought…um…tray…lame! Time to step up the game! I had 3 more 2x4s so I decided to keep building. Again, I was concerned with time constraints of a retail store so simple was again the goal! We are getting ready to spruce up the outside walkway of The Blue Building so I thought i would make a leaning wall ladder for plants or decor. The design should be simple and it’s another project that folks with little experience could tackle confidently!
Supplies:
- three 2x4s ($2.64 each)
- jig/saber or miter saw
- drill
- level
- 20 screws 2 1/2 inch
- paint or stain of your choice
Planning:
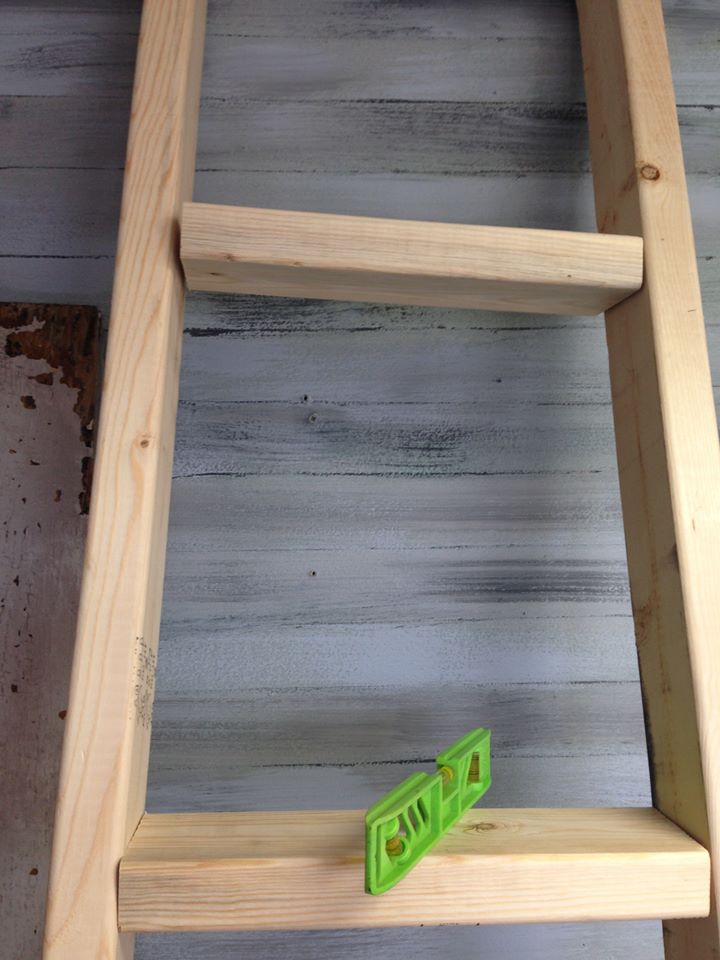
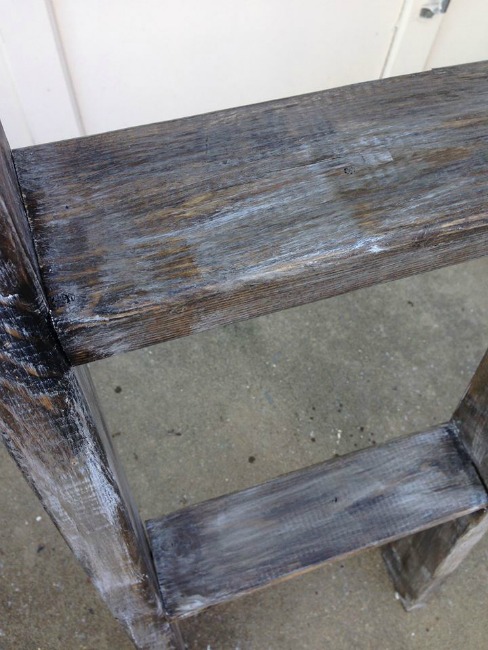
First step was again to determine the dimensions of the ladder. I wanted a taaaaallllll ladder. They make more of a statement and would display more decor items! So I decided to use the entire length of the 96″ 2x4s. I decided a good width was 16 inches. Which would make each rung/shelf 13 inches wide. I figured the general shape between rungs is pretty much a square so I divided 96 by 16 and came up with 6. So for six 16 x 16 boxes I needed 5 rungs/shelves. So I cut five 13″ sections.
Assembly:
Since the 2x4s were rather thick, I opted to use screws instead of a nailer/stapler to attach the rungs. I marked 16″ increments along each outer rail, drilled pilot holes for the rungs, and started the screws into the holes.
I started on one side and attached each rung with one screw. Then I lined up the first rung with the other outer rail. I tilted the rung and used the level to ensure the rung was level.
Then I attached one screw to the second side rail. I inserted the remaining screws, one into each side rail while adjusting the rung to ensure level installation.
This was the most difficult part of the build. I did have to drill another set of pilot holes for 2 rungs because I inserted the screws crookedly and then that rung was not level. However, it still went relatively smoothly for my first ladder build!
Optional: before I started the project, I made a slight angled cut to the bottom of each side rail so that the ladder would sit flat on the ground. I also use my mitre saw to cut an angled section off of the back of the top of each side rail to allow it to sit more flushly against the wall. The top was an awkward cut and I am sure there is a more effective way to measure but I am a rookie so I used the eyeball method and you can see from the pics that this was not exact!
Final Finish:
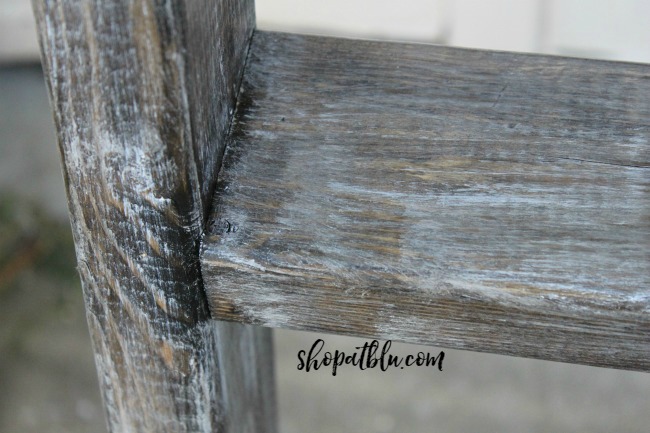
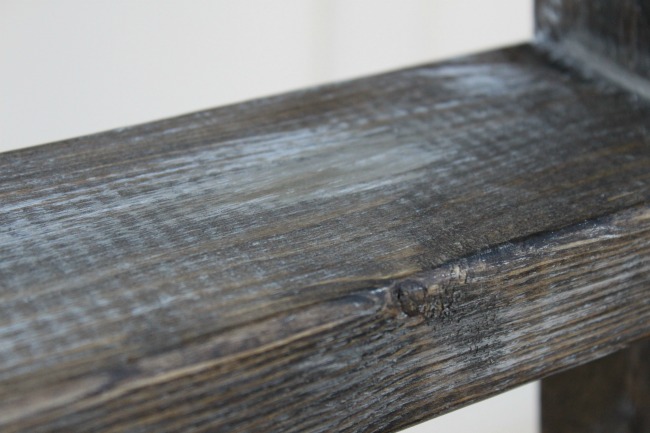
Finally, I stained the ladder with MinWax Jacobean stain for a dark rich brown.
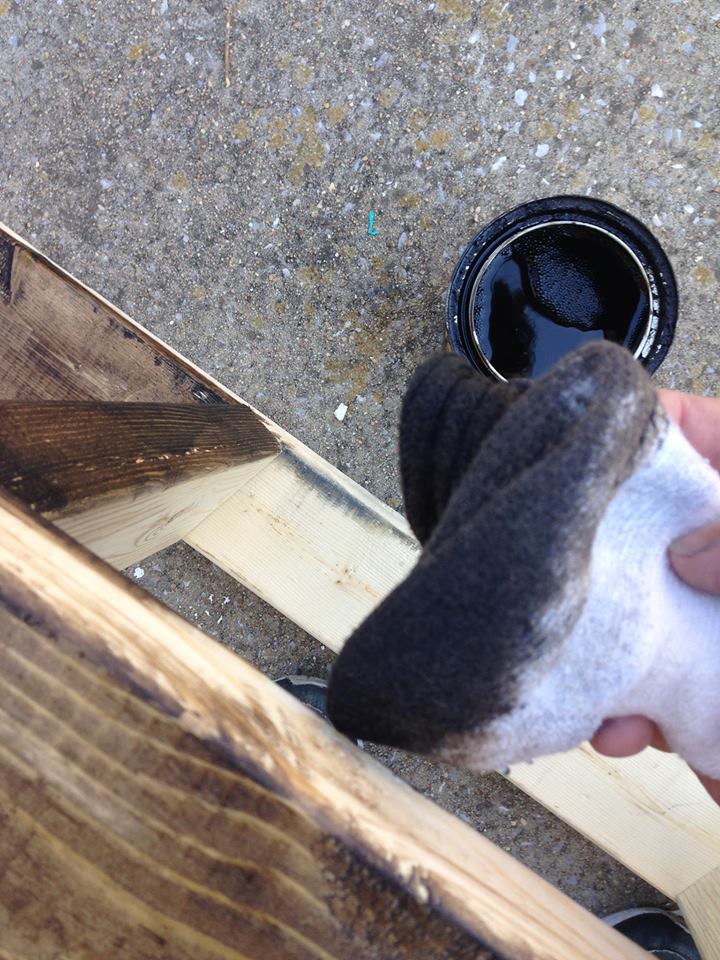
While still wet, I dry brushed some white latex paint and then blended with more Jacobean. This gave me a wonderfully weathered finish.
Thanks to Gina Luker for pushing me to build! This is something I never seem to be able to make time for!


Feel free to follow these links if you want to buy any of the tools I used in this project! I will make a small profit should you make a purchase! Thanks for sharing the love!
I am so happy to be sharing these projects in Gina Luker’s 2×4 round up! Check out all of the exciting projects below!


Very cool piece. Love the industrial pipe handles and the COLOR, omg!!!
Thanks Sara! My fav finish right now!
Thanks Sara! It was an easy project! I will definitely be doing more of these!