DIY Dried Orange Slice Ornaments
As an Amazon Associate and member of other affiliate programs, I earn from qualifying purchases.
Looks like this is the year that I finally dry those orange slices and use them for Christmas decor. I have always loved decor with dried fruit, pinecones, popcorn, etc. Natural elements are just so beautiful. I suppose I dallied with making my own dried orange slice ornament decor since it seemed a bit intimidating. But I am here to tell you that this process was so easy! Basically, all you need are oranges, a sharp knife, and an oven.
Welcome! If you are joining as part of the Amazing Creators Holiday Blog Hop, I am so glad you are here! If you are a regular, welcome back! I am so grateful for your continued support of my little blog.
I am especially excited to be sharing these creative projects with some old friends. I’m sure you will recognize some of these fabulous bloggers from years past. I am equally excited to introduce you to some new friends as well. In this hop, I know you will find some fabulous ideas for decorating, cooking, DIY’ing, and gift giving. At the very least you, will be excited for the beginning of this holiday season. I know I am. I have linked all of my incredibly talented friends at the end of this post. Just click on the links next to their names to enjoy their projects.

Now, onto our dried orange slice ornaments.
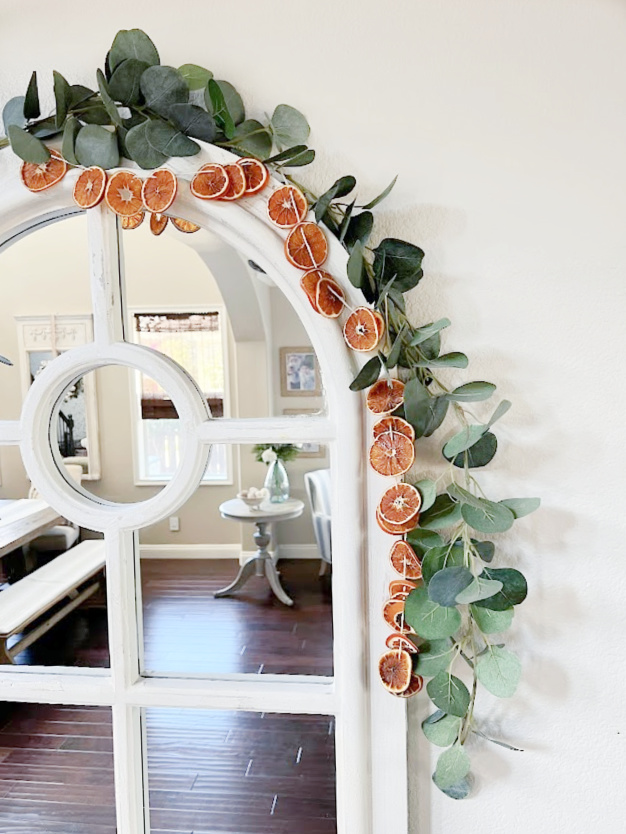
Dried orange slice ornaments and garland can be used in various ways throughout the Christmas season. You can use them as ornaments, as is my intention for this project. Dried orange slice ornaments can be scattered on tabletops, side table, buffets, How about sprinkled down the center of a dining table on a long runner? Tie them to greens and garlands. And one of my favorites ways to use dried orange slices is to embellish gifts. They are their own little mini gift of happiness.
My friend Kristin from My Uncommon Slice of Suburbia made this beautiful garland to decorate her doorways.
So many possibilites!
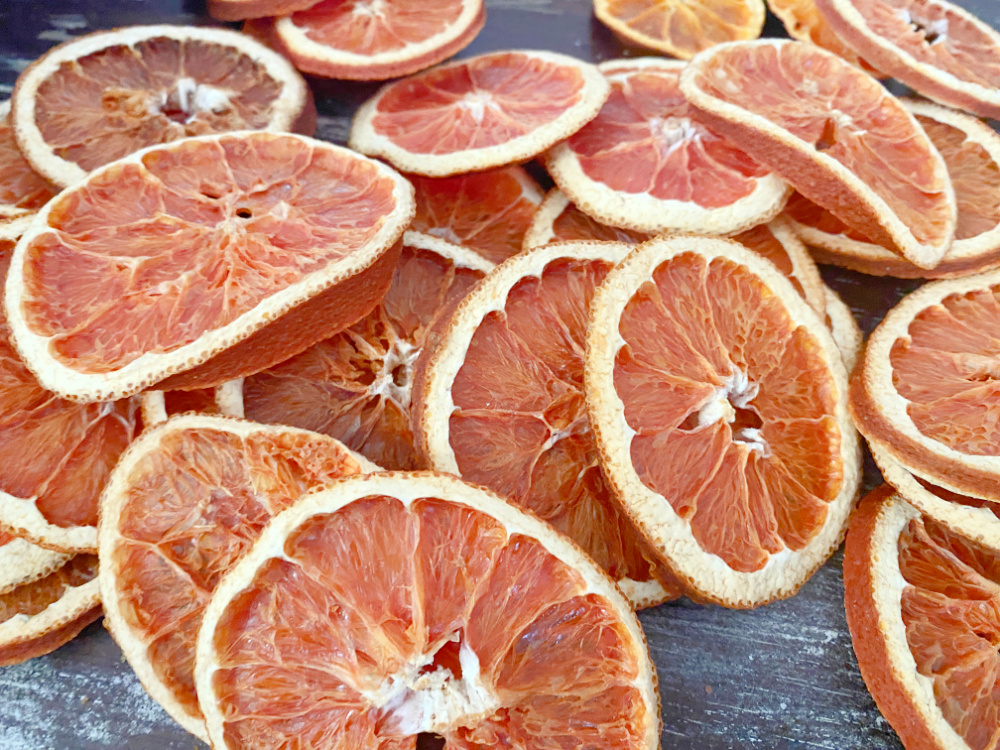
Blood Orange, Navel and Cuties, OH MY!
First step is, of course, to buy some oranges. There is no shortage of varieties of my favorite citrus fruit right now.
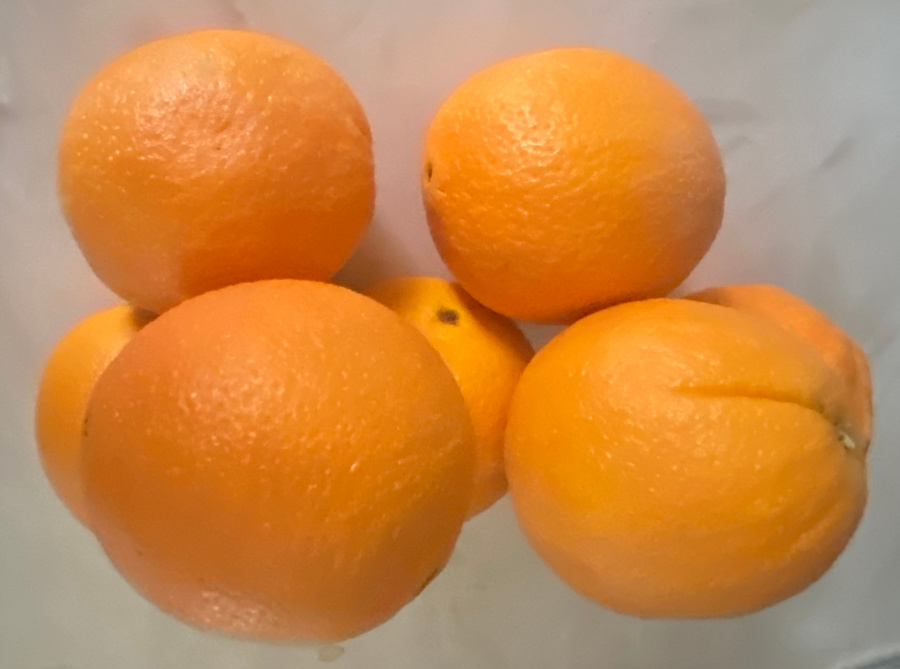
Oranges come in many colors in a variety of sizes. I checked our local Publix and the normal oranges must have been in high demand as there was only one bag. So I bought some grapefruit oranges and some Cuties.
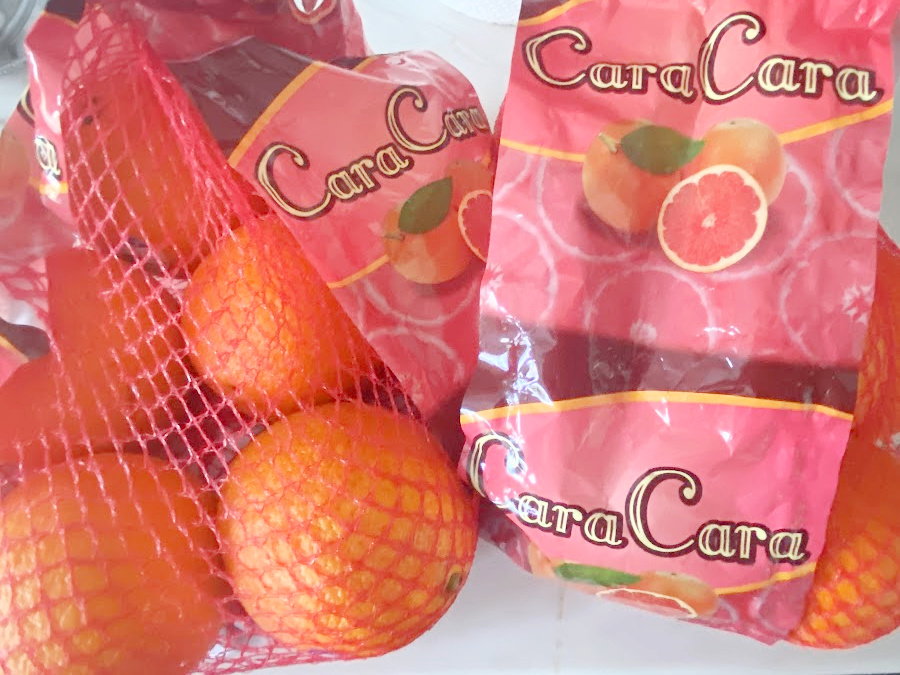
The grapefruit oranges have a pink tint.
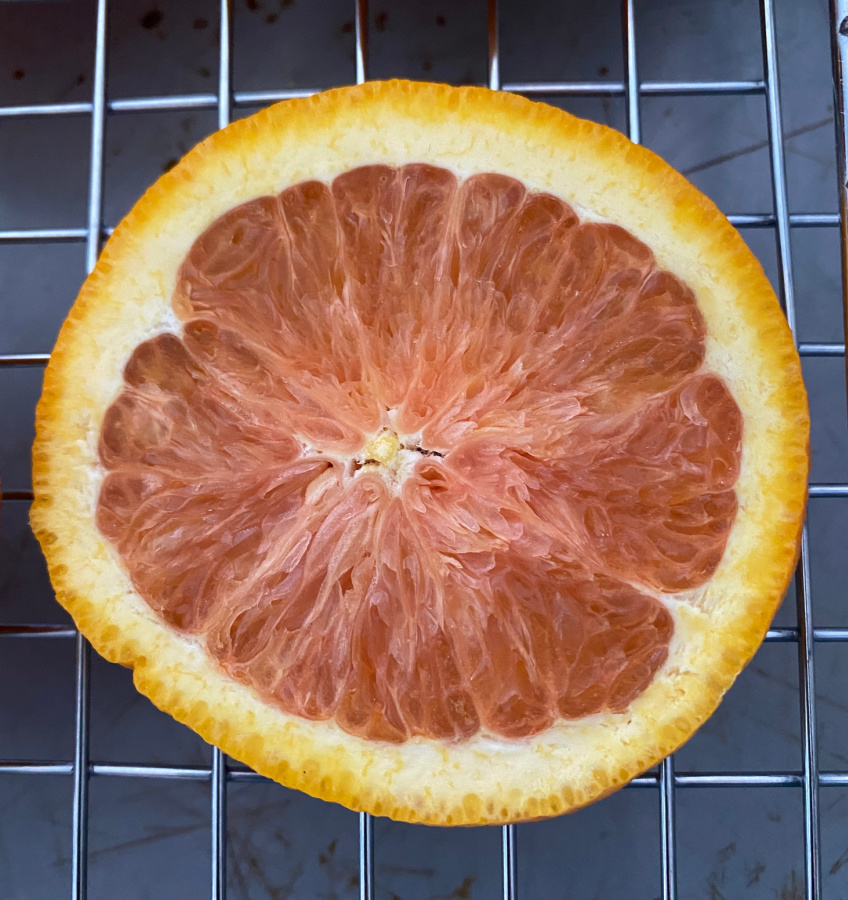
I was also trying to find blood oranges, which have a deep red flesh inside. Cuties and clementines are nice because they are quite small and will add some dimension to the projects.
Prep Your Oranges
Wash the outside of the oranges and dry them. Next, grab a sharp knife. The slicing process is so much easier with a super sharp knife.
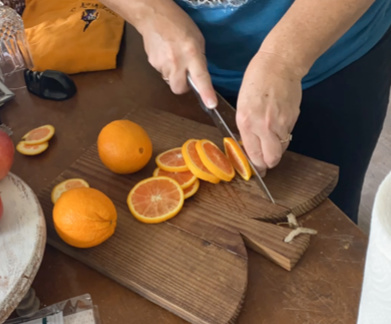
I actually sharpened my knife halfway through the slicing process. And I noticed a big difference. With a sharp knife, it is easier to slice through the peel and flesh of the orange. A sharp knife also helps you keep your slices consistently the same thickness. A dull knife tends to squish the orange causing mis-shapen slices and sends excess juice everywhere. Just a mess.
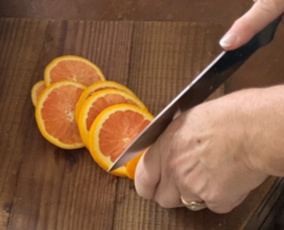
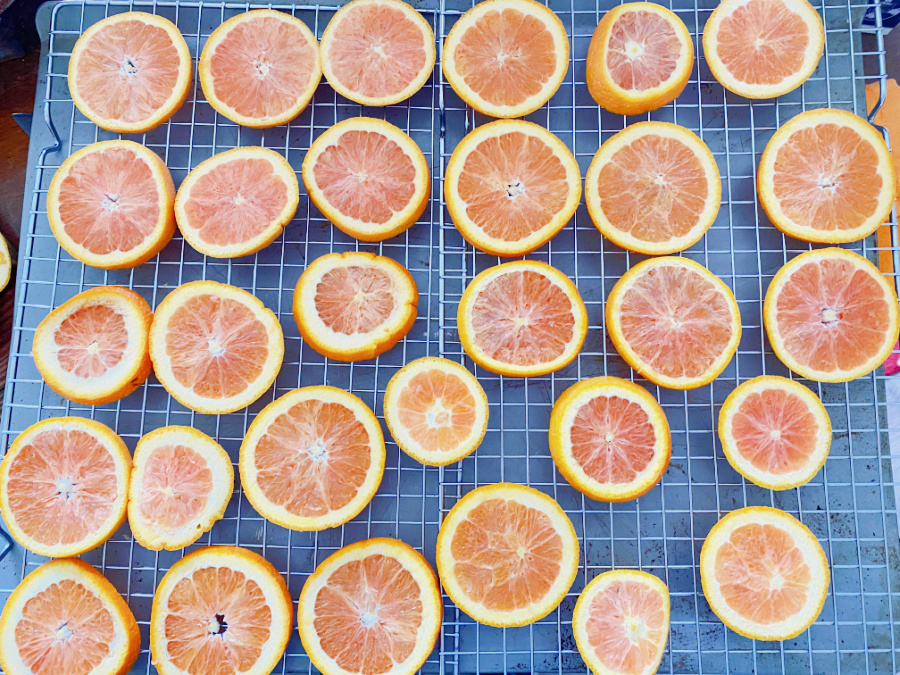
The thinner the slice, the quicker the slices will dry. But find your comfort zone with a few practice slices. After you slice your oranges, pat them with a paper towel to remove as much of the excess juice and wetness as possible. This will make the drying process go more quickly.
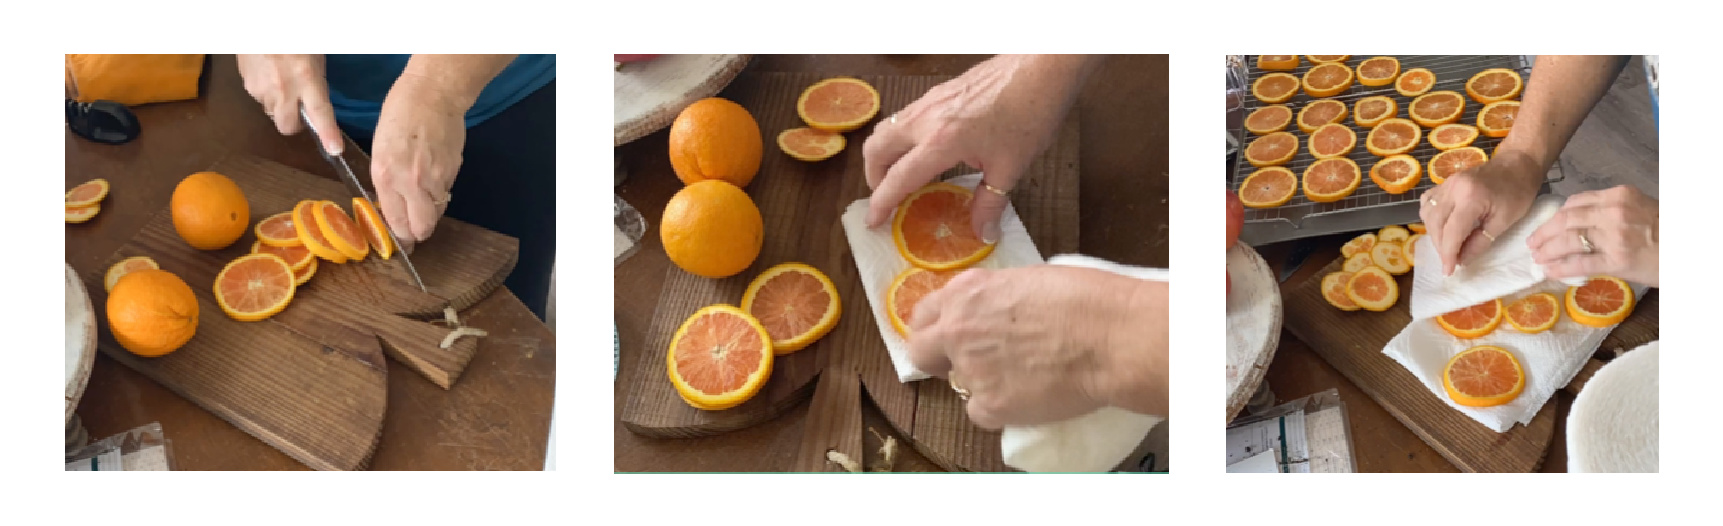
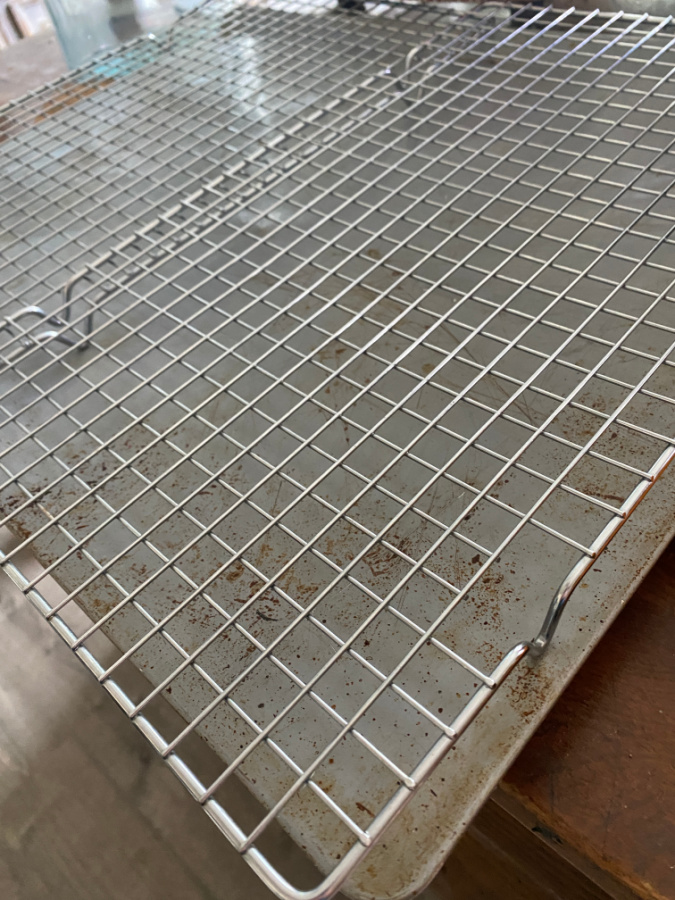
Next, I lined my cookie sheets with drying racks. This allows the air to circulate which speeds up the drying process.
If you don’t have drying racks, line your baking trays with parchment paper. This will prevent the oranges from sticking and will help prevent browning of slices.
The Art of Drying
Place the oranges onto the baking tray in a single layer.
Preheat the oven to 175 degrees and load the baking trays into the oven. Bake in 90 minute sessions, flipping the orange slices after 90 minutes. Repeat the process for as many sessions as necessary for the oranges to be completely dried.
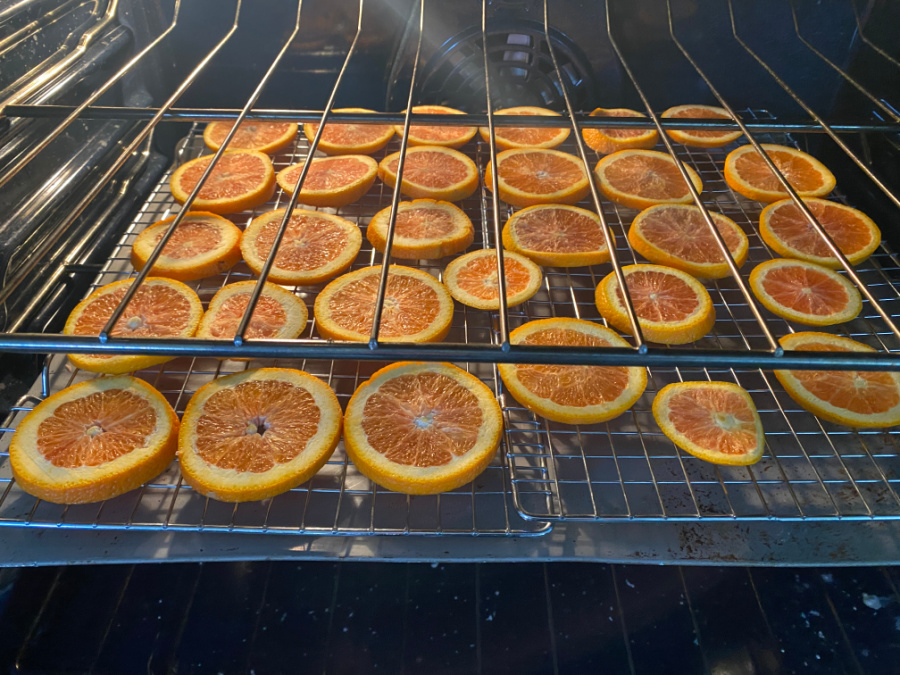
By completely dry I mean hard and crisp. There should not be any soft spots on the slices. NOTE: if you are not using baking trays, bake your oranges slices in 60 minute sessions and flip at the end of each 60 minutes to ensure even drying and prevent browning.
I started this process with 60 minute bake sessions. It took 9 hours. For the next batch, I did slice a little thinner and I baked in 90 minute sessions. This only took 6 hours. Keep an eye on the smaller slices and any odd thinner slices as they will dry more quickly.
Once your oranges have dried, allow them to cool.
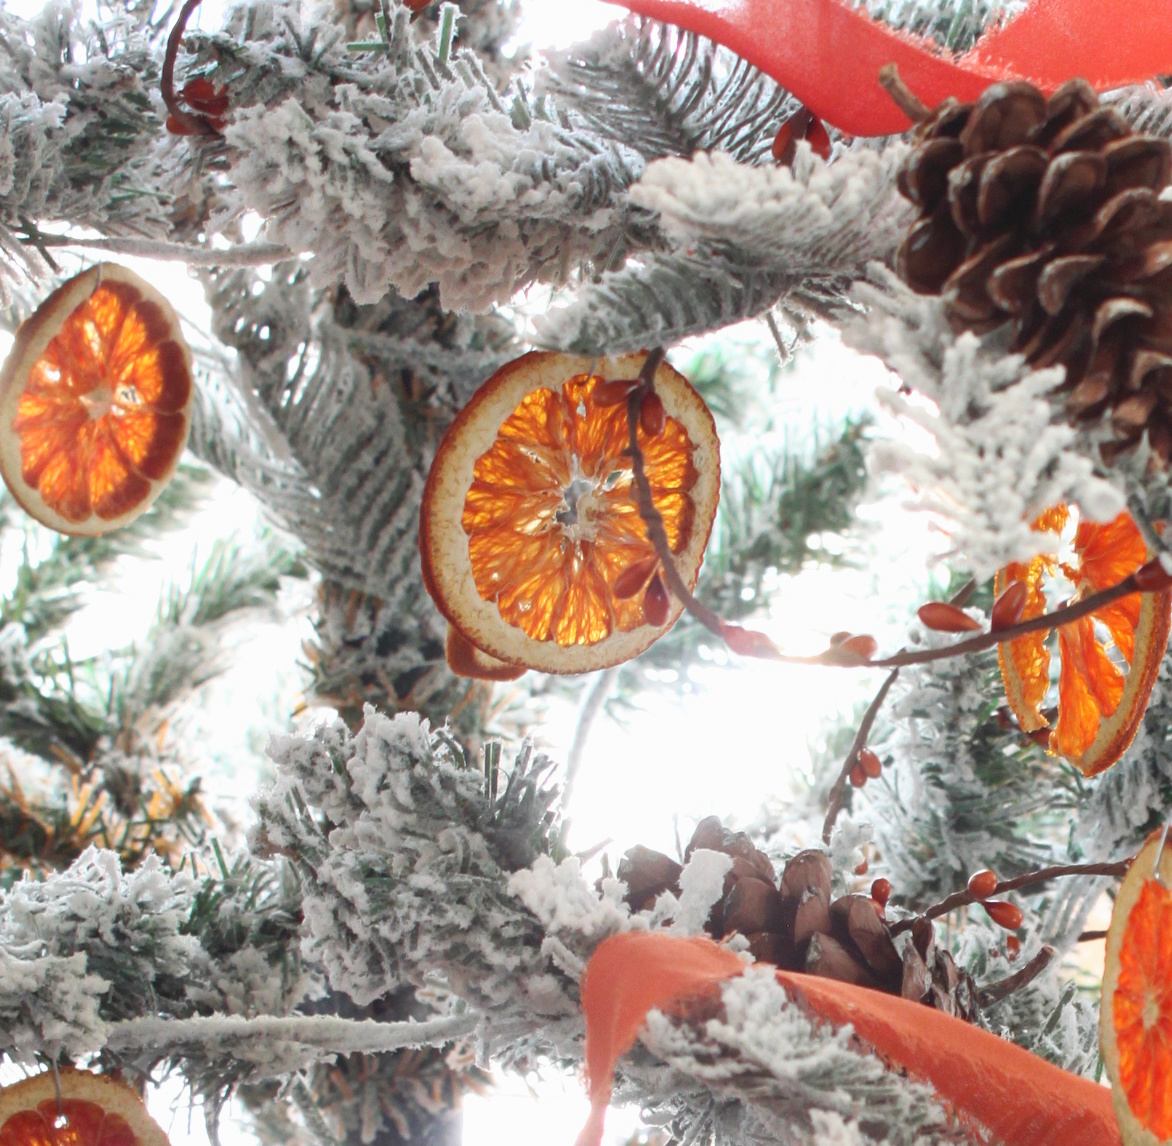
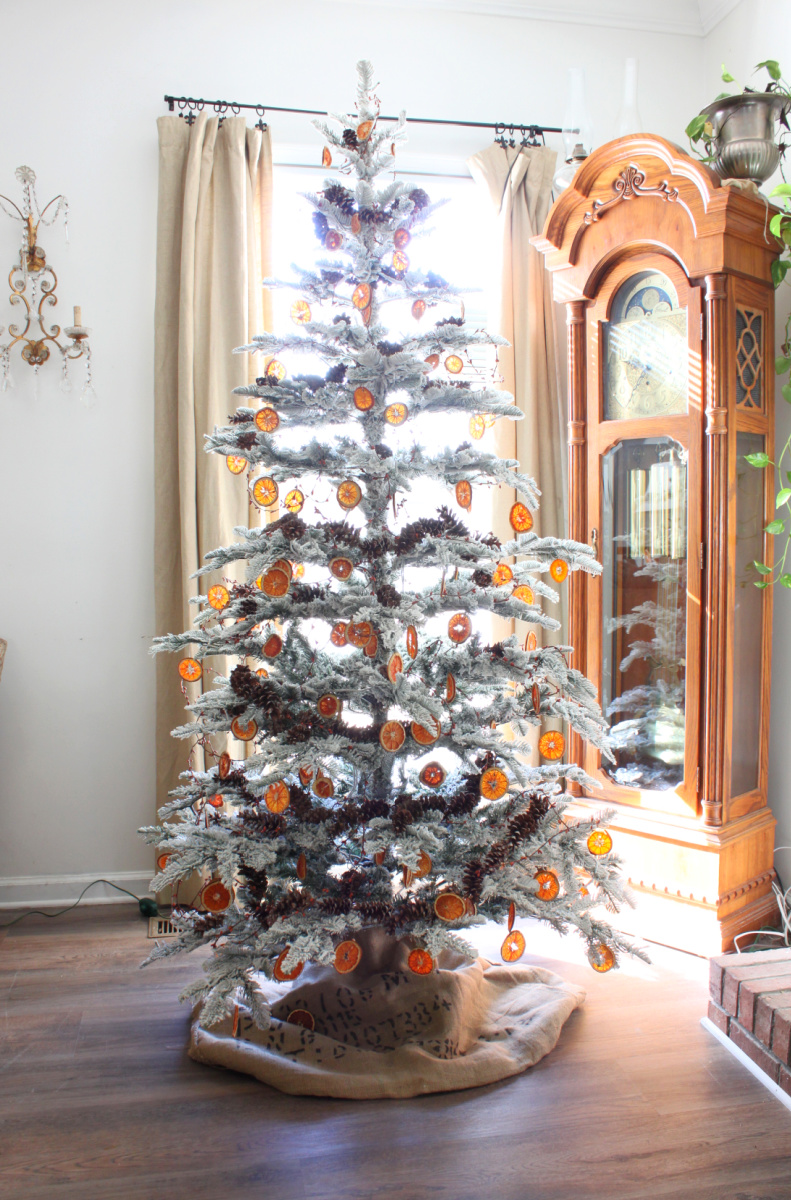
How amazing are these with this translucent appearance reminiscent of stained glass? I placed my tree near the window for this reason!
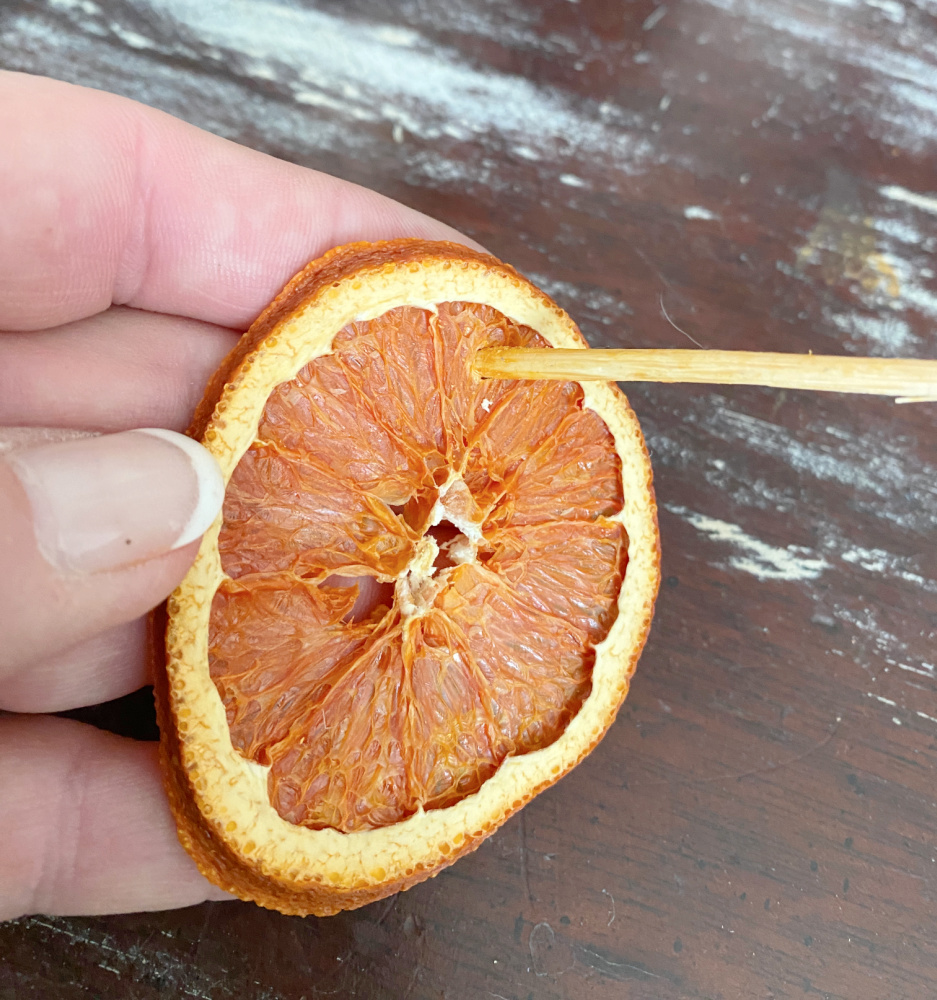
Preparing to Hang
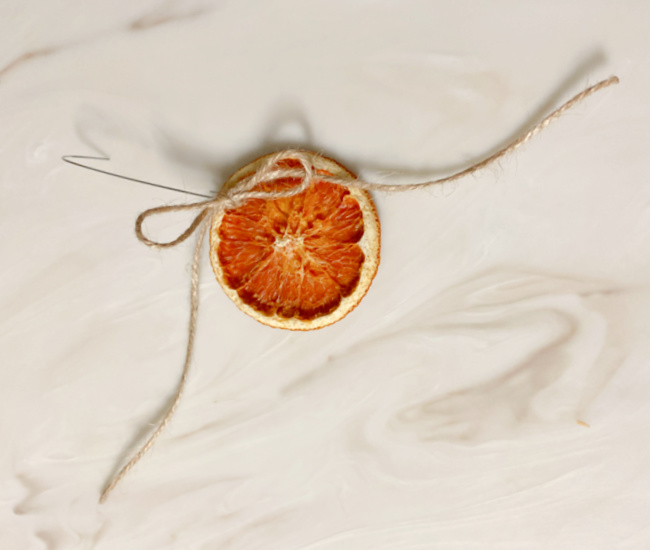
I used a bamboo skewer to poke a hole in the center of each slice.
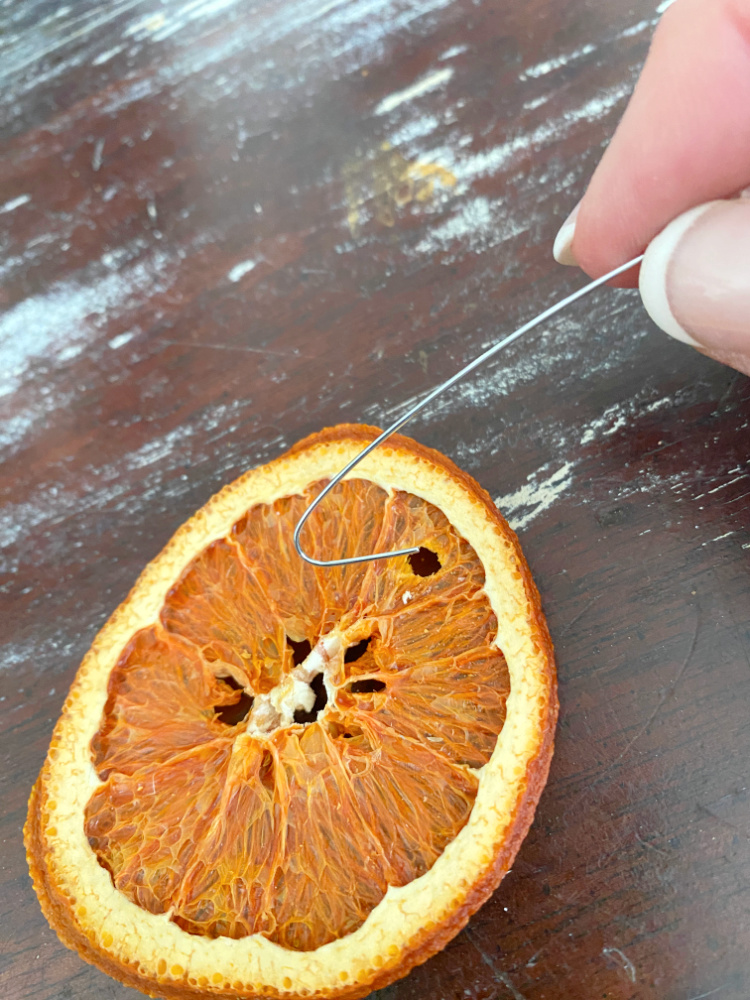
Attach a hanger of your choice. For simplicity’s sake, I used a wire ornament hook.
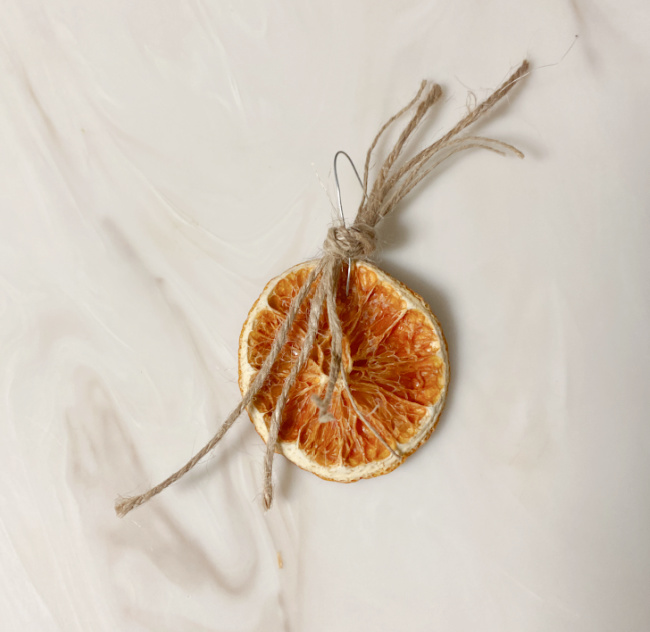
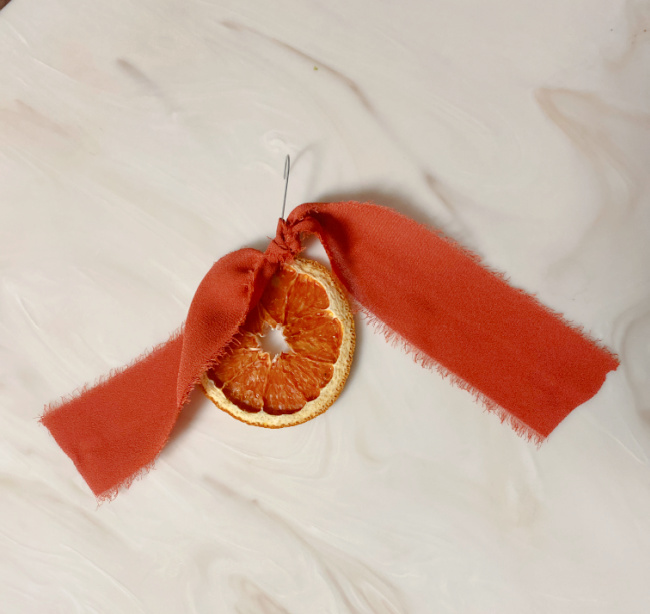
Get creative. Use twine or ribbon or lace. Whatever you have on hand! I kept it pretty simple for now with the tree hooks but will be adding twine and ribbon to change the look of the tree.
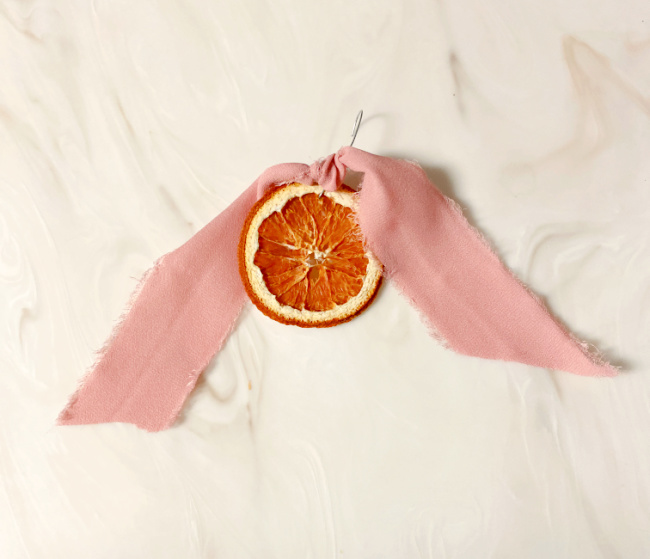
Here are some variations. I will use all of these this season undoubtedly.
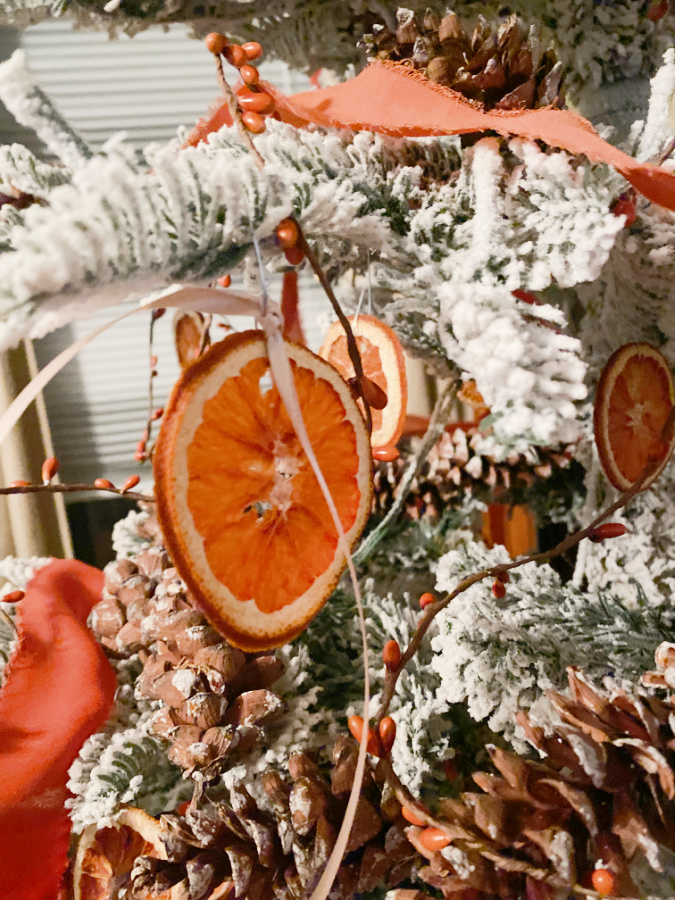
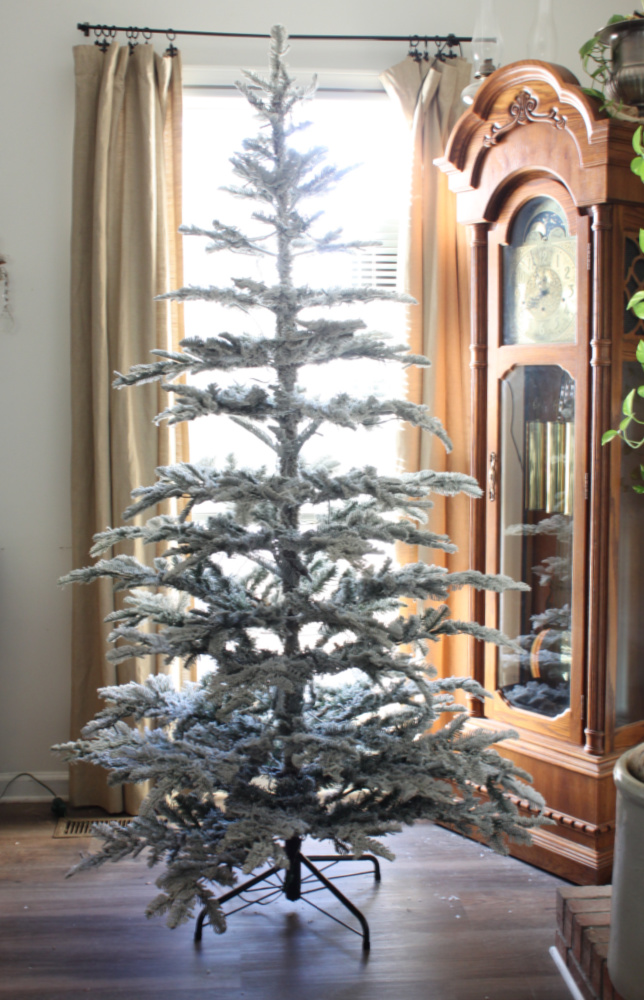
I am lucky to partner with King of Christmas this holiday season. King of Christmas sent me this beautiful 7′ Noble Flock Tree with white lights to decorate and use in my home. Isn’t it just lovely?
You know I had to give the dried orange slice ornaments a test drive.
Say hello to our fall tree!

She was made to sport these beautiful dried orange slice ornaments.
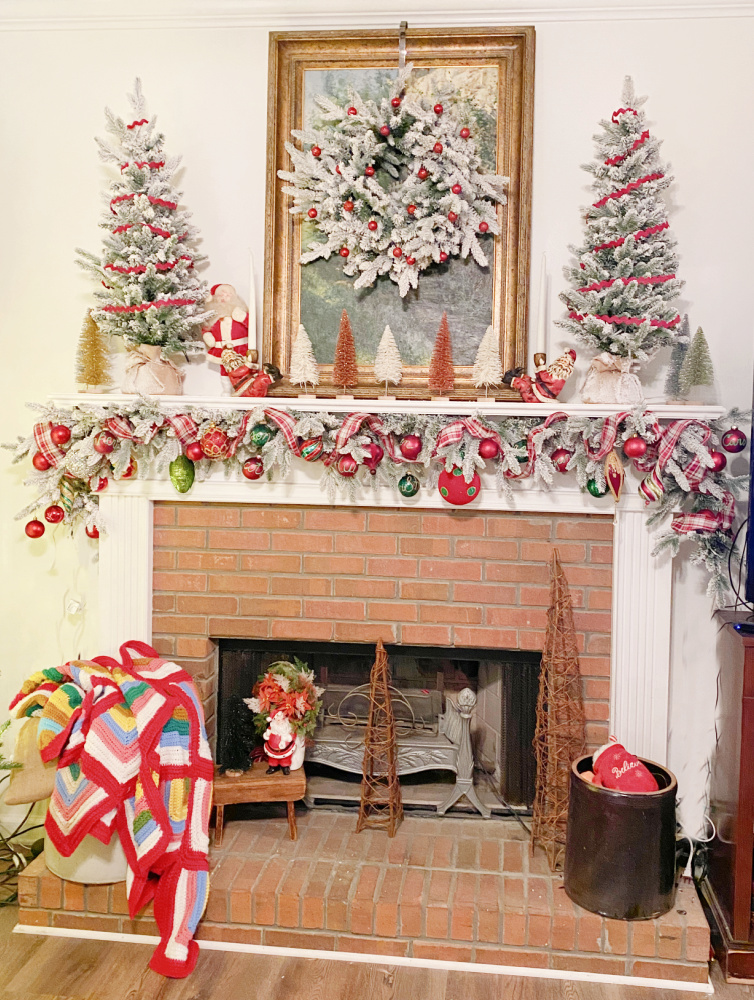
Here are a few of my other favorite Christmas projects:


This is stage two this tree that I will use for Thanksgiving. She sat naked for a few weeks (stage one) so we could enjoy her simple beauty. After Thanksgiving, the noble fir will take on her Christmas persona. I can’t wait. Do you have a fall tree before the Christmas season?
The Amazing Creators
As promised, here are all of the Amazing Creator’s Holiday projects! As special shout out to Kimberly at From Farmhouse to Florida for hosting this hop. She is the first post listed below. Be sure to leave some comments on each blog. We absolutely love your feedback. Enjoy!
For More Holiday Inspiration, Please Visit My Friends’ Posts!
- “Snow” Place Like Home for the Holidays from Kimberly at From Farmhouse to Florida
- Star Anise Garland with Orange Slices by Cindy from Cloches & Lavender
- DIY Dried Orange Slice Ornaments by Sue from Shop at Blu
- DIY Christmas Countdown Calendar by Kristin from 5th Sparrow No More
- Repurposed Cookie Sheet Christmas Sign by Kim from Exquisitely Unremarkable
- Elegant Winter Wreath by Crystal at Sweet Valley Acres
- The Best Christmas Decor Ideas for Decorating Your Home by Rachel from Tea and Forget Me Nots
- The Perfect Gifts for Couples to Give Each Other by Sharon from Now Choose Life
- Nature Inspired Wood Slice & Pinecone Christmas Ornaments from Donna at An Organized Season
- Peppermint Christmas Bowl with Popcorn by Maria from Pure Happy Home
- Homemade Christmas Thin Mint Cookies by Kristy from At Home With Kristy
- Dairy Free Hot Cocoa Recipe by Juliet from A Loverly Life
- Crochet Christmas Tree Pattern from Sara at Birdz of a Feather
- The Best Kitchen Christmas Decorating Ideas for a Cozy Home by Kim at Perfecting Places
- A Holiday Farmhouse Kitchen Table from Linda at Bushel and a Pickle
- Christmas Tree Brownies from Rosemary from My Home and Travels
- DIY Charger Plates for Christmas from Carol at Blue Sky at Home
- A Holiday Gingerbread House Party by Mary Anne from House of Mar


That tree with the light shining through the orange slice is just gorgeous! It really picks up on the colour of the grandfather clock.
It’s all about those little details? Right?!!
There’s nothing like dried oranges for Christmas.. Great tutorial
Thanks Cindy. I’m thinking this won’t be the last batch!
The dried oranges on your King of Christmas Noble Flock tree are so pretty! Simply beautiful!
Thank Kim! So easy too!
I love the look of these dried orange slices – thank you for sharing the tutorial.
Of course! Thanks!
I love how the blood oranges dried!!! The color is so pretty! Great project, thanks for sharing all your tips!
Just different enough, right? Thank you Crystal.
I’ve never made these but this year might be the one, they look so good and I bet smell amazing.
You will be so glad! Do it!
Thanks for sharing this tutorial! I have been wanting to do this so I’m pinning now! Your ornaments look so pretty on that gorgeous tree! Perfect for Thanksgiving and through Christmas too!
Thanks so much, Donna! Don’t wait! Do it now…so easy!
What a pretty tree and I bet your whole house smells fabulous with all those amazing oranges!!
Thanks, Kim. Loving the whole citrus vibe this season!
These are so darling! I love the garland but the tree all decorated with orange slice ornaments is so lovely!
Thanks, Mary Anne. I am enamored with this tree and the oranges.
Love how you’ve decorated your Christmas tree with dried oranges, Sue! It looks so beautiful and I bet it smells equally amazing! Fabulous step-by-step instructions too!
Thanks Kristy. I really couldn’t go wrong with those instructions. The process was so easy!
These dried orange ornaments turned out beautifully! I love how they look on your flocked tree with the light streaming through them.
Thanks, Maria! I was pleasantly surprised by the glowing slices!
I love these but one of those things I have never made. I think it’s time to try it. Great post.
Me too! It was so easy and I’m hooked!