How to Paint a Faux Rock for your Garden
As an Amazon Associate and member of other affiliate programs, I earn from qualifying purchases.
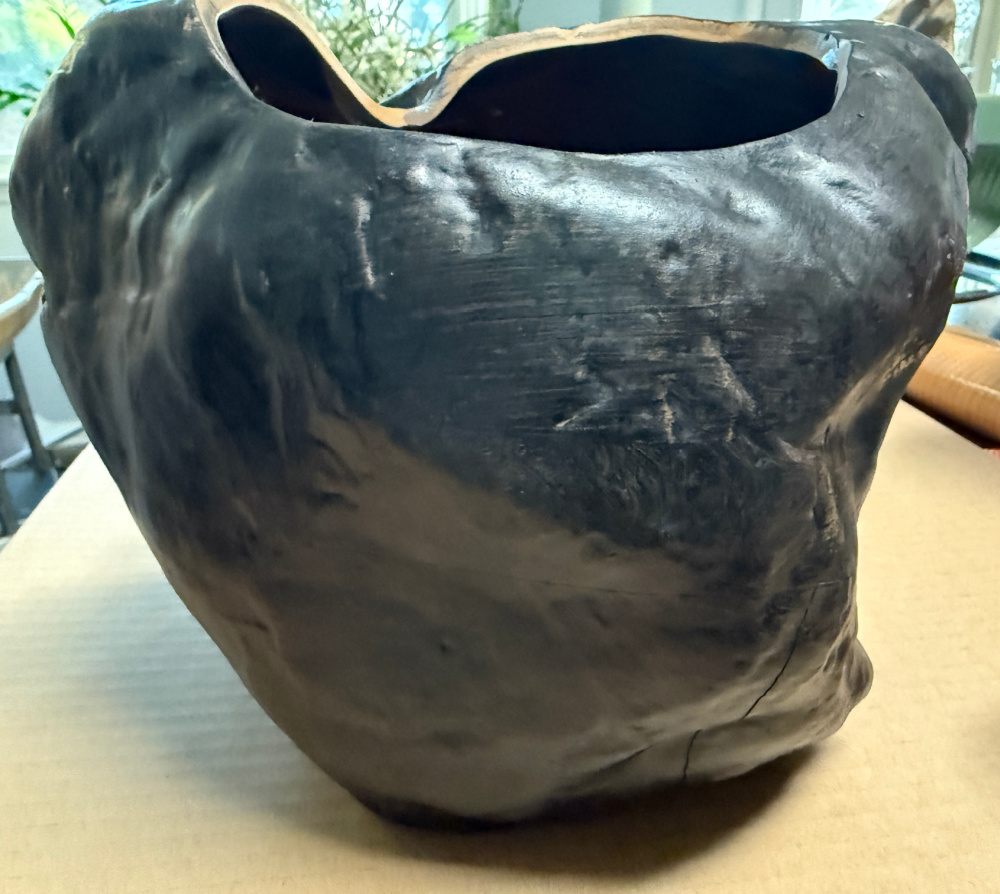
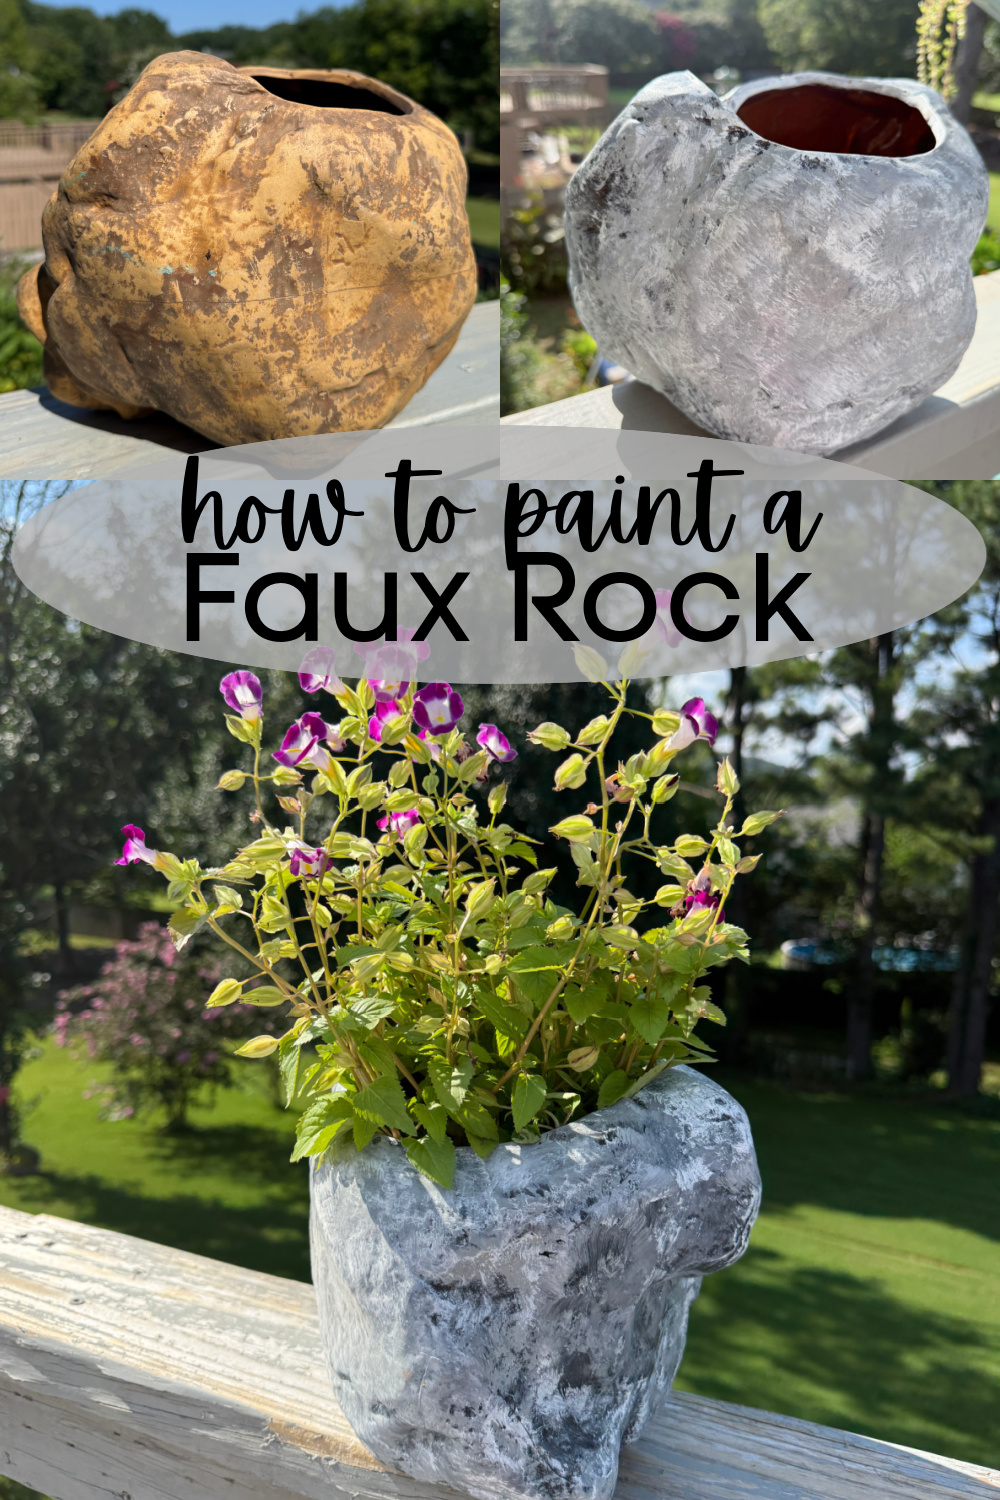
This sad dated rock planter needed a makeover desperately. I thought I had 2 of these but I can only find one. I wanted some unique planters for my newly re-stained deck (you can read about that below). But the deck is grey. I would rather the planter fit into the same color family so the old brown needed to go. So, you know me, if something doesn’t match…paint it! Let’s upcycle this planter with some realistic faux rock painting.

As I said, I just re-stained our deck. We had this deck rebuilt in July of 2022. I waited 6 months before applying the stain. Probably due to application error (ALL ME), we had some chipping and flaking after about two seasons. I was a bit upset because of the amount of time it took to initially stain the deck and the steps, with two landings. But, a refresh was well needed and I finished staining just yesterday.
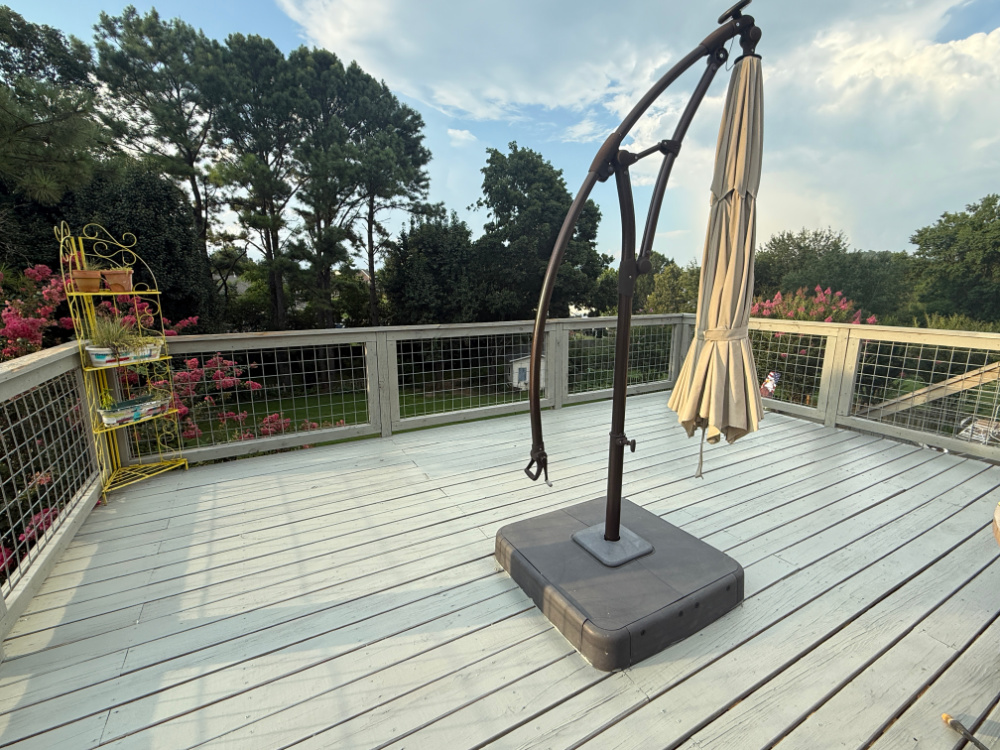
The upside to a project like this is getting to switch up your decor once the deck is finished. I’m always looking for unique items in my decor. You know like different shapes and unexpected textures. I’m definitely no professional, but I do I love when a glance at my stuff makes me smile. I think this little rock planter will make me smile.

I bet you guessed that this project was completed for the Thrift Store Decor Team monthly project share. Join us every second Wednesday of each month for creative projects with a repurpose, restore, reuse, upcycle, or revitalize theme. You never know what skills we will be sharing so don’t miss a single Thrift Store Decor Team Wednesday! All of the projects are linked at then end of this post. Now, let’s get to this faux rock painted project!
Choosing a Color
As I said, the deck is a light grey so the plan was to use a similar color as a base for my planter. The finish would be rather easy because I could get the desired look from simply sponge painting. There are several methods to faux rock painting. Let’s see where this planter, hereafter known as Rockella, leads us.
Prep your Project Piece
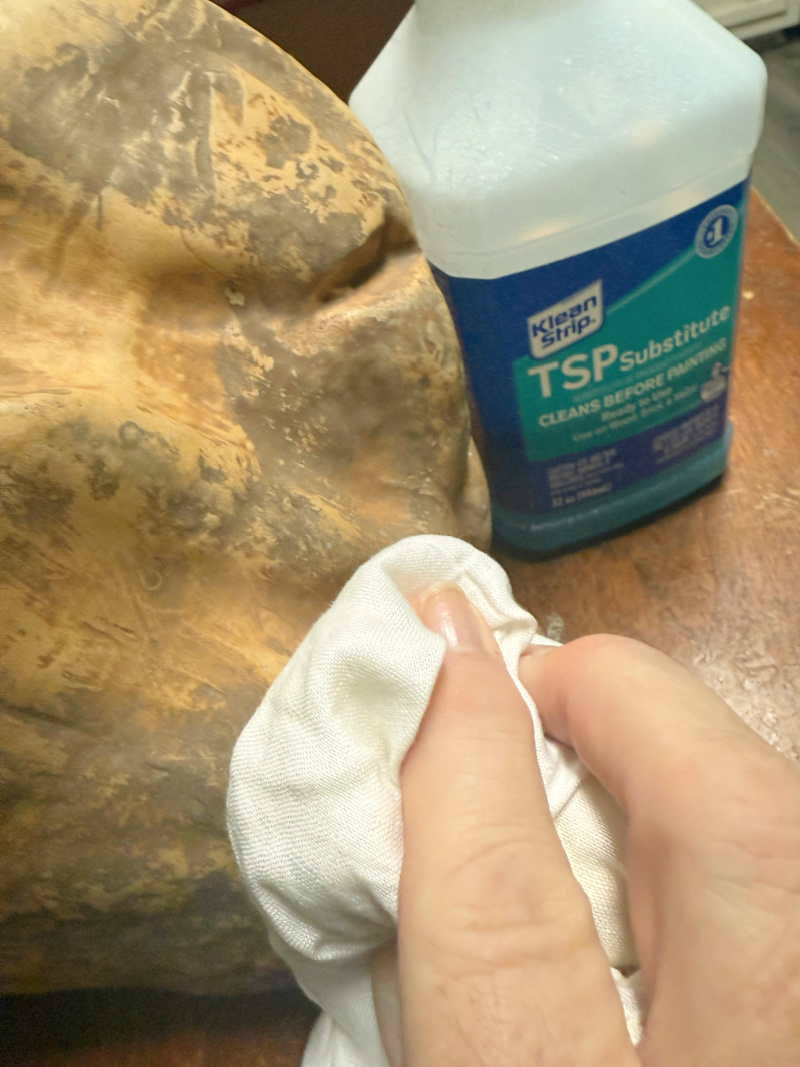
First step in painting is always clean and prep your piece. So Rockella got a nice bath.

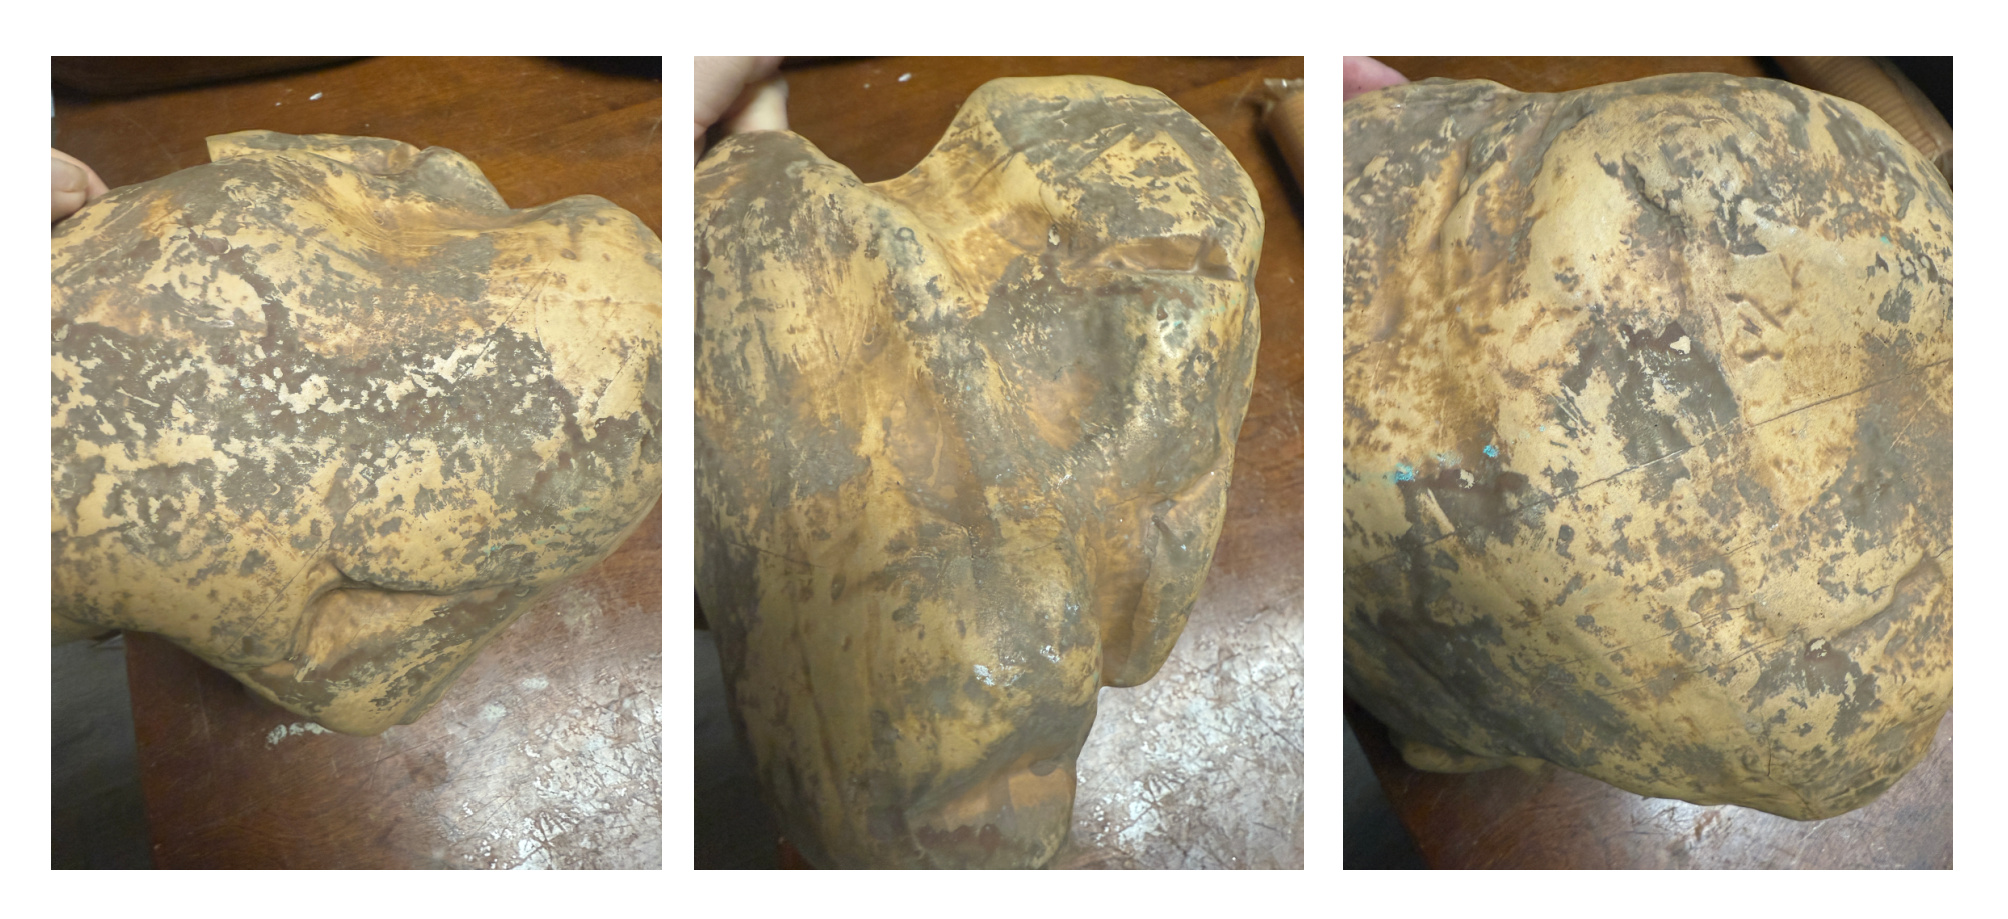
Rockella is made of ceramic. Her interior is glazed. She has a matte finish currently so the paint should adhere nicely. Regardless though, a critical prep step is to wipe your project piece down with TSP, a solvent available in the paint section of you local home store, which removes any residual dirt and preps the surface for better paint adhesion.
A Paint Plan for our Faux Rock Planter
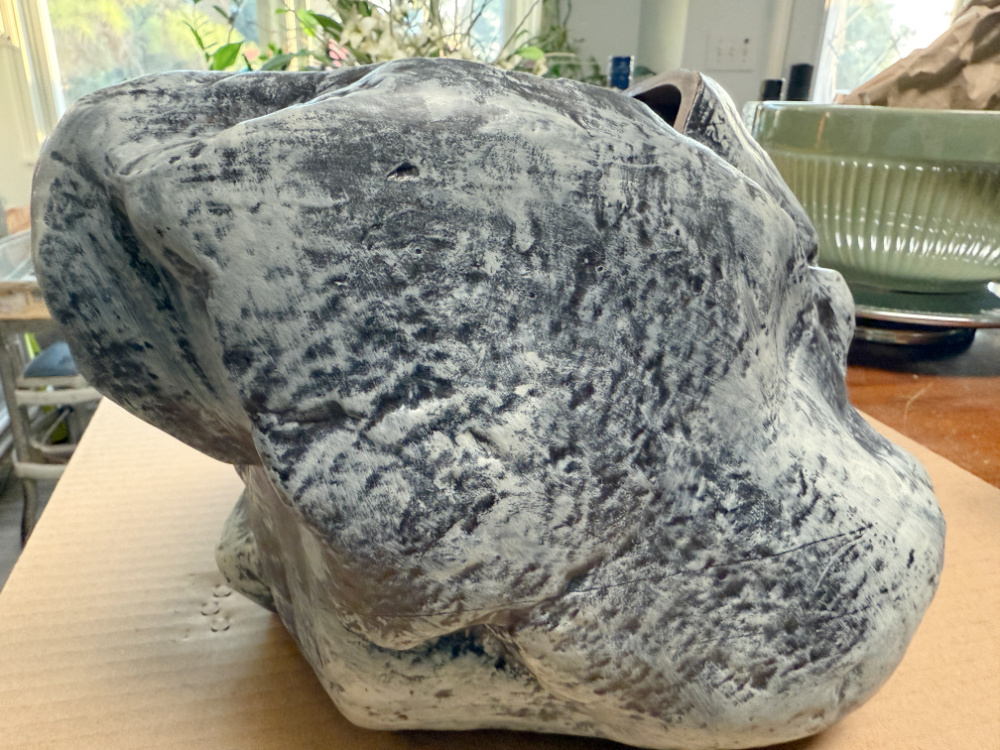
Rockella has lots of groves and crevices just like a real rock. The plan was to base coat in a dark color, sponge paint over with a grey color, wipe off a good bit of the second coat, and finish off with some dry brushing in a third complimentary color either lighter of darker.
I gave Rockella one base coat of black thinking that this would settle into the deeper grooves of the planter and give a boost to the texture. I considered grey washing over the black which would dull the black substantially. I could then drybrush over the grey with a darker grey and some white. Creating a dimensional finish.
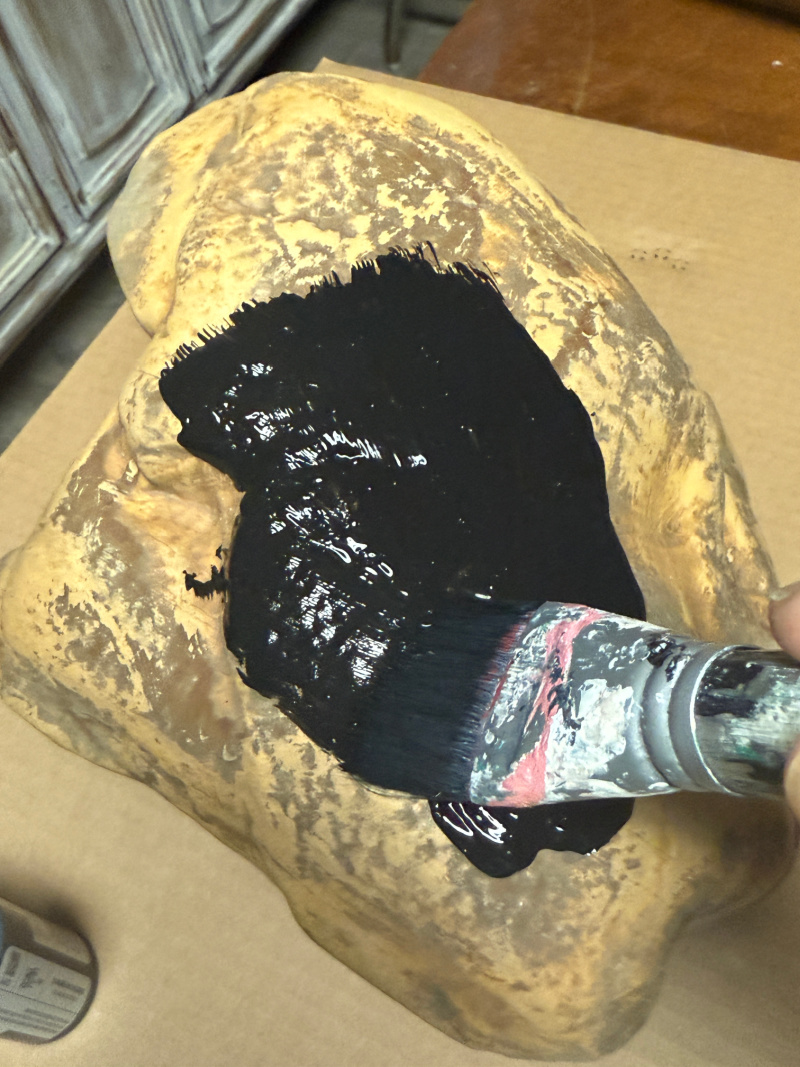
But that black scared me. It was very dramatic. I know, I know! You have to be very patient and trust the process.
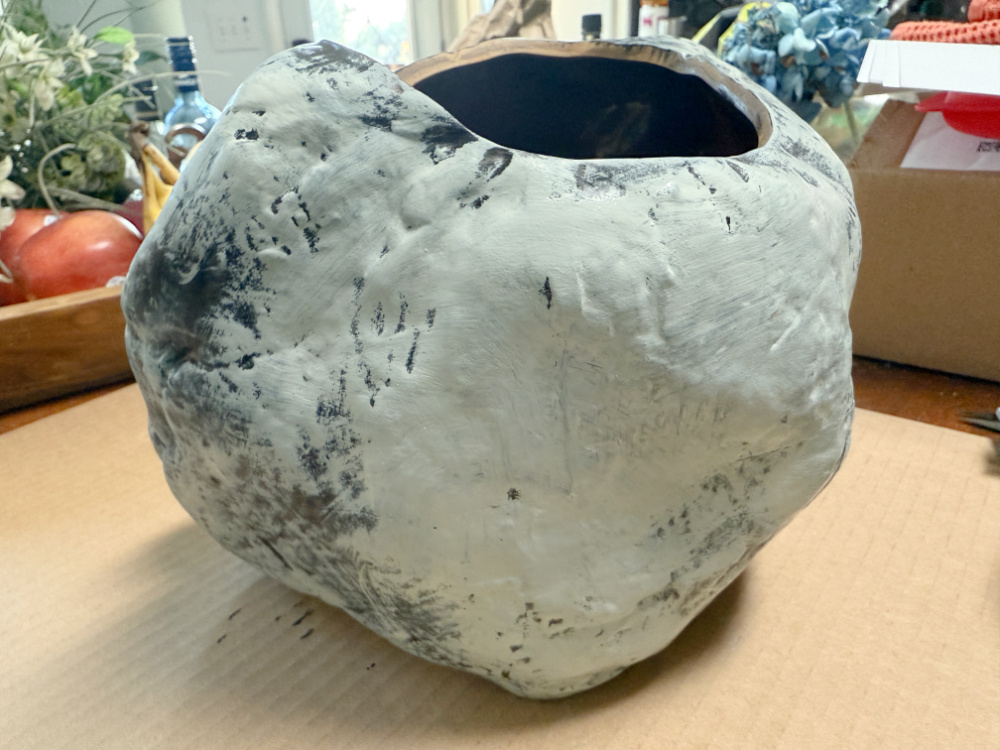
So I started to add a second coat of grey planning to wipe it away essentially leaving a grey wash behind. But as I applied the grey, I thought this it too thick.
OOPS!
I tested an area by wiping away the grey. I didn’t like this effect. I think it was because this test area was the smoothest part of the faux rock and had less divets and crevices. I wanted more, believe it or not, of the dreaded black to be popping through like the edges of the photo above.
I went too heavy at first. Faux painting involves alot of practice to achieve the look that you like. But always remember that it is just paint and paint can be very forgiving especially if you are using rustic or shabby technique. You can always wipe the paint off before it dries or paint over it. Which is exactly what I did! I just grabbed a damp rag and wiped off the paint.

I was left with a flat white space so I dry brushed some grey just to mottle the surface a bit. Dry brushing is a technique, in which you remove most of the paint from the brush and drag the almost “dry brush” across the surface of your project piece.
Then I dabbed paint onto the area alternating white and grey for that faux rock finish. This gave my smooth surface a textured look just like the surface of a rock!
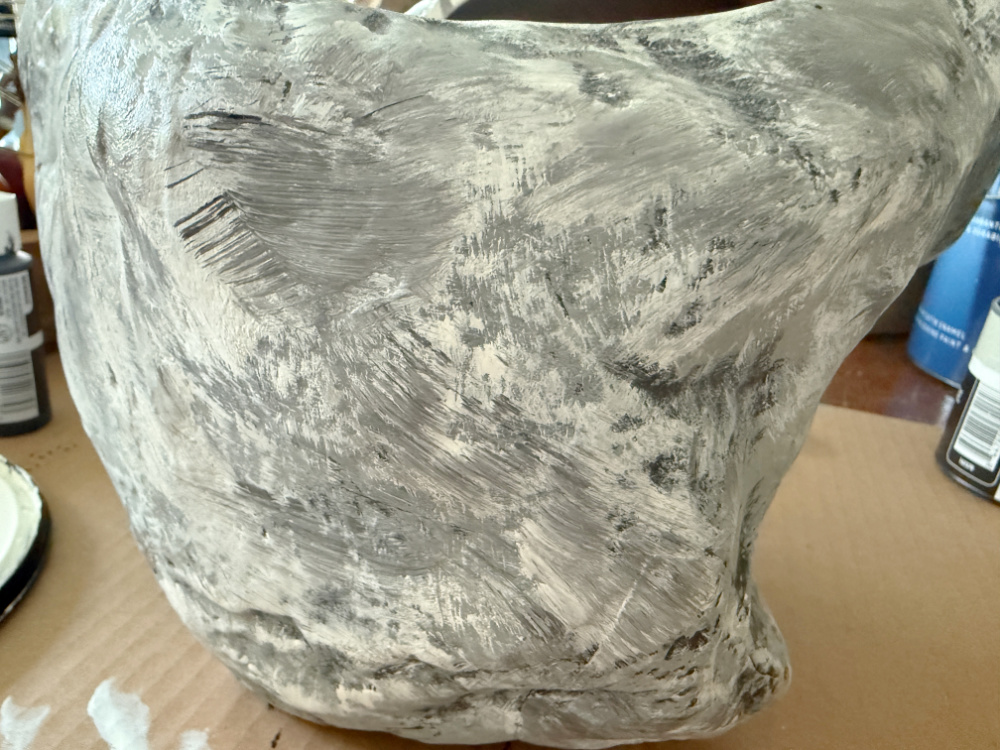
I continued with the dry brush technique around the rest of the planter. First with grey.
I allowed the grey to dry and then dabbed tones of grey and white.
It’s all about the LAYERS
In the “in process” photo above, I added the grey and then some white. Then I just used a tapping or pouncing motion of the brush to blend the colors. I added more black in spots, more white in others all the while being careful not to cover the underlying black. See how that give the piece dimension?
I thought about spicing things up with some green to play with a mossy look. But I decided to stay simple. A faux mossy look can be a whole other project for under the deck!
Anyway, a big part of faux painting is just playing around until you have achieved the desired look. If things get confusing or the colors are blending too well just allow the paint to dry and start again. It really is that easy. You can even practice before starting on your piece. I keep a piece of cardboard handy for removing the paint from my brush and for handy access to each color.
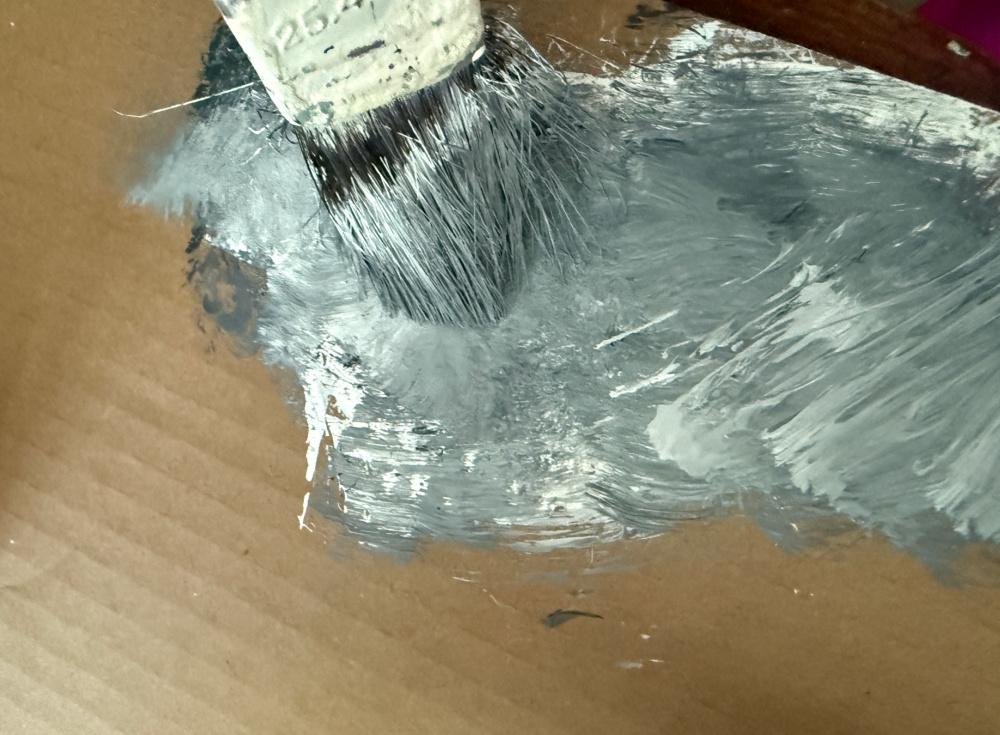
I just squeeze a little of each color onto the cardboard and use is as a makeshift painters palette. Just like the pros. A girl can dream, right?
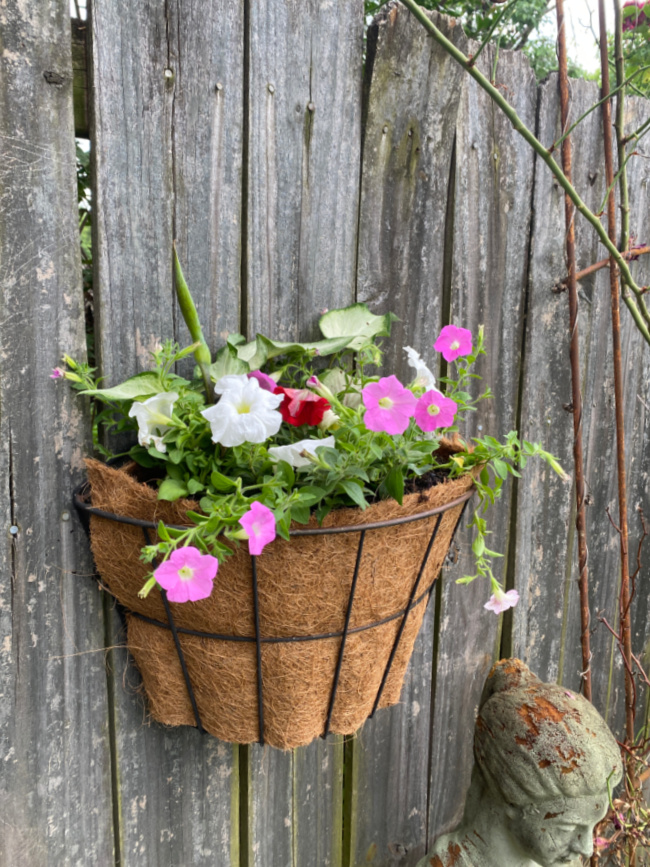
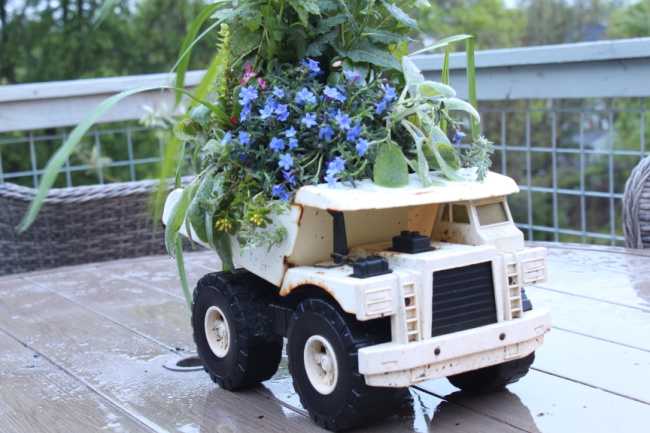
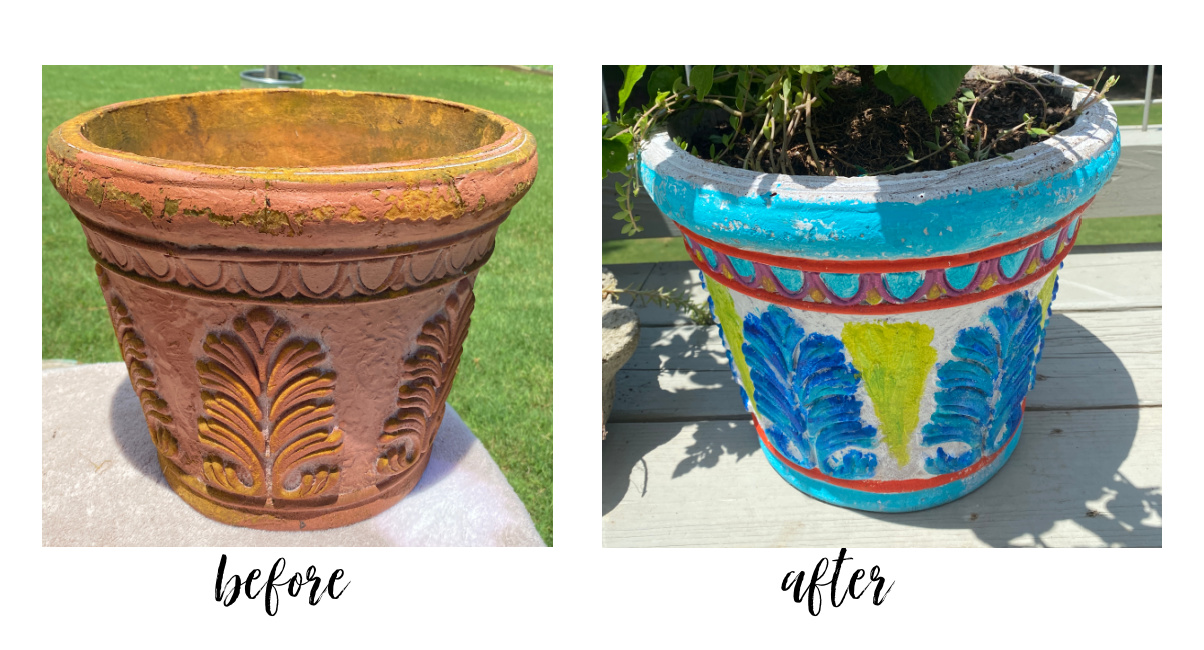
Here are some of the other planter upcycles from the blog:
A Little Nostalgia
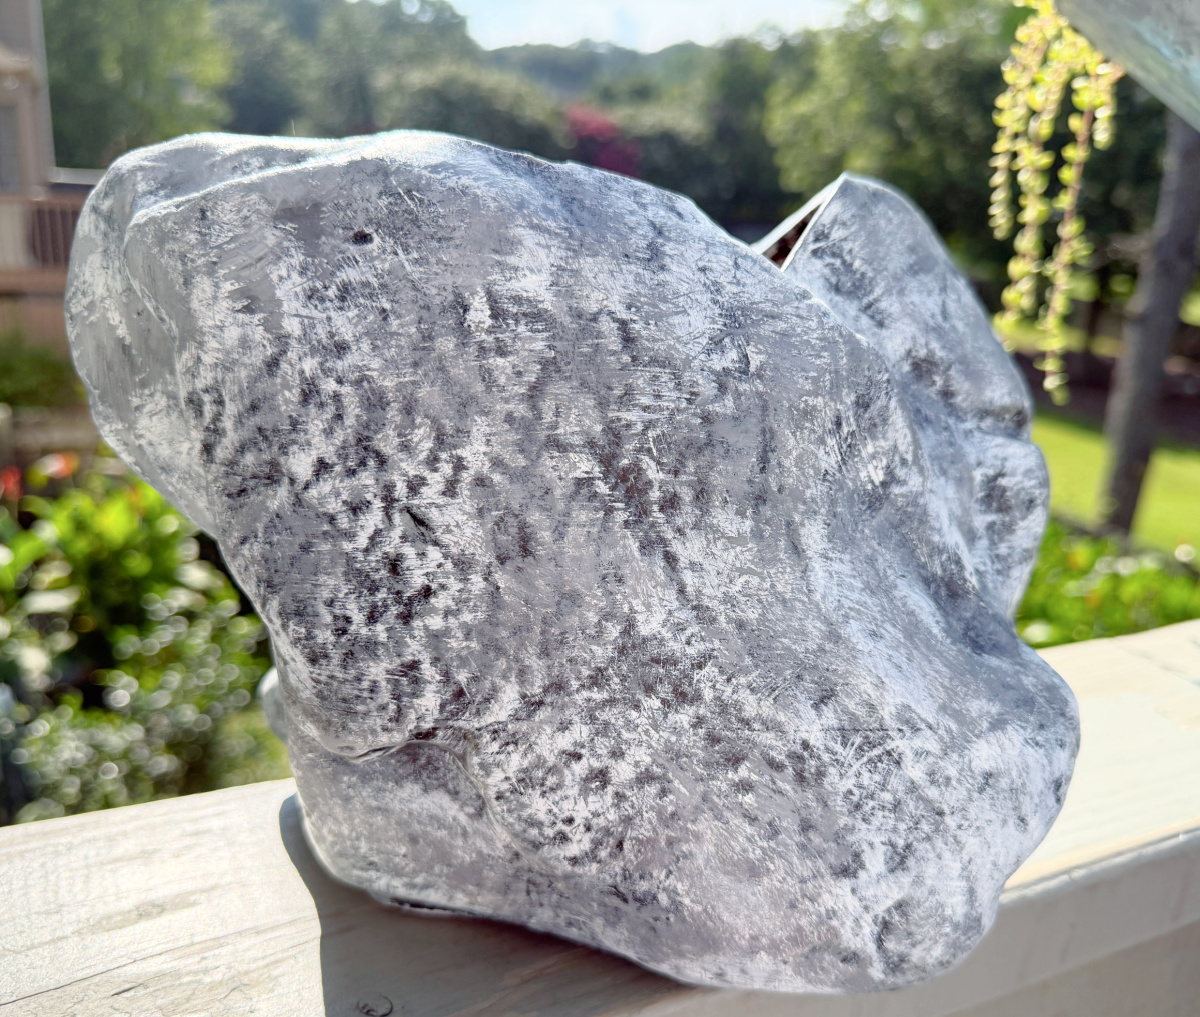
This project brought back some memories. I think it was the size and shape of my faux rock planter. These are rock from Manayunk, a neighborhood in Philadelphia where I grew up. I grabbed a few from the neighborhood when we moved away from the area.
We had these in our yard. There was a whole wall built from these. And down the street from my house is a whole cliffside of this mica rock. They were so magical with their normal rocky look but that glimmer and glitter that screamed “I’m special”!
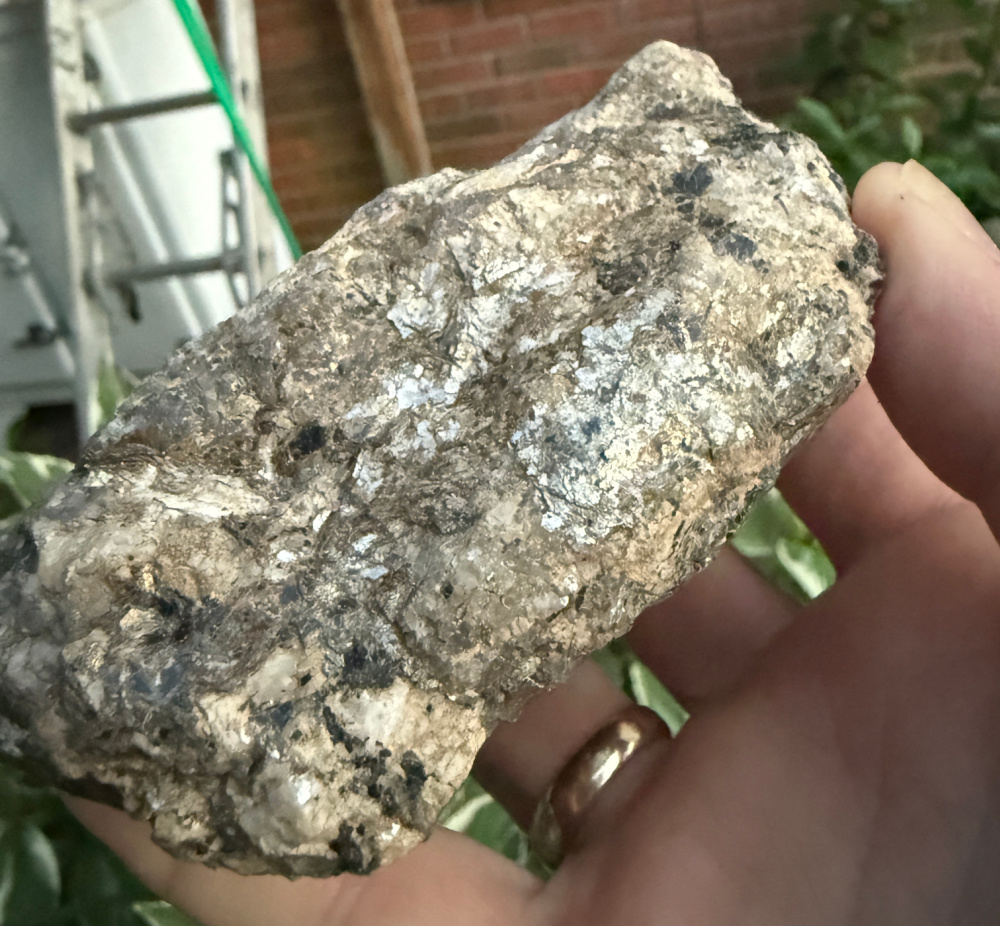
It’s hard to see in these photos, but the white spots are actually tiny flecks of mica which are silver and catch the light so beautifully. I had to have some of these for my garden.
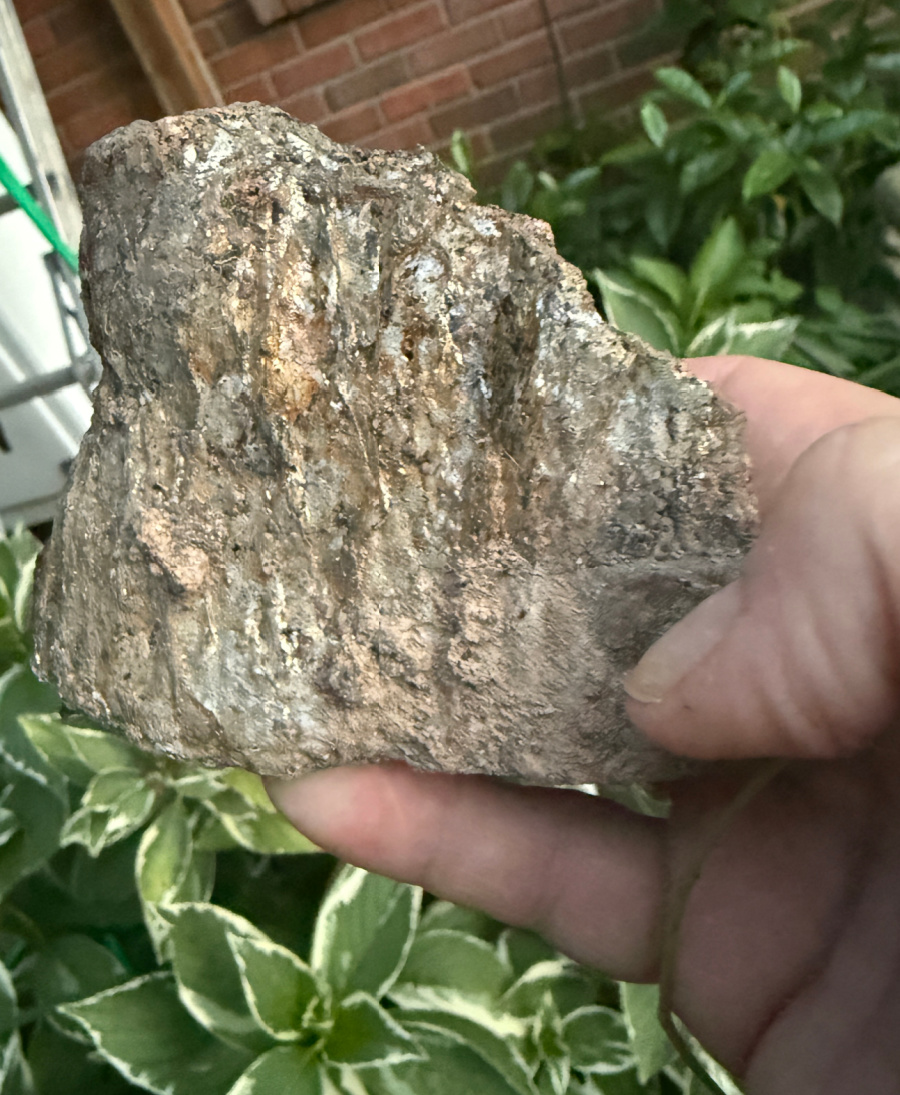
I don’t have any metallic silver paint to replicate this finish exactly right now. So that means, my friends, we have just added another project to the to do list…Manayunk Mica Rocks! I need to grab some photos the next time I’m in Manayunk. Are you weird like me and have a favorite type of rock that isn’t marble? Because everyone loves marble!
I came down with a stomach bug between the end of the deck re-stain and renewing this rock planter. So the beauty shots on the deck are yet to come.
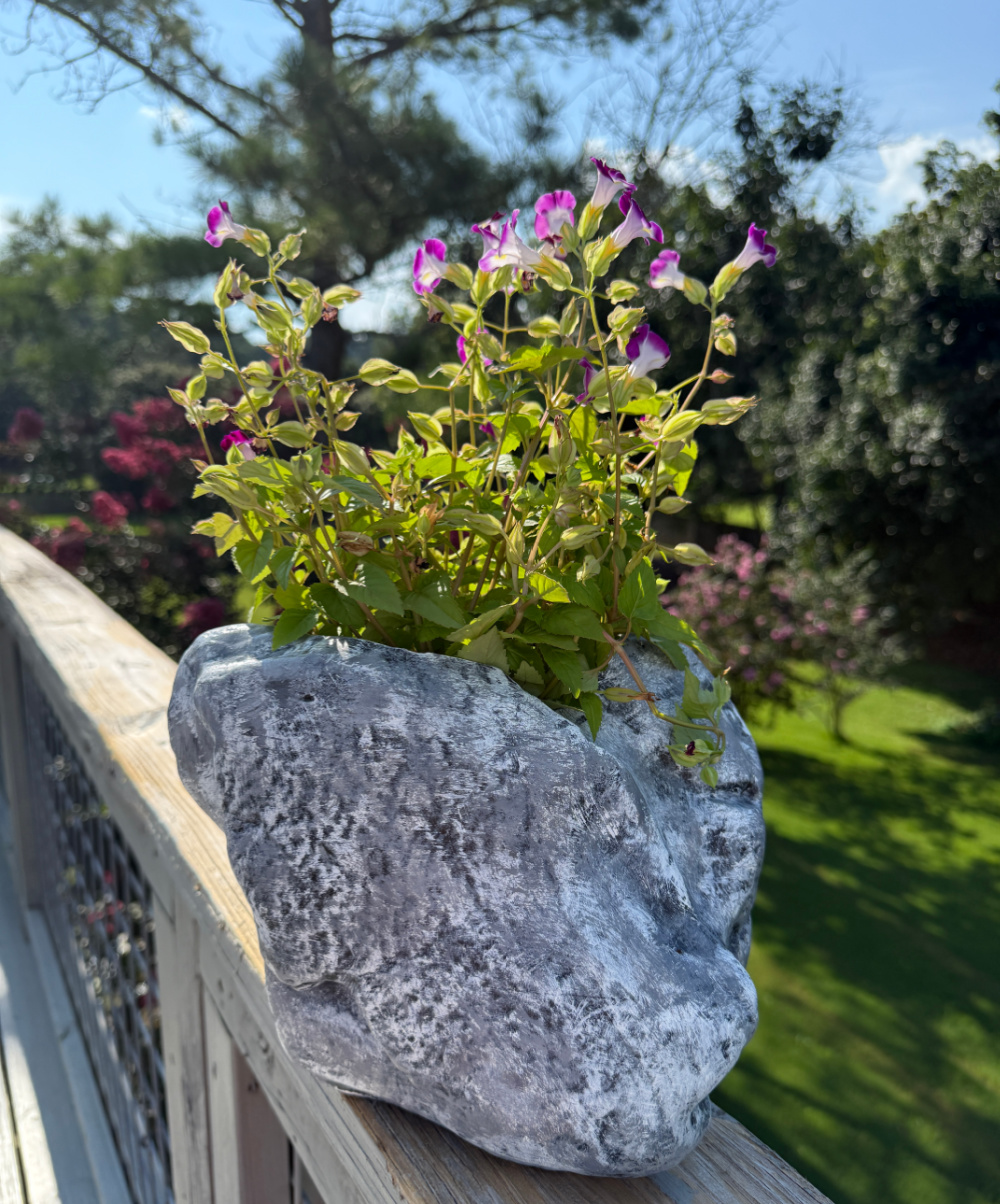
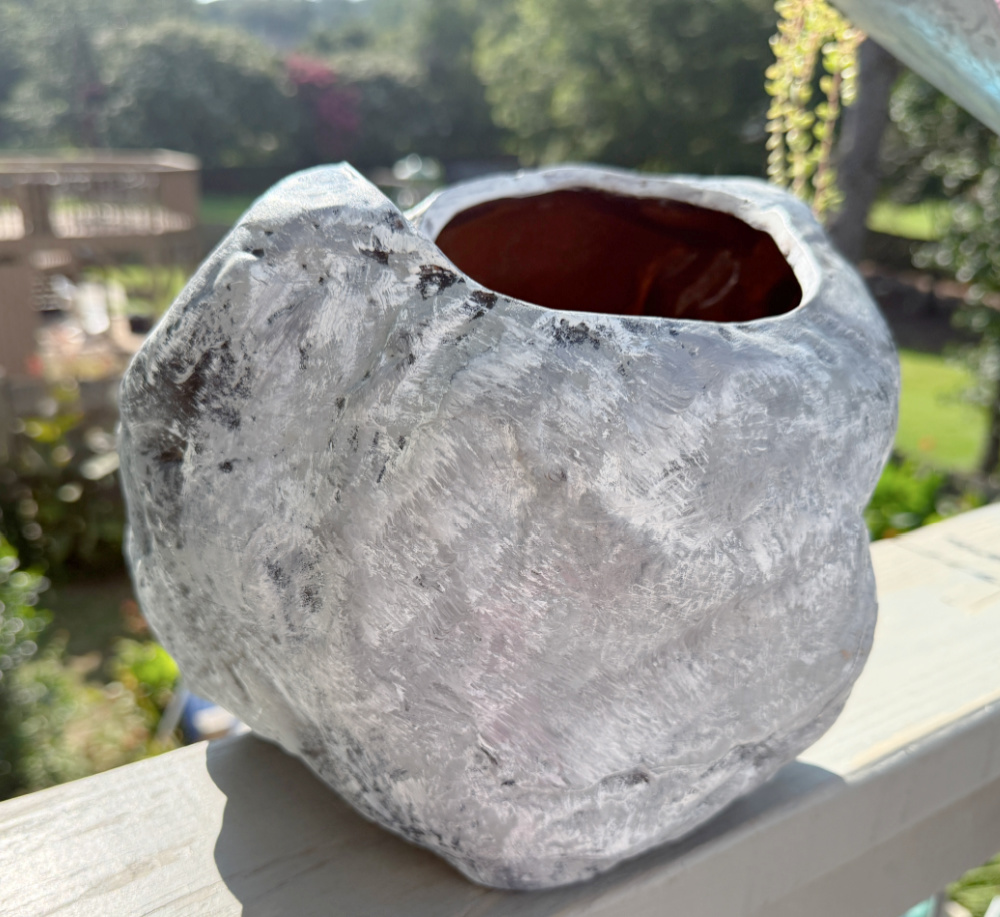
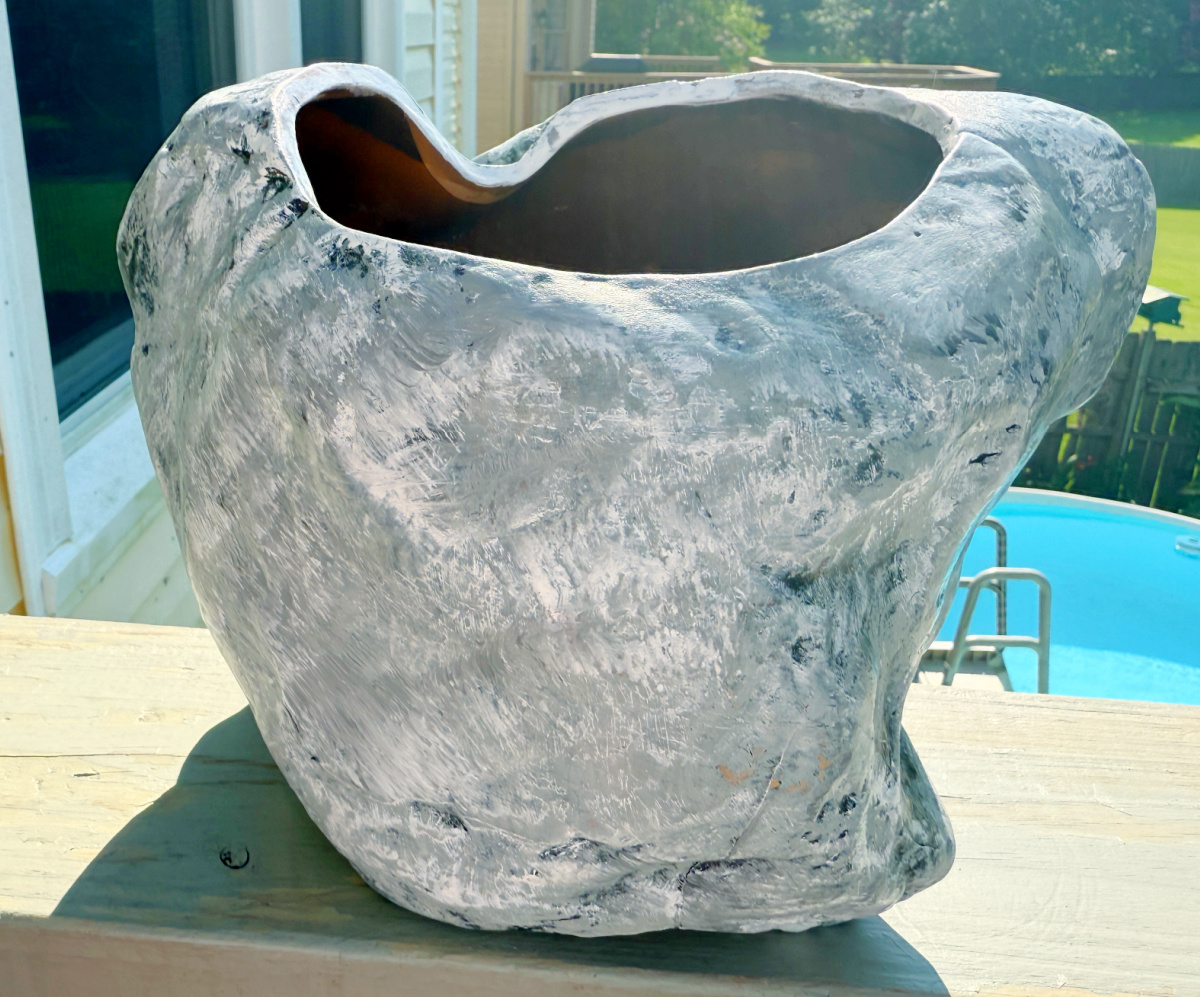
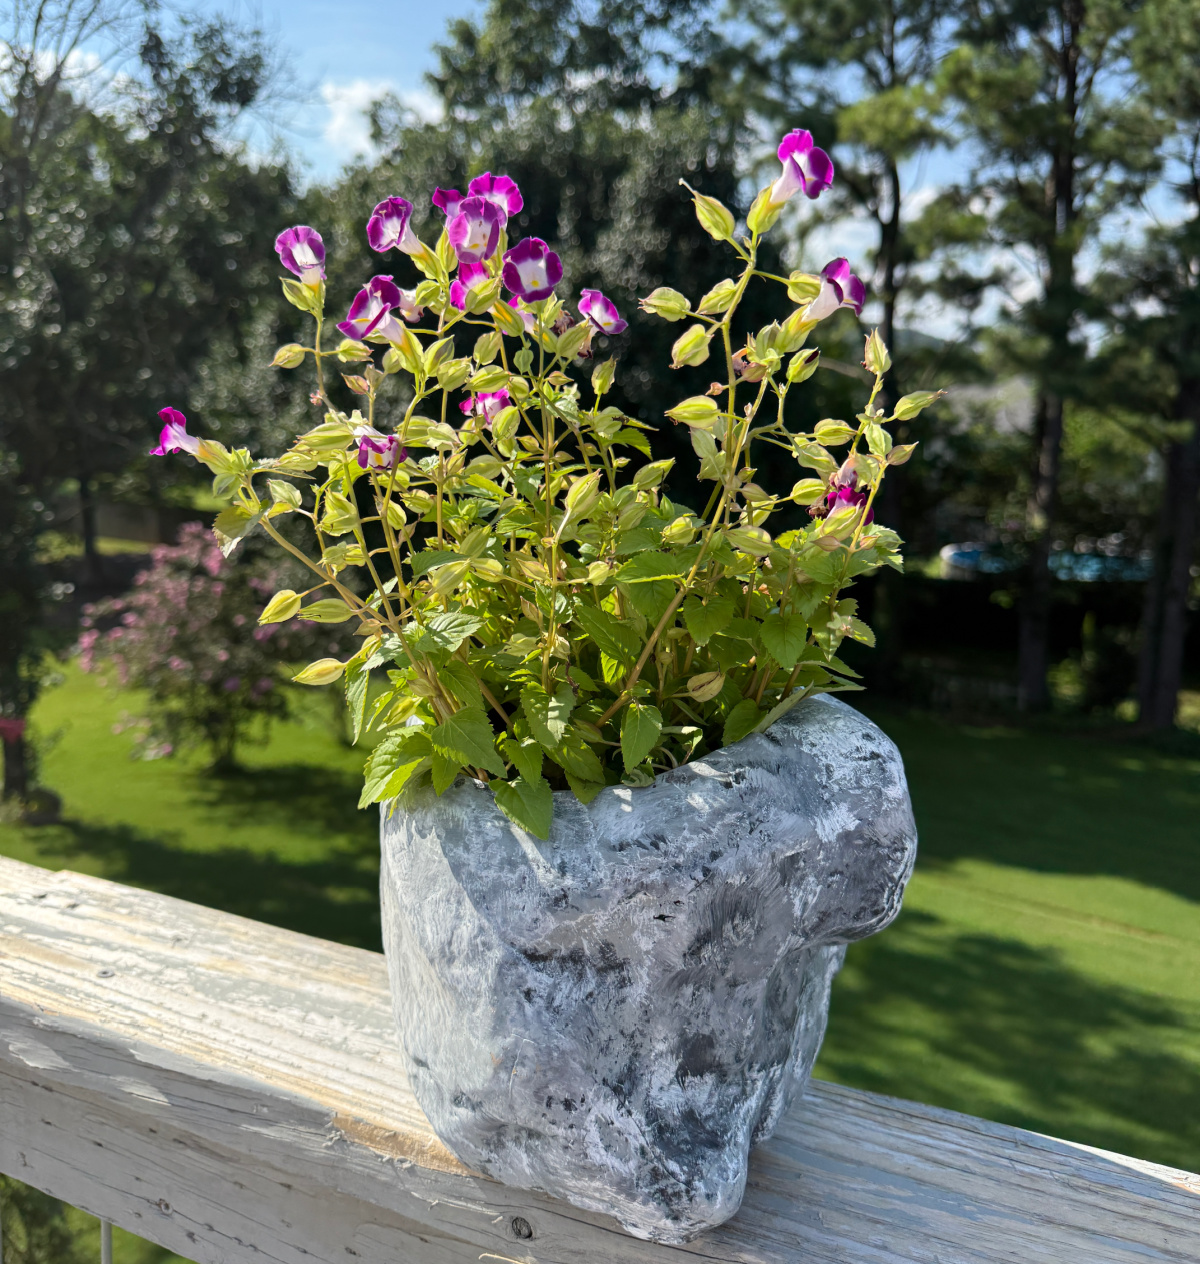
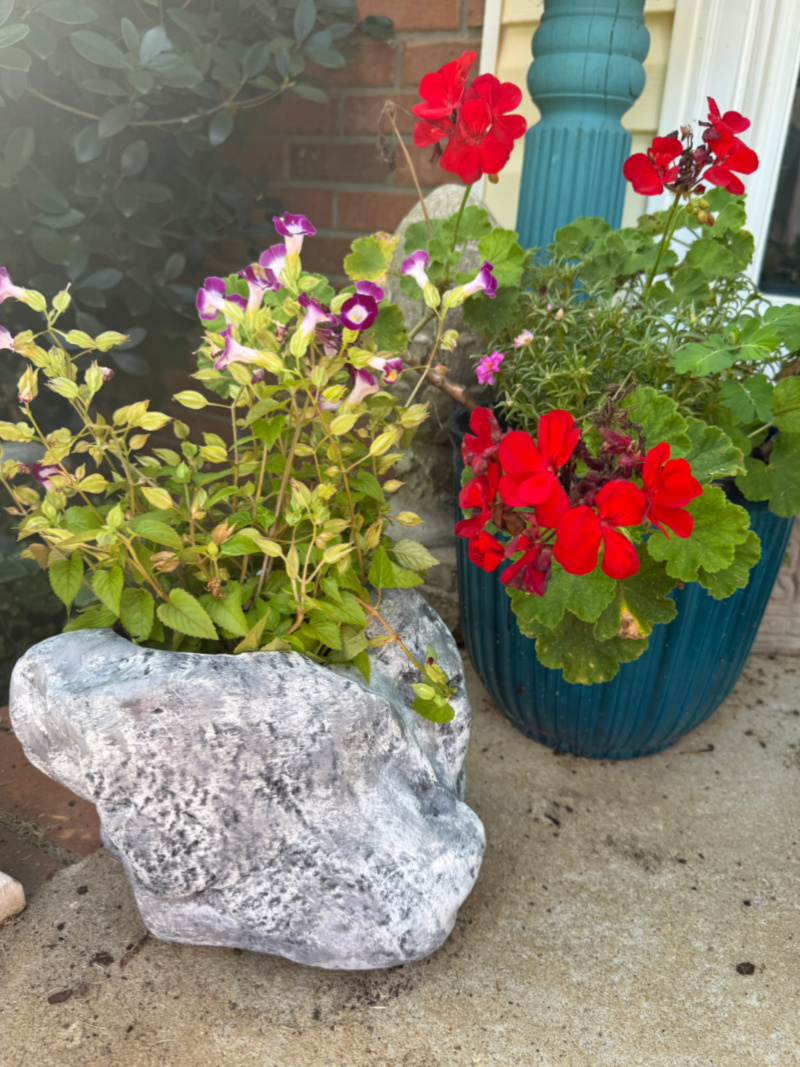
I did place her in a few spots around the yard. Near the deck steps.
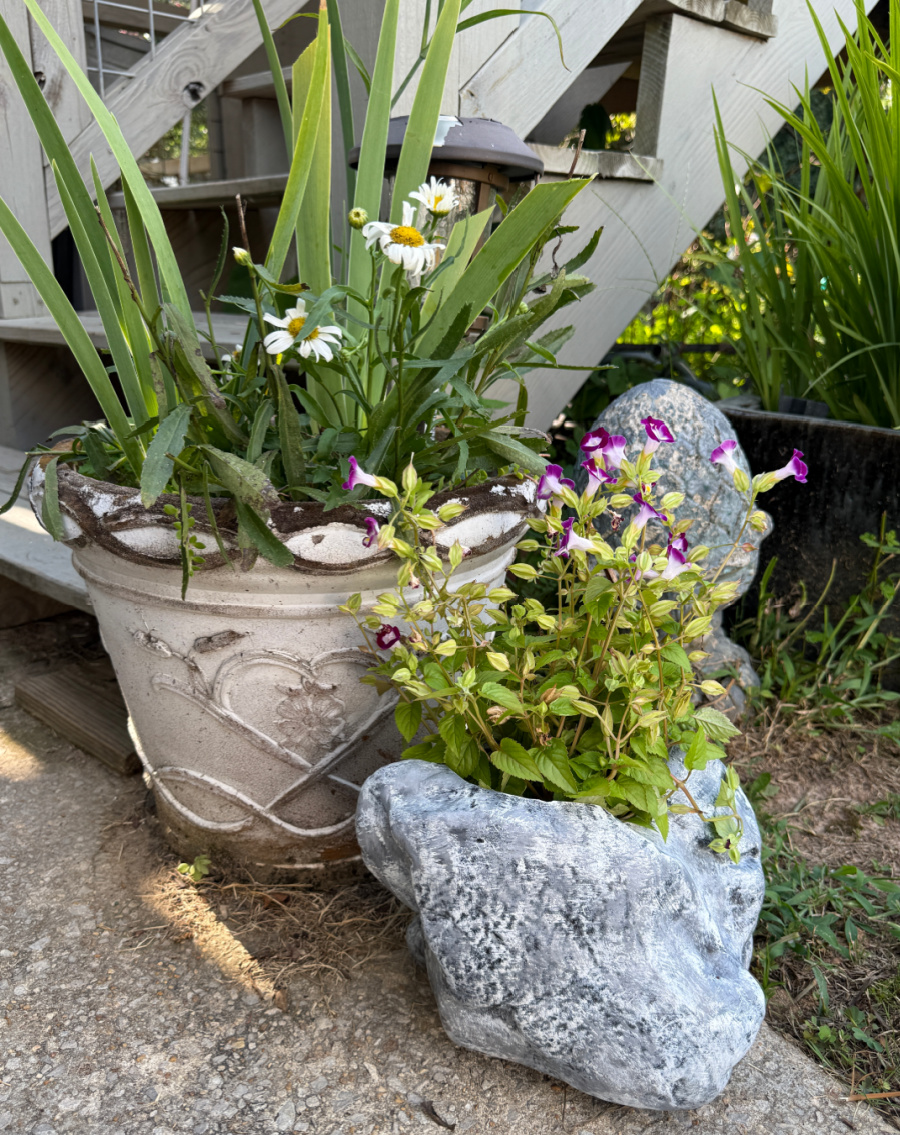
On the stair landing…
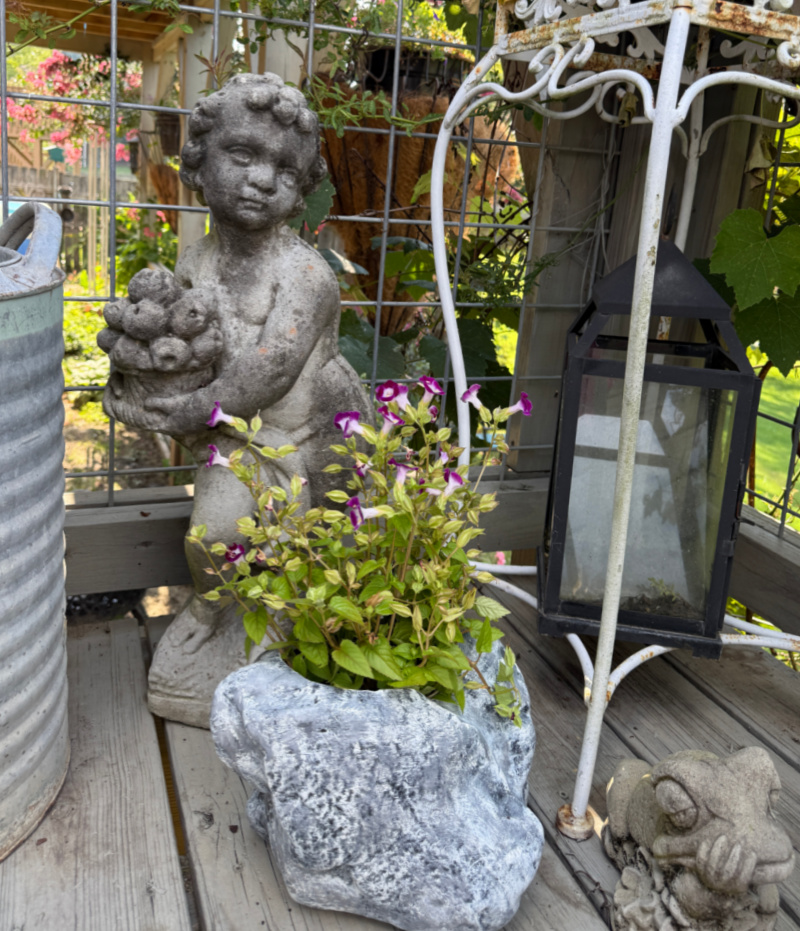
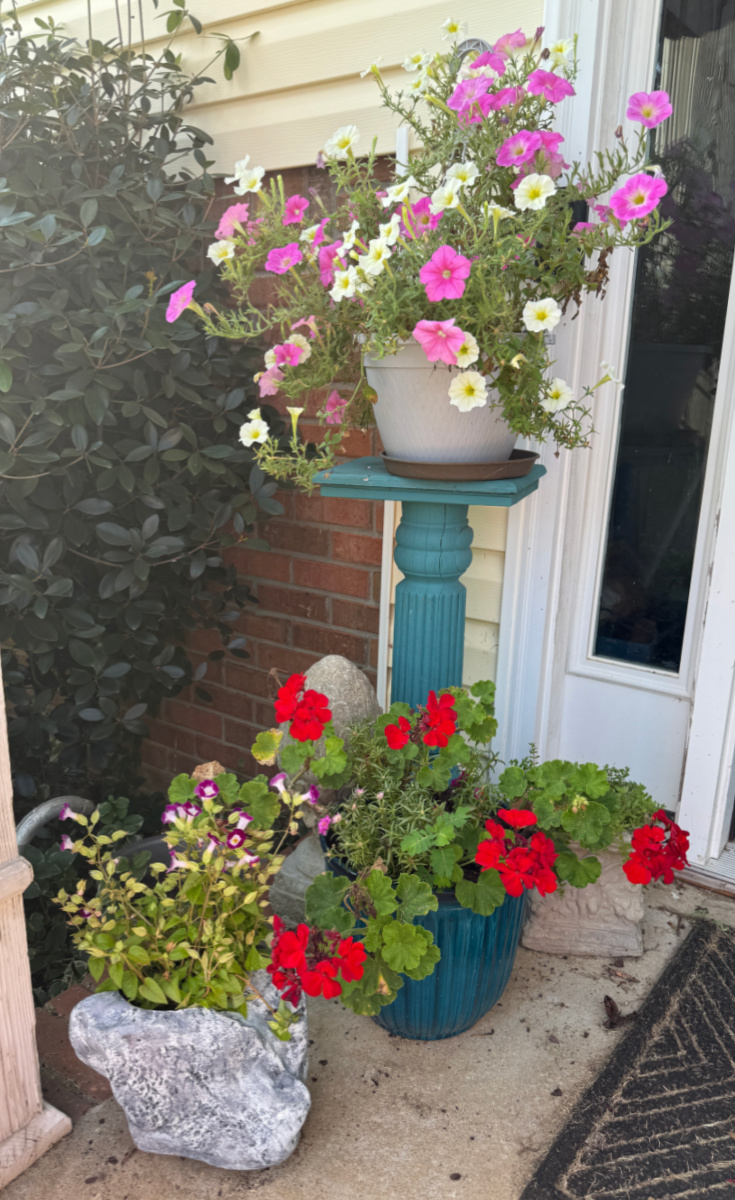
And we landed at the front door. For now, Rockella is enjoying a prime spot at the front entry to our house.
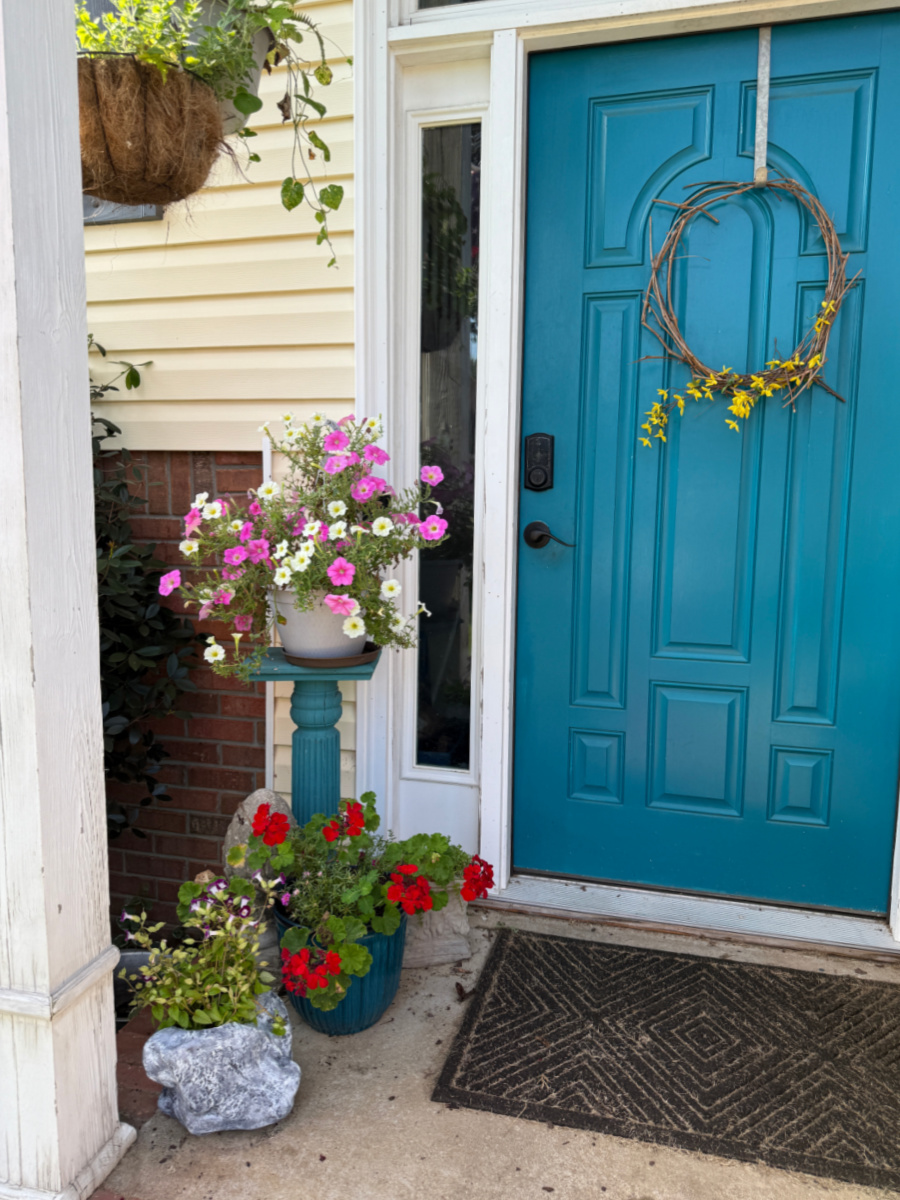


PS. I know my wreath is off center, the support post need painting, and the stoop needs sweeping. Sometimes you just gotta do what you can do. This is life! Keeping it real here at Blu.
Hopefully, I will feel 100% by the weekend and can restyle the deck. No promises, though, as temps here in Bama will be near 100 degrees. But, I can see myself getting out there at an obscenely early hour to beat the heat. I will be sure to drop some photos once Rockella has found her permanent spot on the deck.
Until then, STAY COOL, literally!

We have a few new team members this month so welcome to Michelle from Our Crafty Mom and Marianne from Songbird. I can’t wait for you to see all of their fabulous creativeness!
My Repurposed Life – Upycled Drapery Hooks
Petticoat Junktion – Paint A Plastic Cherub Statue
Our Southern Home – Gingerbread Village
Shop At Blu – Faux Rock Finish THAT’S ME! You are here!
Our Crafty Mom – Double Sided Decoupage Cutting Board
Songbird -Curtain Rings Candle Holders


This makeover project rocks! haha
No seriously you did a great job at replicating a true rock texture on your faux planter. Love it! I hope you feel better soon and I am looking forward to your styled deck makeover pictures.
Lol! Thanks, Marianne and welcome to the Team! Can’t wait to do some fun things on that deck!
Sue, I love the new look of Rockella. Your painting technique is spot on for this makeover.
You did a great job on the deck, it’s very pretty. Love the fur baby, and finally-I hope you’re feeling better.
Pinning!
gail
Thanks, Gail! I love to paint. I don’t get to faux paint very often so this was a welcomed project. I’m feeling much better now. Thank you, my friend!
Girl! This looks like you hollowed out a real rock for a planter. I love it. I can’t tell you how many times I started something similar and freaked out with the paint. So glad you trusted the process. It looks fabulous!
Thanks, Christy!! That was exactly the goal. You are so sweet!