I am thrilled to be trying another new paint product this month as part of the Fab Furniture Flippin’ Contest. This month’s sponsor is none other than Velvet Finishes by Kellie Smith. I have been a HUGE fan of Kellie’s since I saw her phenomenal project for one of the first FFFC in which I participated. Check out the actual piano that she transformed into a functional bar here!
Velvet Finishes is a NO SAND, NO PRIME, NO CHALK, NO WAX furniture paint that will, to quote Kellie, ROCK YOUR WORLD! I love the fact that this furniture paint is so super easy to use. The theme for this contest is “Colour Your World” and I decided to do just that! Here are the colors I selected:
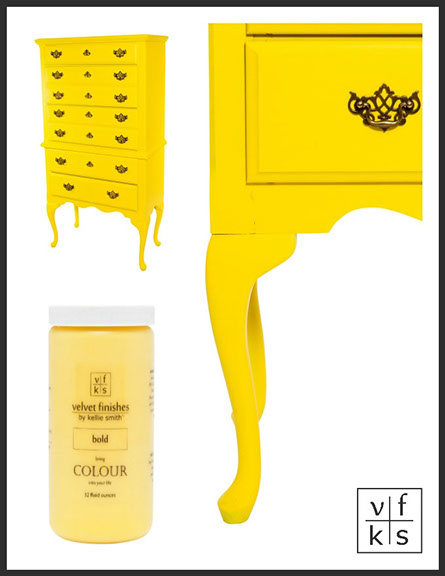
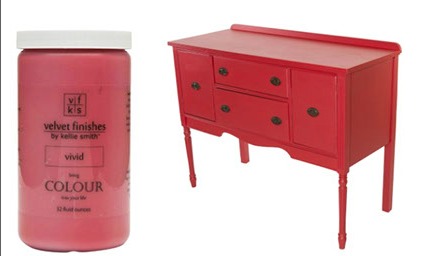
Let me just say that color was a very difficult decision as Velvet Finishes has some fantastic choices! I selected one 32 oz. jar of Vivid, an 8 0z. jar of Bold, a bottle of Ready, a bottle of Protect, and an 8 oz. jar of Enhance Dark Glaze to use in my project. Check them all out here. I received these products for FREE in exchange for this post! Each of the participants of The Fab Furniture Flippin’ Contest receive product compensation from the sponsoring brand, Velvet Finishes in order to complete their themed projects. Velvet Finishes will also provide the prize package for the contest winner.
Again, the colors were so phenomenal that I had to refer back to the theme, Colour My World, to select the perfect colors for my project. The combination of Vivid and Bold screams COLOR! In addition, I thought I could blend these two to obtain a few other vibrant colors. So, that was the plan!
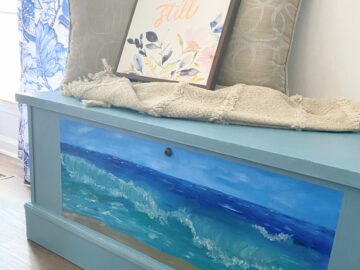
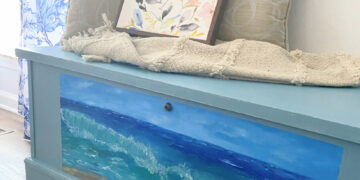
Here is the piece I selected:
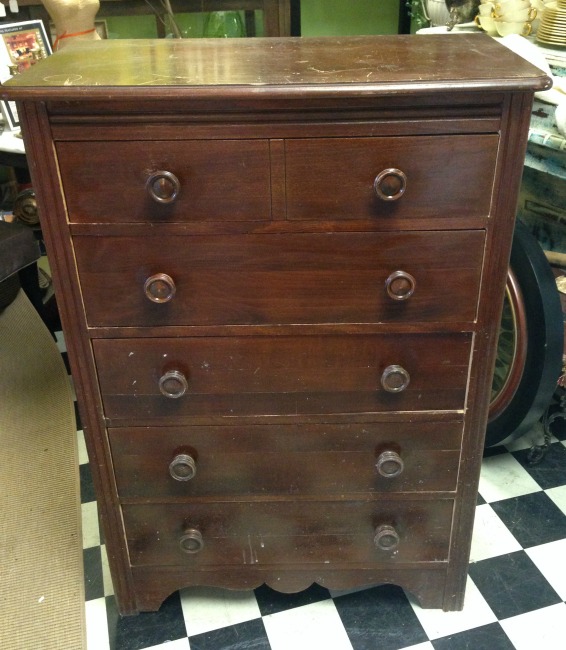
I love to grab a dated chest and bring it back to life. Small chests are so convenient to place in a room. You can use one in just about any room of your home! And it’s always a treat to have a smaller piece of furniture bring some phenomenal color to a space.
Prepping the Chest …or Not
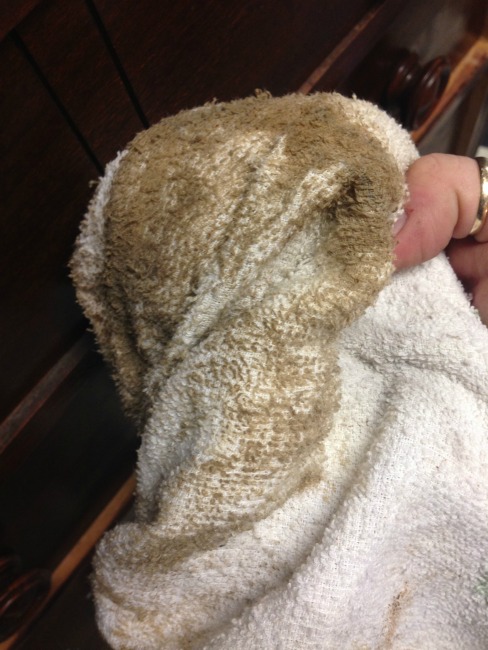
I started by giving the entire chest generous coat of Ready. I must say that this is my type of prep…quick and easy.
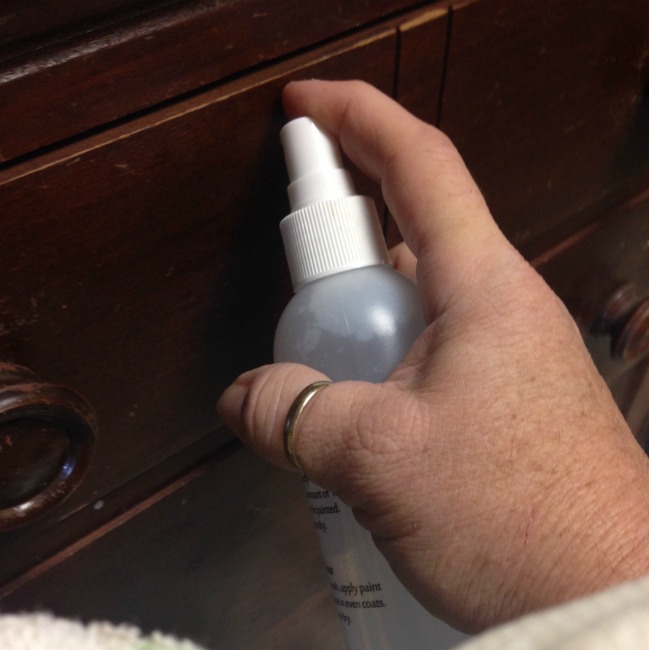
Here is what my rag removed from the chest. I simply sprayed it on and wiped it off with a clean cloth. I seriously could get used to this!
Paint!
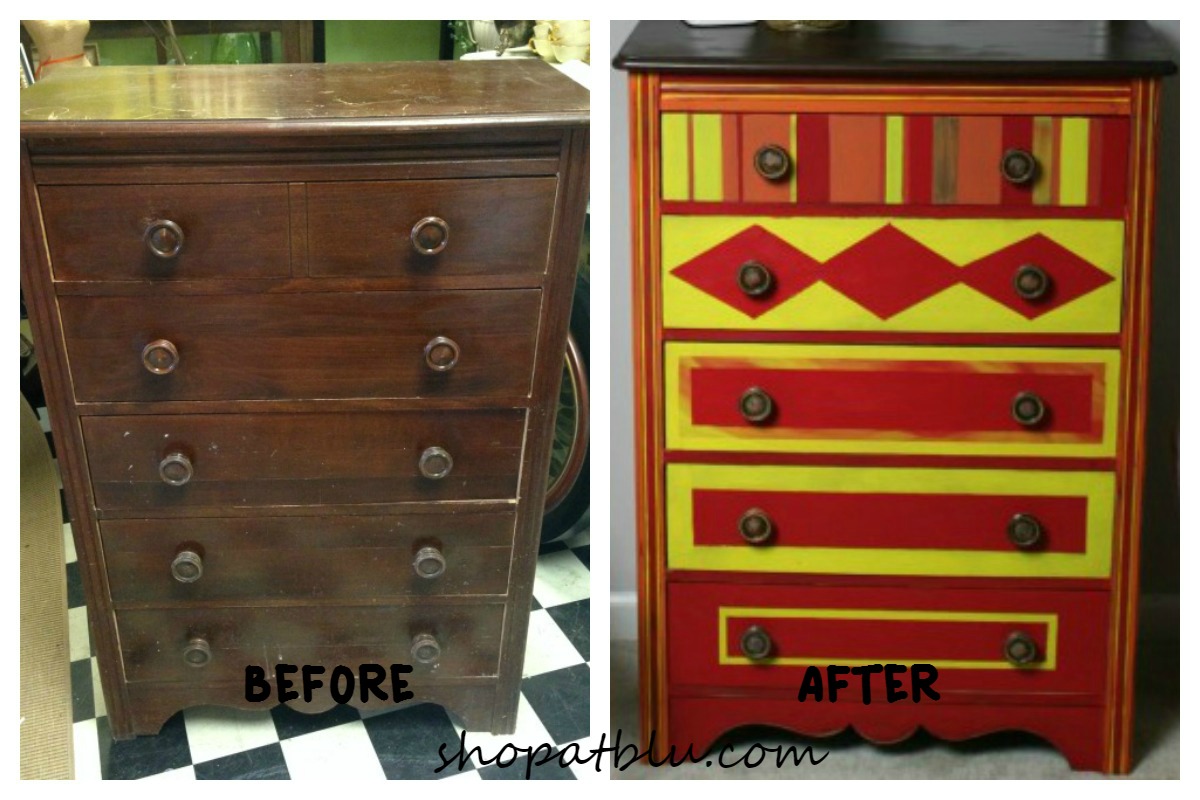
Next I applied a coat of Vivid to the entire chest. The paint was incredibly smooth and covered well. I applied 2 coats liberally. The original finish on this chest was a mahogany or brownish red, rather dark, a rather difficult finish to cover without a primer, from my experience. However, this paint did a better than average job. A third coat will be needed on areas where I don’t use other colors. I was impressed with the coverage.
Design
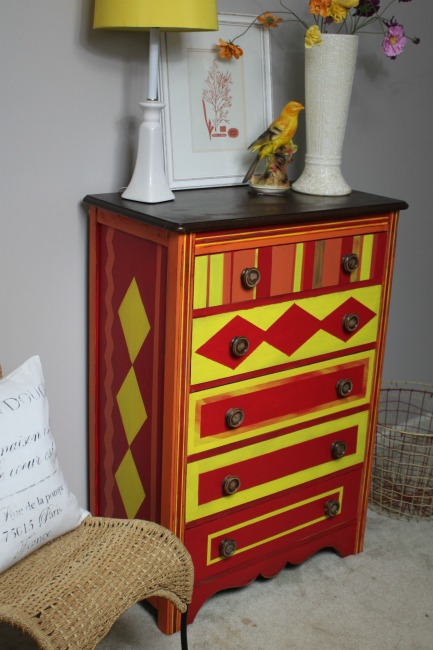
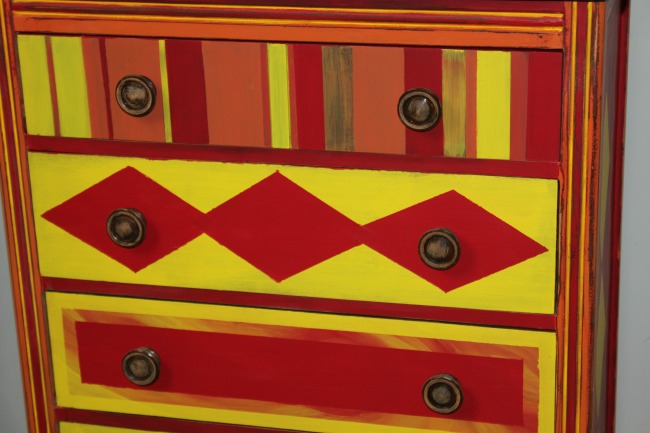
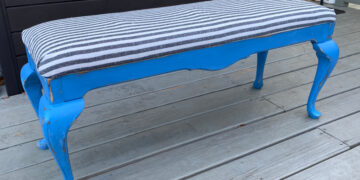
Next I taped off sections of the drawers and sides. I didn’t really have a plan or design in mind. I just started with some stripes, added some lines, and finished with some diamonds. In the process I mixed my two base colors to obtain vibrant variations of the two. I loved playing with different recipes to obtain colors that were more vibrantly Vivid and others that were more vibrantly Bold. How perfect are these names??!!
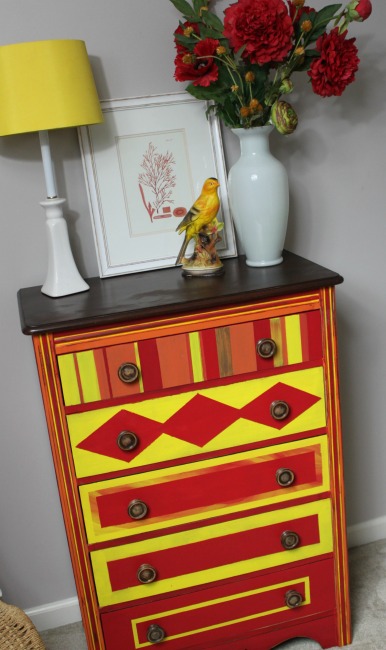
In the process I inserted the drawers in different orders to achieve what seemed to be a better flow of these fantastic colors. I tried to stay with three basic colors so that the piece would not be too busy. I realize that some folks will be shocked by the color combo but this baby is definitely rocking some color!
I sanded and restained the top of the chest since it was scratched and chipped. I lightly sanded the original knobs to give them some texture before reinstalling them.
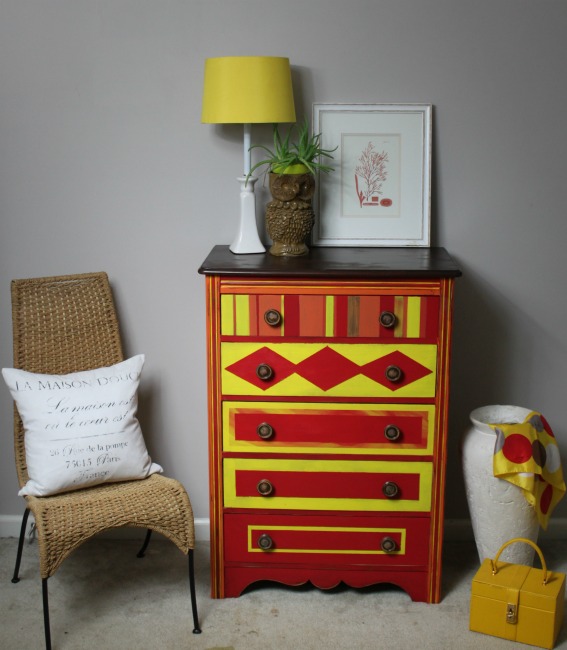
And here she is in her Boldly Vividly Coloured new look!
My diamonds were a little wonky. I tend to just go with the flow rather than stick to a strict plan. So I did need to retape and touch these up.

If you have ever tried to paint an intricate design with painter’s tape, you know this can be a very frustrating process of tape, fix the bleed throughs, tape, fix the bleed throughs, repeat, like a million times. And if you have ever painted with RED you know that you are forever touching up. Red tends to bleed through EVERYTHING and doesn’t EVER wipe off easily. Velvet Finishes, however, wiped off nicely when I overpainted or was sloppy. You just don’t know how invigorating the feeling when you wipe a red mistake and it ACTUALLY WIPES OFF! Thank you Kellie Smith! You are my hero! You GET ME!
My house is dominated by blue cause, y’all know I am a Blu girl! But my hubby loves RED and I can see me making a space for this beauty somewhere! Those colors! Yikes!
This month’s hosts are Lynn from On Fern Avenue and Thea from Sweet Tea Refinishing. Click on these links to visit their blogs and see how they used Velvet Finishes to exploit some color!
Are you a blogger who is interested in participating in a future FFFC? Email info@fabfurnitureflippincontest.com for more info on this fabulous contest.


Comments 0